Do you ever find yourself thinking “why do I even need to login every time I want to use my computer?”. If you’re using your home PC or you never take your laptop out of your home, logging in every single time you want to use your computer becomes a pure waste of time.
Of course we do care about our cyber security but if you are pretty sure it’s always you or someone trustworthy who’s using the computer, you can then throw away this login thing and just login automatically. It’s going to save you some precious time: just press your power button, get your coffee ready at the kitchen and come back to find your desktop waiting for your clicks.
This is also useful if your computer needs time after startup to warm up and settle into lower CPU or Disk usage. If you usually get this problem of lag at startup or in general, don’t forget to check this guide to make you Windows 10 computer faster:
https://win10faq.com/speed-windows-10/
Remember that if you perform these steps and get automatic login, everyone that has access to your computer will be able to login and use it even if they don’t know your password or pin number. Also if your computer is stolen, your private data will not be protected. So make sure you are the only one using the computer and if the situation changes, we encourage you to revert to the old settings.
Let’s get right to it. If you’re using Windows 10 Pro , Enterprise or Education edition that’s connected to a domain – This method (Method III) is probably the perfect one. Otherwise, go to Method I.
Notice that all our three methods are certified and safe ways without any hacks or third party apps. Best to do it this way so that your username and password will never leave Microsoft’s vault.
Method I: Set it Directly From the Settings App
Although this method is very easy and works in 99% of the cases, people forget about it and keep searching for complicated ways to do it. We recommend that you go through this one first and in case it didn’t work, you will find more complex longer methods explained after this one.
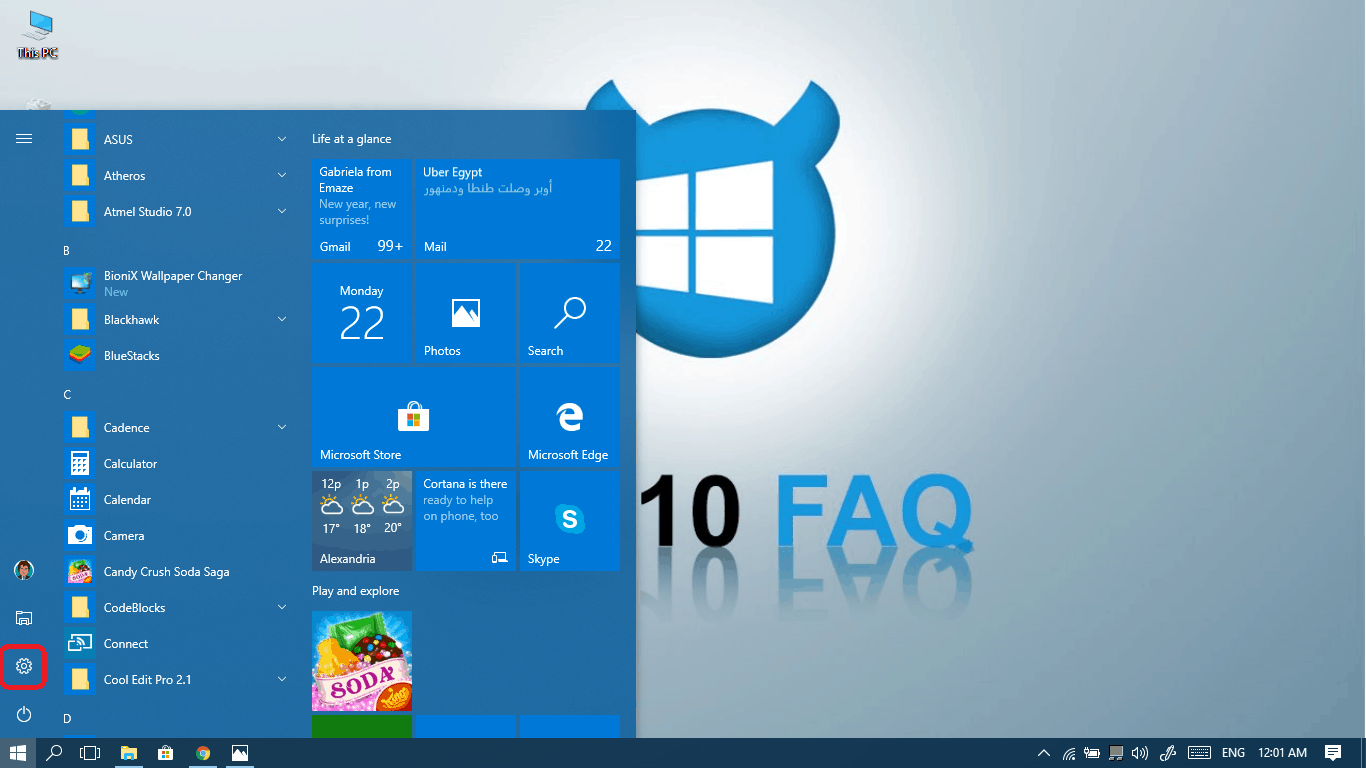
- Open Settings from your start menu.

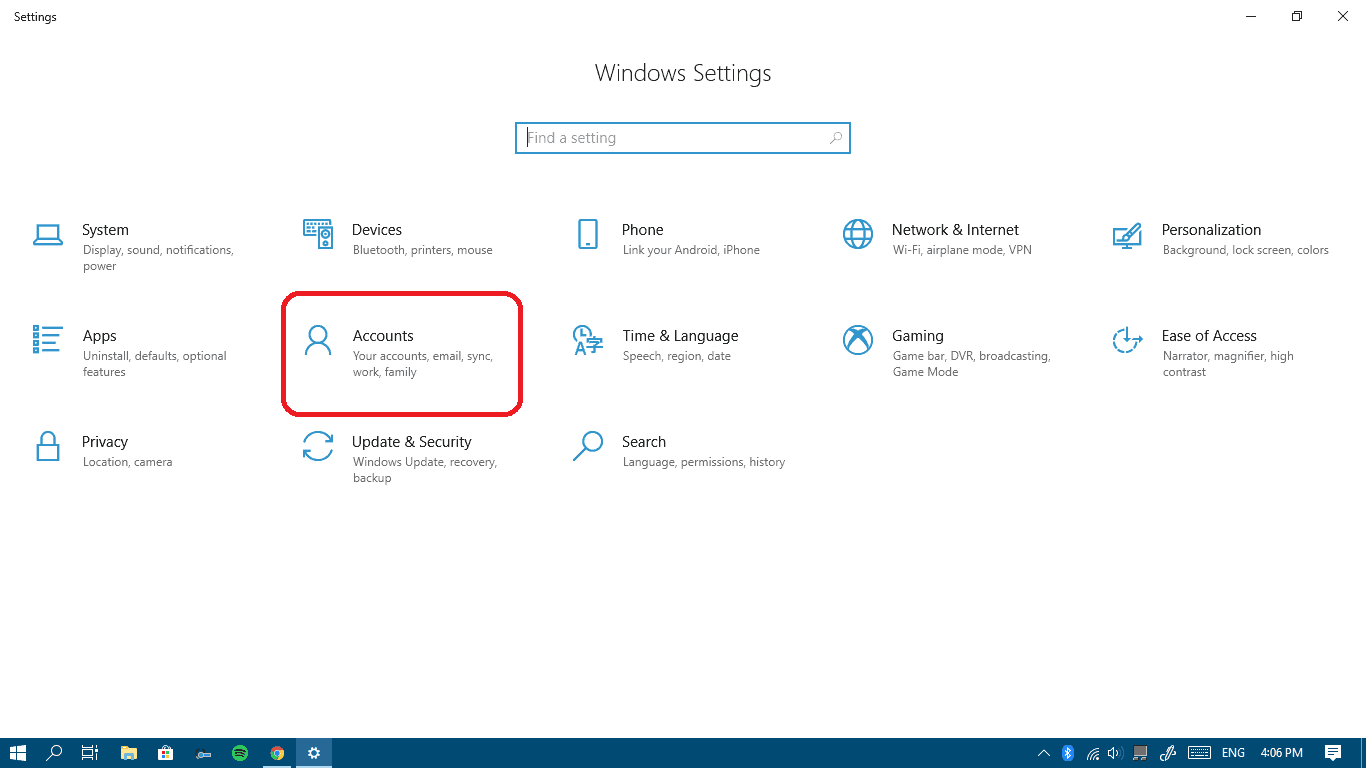
- Click on Accounts.
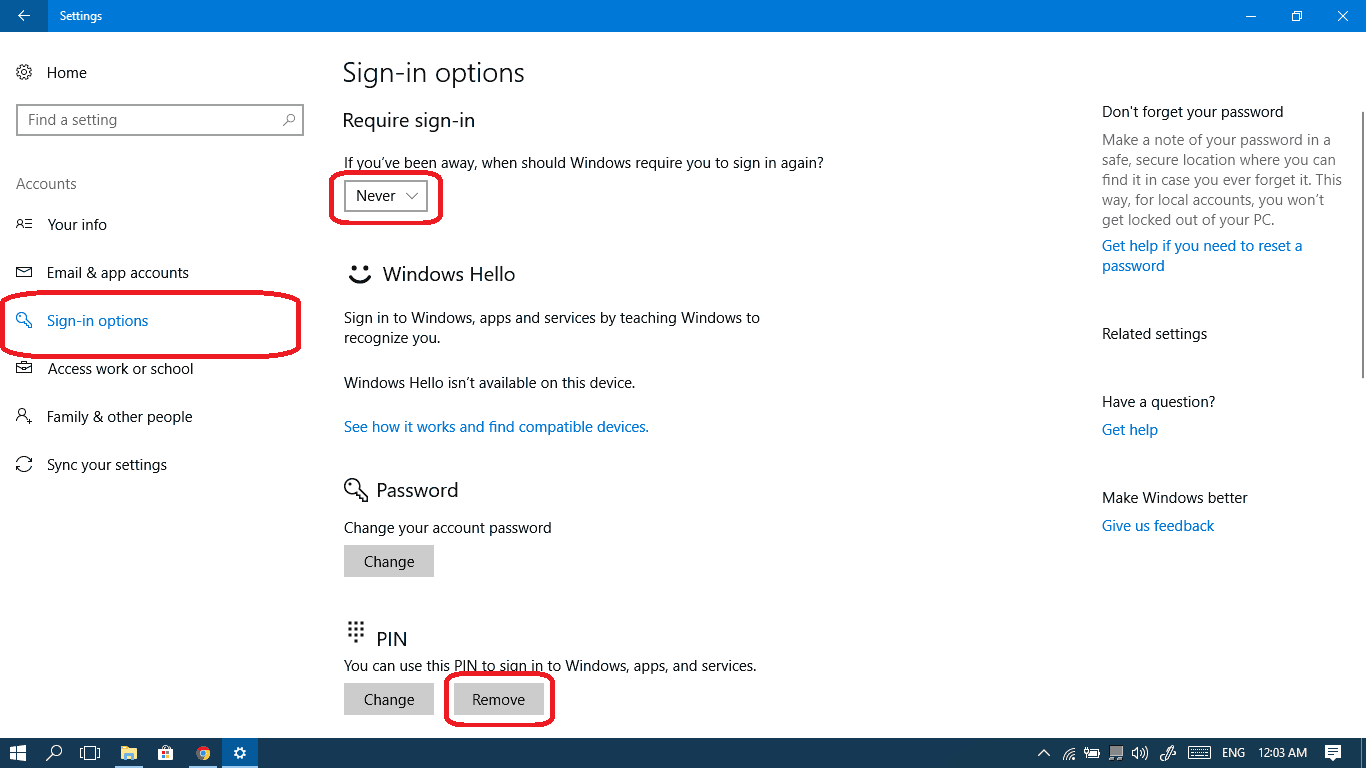
- Select Sign-in Options from the left pane and select Never from the Require Sign-in list. It’s also very important that you remove any PIN you have previously set so that your computer won’t need any inputs before logging in. Click here if you can’t sign in to your account.
This is the standard way to auto-login. Again, we do recommend going for it before heading to other ways.
Method II: Configuring it in Account Settings to Enter Windows 10 Auto Login With Password
- Press Windows Key + R or launch Run from your start menu.
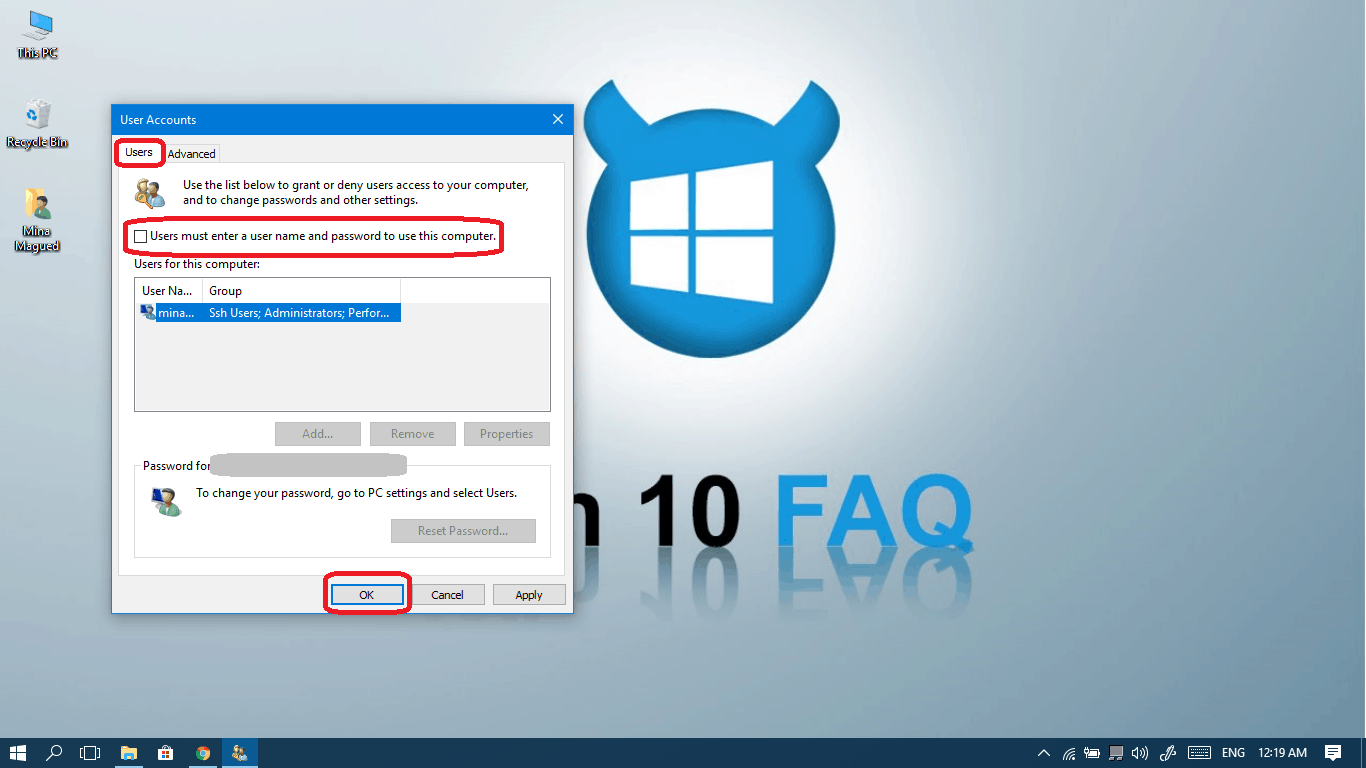
- In the Run command box, type netplwiz and then press enter to open the User Accounts panel.
- In the Users tab, uncheck this checkbox: “Users must enter a user name and a password to use this computer” and then click Ok.
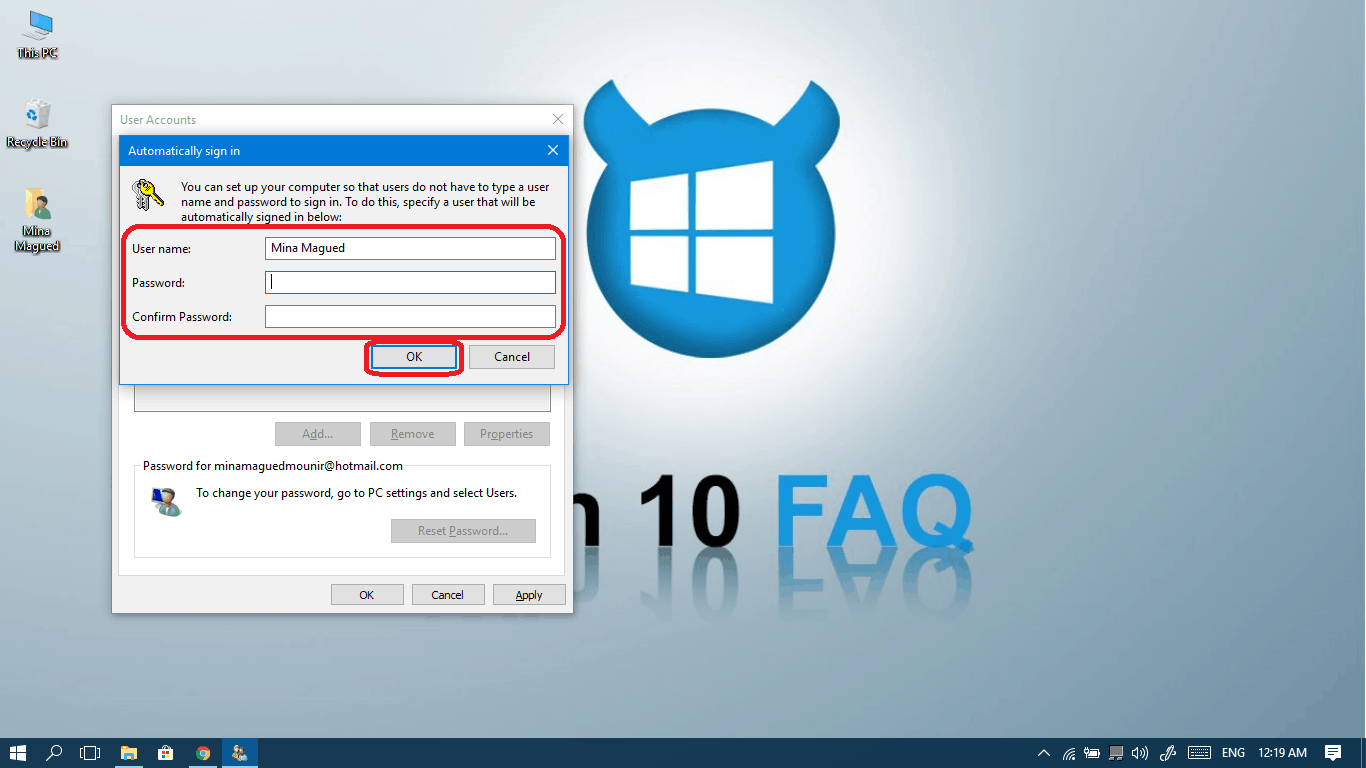
- Now you will need to enter your username and password and retype it to confirm your identity and then click another Ok.
- Now restart your computer and check if the auto-login works.


Method III: Use Autologin
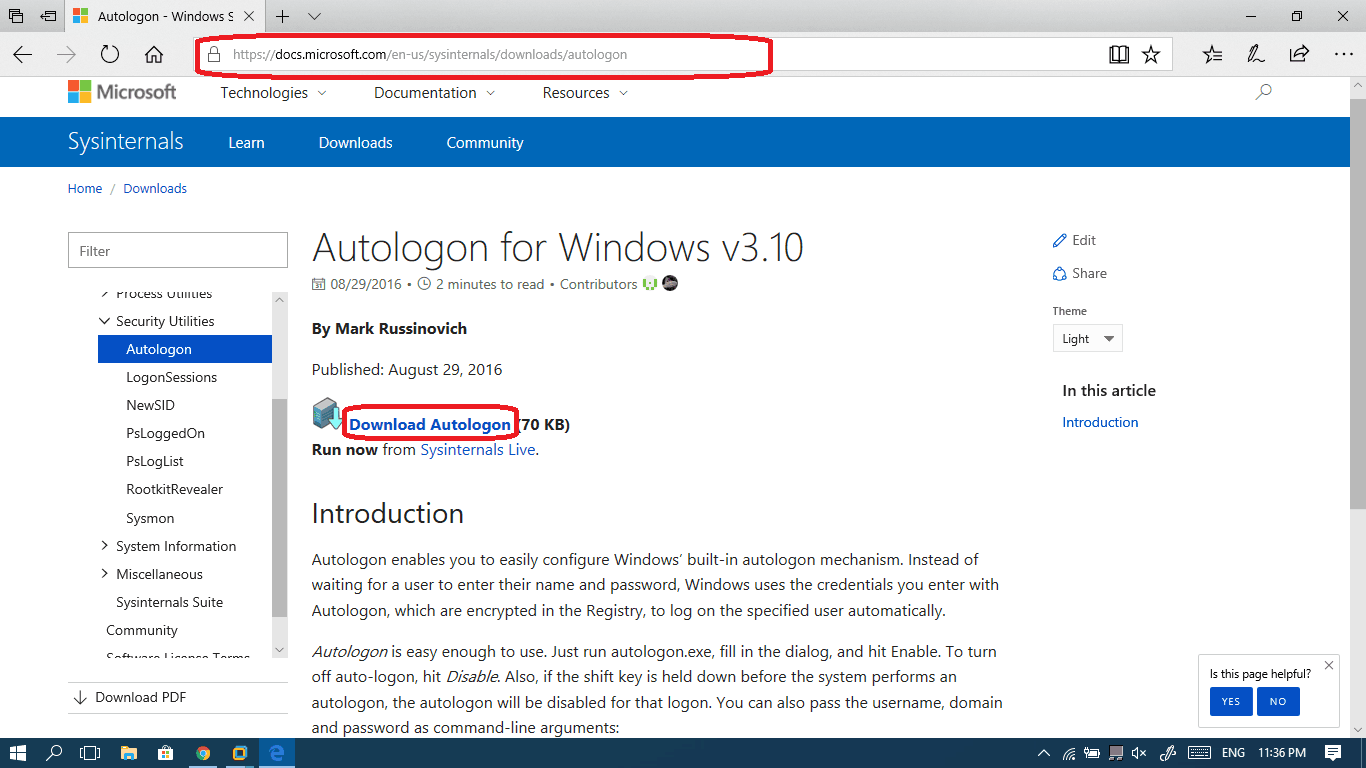
Auto-login is a tiny tool of 70 KB that configures your auto-login settings. It’s also published by Microsoft which is relaxing in fact. It’s really useful if you have Windows 10 Pro, Enterprise or Education that’s linked to some domain – the two other methods might not work if you’re connected to a domain, and this little app is tailored specifically for domain logins. It’s very easy to use and its interface says it all. Check it out:
- Go to https://docs.microsoft.com/en-us/sysinternals/downloads/autologon and click Download Autologon.
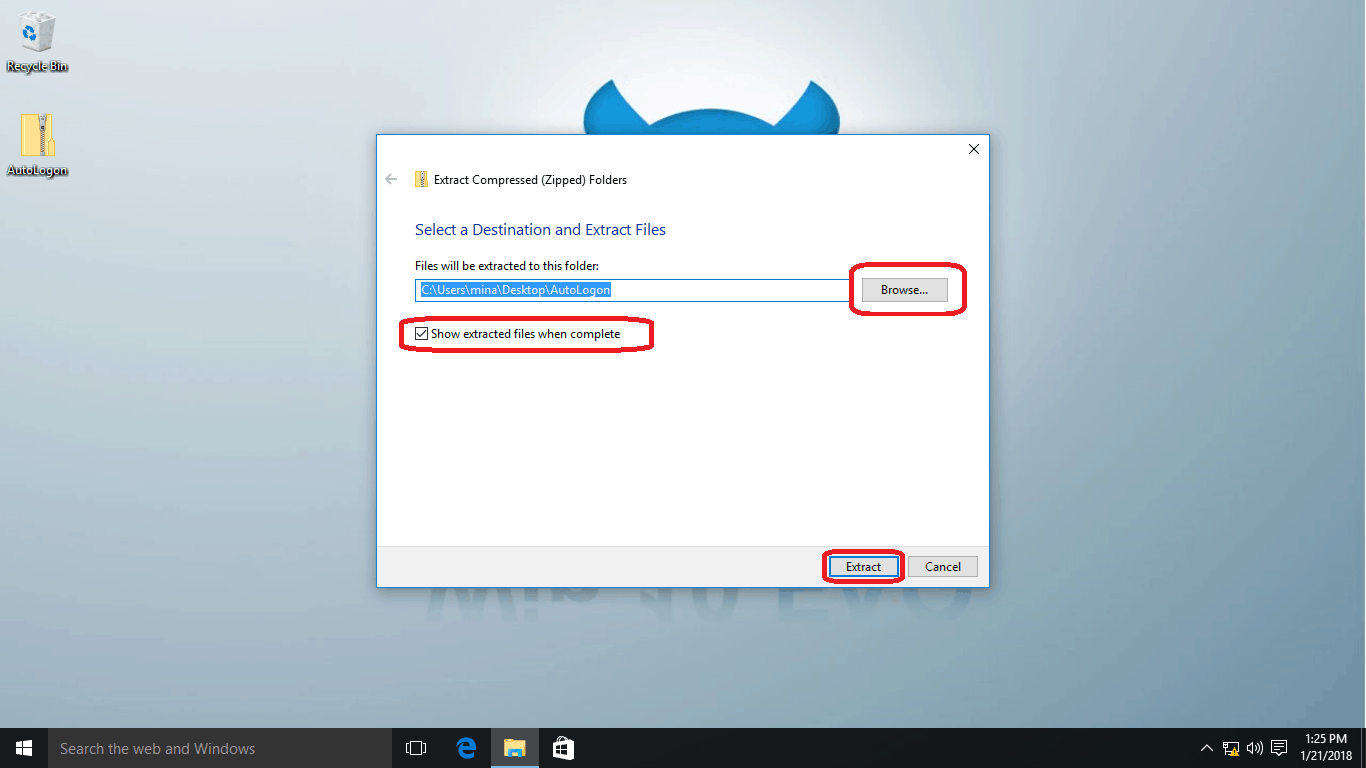
- After your download finishes, right-click on the zipped file and choose Extract all.
- Choose a location using the Browse button, check the checkbox so that the extracted folder gets opened automatically once the extraction is done, and finally, click Extract.
- Right-click on the Autologin file in the extracted folder and choose Run as administrator.
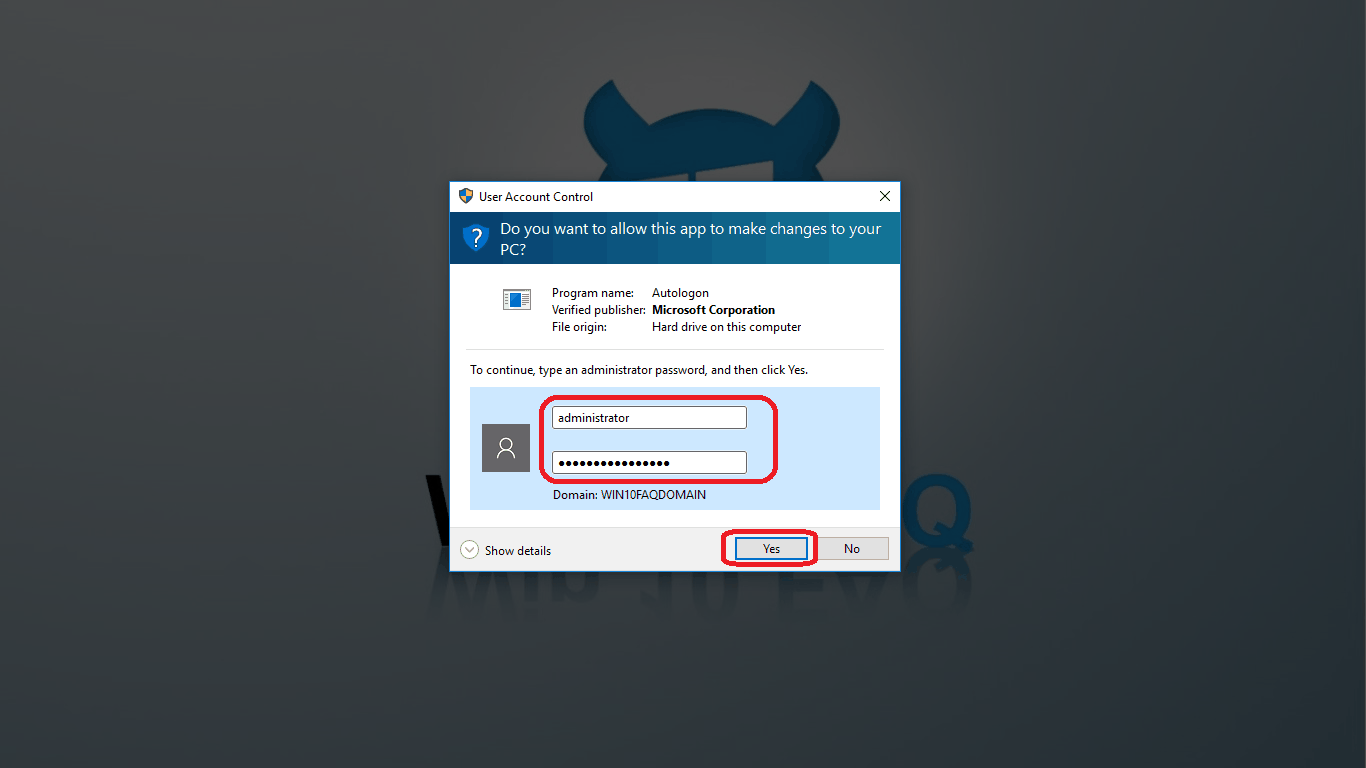
- In case you’re a part of a domain, you’ll have to provide a username and a password with administrator privileges, then click Yes to allow the app to make changes to your PC.
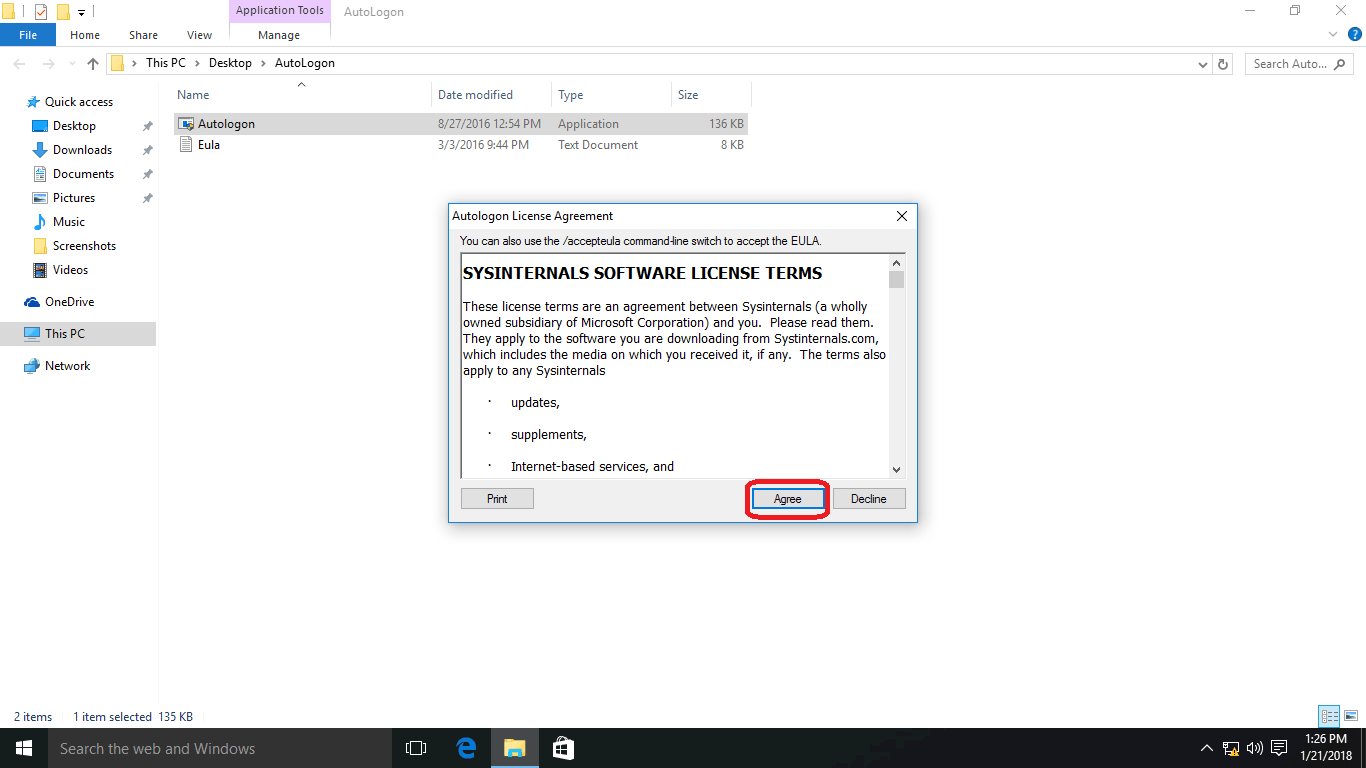
- Read the license agreement carefully (I’m supposed to tell you this but I’ve actually read it and there’s nothing special there 😉 ) and then click Agree. Also, click here to fix it if your computer keeps saying ‘Your Windows License Will Expire Soon’.
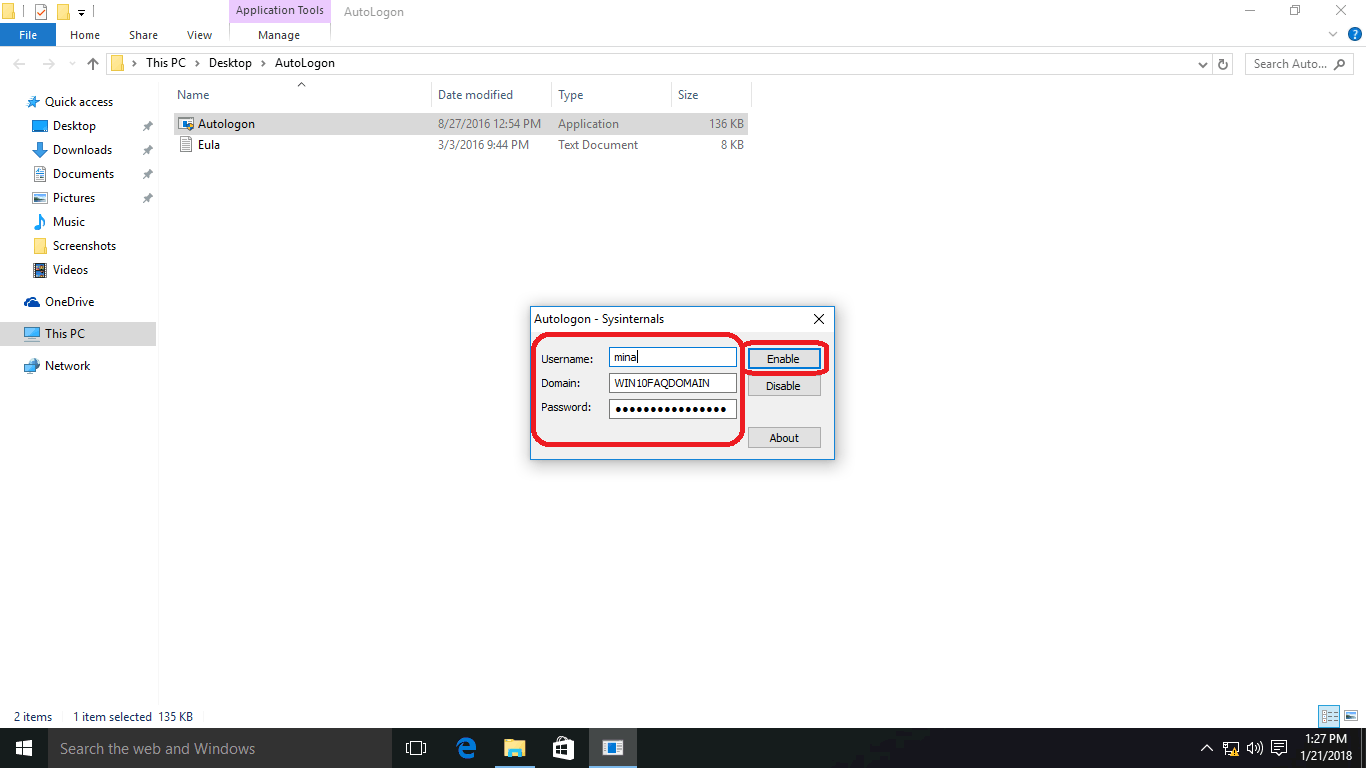
- Now enter your Username, Domain name if found, and your Password, and then click Enable.
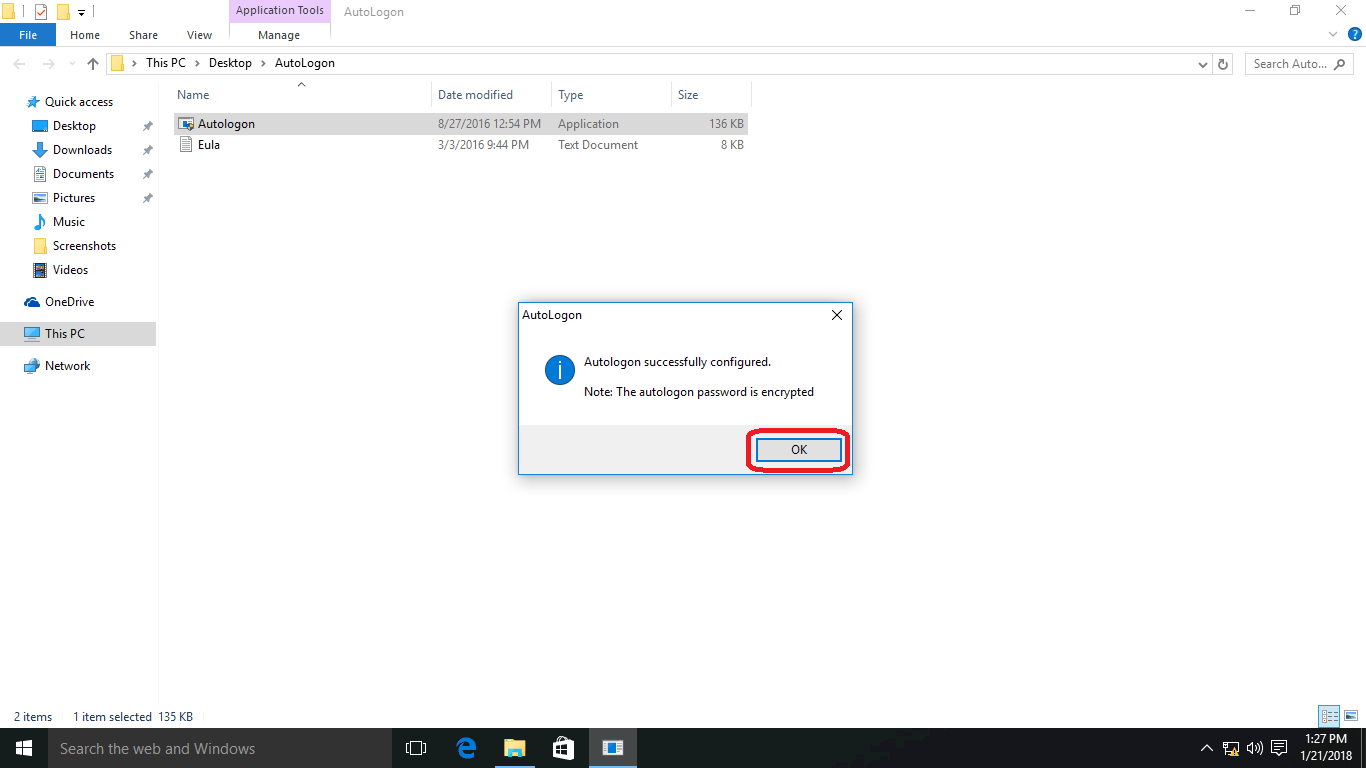
- If everything is good and the provided credentials are correct, this message box will appear. Click Ok.
- Now restart your computer and give it a try. You will find yourself logged on automatically.


Frequently Asked Questions
Here are some of the frequently asked questions that are related to this topic.
Why Do I Have 2 Accounts on Windows 10?
This issue usually happens to users who have turned on the automatic login feature in Windows 10 but changed the login password or computer name afterward. To fix the issue “Duplicate user names on Windows 10 login screen”, you have to set up auto-login again or disable it completely. Or, you could just set up a fingerprint login instead of the regular password login if you don’t want to go through the entire process again.
Suggested Read: How to fix Windows 10 Stuck on Welcome Screen (2022 Guide)
How Do I Login with a Password Instead of a Pin?
Go to the Settings app, then click on Accounts, and choose Sign-in options. From there, you can choose a password and add it. Once done, a confirmation dialogue should appear asking if you would like to make this the default login method. If not, just go back to Account settings and set it from there.
You might have other windows-related questions like How to Stop Disk Check On Startup In Windows 10, How to Disable and Enable Startup Programs, and How To Find WiFi Passwords in Windows 10 & 11.
Hi!
Tried mostly all of these solution in the past but our problem is that when the screen shutdown after the desired time (to save the screen from burning etc), when it comes back it asks for a password.
Still haven’t found a way to prevent this with windows 10 and a domain user.
It’s used in a setup for cashiers all in one computers. We can’t even just close the screen because the only button on it closes the whole thing and not just the screen.
If you have suggestions to try, i’m all ears!
Hey Jo, let’s try this:
Open your settings>accounts>Sign-in options (from the left pane) and then at the top of the page, adjust Require sign-in to Never.
I hope this fixes your problem but I’ll be there if it doesn’t work. Good luck!
Worked! Thanks.
Always welcome ^_^
If I set the computer to auto login as a basic user, is there a way to disable the setting if I need to log in as an administrator? Thanks.
Hello Chris, you will have to disable the whole setting in order to do this, either from the settings app or the User Accounts panel (check the Users must enter a user name and a password to use this computer checkbox) it’s all in the guide.
I have a different, but related situation. I am setting up brand new Win 10 Pro (1803) machines for a lab environment and as I have always done before, I am modifying the WinLogon key in the registry to perform auto login to the patron account on the computer. I also use the shift key to interrupt the auto login so I can login as my admin user.
The patron account has a password. In the past, what I have done is change the DefaultUserName string to the patron account. I then create the DefaultPassword string and fill in the password. I then add AutoAdminLogon and set it to 0 initially so I can make sure everything boots up before I commit. Once I am sure I haven’t messed up the registry, I change the latter to a 1, reboot and the patron account automatically logs in.
Here is what is going wrong this time. First, DefaultUserName is not in the registry so I add it. Same for AutoAdminLogon, so I add it and set it to 0. I reboot and guess what. Both those registry entries are gone!
I then reentered them and set AutoAdminLogon to 1. On reboot, the patron account logs in like I want. I then go back to my admin account and change the entry back to 0. Reboot and the entries have disappeared again!
It is really getting frustrating! Do you have any ideas on what is happening and if there is a way I can work around it?
By the way, I need to have it set up this way because we use PC Reservation from Envisionware so that Patrons have to log in to the computer with their library cards and that software only works on a running, logged in user.
Thanks in Advance
Hello Wendell, I did some research on your case and here what I found: people usually use these:
AutoAdminLogon
AutoAdminLogonCount
DefaultPassword
and it’s noticed that if the AutoAdminLogon key value is present and contains a one, and if the AutoLogonCount key value is present and is not zero, AutoLogonCount will determine the number of automatic logons that occur. Each time the system is restarted, the value of AutoLogonCount will be decremented by one, until it reaches zero. When AutoLogonCount reaches zero, no account will be logged on automatically, the AutoLogonCount key value and DefaultPassword key value, if used, will be deleted from the registry, and AutoAdminLogon will be set to zero.
So finally what I would recommend is to set the AutoLogonCount to a large number so it can be used for a large number of restarts and keep the entries from disappearing. I’m not if this is suitable for your problem but I’ll keep searching and I’ll come back for your if I have any updates.
Hello How About RDP?
Is this work for RDP from Google cloud, Digital Ocean, Azure etc?
my rdp always become black when i minimize