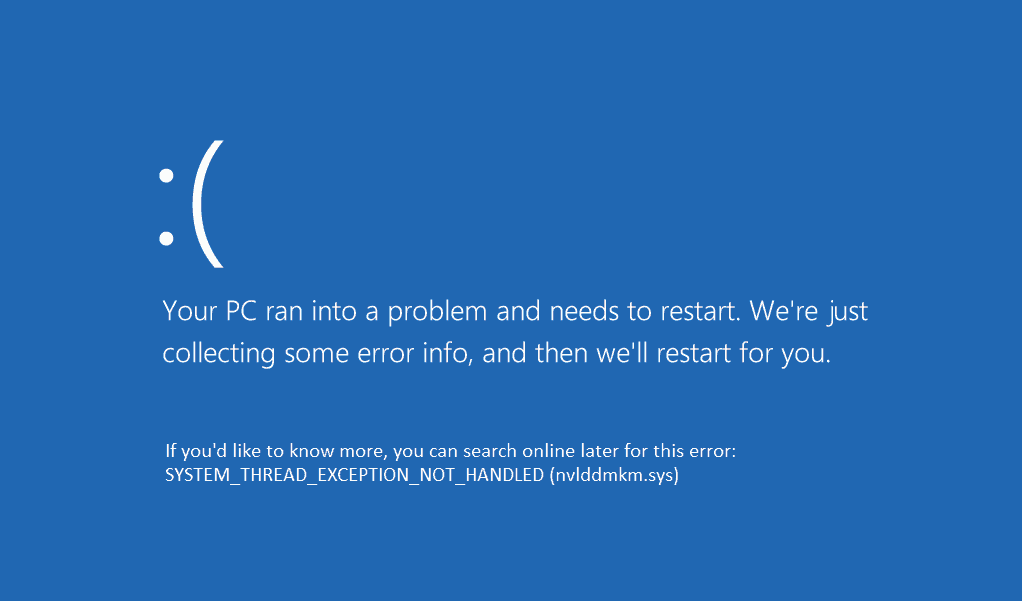
Getting a Blue Screen of Death, or BSOD is one of the most frustrating things that can happen when using Windows. This screen with the “System Thread Exception Not Handled” error message at the bottom is a fairly common one. You should also see a file name after the error message in parenthesis. This is the file that Windows has determined as being the source of the problem. What you do next will depend on when the BSOD is occurring and what that file is.
Finding the Cause of the BSOD
While uncommon, it’s worth mentioning that hardware issues can also cause this crash (and not just software issues) – usually problems with memory(RAM). The solution could be something as simple as re-seating a component inside your computer case, but you should not touch your computer’s internal hardware if you aren’t 100% sure what you’re doing. These issues can often be very tricky to diagnose and may require an expert’s help to fix them.
However, as this BSOD is usually caused by issues with drivers and other system files, the focus of this guide will be on repairing those files. Always start with checking the software before you start changing things with the hardware.
The first step in doing so is identifying the problem file. If the crash happens every time you try to boot Windows then make sure to write down the name of the file when you see it after starting your computer. If it seems to happen at random or when running certain programs and you don’t remember or haven’t written down the file name, it is possible to see that information without having Windows crash again. Please read on.
Finding the file with crash Information
Windows stores information from a BSOD in what are called minidump files. You can find and view these files with special software, such as BlueScreenView. It’s a fairly old program now, but it works great on Windows 10.
After installing and running BlueScreenView, it should automatically find and list all the minidump files your computer has made after a BSOD crash. You can then view important information about that crash, such as the error code and the file that’s involved.
Researching the file
Once you’ve found the name of the file, it’s time to do some research on it. As mentioned before, the problem file is most often a driver file, especially display drivers such as nvlddmkm.sys, the NVIDIA display driver file; or atikmdag.sys, an AMD driver file. Other common causes include wificlass.sys, a Wi-Fi driver file and iaStorA.sys, a driver file for Intel’s Rapid Storage Technology. You may have a different file causing the issue, however.
Either way, you’ll want to run a search on the file name in Google, or whichever search engine you prefer and the results should give you information on what that file is and what device it’s for if it’s a driver file. Once identified, the next step is to repair the BSOD-causing file.
Repair Methods
In the case of a faulty driver file, updating it through Device Manager is one way to repair it. If you are not able to boot into Windows, you’ll first need to find a way to do so. Entering Safe Mode is usually the best way to do this. You can skip ahead if you don’t need to enter Safe Mode.
If there is no file name displayed, or you are unable to find useful information on it, you may need to try a more general recovery method, like using SFC.
Entering Safe Mode
When Windows cannot boot, Safe Mode needs to be entered through the recovery options screen. The following is one of the most surefire ways to do so:
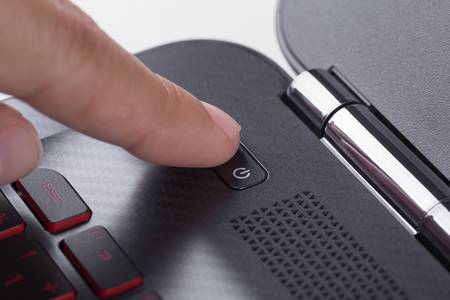
- Power on your computer.
- As soon as the Windows logo appears hold down the power button until the system powers off . You may need to repeat these first two steps as many as 3 times, but sometimes it works after being interrupted just once.

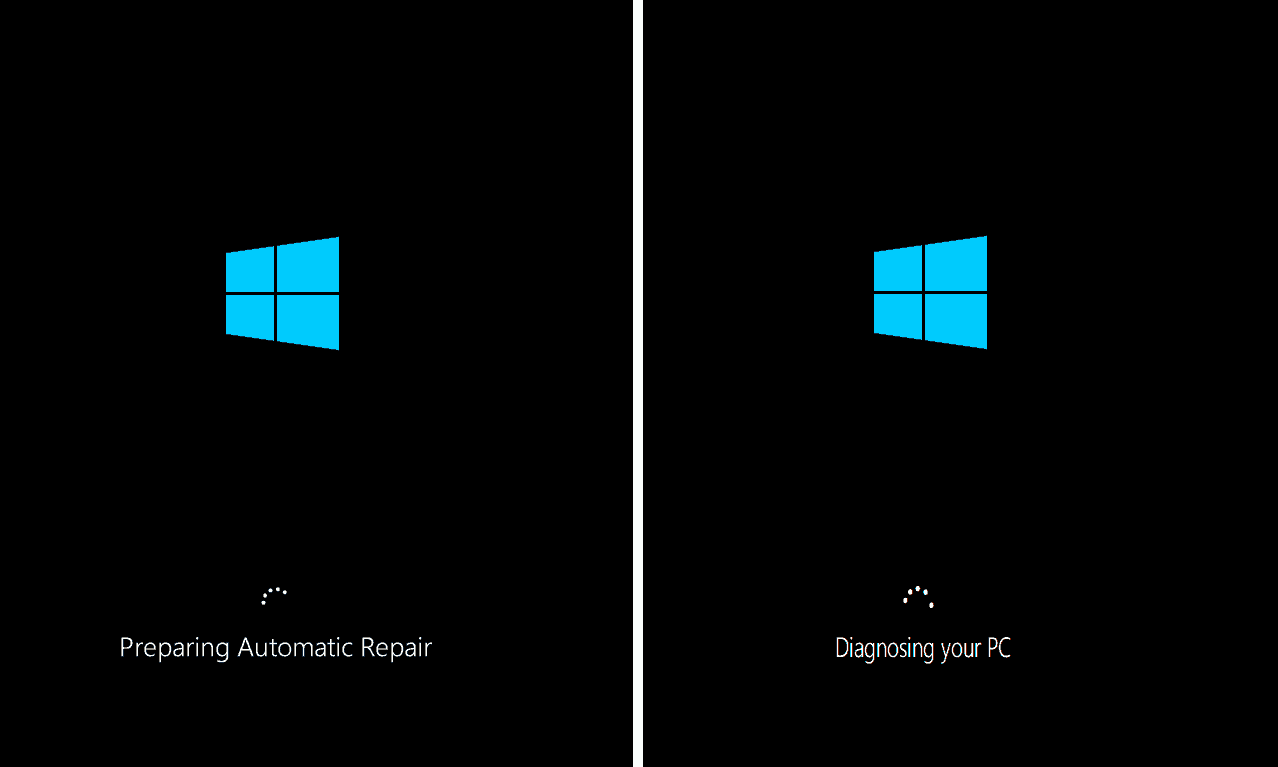
- Power it on and let it start. You should see a screen saying “Preparing Automatic Repair” followed by “Diagnosing your PC”.
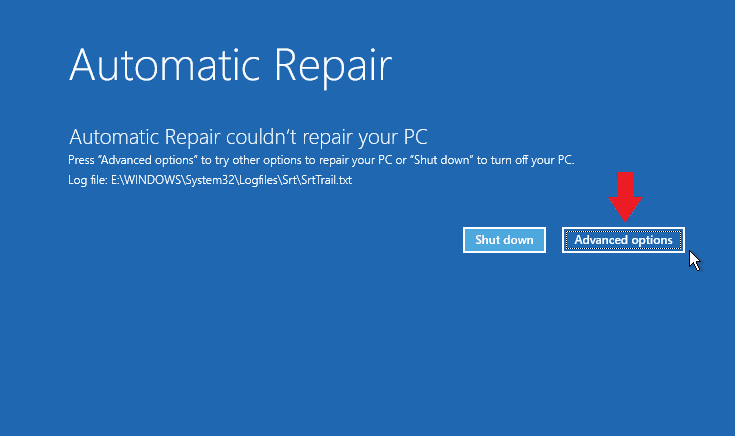
- Once this is done you will likely see a screen saying “Automatic Repair couldn’t repair your PC”. Click on “Advanced options“.
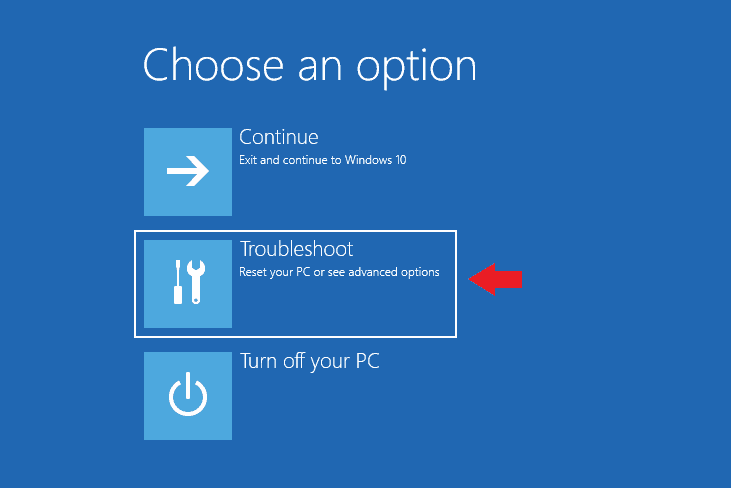
- Then click “Troubleshoot” on the next screen.
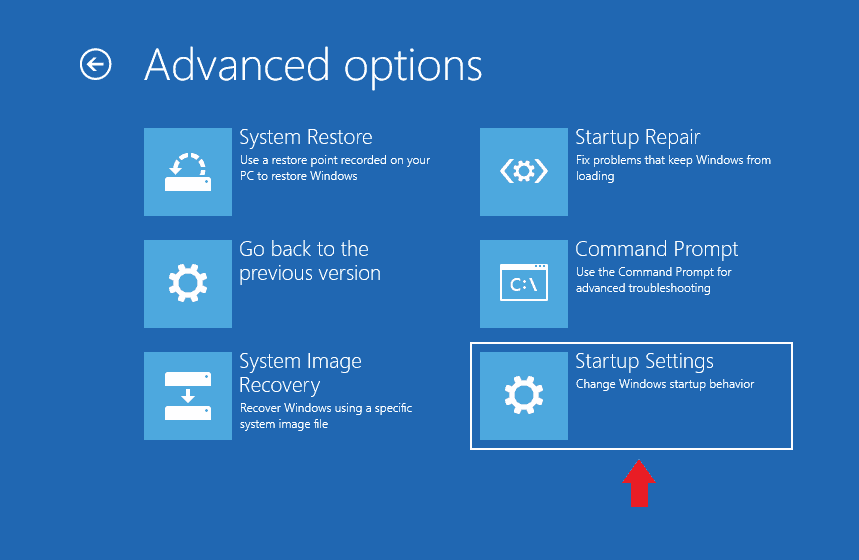
- Click “Advanced options“.
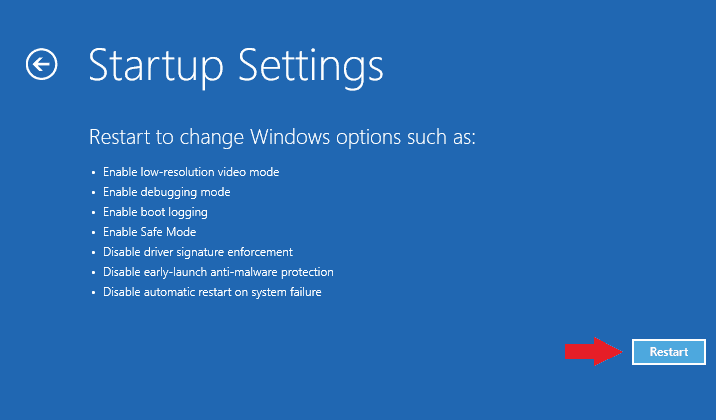
- Then click “Startup Settings“.
- Now click “Restart“.
- A screen showing a list of options and their corresponding numbers should come up after restarting. Press the 5 or F5 for “Enable Safe Mode with Networking“.

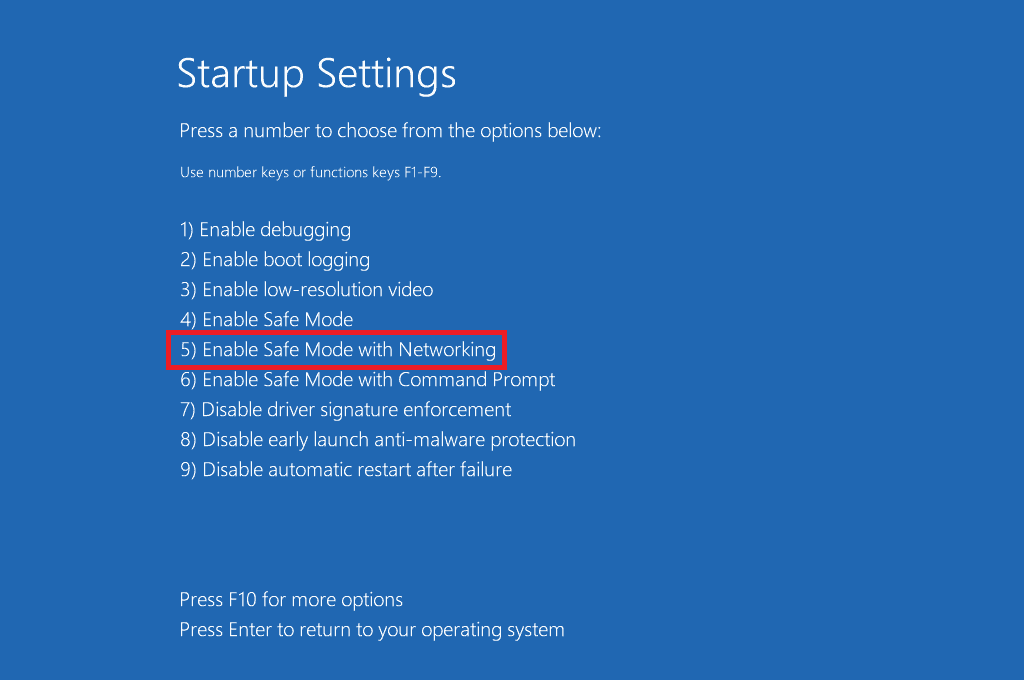

Windows will restart and should now be in Safe Mode with Networking. This basically disables all non-essential drivers, except those for networking, which should allow you to still access the internet. It will look something like this:
Click here to skip ahead if you successfully entered Safe Mode.
Using a Recovery Drive or Installation Media
If for some reason this method doesn’t work for you, you will need to use either Windows installation media or a recovery drive. Installation media being either a DVD or USB drive from which Windows 10 is installed. One of these may have come with your computer. If not, or if you can’t find it, you’ll need a recovery drive.
A recovery drive is a drive which can diagnose and repair issues with Windows. It can be created right in Windows and is usually made with a USB drive. Even if you don’t need one now, I’d highly recommend making one in case you need it in the future. Click here if you already have either of these.
Making a Recovery Drive
You’ll need access to a working Windows 10 computer and a USB drive that you can delete all the data from in order to make one. Once you have both of these, do the following:
- Insert USB drive into a running computer on Windows 10
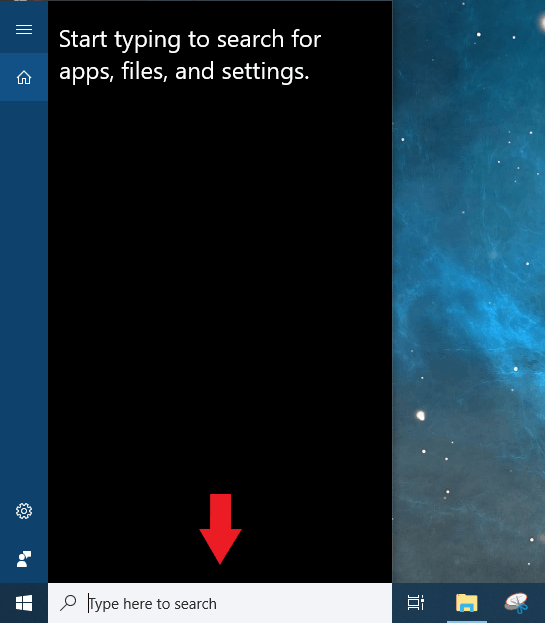
- Open the search by clicking on it or with the Win + S shortcut
- Begin typing “recovery drive” and the option for it should come up
- Click on it and click “Yes” to the User Account Control pop-up that should come up.
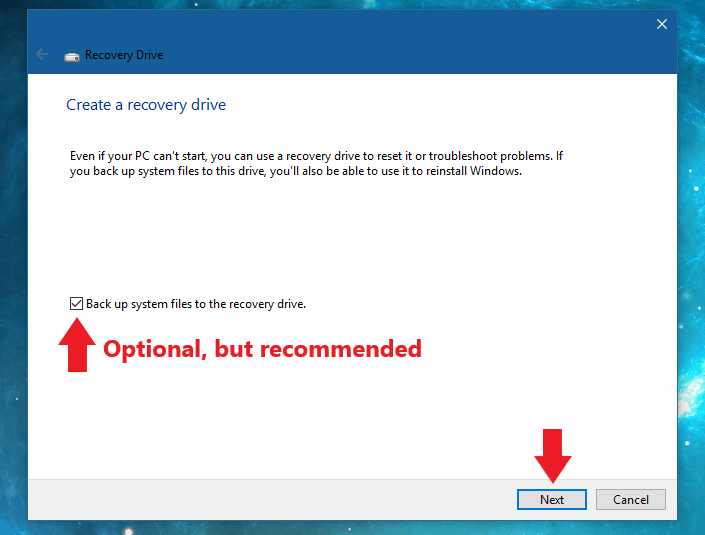
- On the Recovery Drive window is a checkbox saying “Back up system files to the recovery drive.” Leaving this checked will make it possible to reinstall Windows from the recovery drive, but it will take significantly longer to make and also requires a USB drive that can hold at least 16GB of data, according the prompt. Doing this is recommended, but optional.
- After deciding whether to leave the box checked or not, click “Next”. A loading bar with “Please wait” at the top will appear.
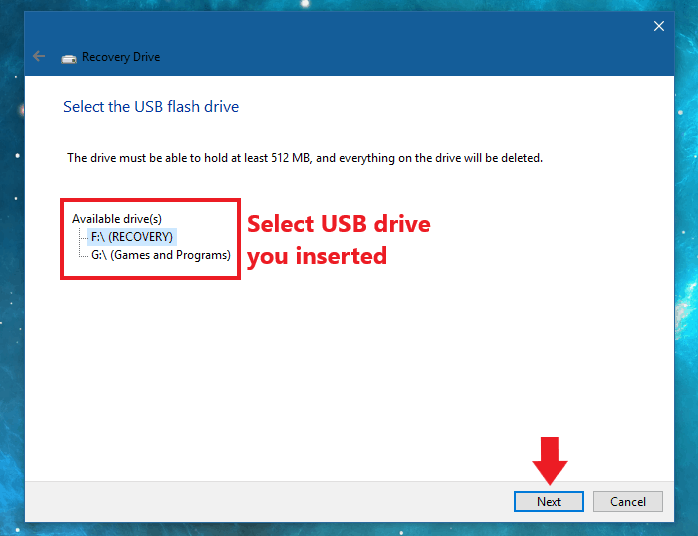
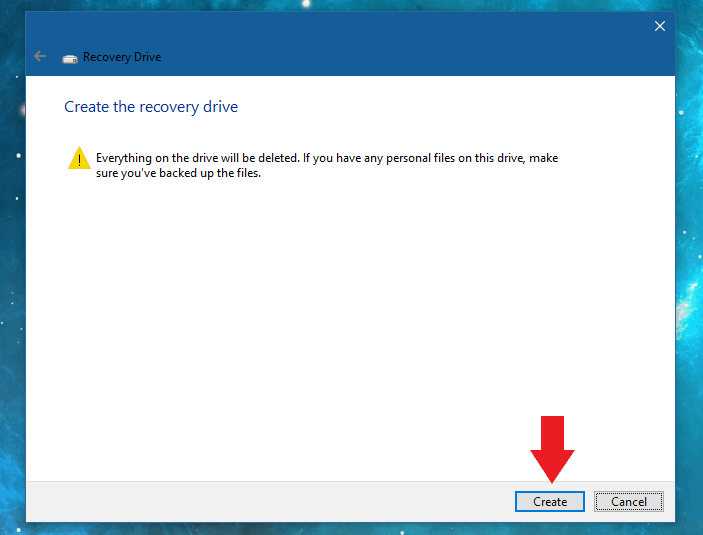
- When it is done you should see a list of all available removable drives. Select the one you want to make into the recovery drive. This will delete everything on the drive, so make sure you select the right one and backup any important data on it before proceeding. Click “Next” and a screen telling you basically the same thing will come up.
- Click “Create” when ready.
- A window showing the progress of making the recovery drive will come up. Wait for it to finish.
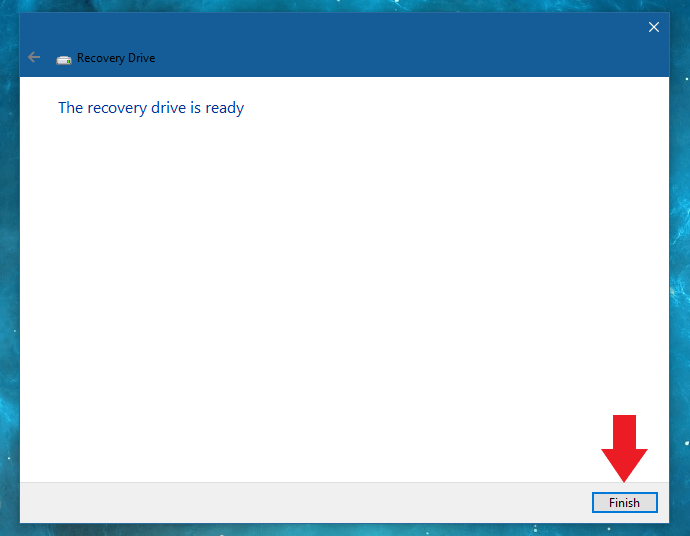
- When it says the drive is ready, press “Finish“.


Getting to Safe Mode With Command Prompt
Once you have either a recovery drive or installation media ready, you’ll use it to get to the Command Prompt from which you can enter Safe Mode. Using either of them to get to there is pretty much the same in the beginning. Here’s what to do:
- Insert the Windows 10 recovery/installation USB or DVD into your computer.
- Turn it on if off, or restart it if already on.
- In many cases your computer will boot first from USB or DVD by default. If not, you’ll need to enter the boot menu of your BIOS and select the drive/disk manually. This is usually done by pressing the F12 key while your computer is starting, but the key varies among brands. You can consult this list to see what key it should be for your computer.
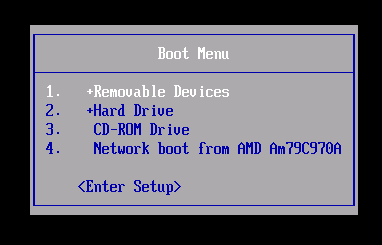
- You should see a screen come up with a list of all bootable devices plugged in to your computer. This is the boot menu. Yours will likely look different from the one pictured, but it should be similar. In most cases you’ll use the up and down arrow keys to scroll through and select the right device. Once highlighted, press Enter.
If Using Installation Media:
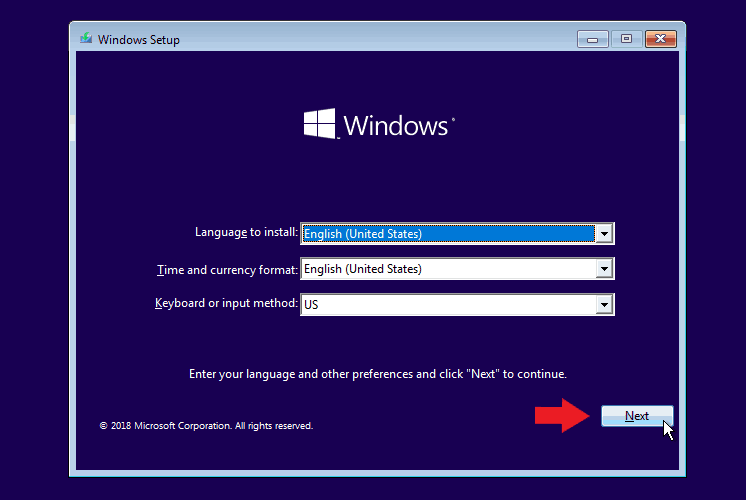
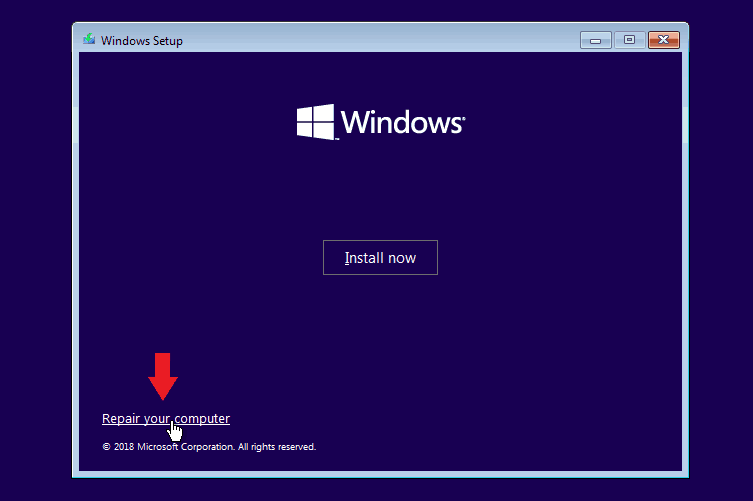
- A setup window will appear with language and related settings. You can change these as needed, but leaving them at default should work for most. Click “Next” when done.
- There will now be a large “Install now” button in the middle, but you’ll want to click “Repair your computer” in at the bottom left of the window.
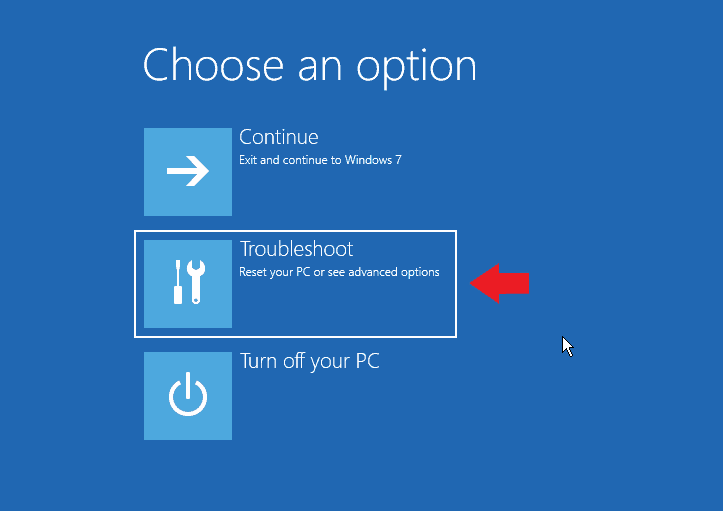
- A screen asking you to choose an option will come up. Click on “Troubleshoot“.
- You’ll now be on an “Advanced options” screen. Click “Command Prompt“.
- Follow instructions on using Command Prompt here.

If Using a Recovery Disk:
- You will see a list of keyboard layout options. Even if not in the US, selecting “US” should work fine if you have a QWERTY keyboard, which most users do. If not, select what matches your layout, clicking “See more keyboard layouts” to scroll through the options if necessary.
- An options screen identical to the one for installation media will come up. Click “Troubleshoot“.
- Click “Command Prompt“

Using Command Prompt
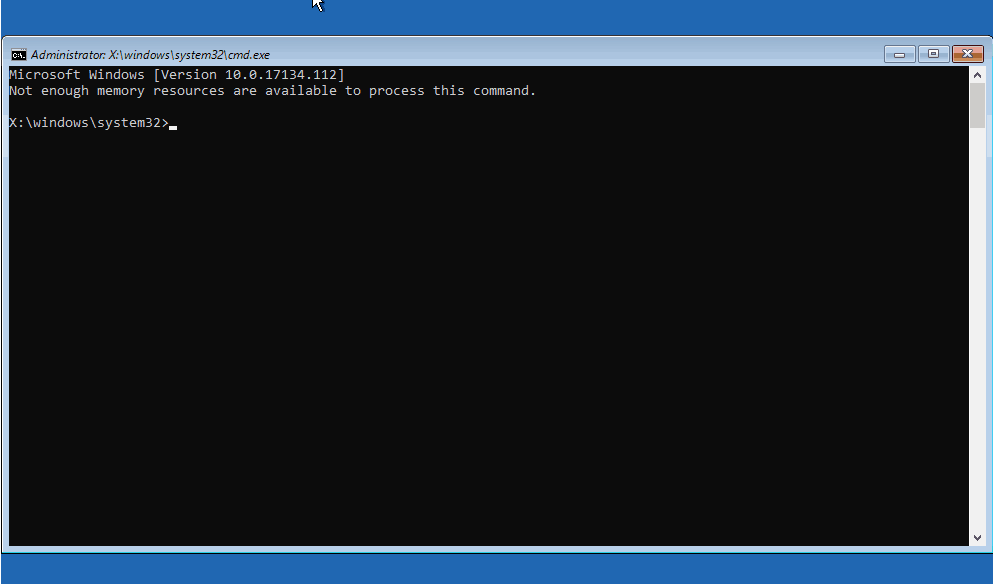
You should now have the Command Prompt window up. You’re going to enter a command that will make your computer start in Safe Mode with Networking by default. You will have to change this setting later in order to boot normally, but doing so doesn’t require using Command Prompt again.
- Once the Command Prompt window is up, enter the following exactly:
bcdedit /set {default} safeboot network - Press Enter. You should receive a message saying “The operation completed successfully”.
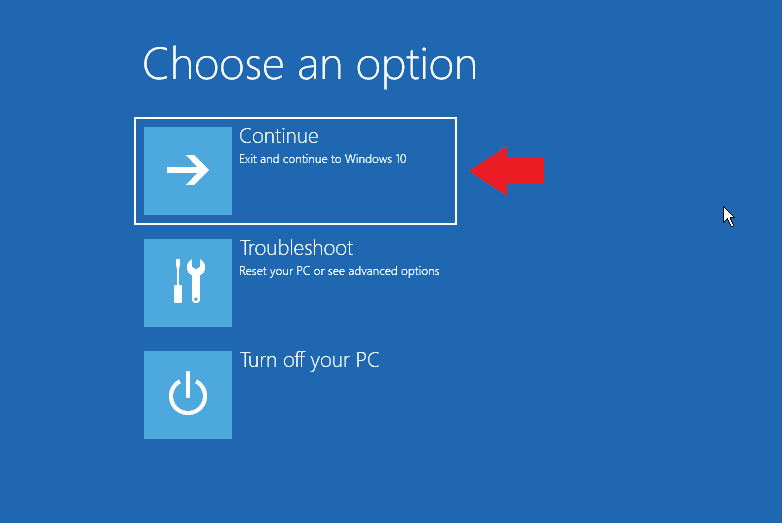
- Exit out of Command Prompt and you’ll end up back on the “Choose an option” screen.
- Click on “Continue“. Windows should now start in Safe Mode with Networking.


Click here to see how to use Device Manager.
Stop Safe Mode from loading as the Default
Here’s how to get back to booting normally after you are done with Safe Mode:
- Open Windows search by clicking on it or with Win + S.
- Type out “msconfig” or “System Configuration” and click on “System Configuration“.
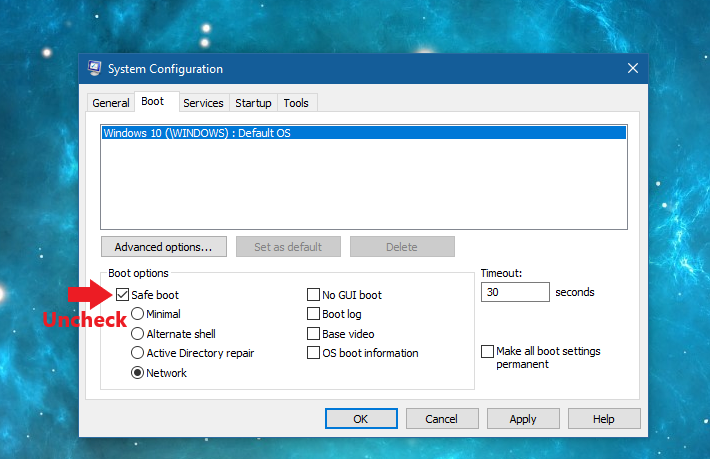
- Click on the “Boot” tab and uncheck the “Safe boot” box.
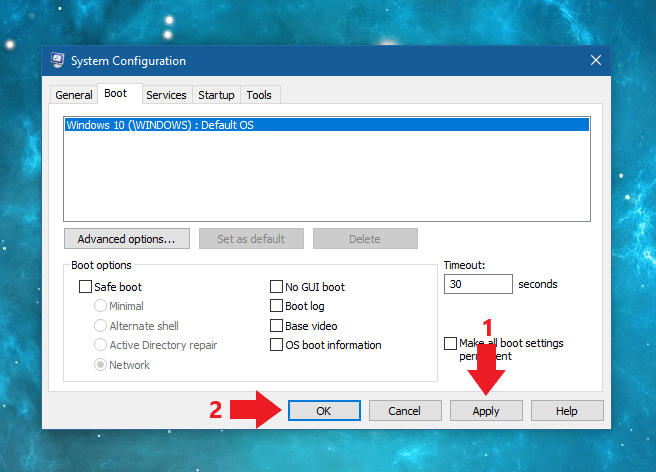
- Click “Apply” then “OK“.
- The window will close and a new one notifying that you need to restart will appear. Click “Restart” if ready to, or “Exit without restart” if you are not.

Repairing the Driver File
Using the NVIDIA display driver as an example, I’ll show you how to use Device Manager to either update or delete it in order to fix the BSOD problem. The exact steps you need to take will vary depending on the file causing the crash, but these example steps should be easy to translate to AMD, Intel or other driver files.
Once you are successfully in Windows either normally or through Safe Mode, do the following:
- Open Windows search by clicking on it or pressing Win + S.
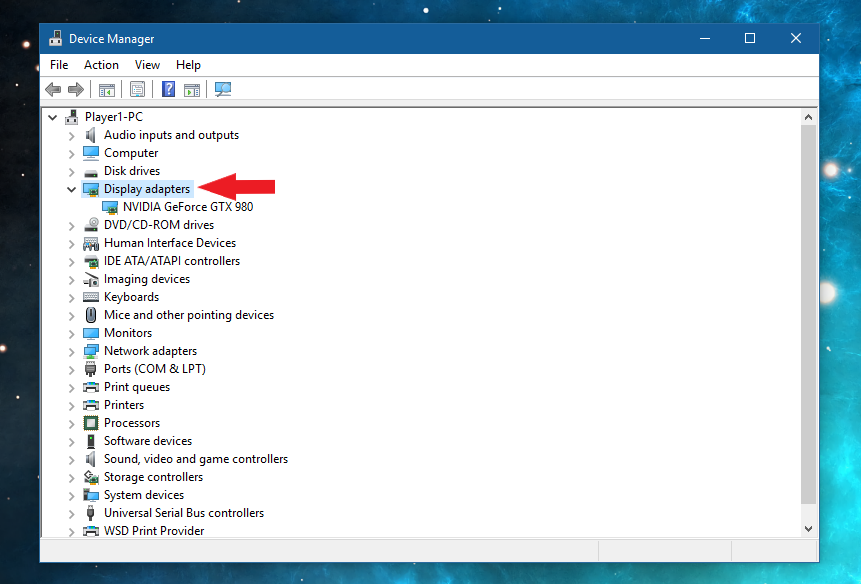
- Begin typing “Device Manager” Click on it when it shows up.
- Click on “Display adapters” (or the section for whichever device you are having driver issues with).
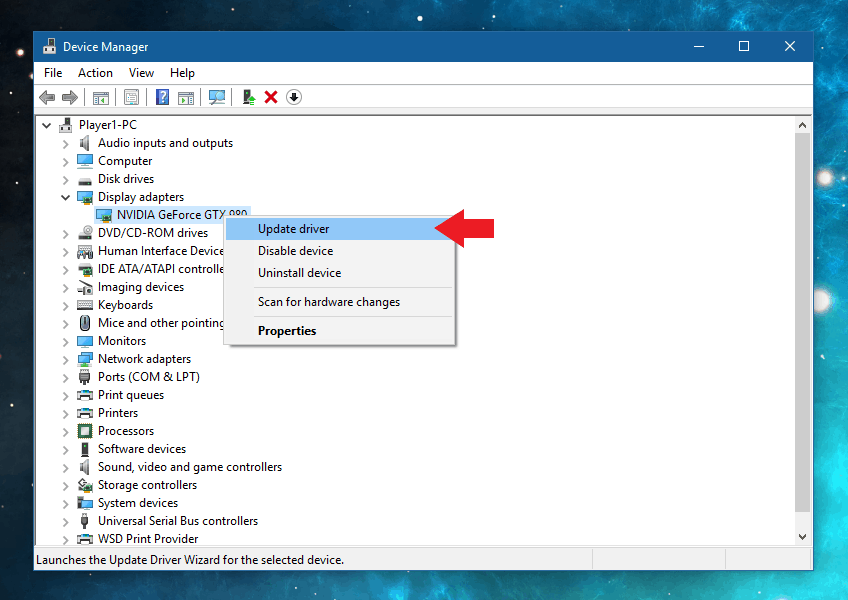
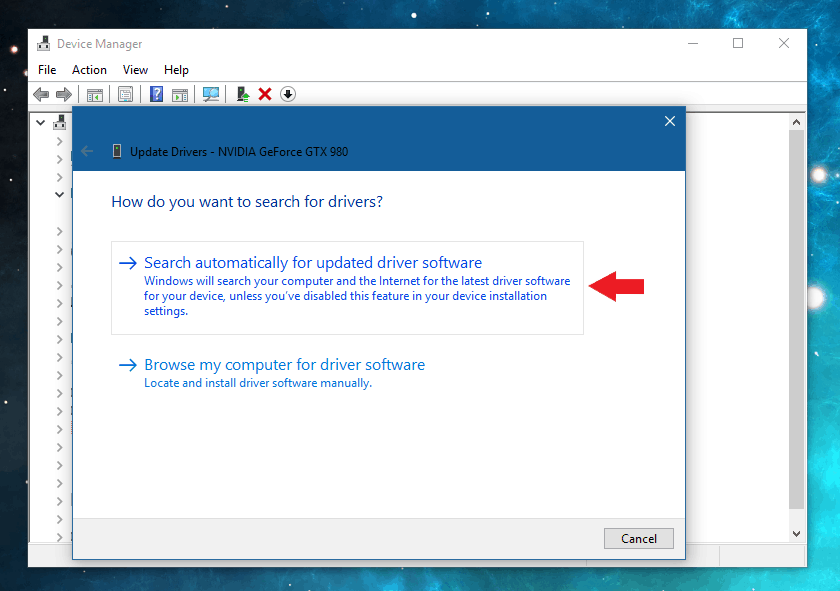
- Right click on the device and click “Update driver“
- On the window that comes up click on “Search automatically for updated driver software“.
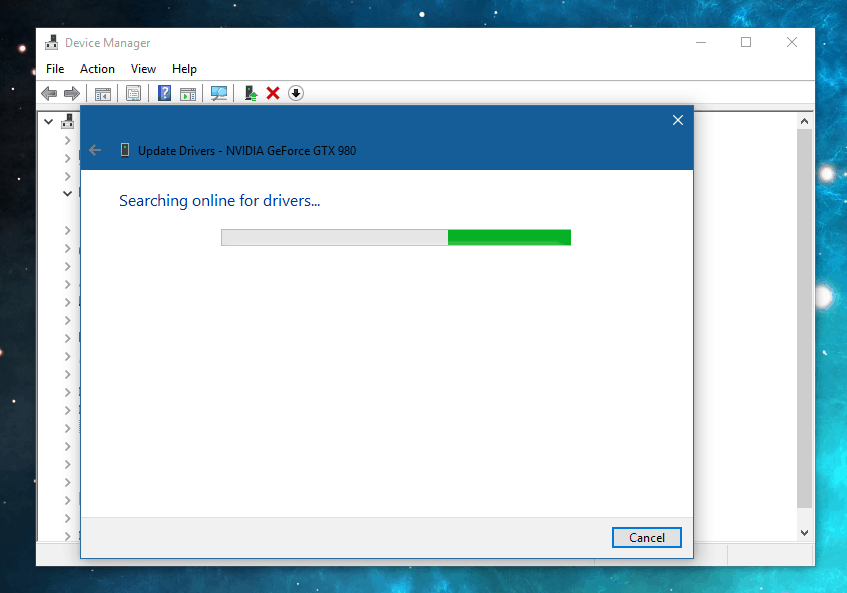
- Windows will search for updates and install them if available. Wait for this to finish.
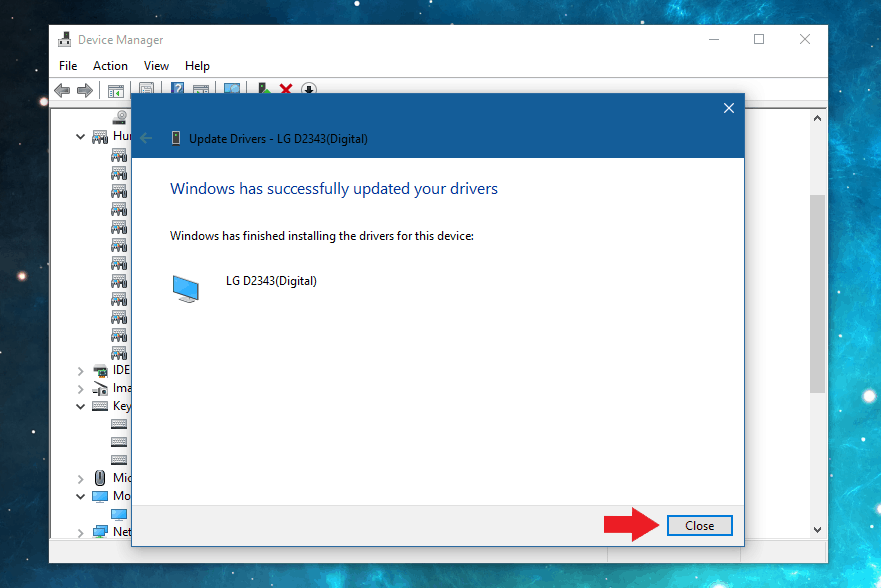
- If there is an update you should get a window saying “Windows has successfully updated your drivers”. If no updates are found you will see a screen saying “The best drivers for this device are already installed”. Either way, click “Close“.
- If the update was successful, go ahead and restart your computer. Hopefully it should now be running BSOD free.

Manually Updating
If the driver didn’t update, or if updating didn’t help, you can try updating or reinstalling manually.
- From their respective official websites you can download the NVIDIA, AMD or Intel drivers you need.
- If it’s not a display driver, a quick search should help you find the right site to download from.
- Checking for Windows Updates may also work.
Deleting the Driver File
Sometimes just updating the driver file isn’t enough and it needs to be deleted first. Here’s how to do so from Device Manager:
- Open Windows search and begin typing “Device Manager” Click on it when it shows up.
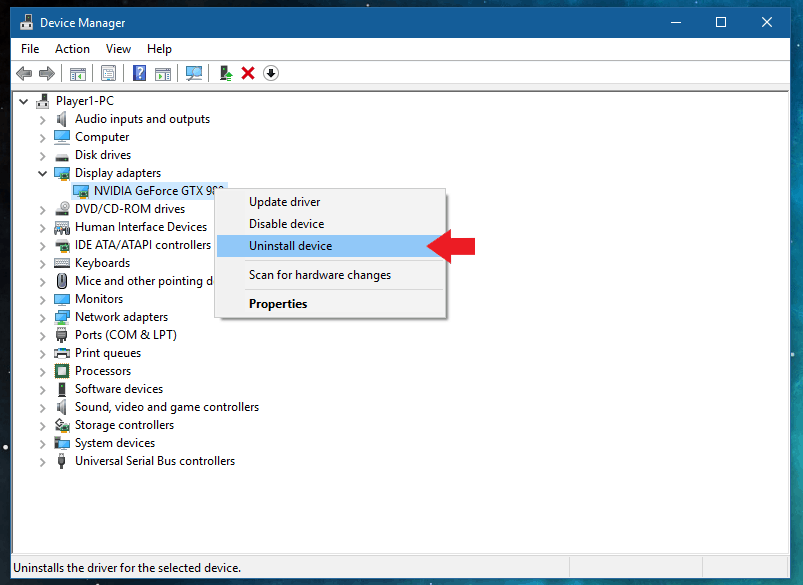
- Click on “Display adapters” (or the section for whichever device you are having driver issues with).
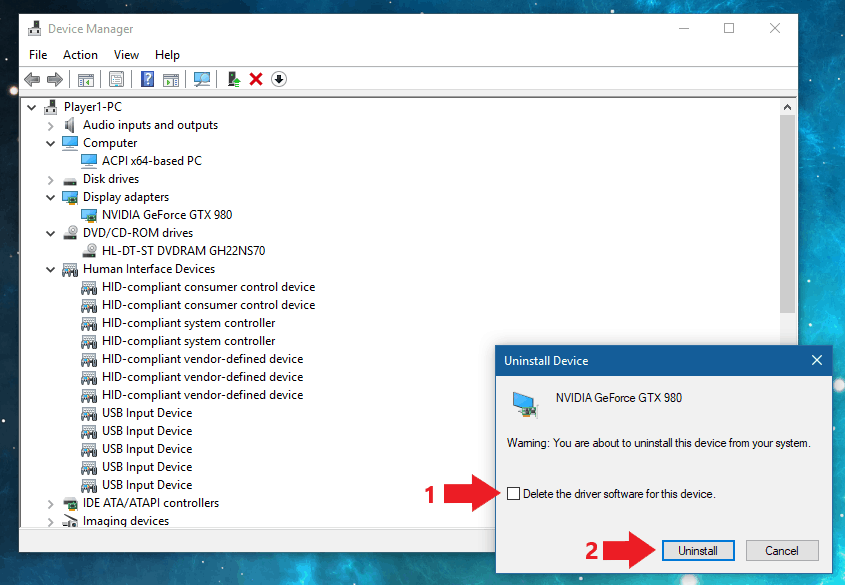
- Right click on the device and click “Uninstall device“.
- Check the “Delete driver software for this device” box then click “Uninstall“. This will likely cause the device associated to stop working. With display adapters, the generic driver should take over.
- Restart your computer. Windows may begin to automatically download and install the missing driver file. If not, you may need to manually install it. Updating Windows will also likely reinstall the driver file.
Updating Windows
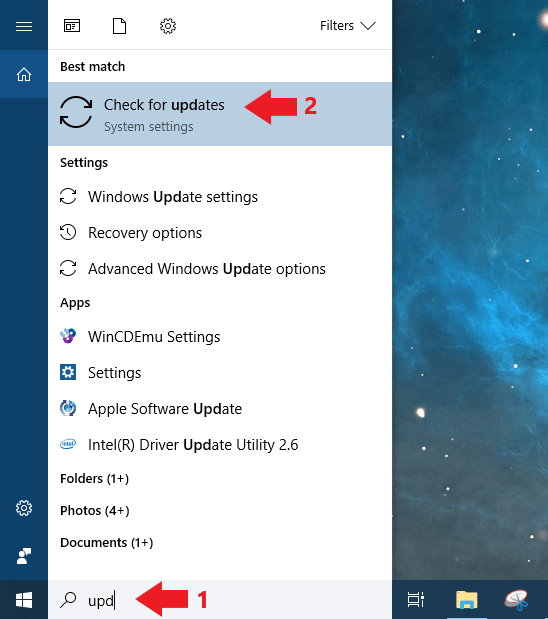
- Open Windows search by clicking on it or with the Win + S shortcut
- Begin typing “update”. “Check for updates” should appear. Click on it.
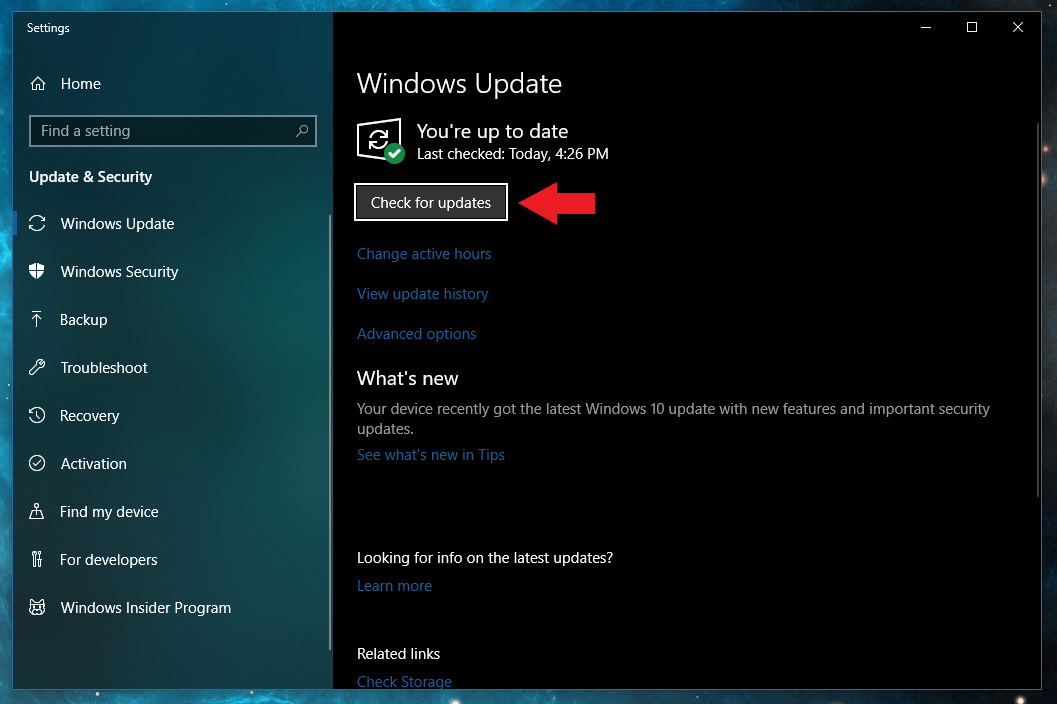
- Click on “Check for updates” in the window that comes up. If there are any updates they should begin downloading and installing. Wait for this to finish.
- If there were updates you’ll likely get a prompt to restart after they finish installing. Click “Restart now” when ready.

After Windows in done restarting and installing updates you should hopefully have a working computer. If this has still not fixed the “System Thread Exception Not Handled” BSOD, using SFC may help.
Repair Files with System File Checker
The System File Checker, or SFC command can be used from the Command Prompt in Windows itself or from recovery options to repair drivers and other system files. Here’s how:
From Recovery Options:
- Follow the necessary steps from entering safe mode until you reach “Advanced options” and then “Command Prompt”.
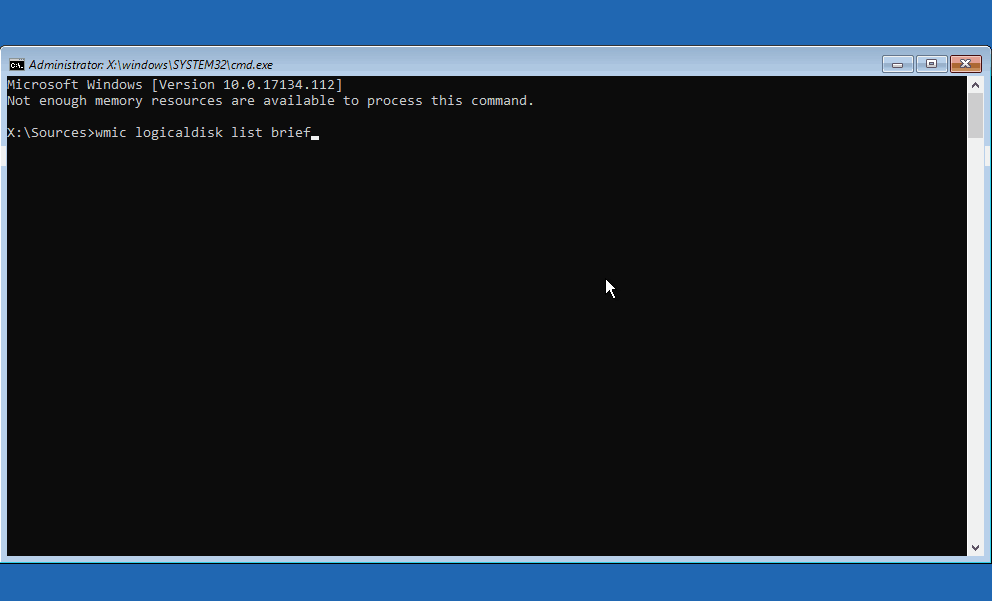
- Before beginning the scan you will need to determine the drive letter of your Windows drive as it often changes in a recovery environment. In Command Prompt enter:
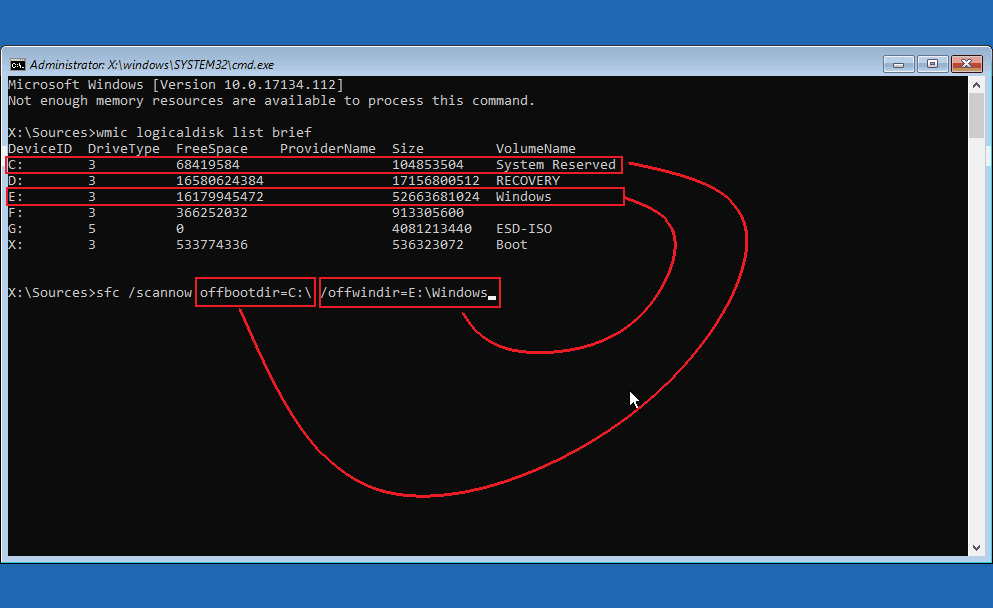
wmic logicaldisk list brief
- You will see a list of your drives/disks by drive letter and name. How you run the SFC command depends on the naming. In many cases your Windows drive will be named “Windows” and have C: as the drive letter. It’s also possible you may have named your Windows drive as something or else, or it may even be unnamed. There may also be a drive named “System Reserved” or “Recovery” that is the C: drive and the Windows drive could be D: or E:. In this case the SFC command will look something like this:
sfc /scannow /offbootdir=C:\ /offwindir=E:\Windows\
This is the command I ended up using in my test system. Yours will likely be different. You’ll need to change the driver letters to suit your system. Replace only the drive letter, type the command identically as pictured otherwise(Note: there is space between the “\” and “/”, it’s just hard to see). I had both a “System Reserved” and “RECOVERY” disk in my case, the “RECOVERY” disk being one made as shown here. Either of these should work in the “/offbootdir=” section, but in most cases it will be “System Reserved”. Your Windows drive letter goes in the “/offwindir=” section. If you only have a Windows drive, use that drive’s letter for both “/offbootdir=” and “/offwindir=“. In that case it will look like this:
sfc /scannow /offbootdir=C:\ /offwindir=C:\Windows\
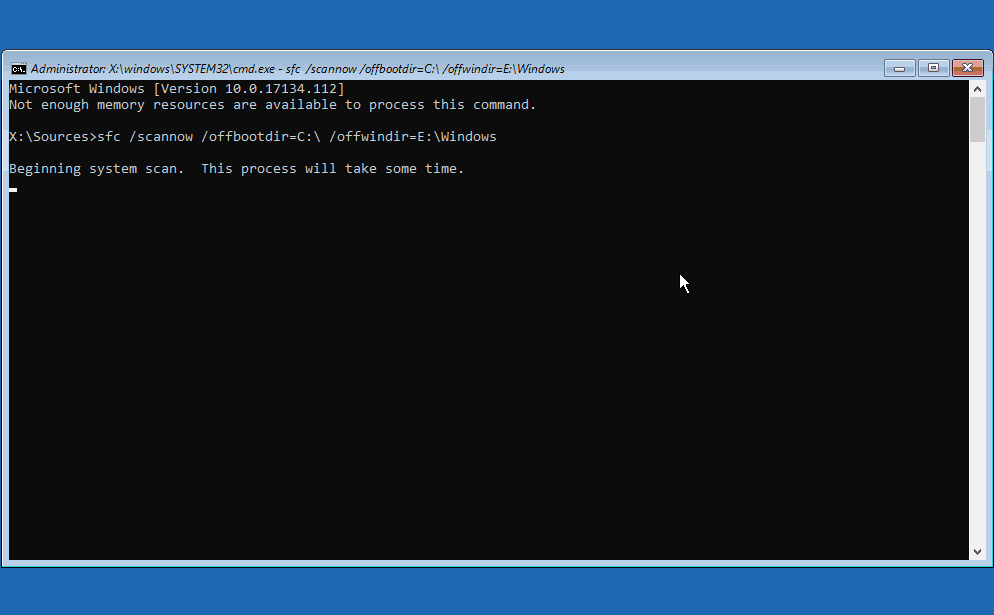
Once you’ve figured out the right parameters for the command, type it in and press Enter.
- SFC will scan for errors and attempts to fix them automatically. It does not give any progress updates and will likely take quite a bit of time. Wait for it to finish.
- When it’s finished, you will see a message stating the outcome of the scan. Exit the Command Prompt.
- Click on “Continue“.

From Windows:
If you are able to get into Windows, using SFC is much simpler.
- Open Windows search by clicking on it or with the Win + S shortcut.
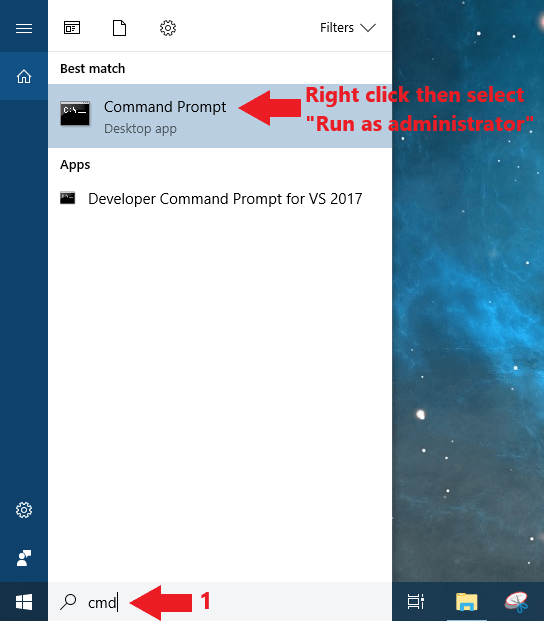
- Type “cmd” into the search bar and right click on “Command Prompt” then click “Run as administrator“
- Click “Yes” on the UAC pop-up.
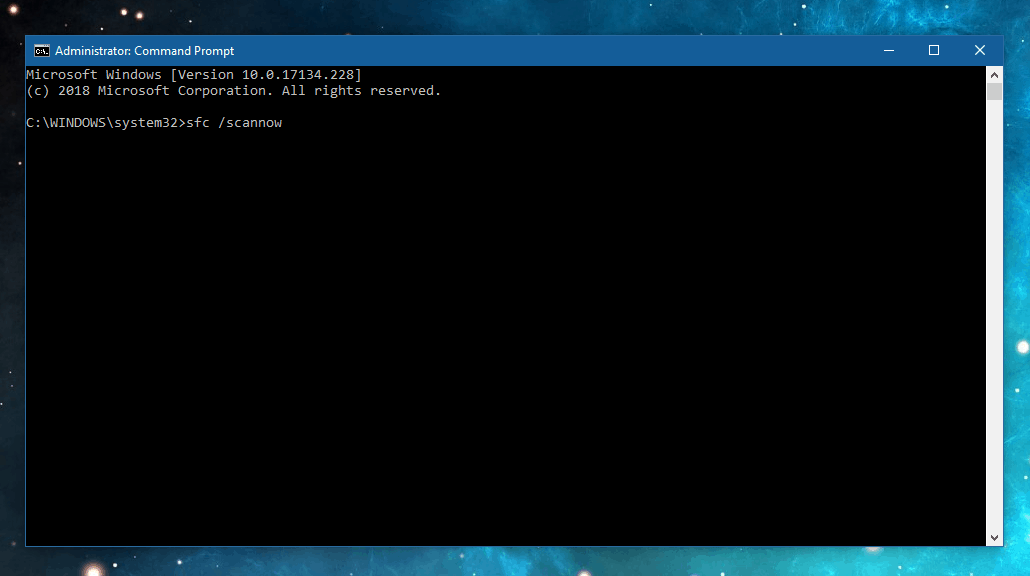
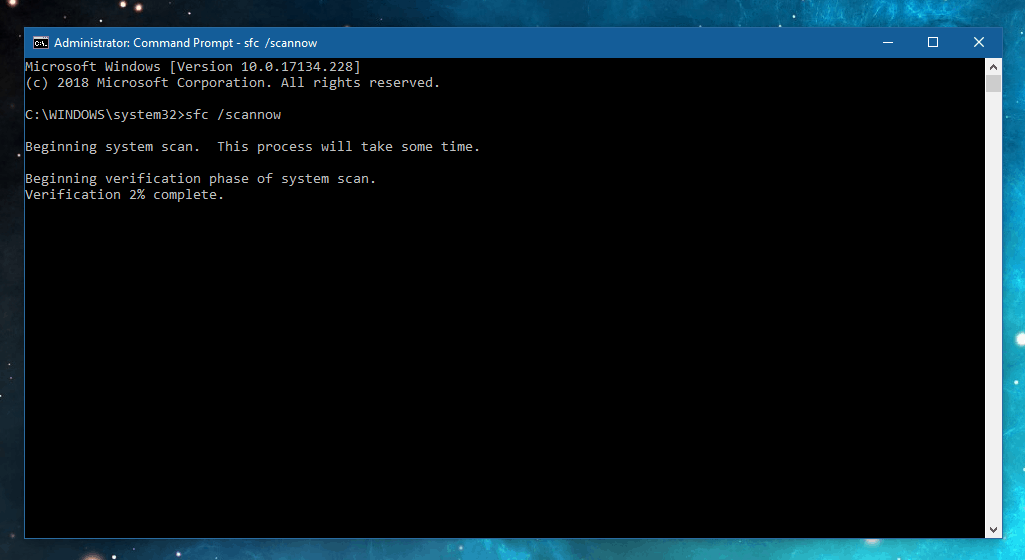
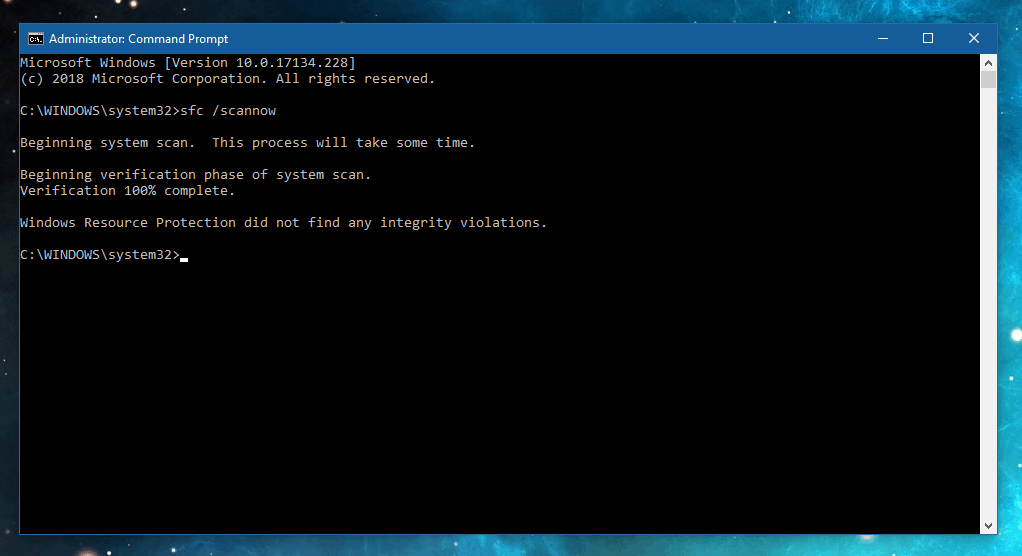
- In the Command Prompt window you can copy and paste or type the below command, then press Enter.
sfc /scannow
- The scan will begin, going through a verification then repair stage. Wait for this to finish.
- A message on the outcome of the scan will be displayed. In my case it didn’t find anything to repair. You will likely receive a different message. Restart your computer.

Suggested Read: What Is OneDrive
Final Thoughts
Hopefully one of these methods has restored your computer to working order. Feel free to ask questions in the comments section if you have any trouble. Or maybe you have a shorter way on how to solve it, discuss it with us.
Do you got any other technical questions about your Windows 10 PC? Try visiting our website. You could find a topic that might help you with your concerns. Or you might have a direct question like How To Fix “There Was A Problem REsetting Your PC”.