Quick Jump
- What is the registry?
- Why backup the registry?
- Wait, can’t I just copy all the files as I would usually do to backup files?
- Method 1: Backing up and restoring the registry using the Registry Editor (not recommended)
- Method 2: Backing up the registry using System Restore (the recommended method)
- Summary
What is the registry?
The Windows registry is a hierarchical repository or a database that comprises settings and configurations for Windows Operating system, users, hardware, and software applications.
In more technical terms, the registry is a collection of keys and values. The keys are found at the left pane of the Registry Editor and they are:
- HKEY_CLASSES_ROOT
- HKEY_CURRENT_USER
- HKEY_LOCAL_MACHINE
- HKEY_USERS
- HKEY_CURRENT_CONFIG
These Keys contain all the Registry values in Windows Systems. In this post, we’ll guide you through how to backup and restore your Windows Registry, before making any changes to it.
Why backup the registry?
Not sure if you it’s important to backup your registry before doing changes to it? Read this section.
The registry comprises of hardware, software and user settings, and therefore it’s one of the most vital components of Microsoft Windows. Furthermore, all operations that run within the system need to consult the registry beforehand. It’s for this reason that it’s prudent to always have a backup copy of the registry.
If the registry is messed up with, it can lead to system errors and worse still, render your system unusable forcing you to perform a clean install. For this reason, it is crucial to always have a healthy backup of the registry so that should something go awry, you can always restore your system from the backup. For best practice, it’s recommended that you backup your registry before;
- Performing a direct registry edit in the registry editor
or, - Repairing the registry using a third-party tool
Now let’s see how you can go about backing up your registry.
Wait, can’t I just copy all the registry files as I would usually do to backup files?
Backing up and restoring the Windows registry is quite different, unlike other files which can be copied to a different location. This is because much of the registry is not modifiable by hand.
In addition, registry files cannot be copied whilst Windows is running and, if you’re thinking about that option: neither can you restore a full registry backup from an export file, like the one you’ll create if you use the first method. That is why our first method is a possible but not recommended one: it won’t be a full backup. Click here to jump to the second method.
Method 1: Backing up and restoring the registry using the Registry Editor (not recommended)
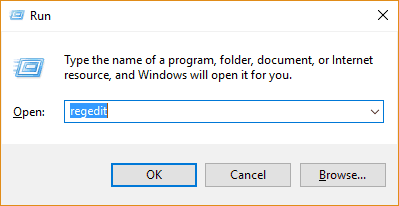
- As seen earlier, open the’ Run’ dialog by Simultaneously pressing on Windows key + R
- Type regedit and hit ‘Enter’
- This opens up the Registry editor. To back up the entire registry, right-click on the ‘Computer’ icon and select ‘Export’
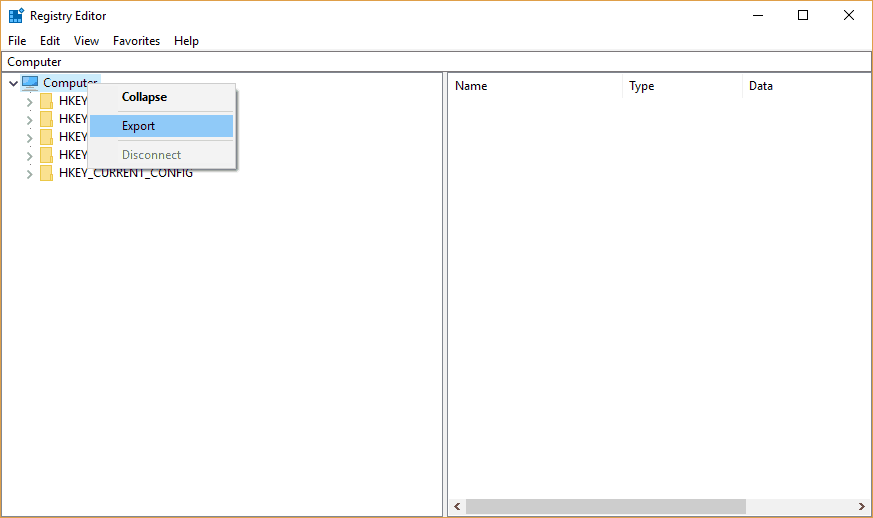
- This will display a pop-up dialogue which will prompt you to specify the name and location of the backup file.

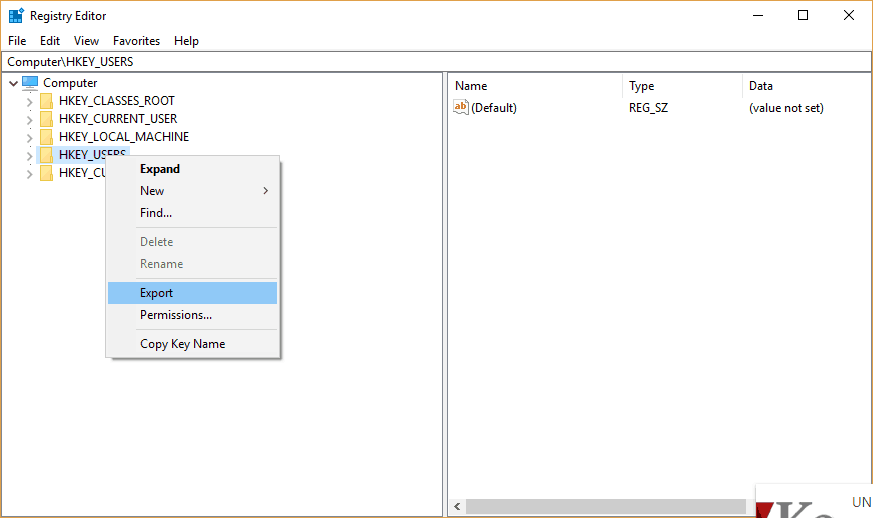
- To back up part of the registry, navigate to the registry hive you wish to back up, right click and select ‘Export’
NOTE:
- You can back up the registry in the following formats
- .reg – Registration files
- *. * – Registry Hive Files (This saves registry files in Binary form)
- .txt – Text Files (This can be opened using a text editor like Notepad
- Win9x/NT4 format
Restoring the registry
To restore the registry,
- Head out to the registry editor, right click on ‘File’ and select ‘Import’
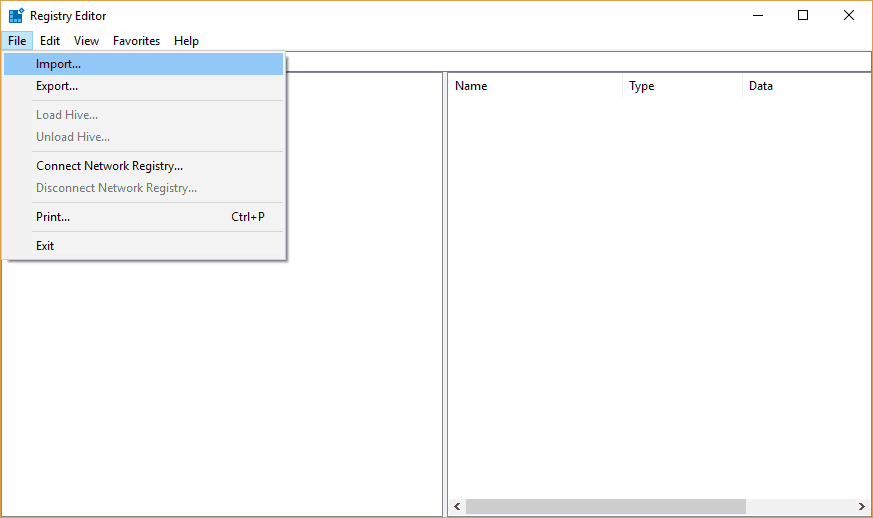
- A pop-up dialogue will appear and will prompt you to navigate to the registry backup file.
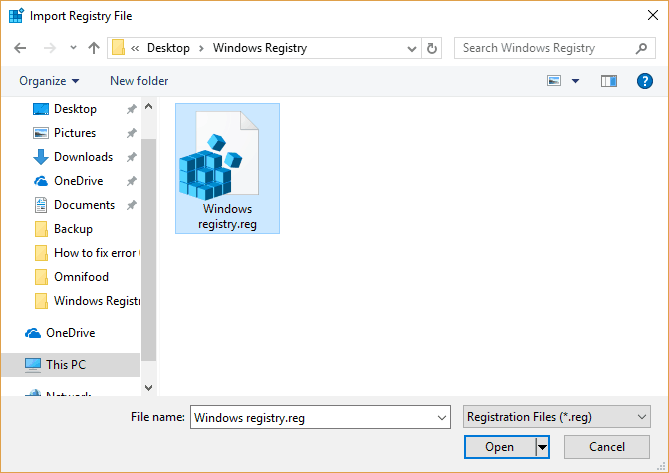
- Click ‘Open’ to confirm.
The downside to using the registry editor as a backup method is that it doesn’t capture all the changes such as the installation of new applications or any crucial changes made to the system. Fortunately, there’s a much better way of backing up your registry.
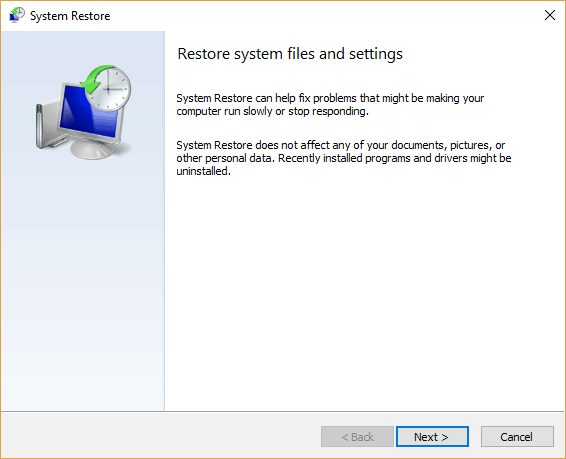
Method 2: Backing up the registry using System Restore (the recommended method)
System restore is the best avenue of backing up the registry if you are planning on making any major changes in the system such as direct registry changes. Should something go awfully wrong, System restore allows you to roll back to an earlier date when your operating system was functioning properly.
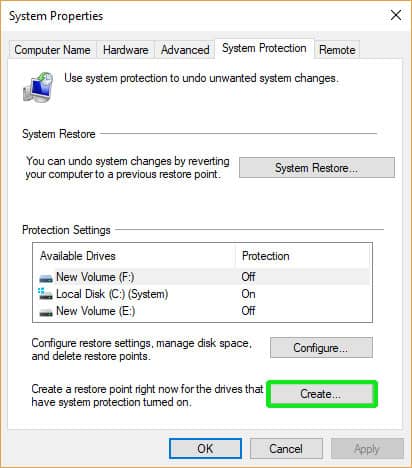
To create a system restore point
- Simultaneously Press Windows key + S
- In the search bar, type ‘Create a Restore Point’

- In the pop-up dialogue that appears, click on the ‘Create ’ button.
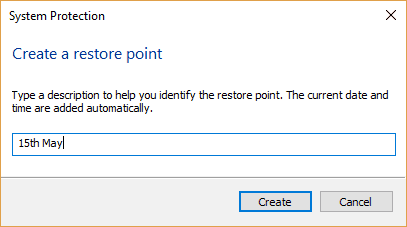
- A pop-up dialogue will appear prompting for a restore point name. Give the restore point a name and hit ‘Create’.
- The system will start creating a restore point based on the current software and hardware settings and configurations. This takes about a minute or two.
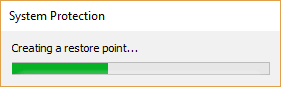
- An alert will pop up showing that the creation of the restore point was successful.

Restoring the system from a system restore point
- To restore your system back to an earlier date and time. Simultaneously Press Windows key + S.
- Type ‘Create a Restore Point’
- In the next dialogue box, click on ‘System Restore’ .

- Click on ‘Next‘
- A list of recently created manual restore points will be displayed.
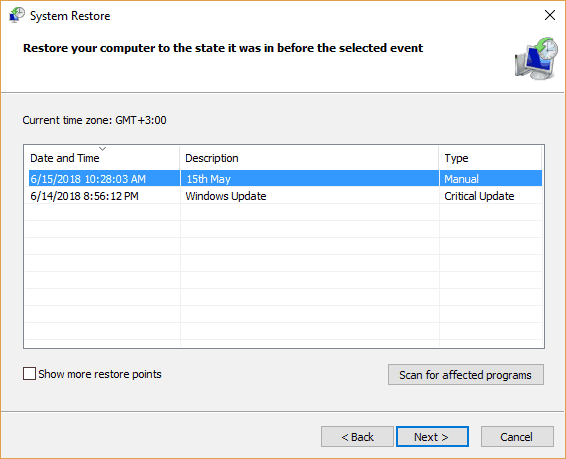
- To display more restore points, check off the ‘Show more restore points’ checkbox.
Select your preferred restore point and hit ‘Next’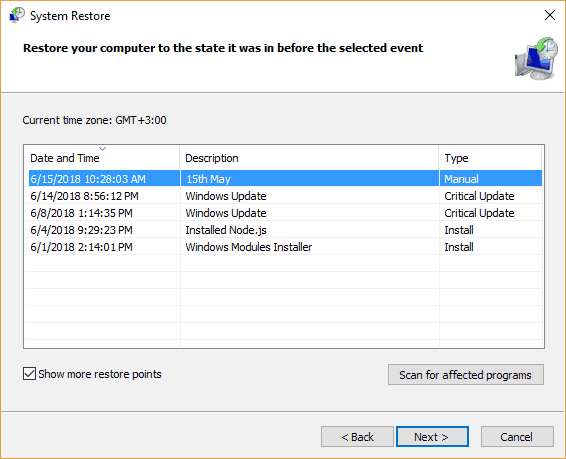 .
. - A summary of the details of the restore point will be displayed showing the restore point time, description and the Drive to be restored. In most cases, this will be the C: drive by default.
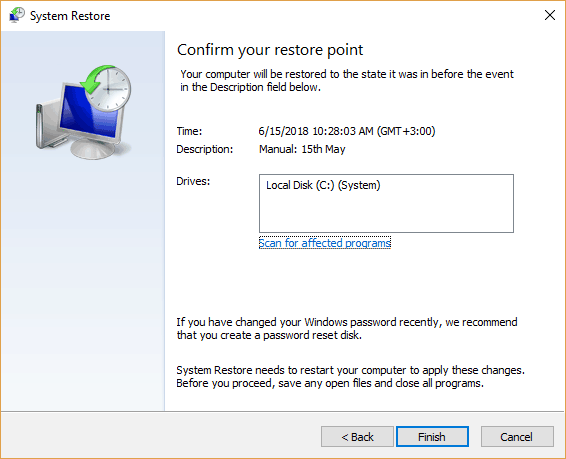
- Finally hit ‘Finish’. This will trigger the beginning of the restore process. The system will thereafter restart to roll back your system to the selected restore point.
To Summarize
Before undertaking any major changes in the system, it’s prudent to have your registry backed up. As we have seen, there are two major ways of backing up the registry using the built-in Windows tools. Ultimately, the System restore method is the most effective method of registry back up and gives you the the option of rolling back your system to an earlier date when your system was working normally.
Still cannot reset default printer.