Warning: It’s always better to backup your important data before resizing your partitions.
I- Why would I ever need to resize a drive?
Well, I’ll start with our famous problem: Drive C: doesn’t have enough space for Windows updates, programs, downloads …etc. Therefore, we need to extend its volume. Another reason could be that you want to install another operating system, like Linux, and need to make room for it on a different partition. There are plenty of other reasons and here we are going to learn how to shrink/extend our partitions.
II- How to resize a partition in Windows 10?
There are two methods: Windows 10, like many other versions of Windows, has a built-in Disk Manager where we can perform plenty of actions. Some people find that one hard and prefer to use other programs with better user-interfaces. We’ll discuss both.
First method: Windows 10 built-in Disk Manager
- Right-click on the “This PC” (which is my computer) and choose Manage.

- From the list on the left, expand the Storage list and choose Disk Management.
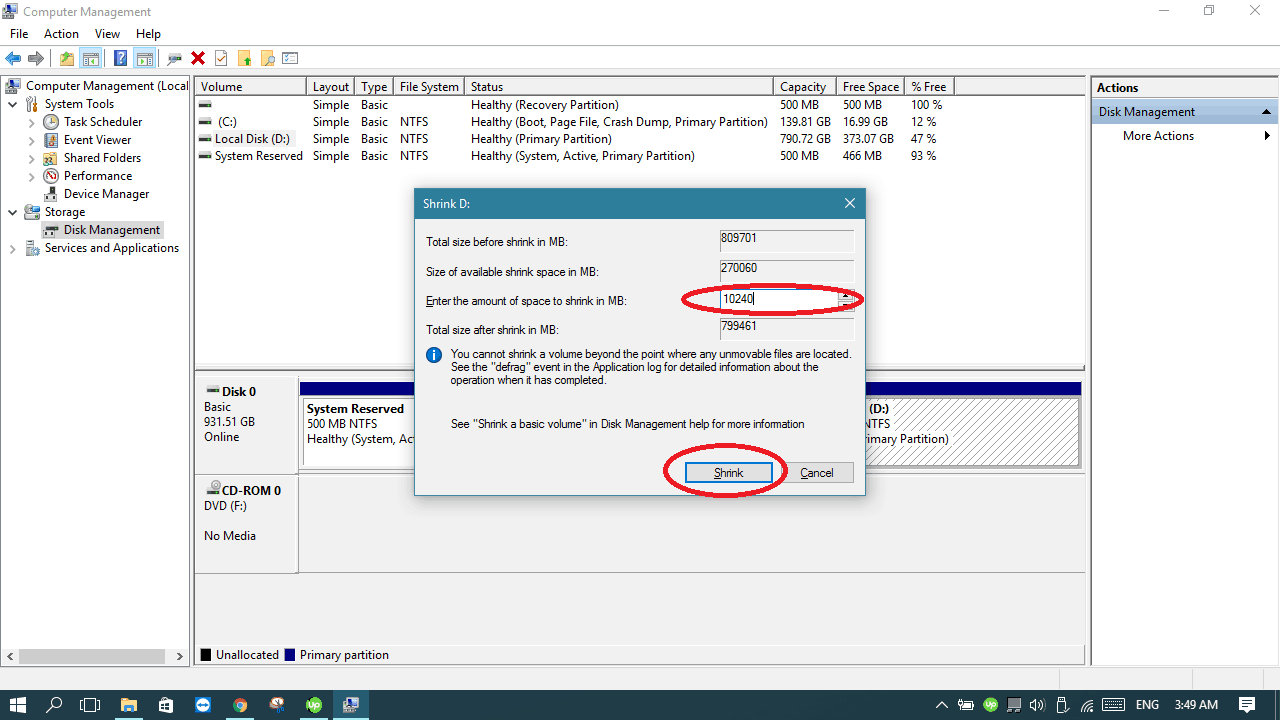
- Now you can see all the partitions (drives) your hard disk has. Let’s say I’ll need to shrink Local Disk (D:) by taking 10 GBs from it. To do that, right-click on Local Disk (D:) and choose Shrink Volume…
- After a few seconds, I will have to input the space I want to take from that drive. Remember, 1 GB = 1024 MBs, which means if I want to take 10 GBs from this drive, I have to input 10240 MBs. Click Shrink.
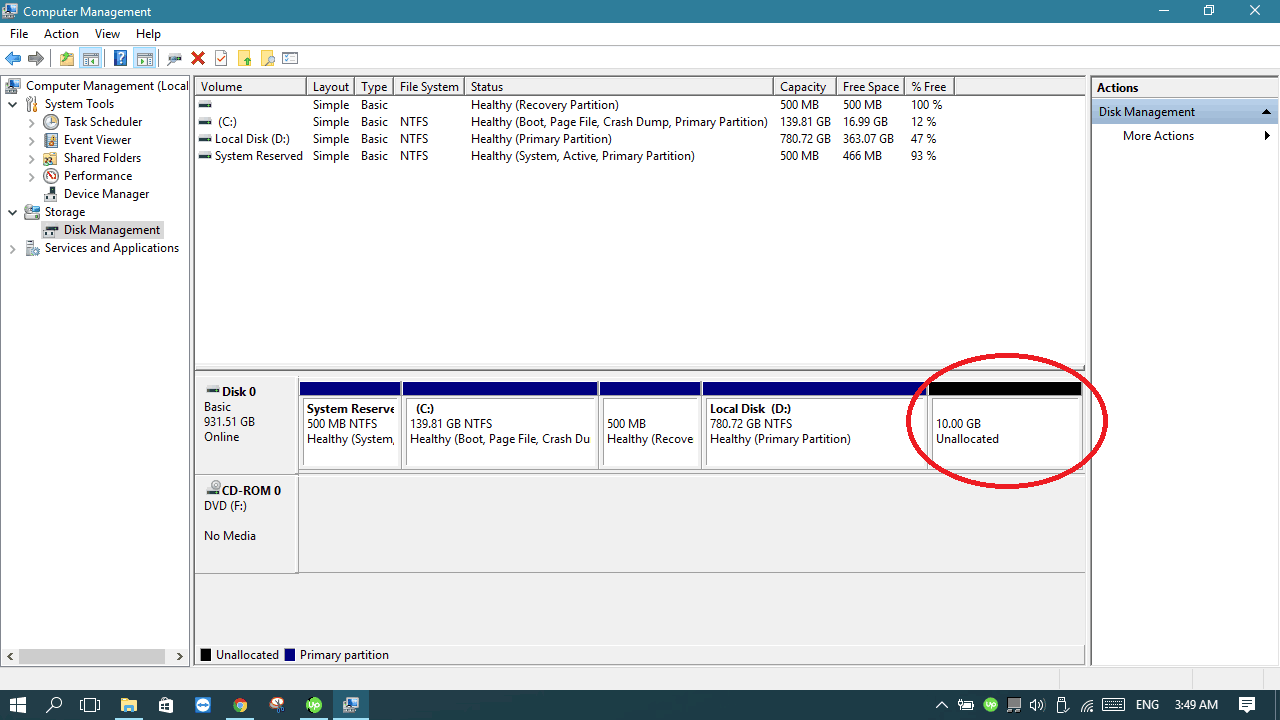
- As you see, I have now an unallocated space of 10 GBs, and Local Disk (D:) went from 790 GBs to 780 GBs. The unallocated space can be used to extend another partition later.
- If you want to extend another Partition like Drive C using the unallocated space, it’s highly recommended to use a tool like in method 2 because it doesn’t usually work in Windows 10 Disk Manager. They only allow to extend the drive you’ve already taken the space from. I mean if you took 10 GBs from Drive D then you can only extend Drive D another time with the unallocated space, which is useless.


Second Method: use a resizing tool like MiniTool Partition Wizard Free Edition:
- Go to https://www.partitionwizard.com/free-partition-manager.html and press Download. It’s fully compatible with Windows 10 and the free version can do everything we need.
- After the setup file is downloaded, open it and proceed the installation process and launch it once it’s finished.
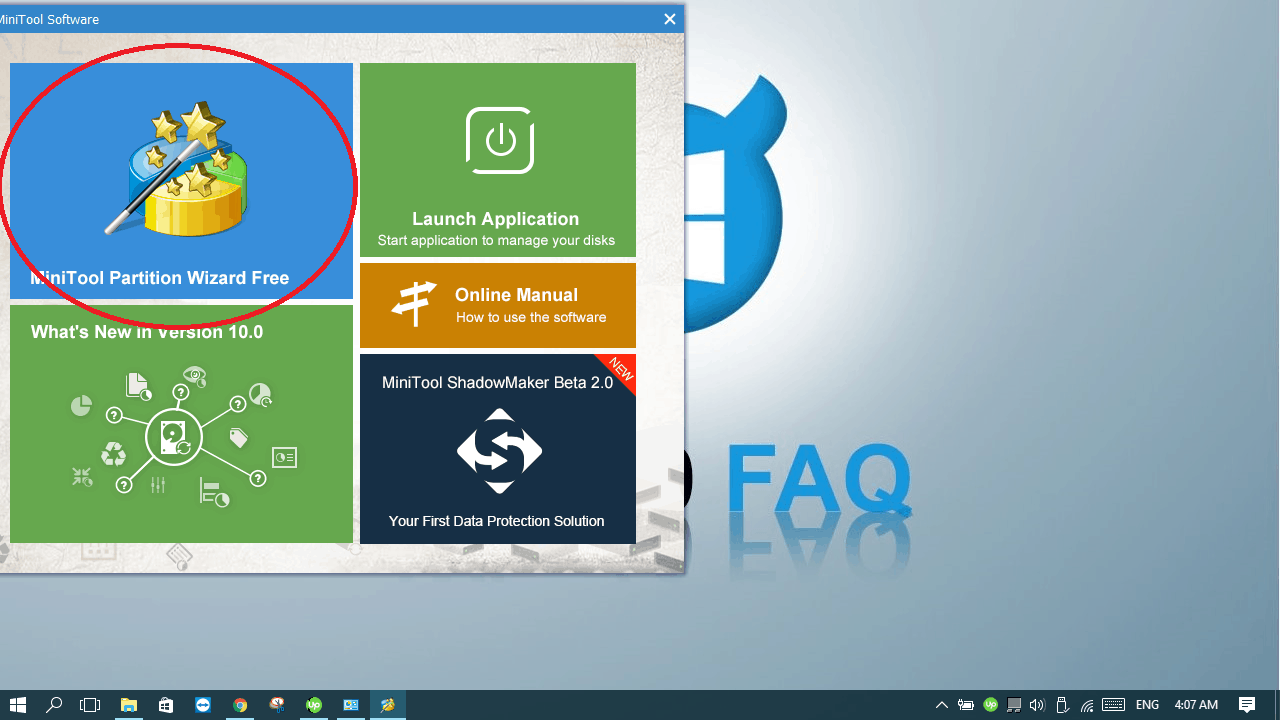
- Click on the MiniTool Partition Wizard Free button to open the program.
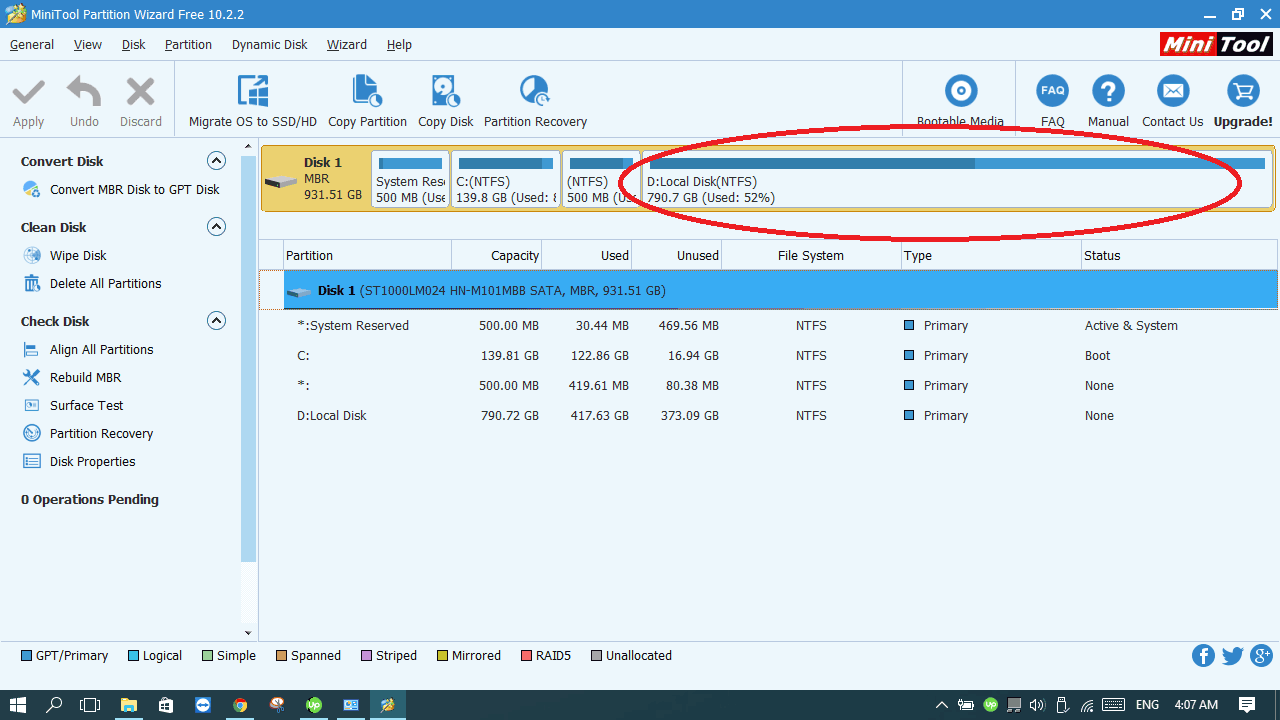
- As you see, we can see all the partitions of the hard drive. Let’s take 10 GBs away from Local Disk (D:).
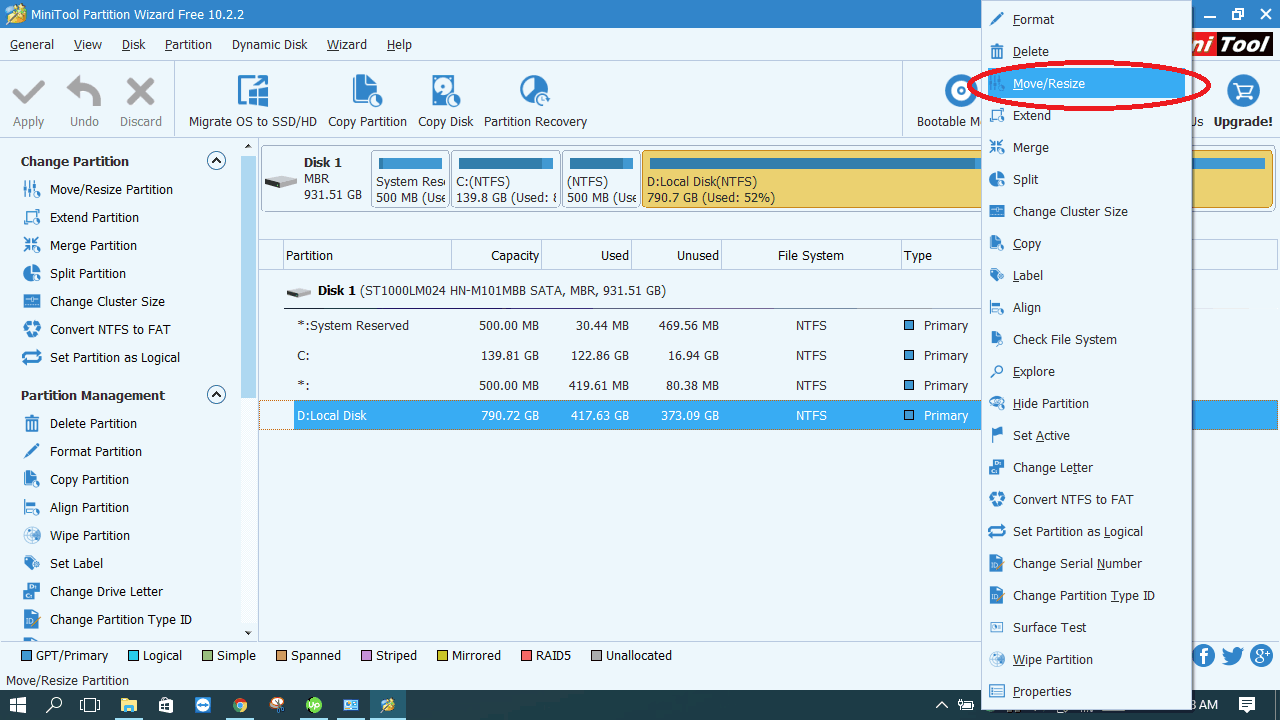
- Right-click on Local Disk (D:) and choose Move/Resize.
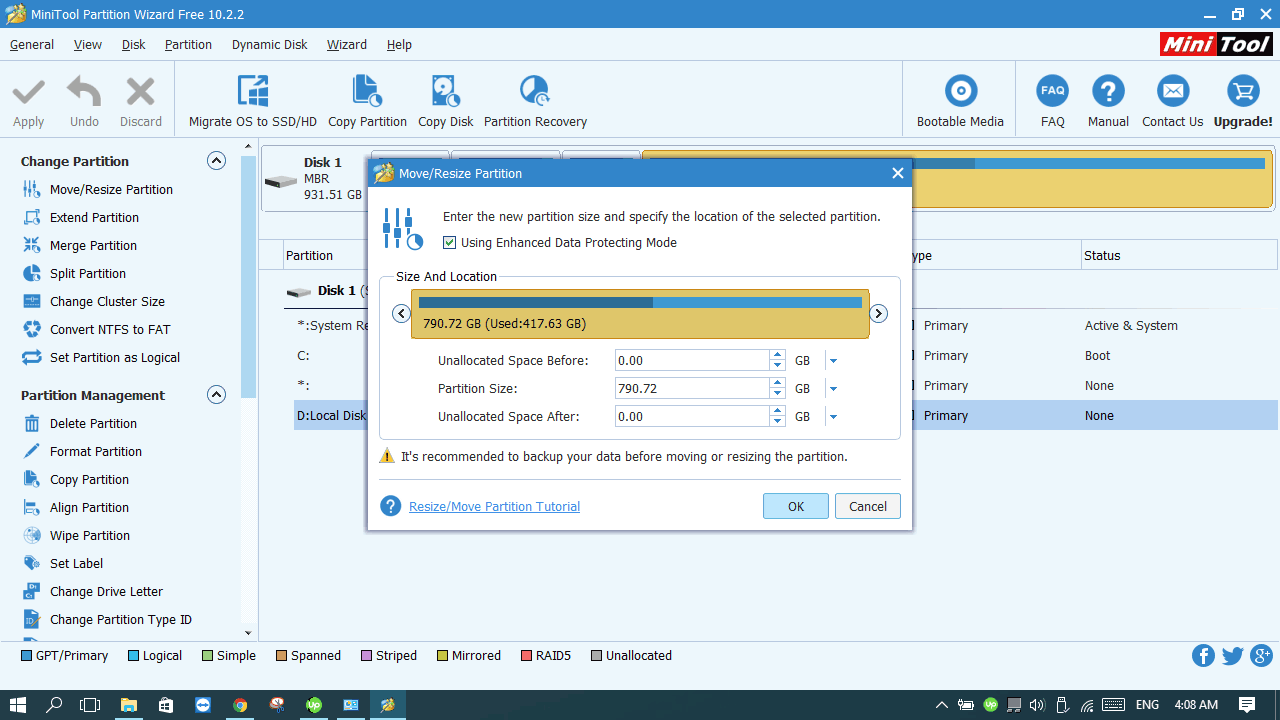
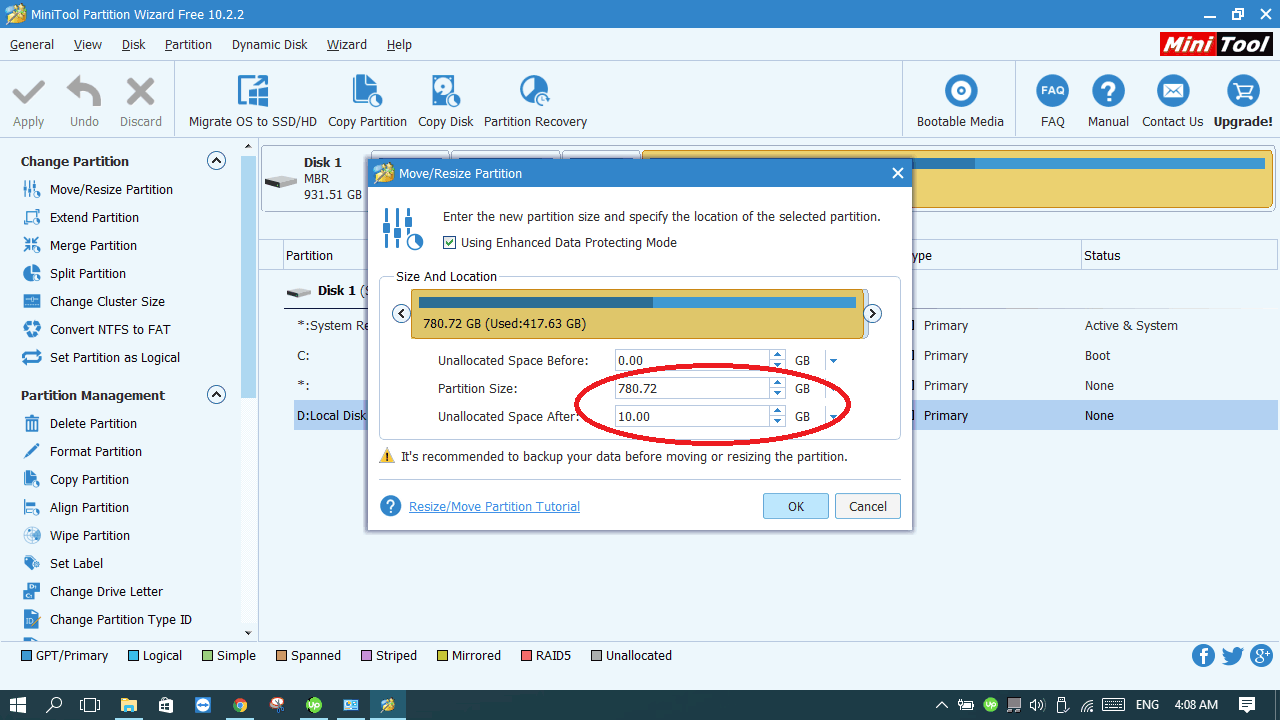
- Now, we can edit the Partition size by making it from 790 GBs to 780 GBs. Check the difference.
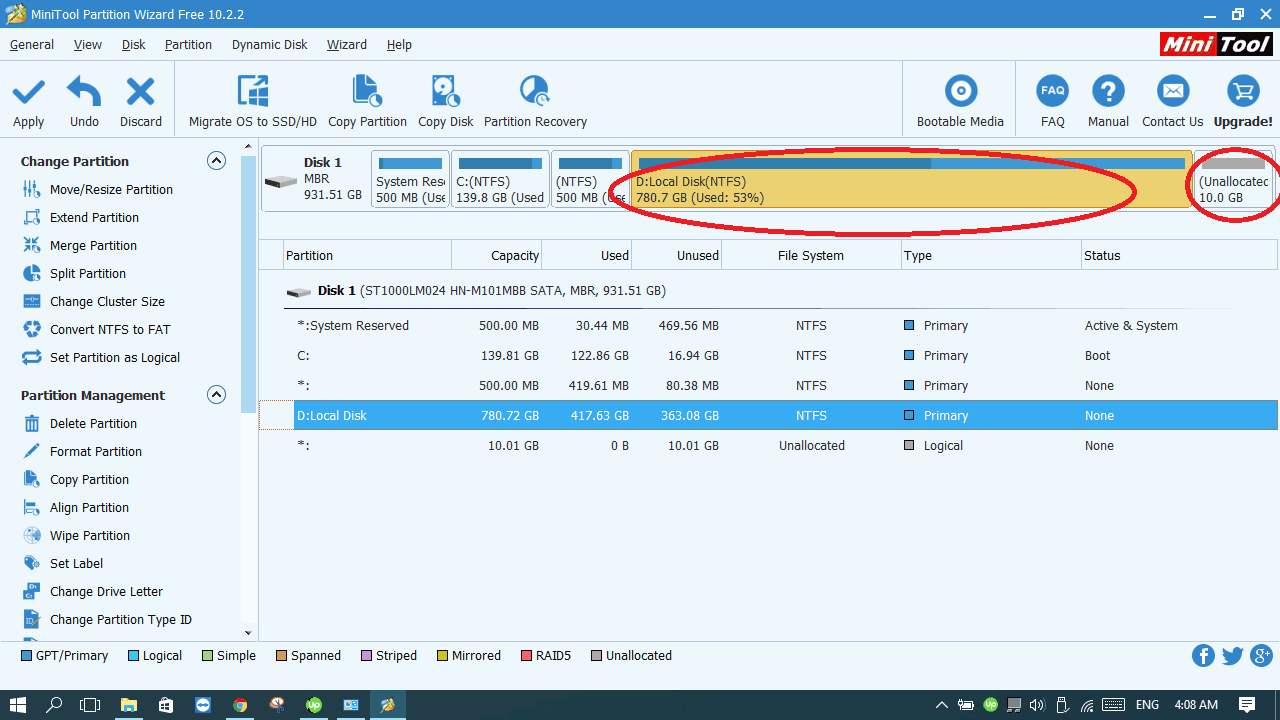
- Click OK. Now you can see that Local Disk (D:) is shrunk to 780 GBs and there’s an unallocated space of 10 GBs standing alone.
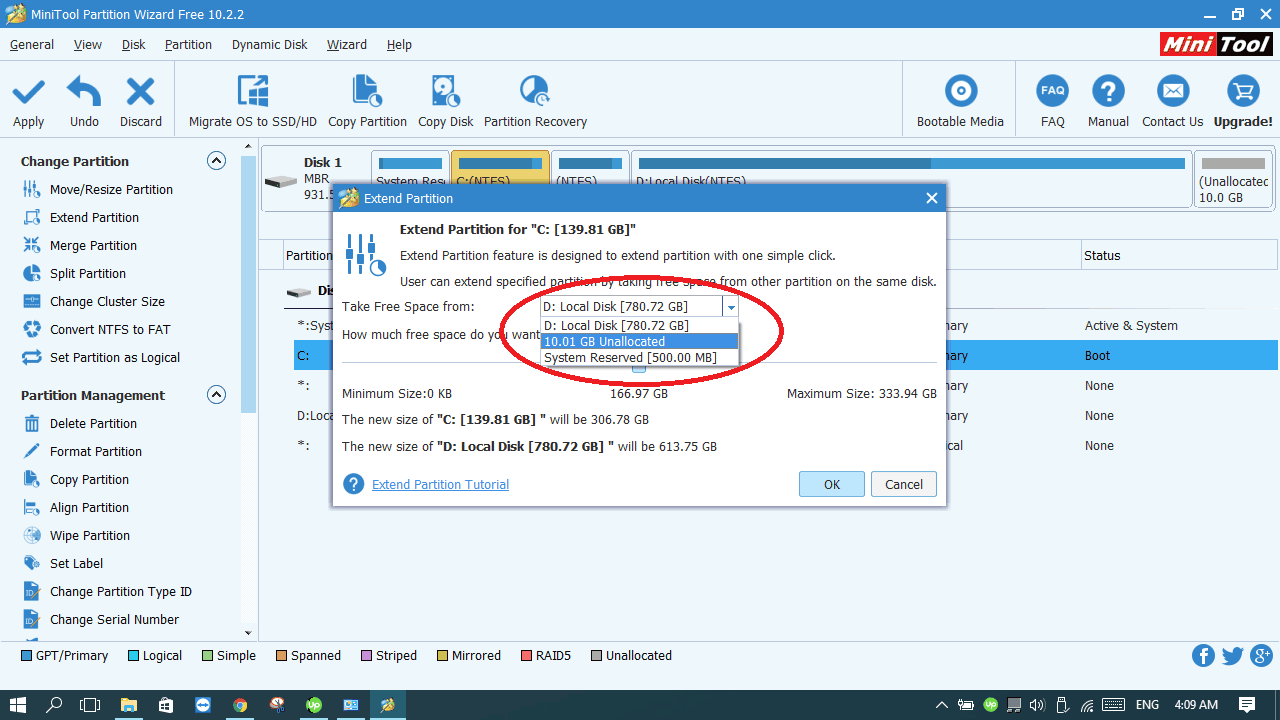
- Go to step 11 if you’ve done your job. If you need to use the unallocated space to extend another drive, like Drive C for example, right-click on Drive C and choose Extend.
- From the list, choose the unallocated space we will be taking space from.
- Use the scroll to determine how much space you will take from the unallocated space to extend the desired Partition and then click Ok.
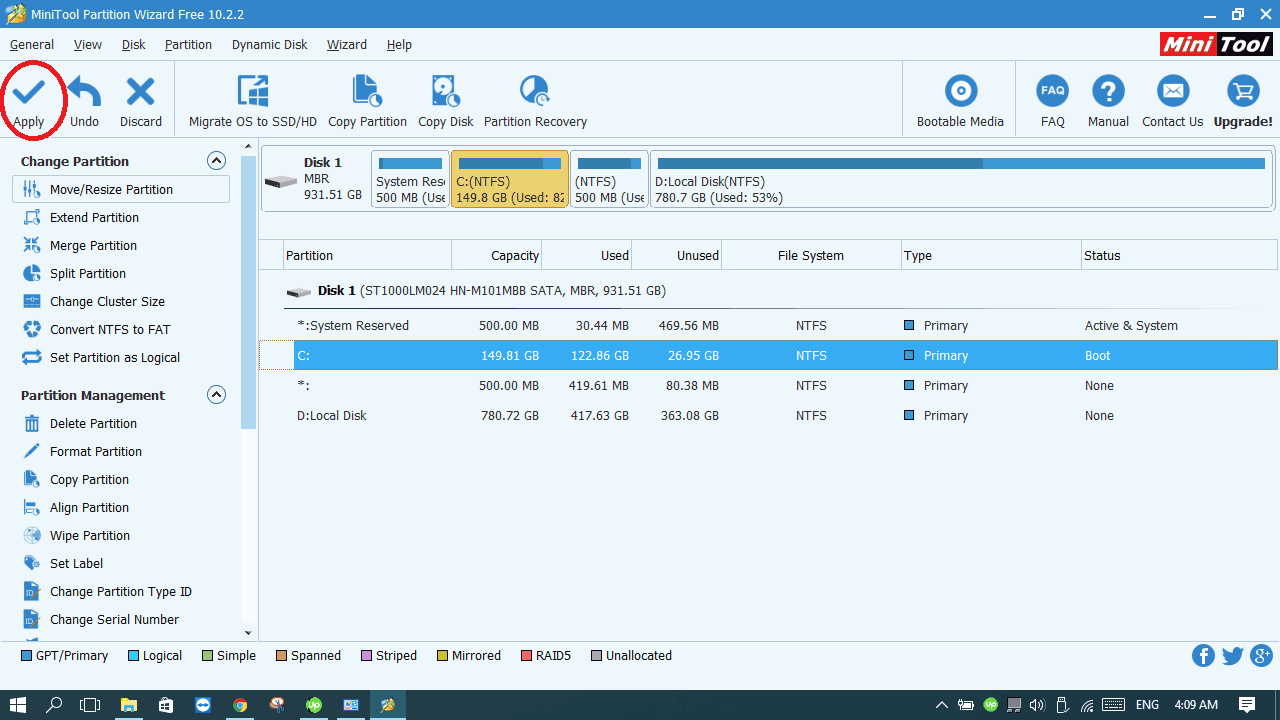
- Now make sure everything is okay. Finally, click Apply.
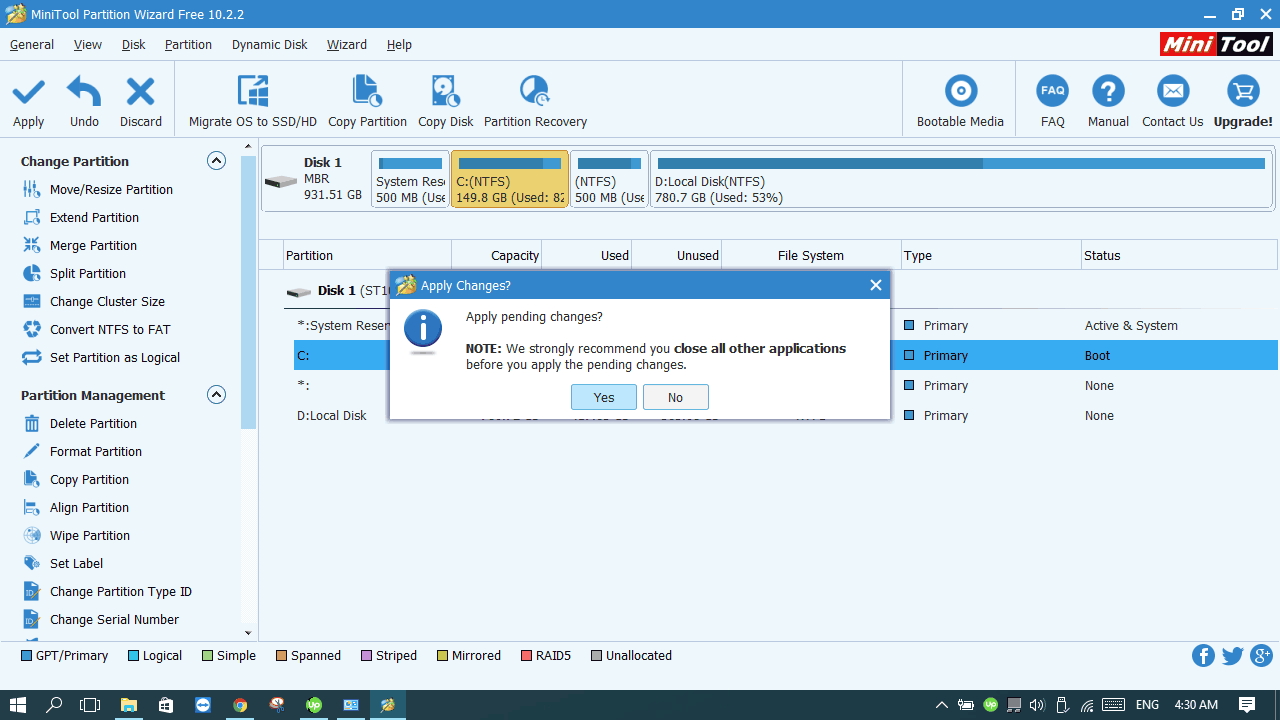
- Before pressing Yes, make sure to close any other applications with unsaved data. Now click Yes and wait until the process finishes. It takes time depending on how much space you are transferring. Once finished, a restart is preferred and you can enjoy your Partitions with their new sizes.


Windows 10, like many other versions of Windows, has a built-in Disk Manager where we can perform plenty of actions.