External storage devices changed a lot since the birth of the PC. From floppy disks and CDs to flash memories and hard drives, people were always looking for the fastest, the lightest and the most durable memory devices. Hard drives are currently the best solution for large capacity and durability, especially since SSD drives became widespread and made a fool out of all HDD drives because of their much faster speeds. Before we dive into your external hard drive troubles, it would be helpful for us to understand the differences between these two formats.
What’s the difference between HDD and SSD
HDDs (Hard Disk Drives) are the traditional storage disks we are all using, both internally (inside the computer) and externally (plugged-in to the computer). They contain spinning disks and a mechanical arm which moves a mechanical head responsible for reading and writing data magnetically. They can last for a long time (sometimes they don’t, though, it’s quite unpredictable!) and they cost a lot less than their SSD equivalent.
However, an SSD (Solid State Drive) is the hard drive of the moment. This disk doesn’t contain any moving parts which is good and prevents mechanical breakdowns. It costs more than an HDD and has a limited life span depending on how much you read/write data.
In general, it’s your usage that defines which one you need to get but when talking about external drives, HDDs are not a good choice nowadays, because moving the hard drive around with all those mechanical parts inside it is just a bad idea.
Why do external hard drives fail to show up sometimes?
This is why you’re here: you plug in an external drive but it doesn’t show up on your computer. This is pretty annoying and has many potential reasons, like:
- Hardware Issues
- Faulty Cable.
- Faulty connection between the cable and the disk.
- Faulty Disk (Especially the HDD ones).
- Faulty USB Port.
- Software Issues
- The disk is just an unallocated space and needs partitioning.
- The computer hasn’t defined a Letter for the drive automatically.
- Some power options aren’t well set and need to be adjusted.
- Some devices/drivers are faulty and need to be re-installed.
If your Hard Drive used to work smoothly and still works on other devices but not on a specific computer, then I recommend that you skip to the software issues directly. Also if you encounter the message saying “USB device not recognized” then please jump to this “usb device not recognized” guide to help you fix it.
Let’s start with some hardware tips to fined out whether the hard drive hardware is faulty or not:
I- Hardware Tips
These tips will help you recognize hardware issues… Please follow them one by one:
- First of all, try to change your USB port, better try all the USB ports on your computer to make sure it’s not a USB issue. If it is not – read on for the next tip.
- In case your cable is removable from the hard drive, try a different cable: cables are fragile and can be easily damaged. If a different cable doesn’t help – read on.
- Try to remove the cable and clean the port where the cable is plugged in to the drive with electronics spray or a dry brush… sometimes moisture and dirt can ruin the connection. If the cleaning doesn’t help – read on.
- Check if you drive has any sign of damage or a cracked outside shell, if it does, that may have caused serious damage to its innards. Also, if your hard drive is an HDD you should feel the vibration of the rotating disks when it’s plugged into the computer (and the computer is on).If you don’t feel anything then it means it’s not working: it might be a cable/USB port issue as mentioned before, but if you changed both and still feeling nothing when the hard drive is plugged in then it’s probable that the drive is broken. If everything seems to be fine from the outside (and you can feel the vibration of the disks if it’s an HDD) – read on.
- Finally, try to connect your hard drive to another computer. If it’s not showing up there either, then do suspect a harder issue hardware issue.
If you went through the steps above and found that your hard drive does work on a different computer – then now we know that it is a software problem in your computer. Keep reading.
II- Software Issues
This will probably be the meat of the guide for most people. Many people treat their hardware very well and rarely have hardware issues. Also, Windows 10 is known for its many issues and problems and that’s what we are here for. So, I’m going to introduce a few hints to help you identify the problem as quickly as possible. Perform the following steps:
- Right-click on your Start button or press the hotkey Windows logo key + X and choose Disk Management.

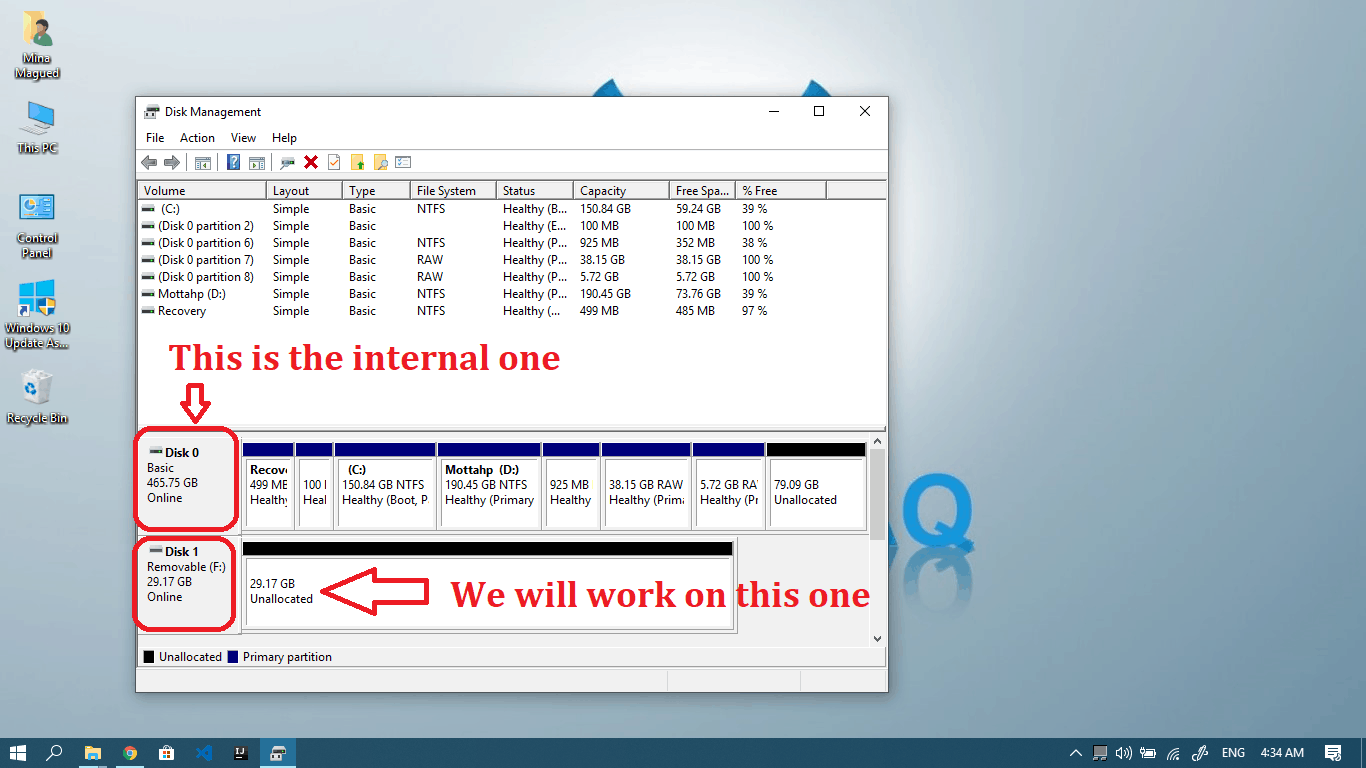
- In this Window, you’ll find all the storage devices connected to your computer and your internal disk which is usually named Disk 0. This means we are going to focus on the other one: Disk 1. Make sure to disconnect any other flash memories or hard drives in order to be sure that you’re working on the one that needs to be fixed.

- Now if it says Unallocated like this, then that is the problem. Click here to learn how to allocate memory to the hard drive.

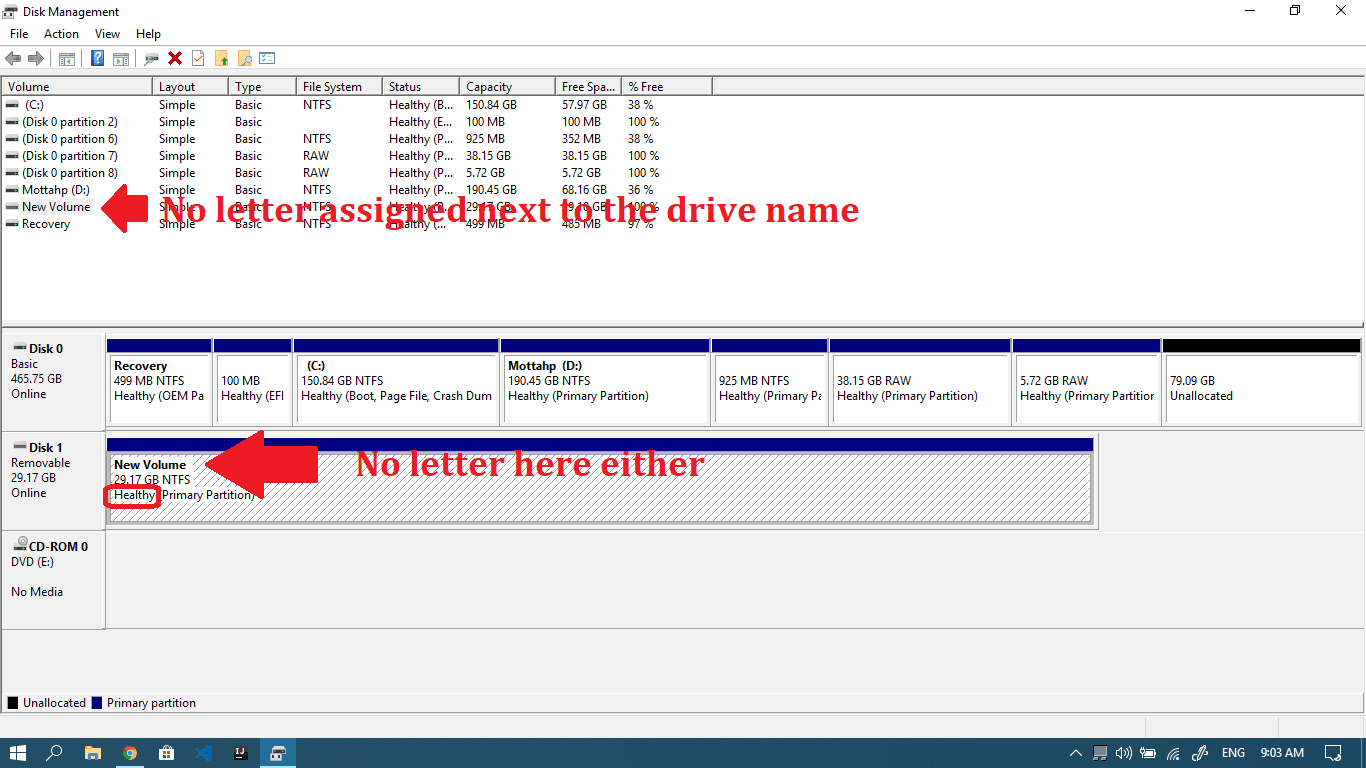
- If there is no unallocated sign and you can see it’s healthy, but there are no letters assigned to it, then you should read this section to assign a letter to the drive.

- Otherwise, If both are good, then start reading from section 3.

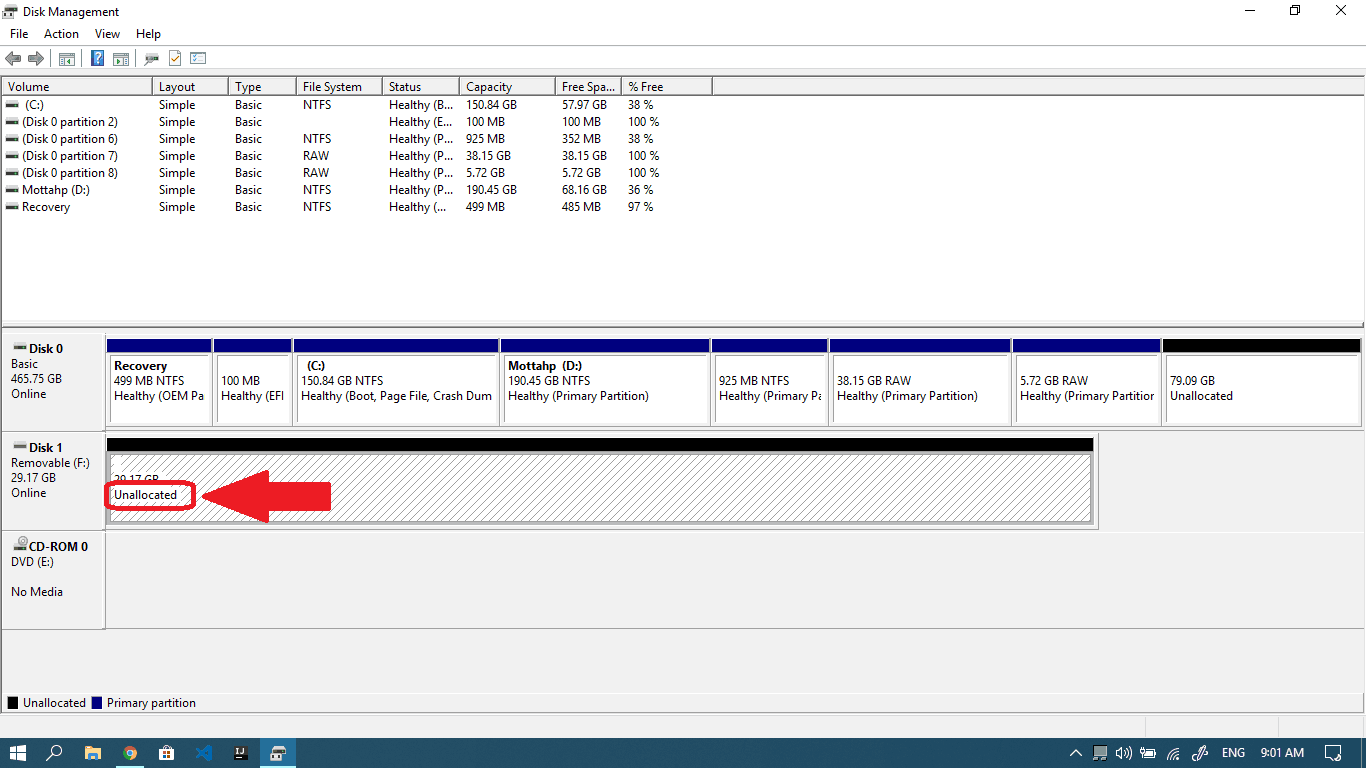
1- The disk is just an unallocated space and needs partitioning.
This sometimes happens when you buy a new hard drive. An unallocated space means your drive isn’t ready to carry data and communicate with your computer because it doesn’t have any partitions on it. Its free space exists but isn’t included in any partition. Therefore, it’s important to create your first partition in order to use it… here we go:
- Right-click on your Start button or press the hotkey Windows logo key + X and choose Disk Management.
- In this Window, you’ll find all the storage devices connected to your computer and your internal disk which is usually named Disk 0. This means we are going to focus on the other one: Disk 1. Make sure to disconnect any other flash memories or hard drives in order to be sure that you’re working on the one that needs to be fixed.
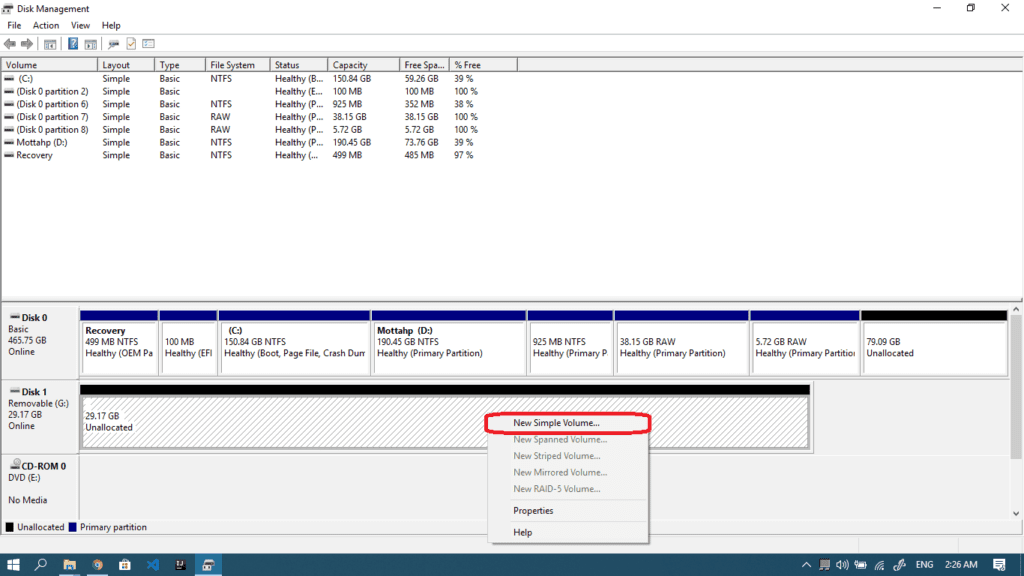
- Now, right-click on the Unallocated space next to Disk 1 and choose New Simple Volume…
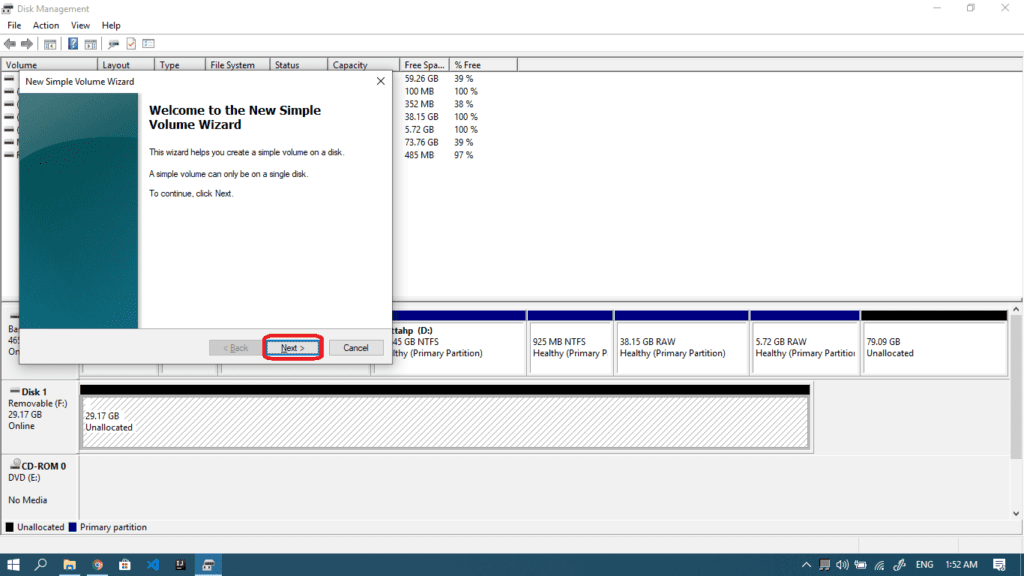
- Click Next in order to proceed with the New Simple Volume Wizard.
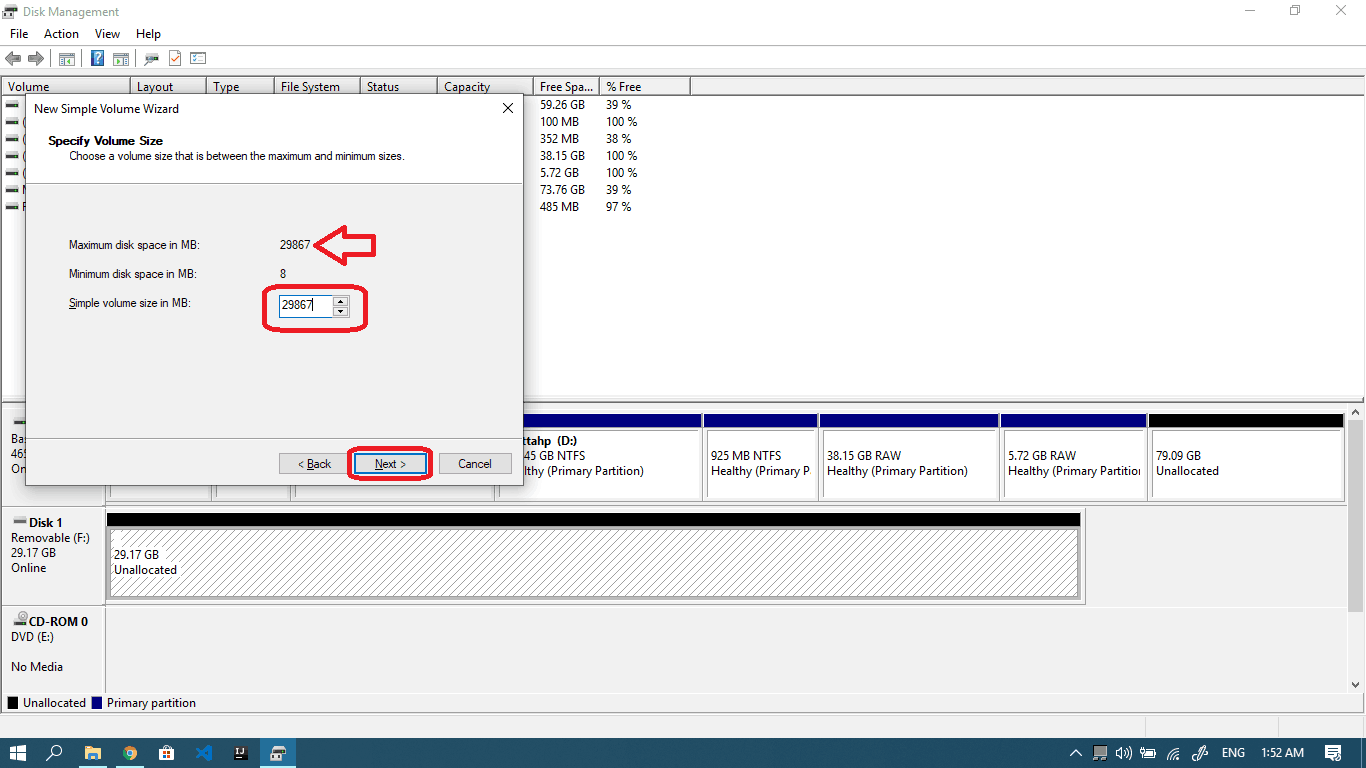
- In this window, you should set the size of the partition. If you’re planning to create only one partition on your hard drive that uses all its space, make sure you set the size to the maximum space noted above and then click Next.

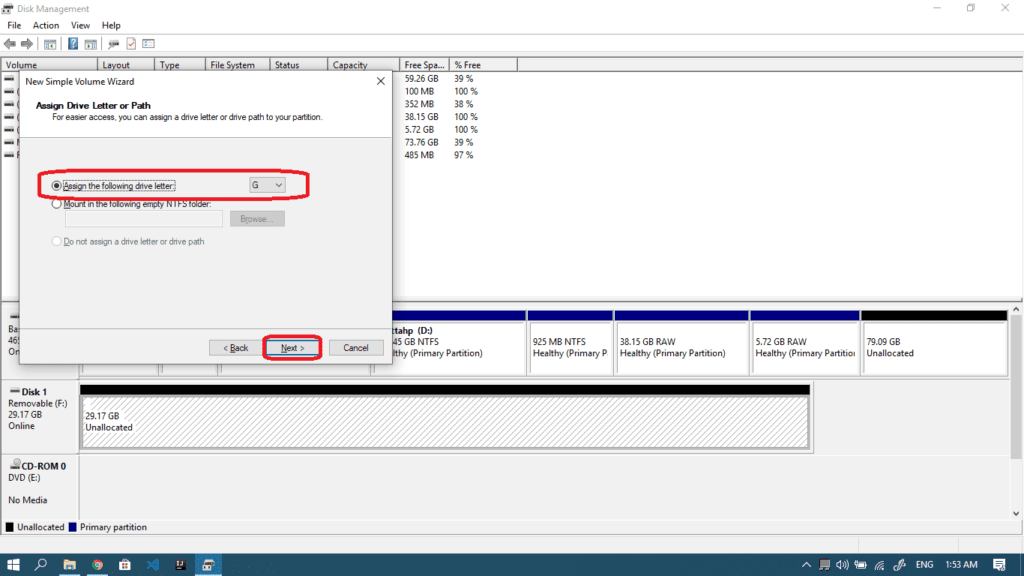
- In this step, you should assign a drive letter to the disk. This is super important because Windows Explorer only recognizes drives with a letter assigned to them. So leave the default letter or choose another one as you see fit and then click Next.
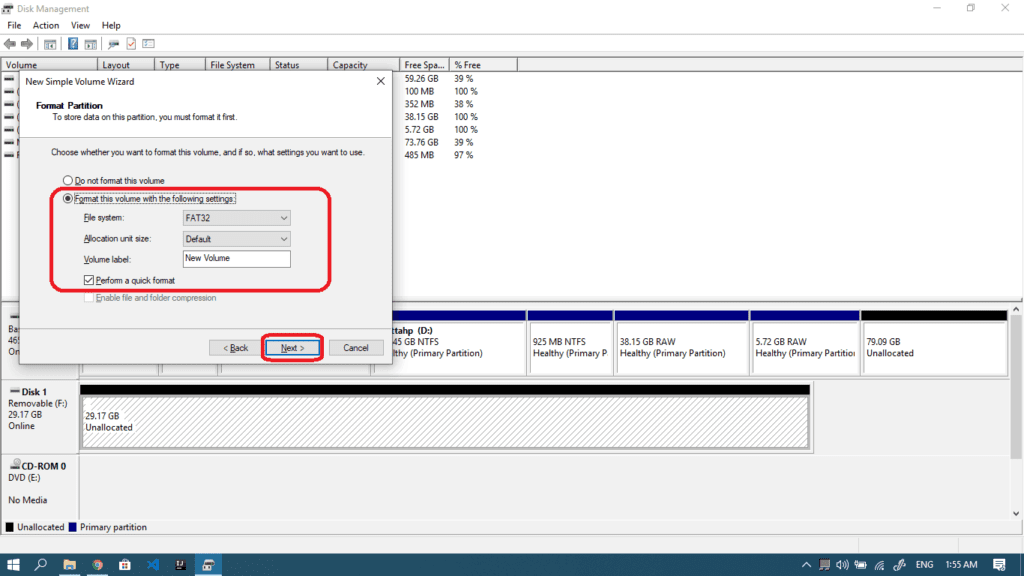
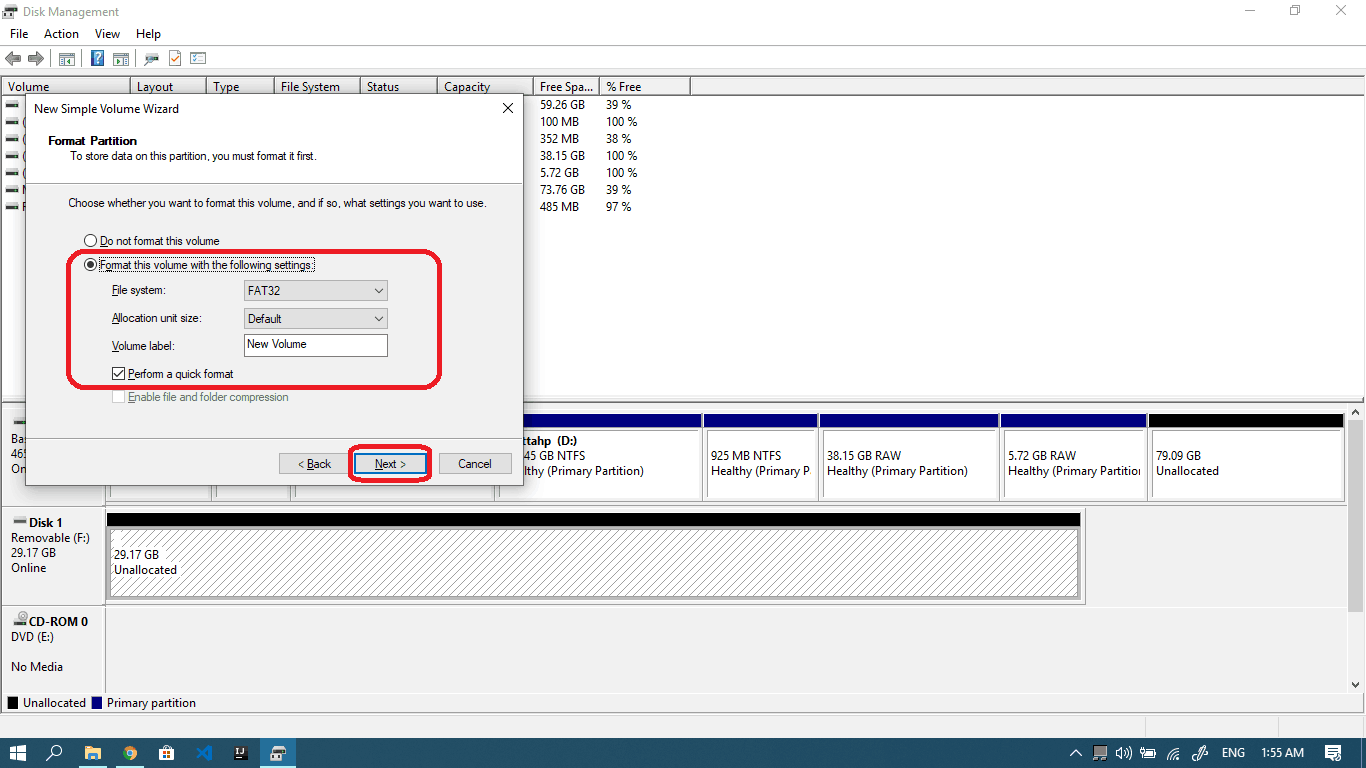
- It’s better to Format this volume with the following settings: FAT32, Default and rename the drive upon your wish. Make sure to check the checkbox Perform a quick format and then click Next.
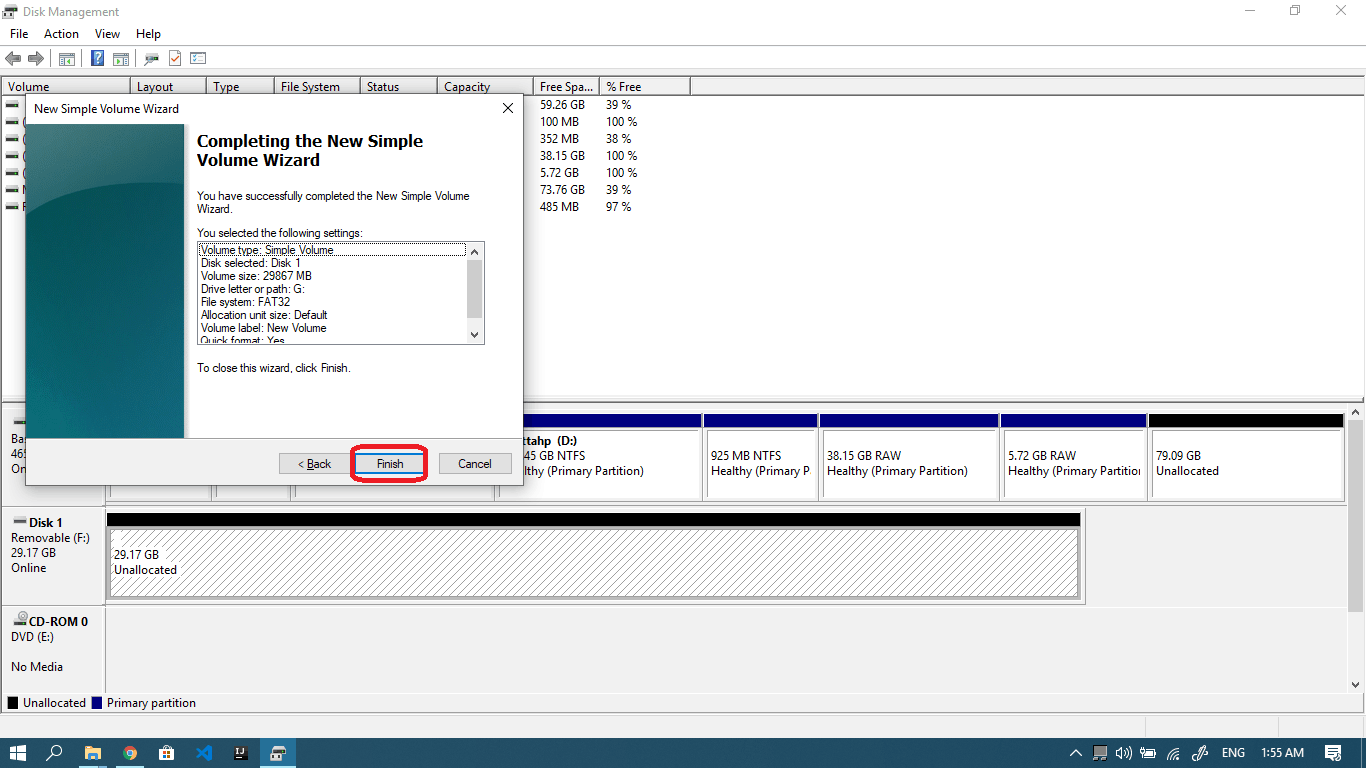
- Finally, click Finish in order to end the process.

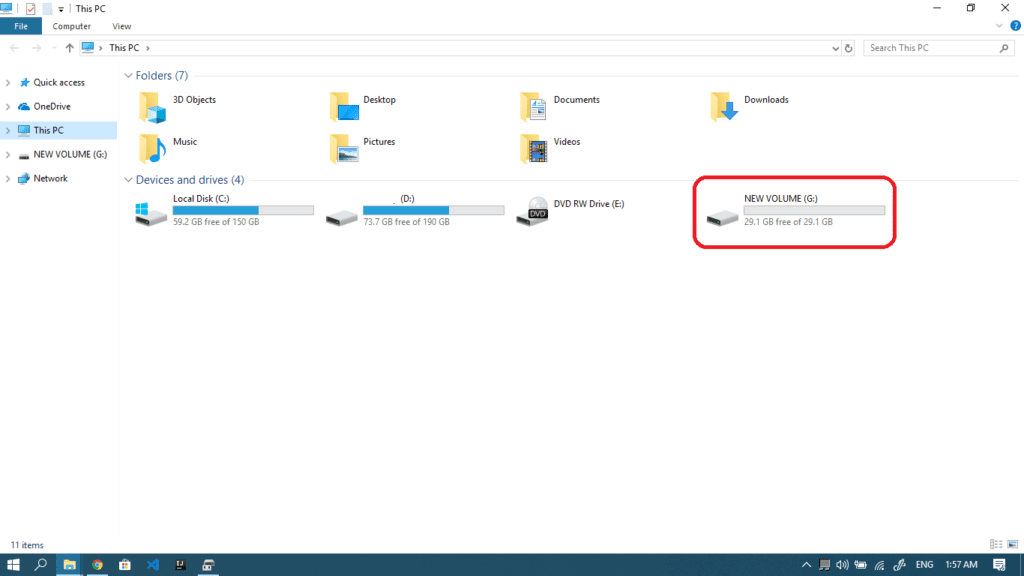
- Now you need to be a little patient while your computer loads your settings and once ready, you will see the drive with the assigned letter in Disk Management and shown in the This PC window.


2- The computer hasn’t defined a letter for the disk automatically
Normally, your computer assigns a letter to any connected storage device. But sometimes, this is not the case and some devices fail to obtain their letters and hence they don’t show up on your desktop. The following steps will show you how to assign a letter to the hard drive:
- Right-click on your Start button or press the hotkey Windows logo key + X and choose Disk Management.
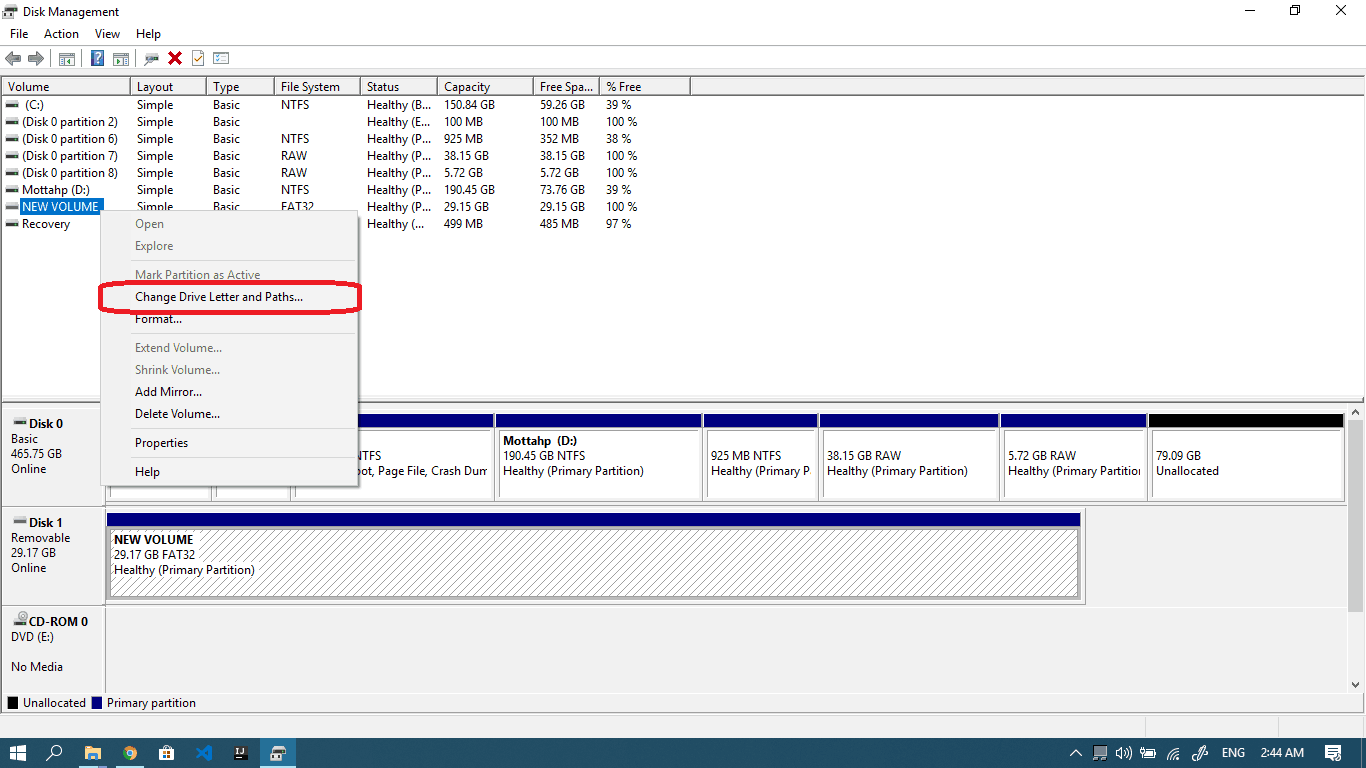
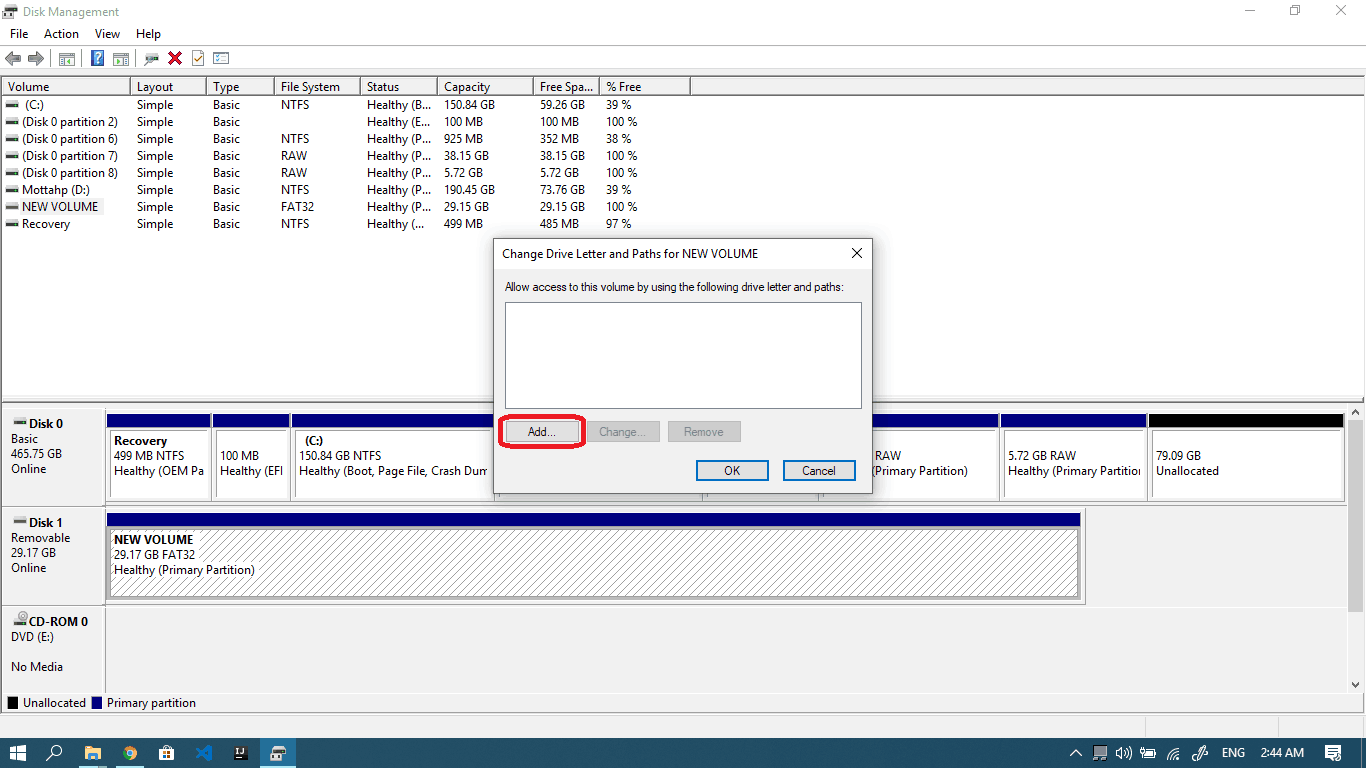
- As you see, the drive is listed but there is no assigned letter appearing next to it like the other ones. So let’s right-click on it and choose Change Drive Letter and Paths…

- Now, let’s click the Add button.

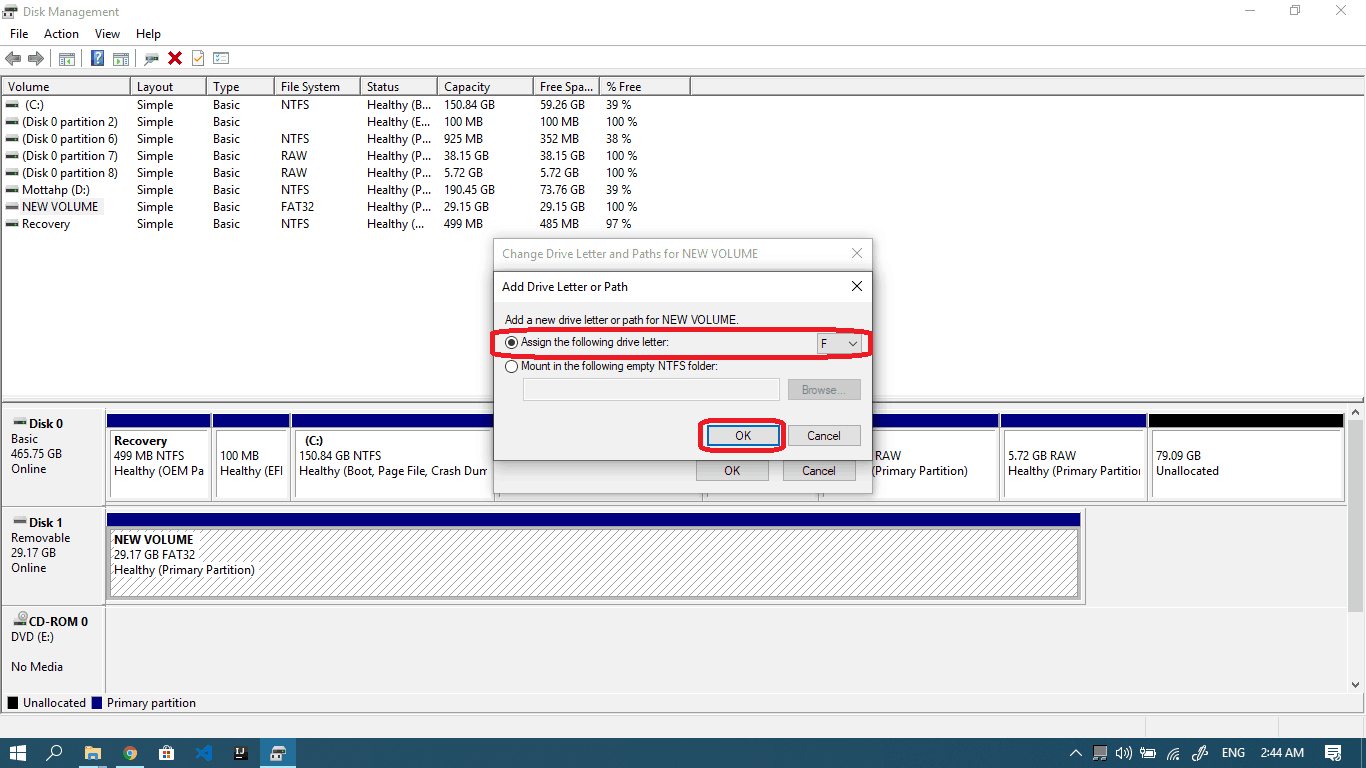
- In this window, choose a letter from the list and click Ok.

- Now everything is settled, the letter is there and the drive appears on This PC window.
3- Some power options aren’t well set and need to be adjusted
There is a section in your power plan responsible for suspending USB ports in case of power saving or in case of low battery (in a laptop). Therefore, I’ll explain a few setting fixes that might solve the problem:
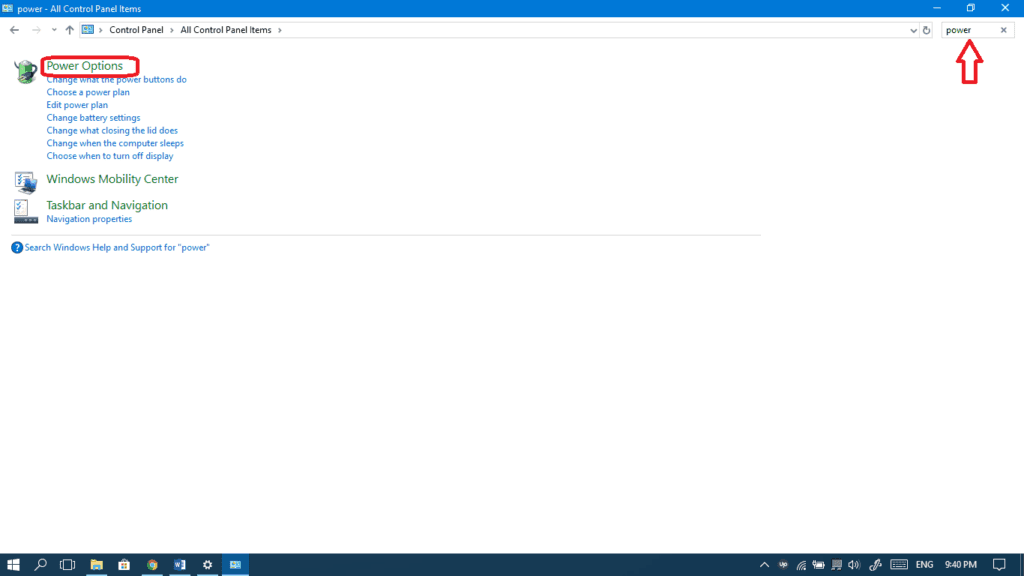
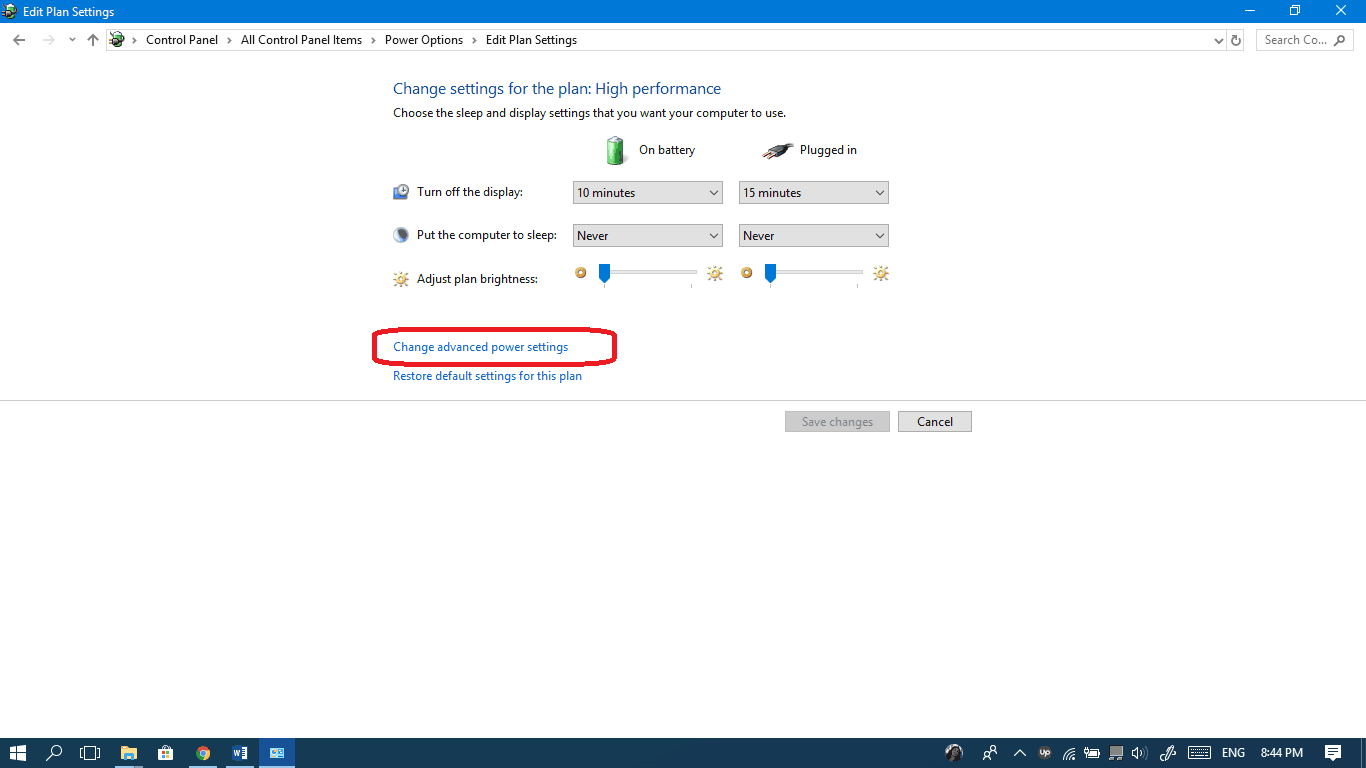
- Go to the Power Options in your control panel.
- Click Change plan settings next to any plan (do this for the one you’re using or for every plan to make sure the problem won’t occur under any circumstances).
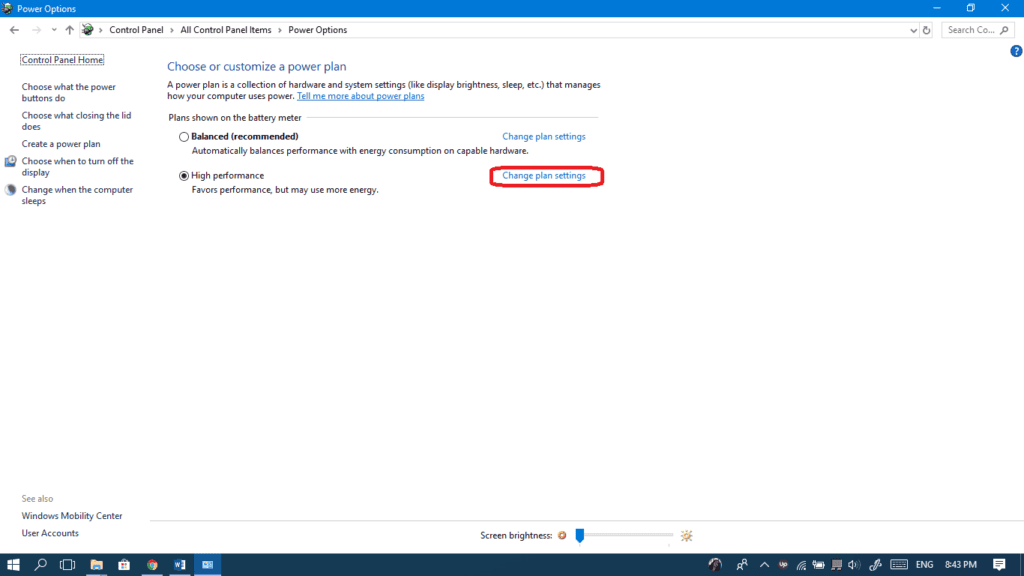
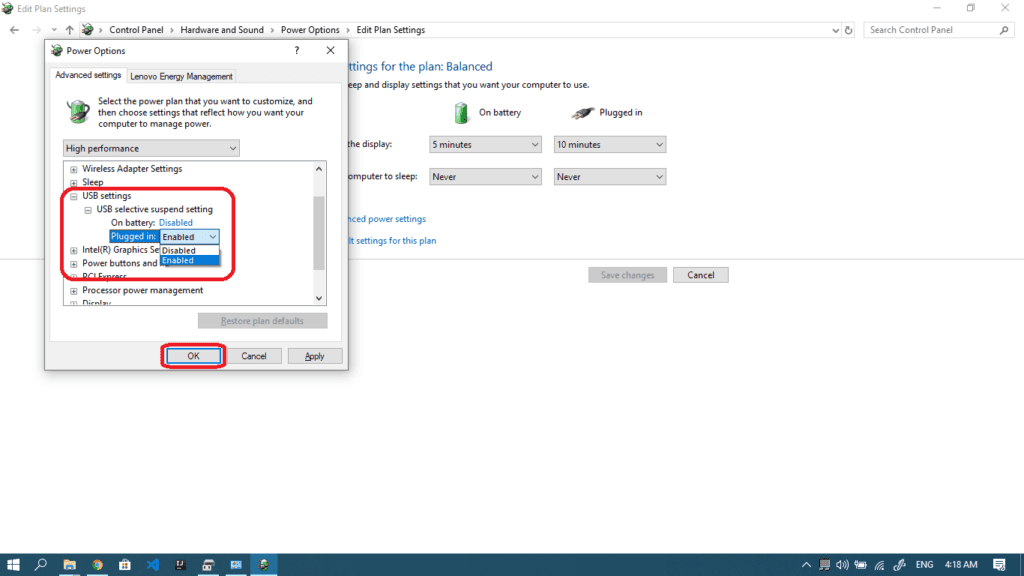
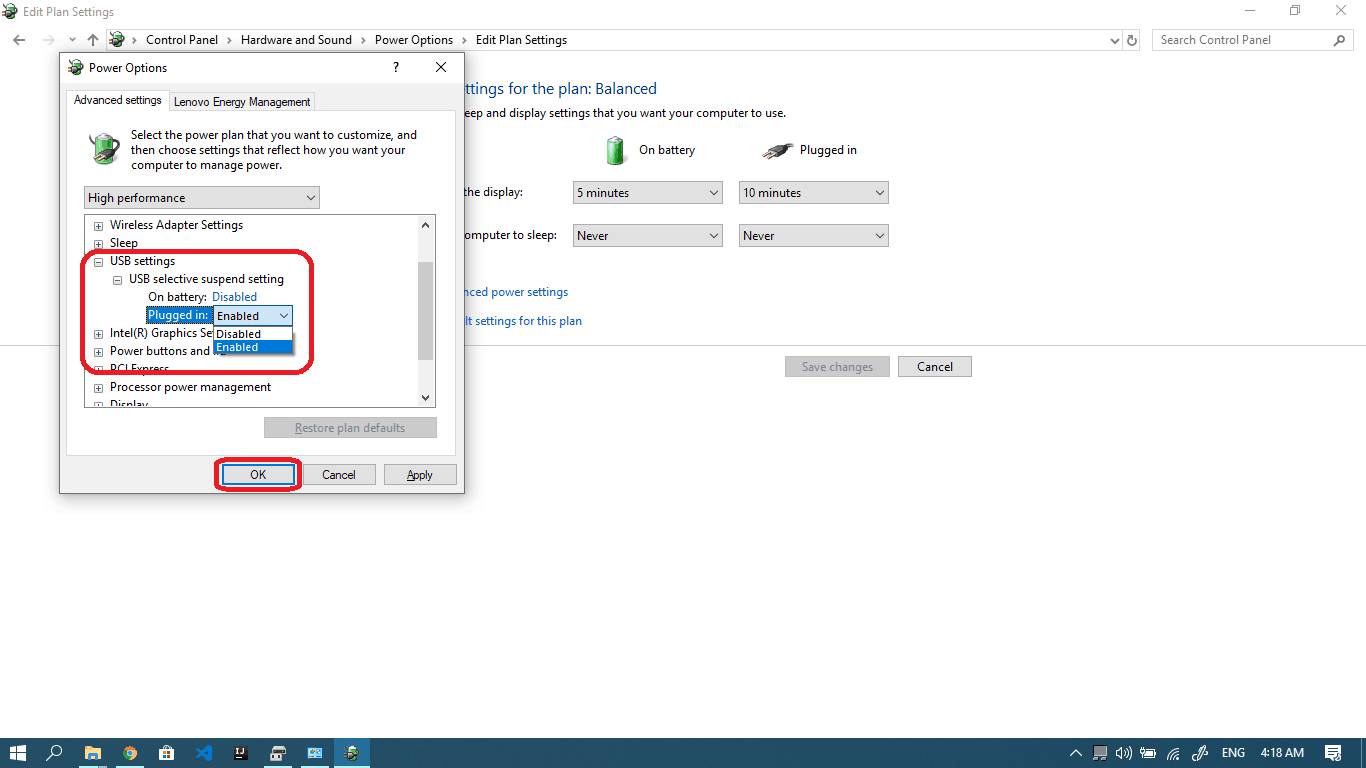
- Now, select Change advanced power settings.

- Expand USB Settings and then USB selective suspend setting, you’ll now need to change the status from Enabled to Disabled under Plugged in and On Battery too in case of a laptop. This may consume a little more power if you’re relying on your battery but if this fixes your issue, then you’d better leave it that way. Finally, don’t forget to click Ok.


If the previous solutions didn’t work for you, then this last one could do it:
4- Some devices/drivers are faulty and need to be re-installed
We will begin by reinstalling the hard drive:
- Connect the Hard Drive to your computer using a USB cable.
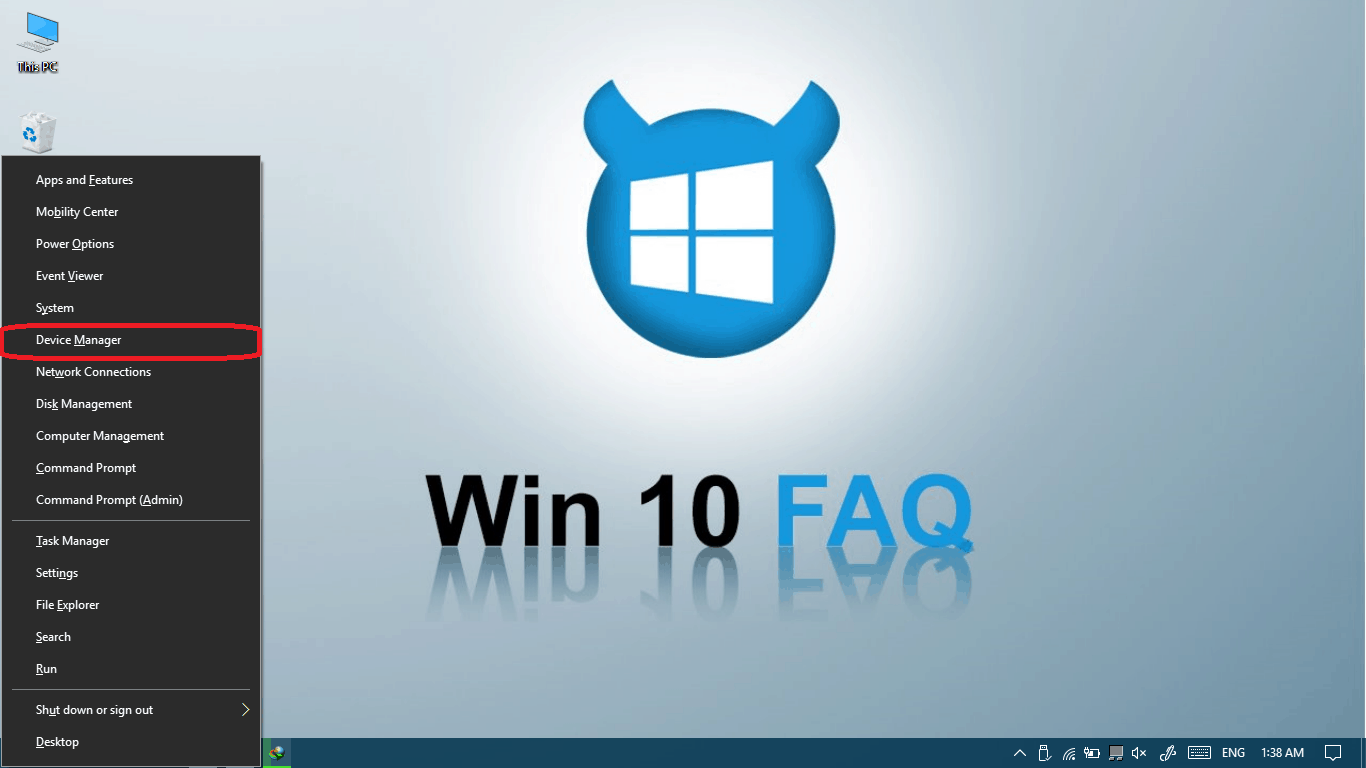
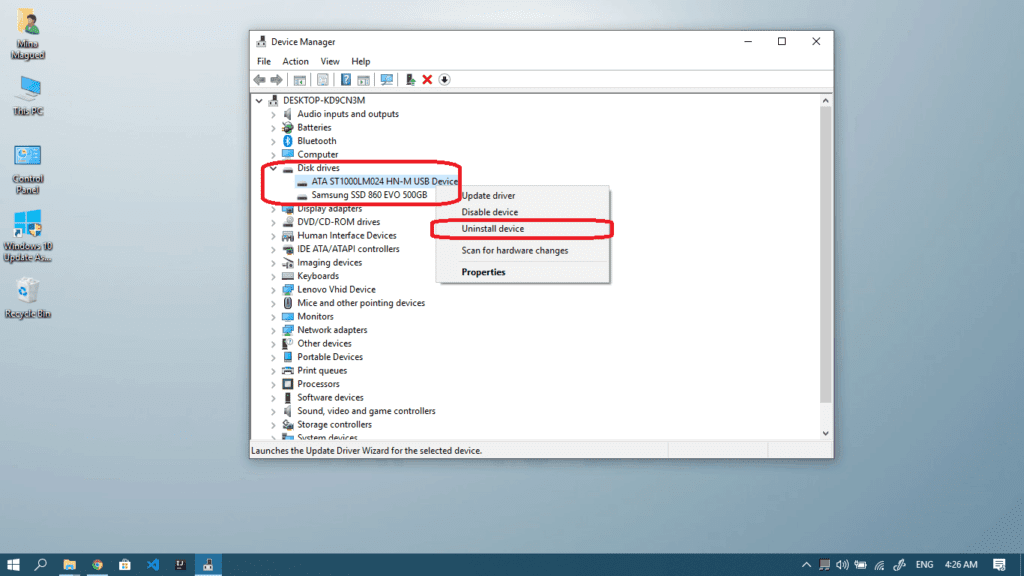
- Right-click on your start button or press the Windows logo key + X and select Device Manager.
- Expand Disk drives and right-click on the external one and choose Uninstall device. Double check that you are uninstalling the right one by plugging it out and in and seeing which hard drive disappears and reappears.
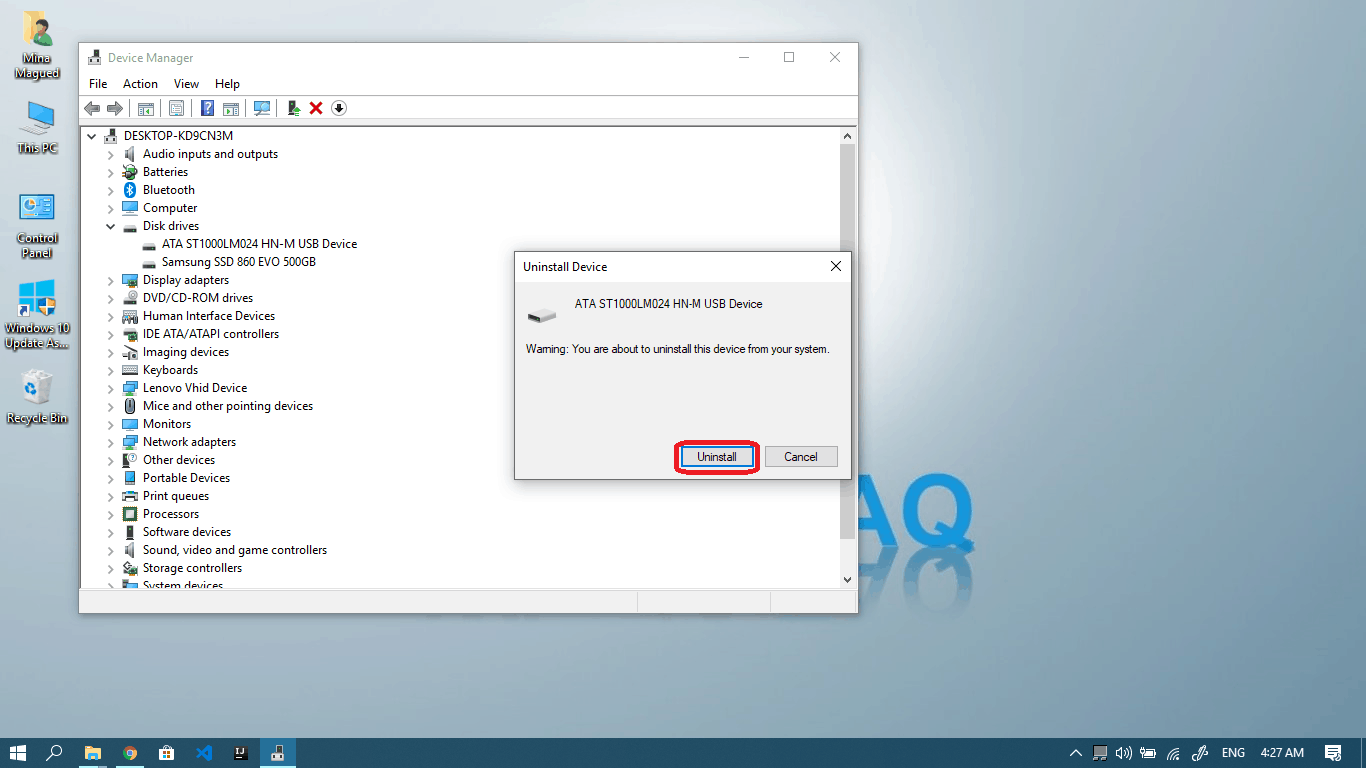
- Click Uninstall and that’s all. You should now unplug your USB cable and reconnect the hard drive and see if it works.


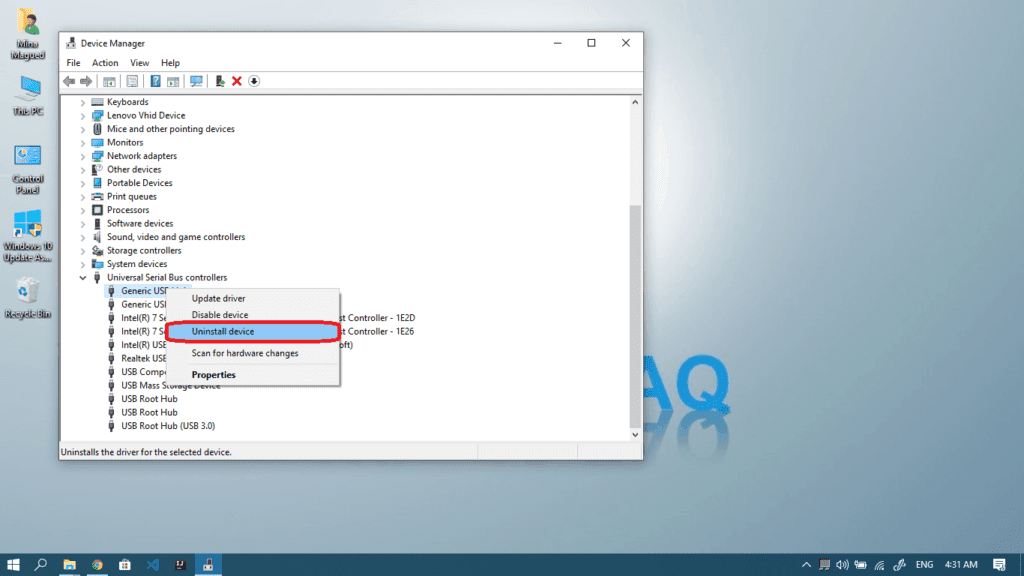
Another family or of drivers that could be causing the problem is the Universal Serial Bus Controllers. If the previous part didn’t fix the issue, then you should:
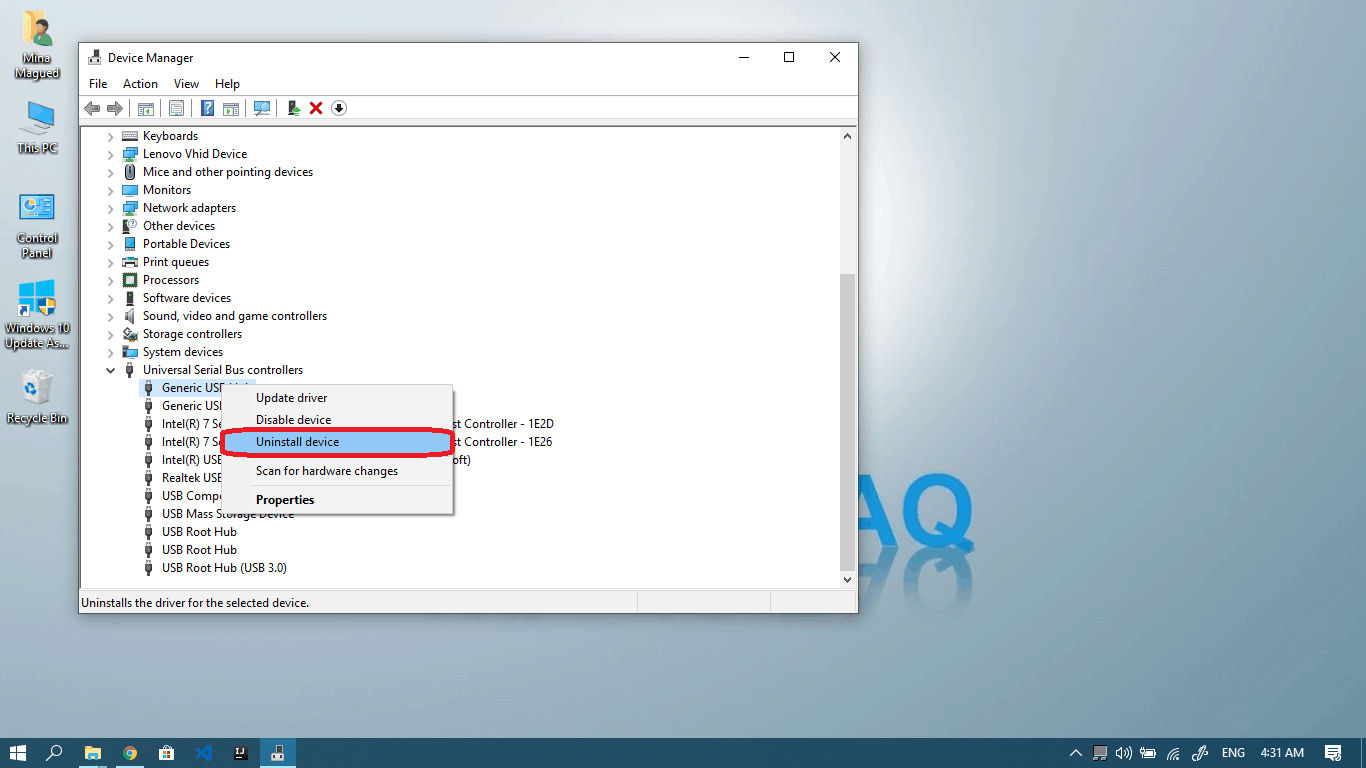
- Open the Universal Serial Bus Controllers and Right-click on any suspicious devices (you can do this for all devices as well, no worries) and Uninstall them.
- Restart your computer and it will automatically re-install all the connected devices.
Related Frequently Asked Questions
How do I fix my Seagate external hard drive not responding?
Some users have reported significant problems with Seagate’s external hard drives in particular. That’s because Seagate has some weird issues with their specific drivers for some reason. Fortunately, you can try several fixes if you own one of this brand’s numerous external hard drive models.
- Try a different USB port on the computer.
- Switch to a new cable if the current one is damaged.
- Try connecting the drive to a different computer.
- Verify if the drive’s light is on. (Light off indicates the power adapter is not connected to power.)
- Try a different power outlet. (Desktop Drives)
If none of these steps work, then you might try reinstalling the Seagate driver. Sometimes this might also fail, case in which you’ll have to get in contact with their customer support.
Do Seagate hard drives fail?
Sadly, one of the most well-known hard drive brands is also one that tends to have a high failure rate, otherwise, people wouldn’t be asking this question so much. In 2014 alone, the failure rate on many Seagate drives was simply abominable, from 9.5% on certain 1.5TB drives to 23.5% on the old 7200.11 series, to a whopping 43.1% on the Seagate 7200.14 drive family of 3TB products.
Final Thoughts
We hope that the fixes mentioned in this article will work out for you. If not, don’t hesitate to contact the company’s customer support to solve your issue, especially if the drive is still protected under warranty.
Do you have any other potential solutions that we haven’t mentioned here? Then feel free to leave us a comment down below. We would also appreciate it if you could share our article with others if you’ve managed to solve your issue because of it. Thank you!