Hello our dear readers, today we are going to help you create a bootable pendrive (USB or flash drive if you’re not familiar with the term) from an iso file. Wait, iso?
What’s an iso file?
An ISO image is an archive file of a storage device composed of the data contents from every written sector. In simpler terms it’s like a compressed file (.rar or .zip) but one that needs to get extracted on a drive that then becomes “bootable” – which means your computer will be able to boot an operating system from it.
Why isn’t it a simple copy-paste process?
The first time I learned about bootable drives, I asked myself why can’t we just copy the Windows (or any other operating system) files manually. But I found that creating a bootable pendrive isn’t a single operation, it consists of the following:
- Formatting the pendrive as FAT32 or NTFS.
- Extracting the iso file containing the operating system you want to burn on the pendrive.
- Burning the pendrive in a way to make it bootable, so that the computer can detect it while looking for operating systems available – this is the biggest difference from simply copy pasting files to the drive.
P.S. the term (Burning) doesn’t mean you will lose the ability to use the pendrive for other things in the future. The term was coined in the era of CDs and DVDs – storage devices that couldn’t be erased or formatted, but with a USB drive you can format it later and use it over and over.
It’s also good to have minimum storage capacity of 8 GBs: that would be enough for most operating systems.
In the following methods, we will discuss burning an iso file on your pendrive once you have your iso file downloaded on the computer. Feel free choosing the method you like, they are all good and should get us to the same goal.
Method I: Using Windows USB/DVD Download Tool
Windows USB/DVD Download Tool is the official one that Microsoft puts on its website for people to use. It has an easy and simple interface for people who don’t want to mess with too many details. Let’s take a look at the installation steps:
Note: While this tool might work for creating bootable drives for other operating systems, we recommend against that. If that’s why you’re trying to do, go to Method II instead.
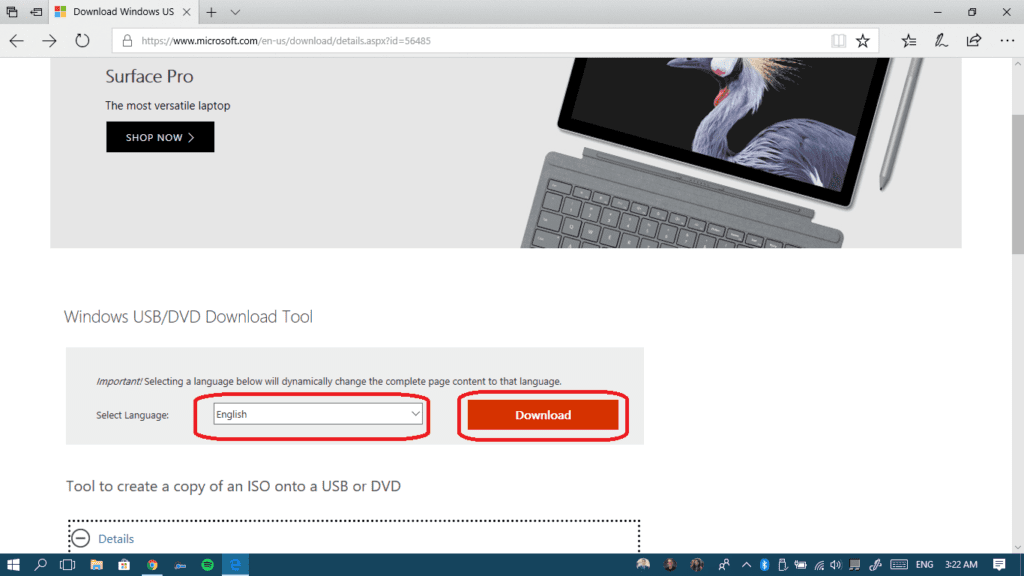
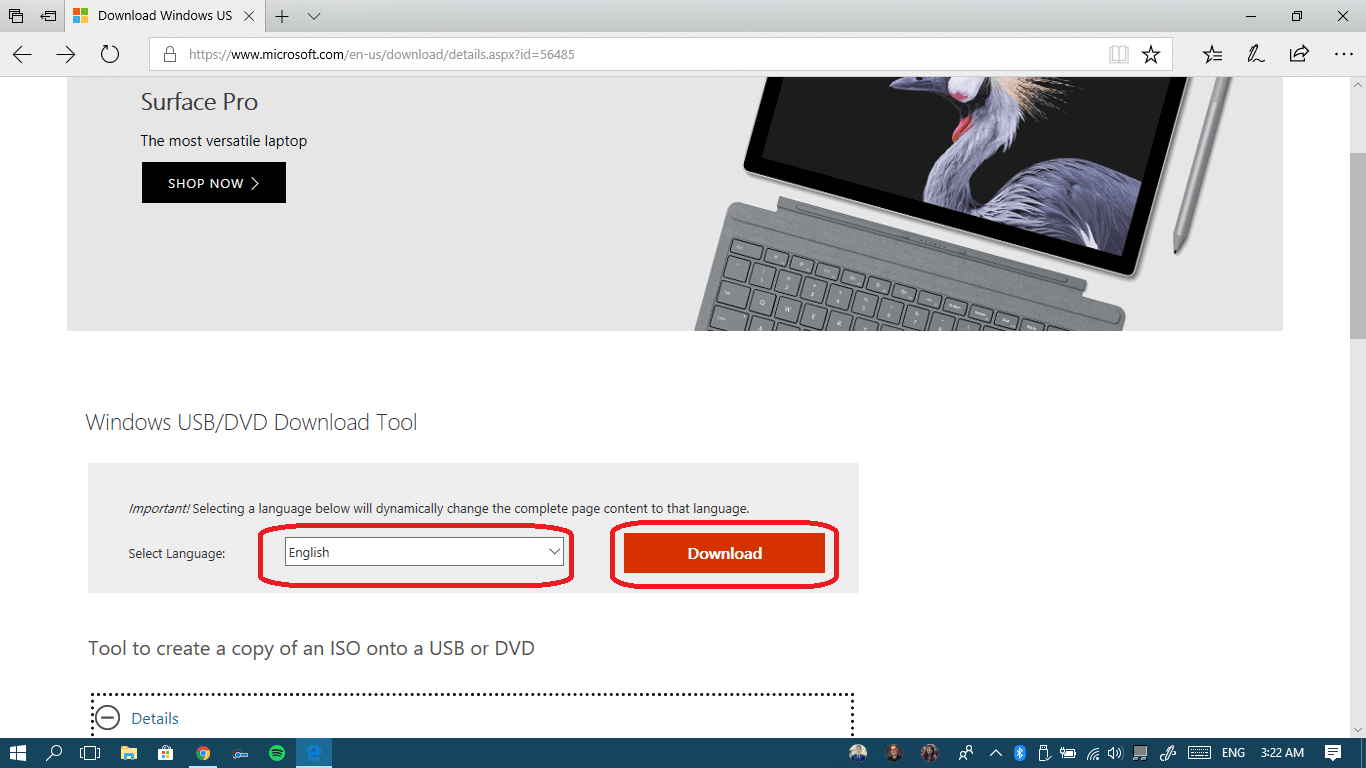
- Go to this URL, scroll a tiny bit, choose your language and hit the Download button.
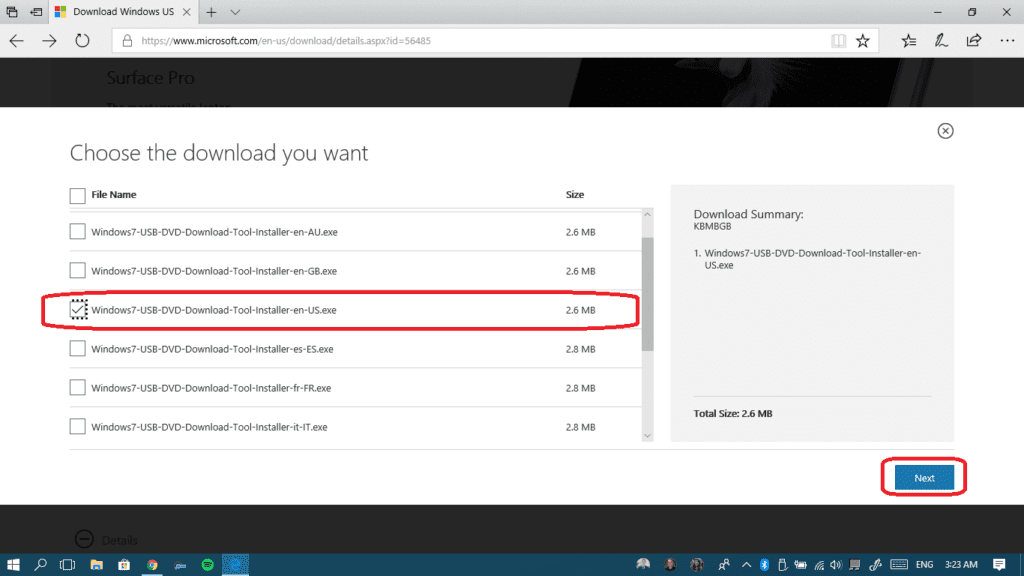
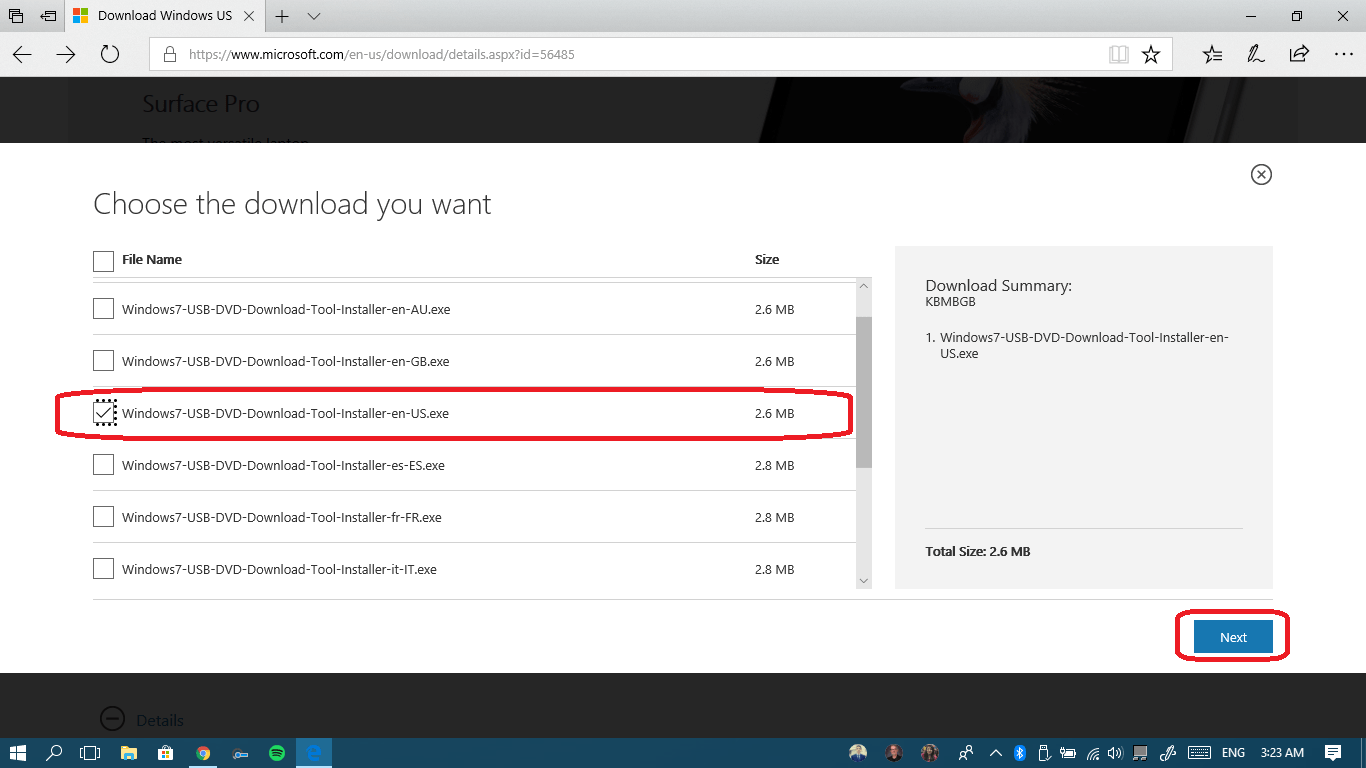
- If you’re working with English, select the Windows7-USB-DVD-Download-Tool-Installer-en-US.exe and hit Next. Don’t worry about the fact that it’s called Windows7-something-something, it’s a tool for all Windows versions including Windows 10.
- Click Save to keep the installation file, or just click Run if you don’t want to save the setup file.
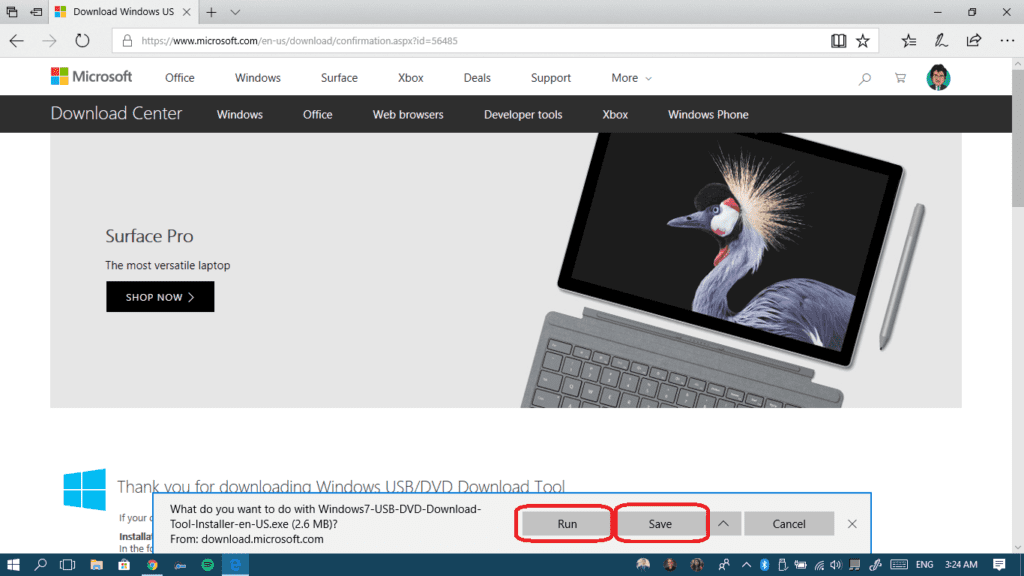
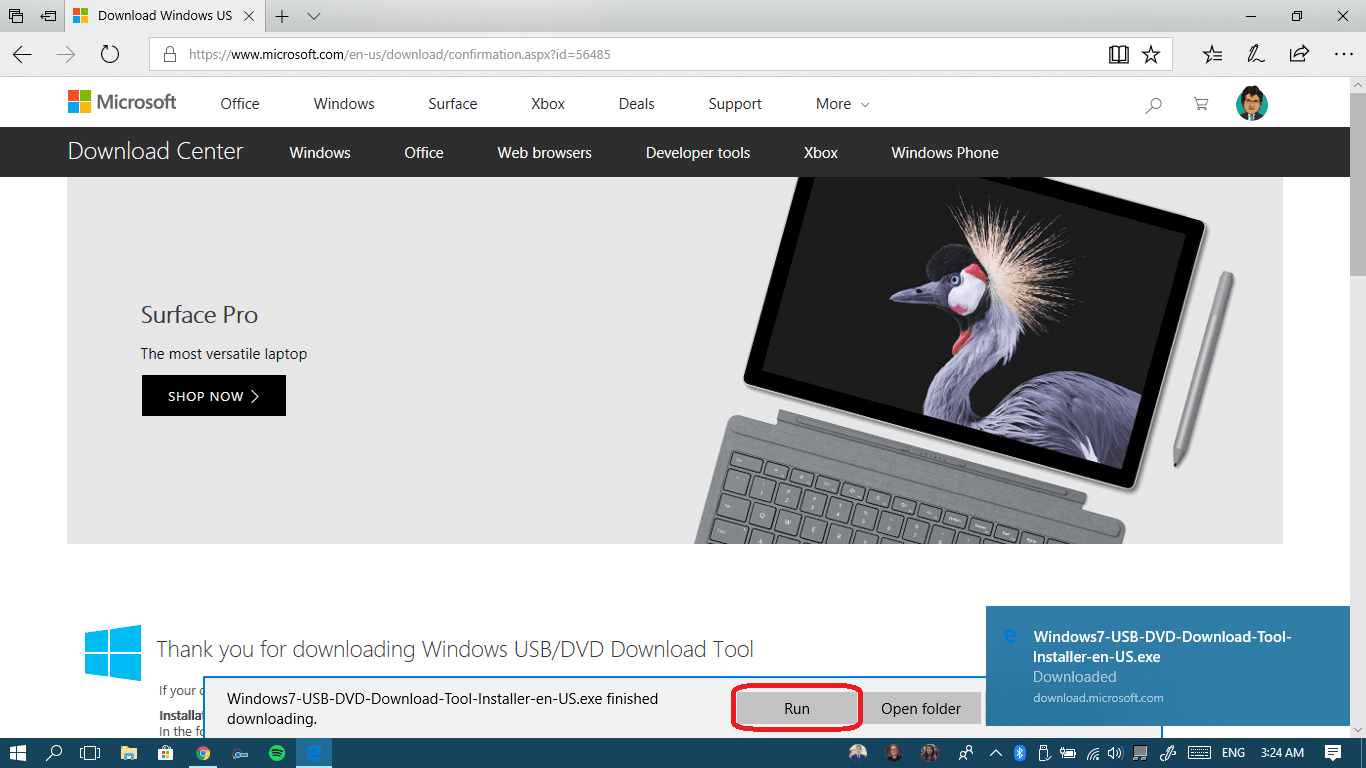
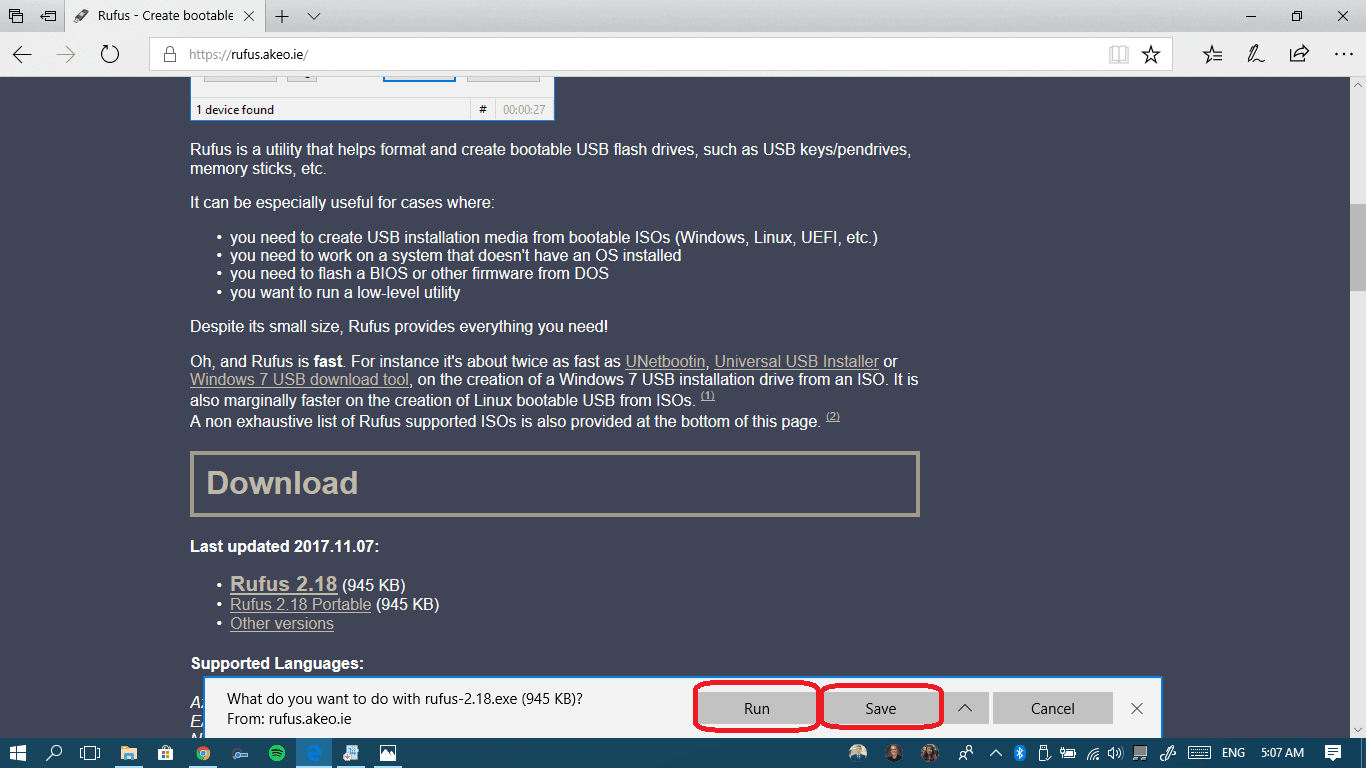
- Once the download is completed, hit Run to open the setup file. Notice that I’m using the Edge browser, that’s why I got this run/save notification – it looks a little different in Chrome and Firefox.

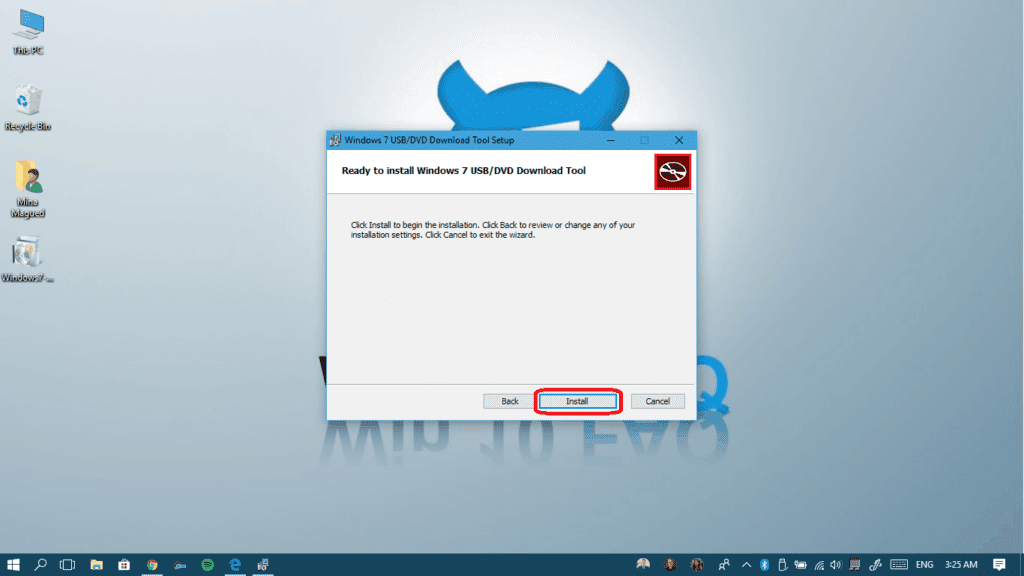
- On the installation window, click the Next button, just until you reach the Install button.

- Here it is, couldn’t they just put it on the front. Anyway, click on it and wait until the installation finishes.
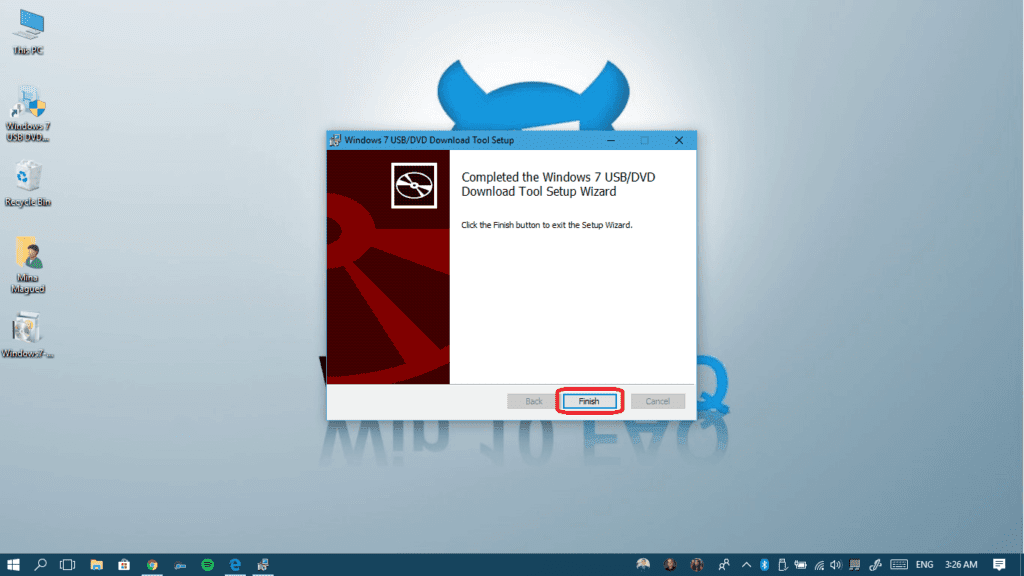
- What’s better than clicking the Finish button, it’s like Pizza is finally delivered!


Now that you successfully installed the tool, it’s time to use it. Follow me:
- Plug your pendrive to your computer.
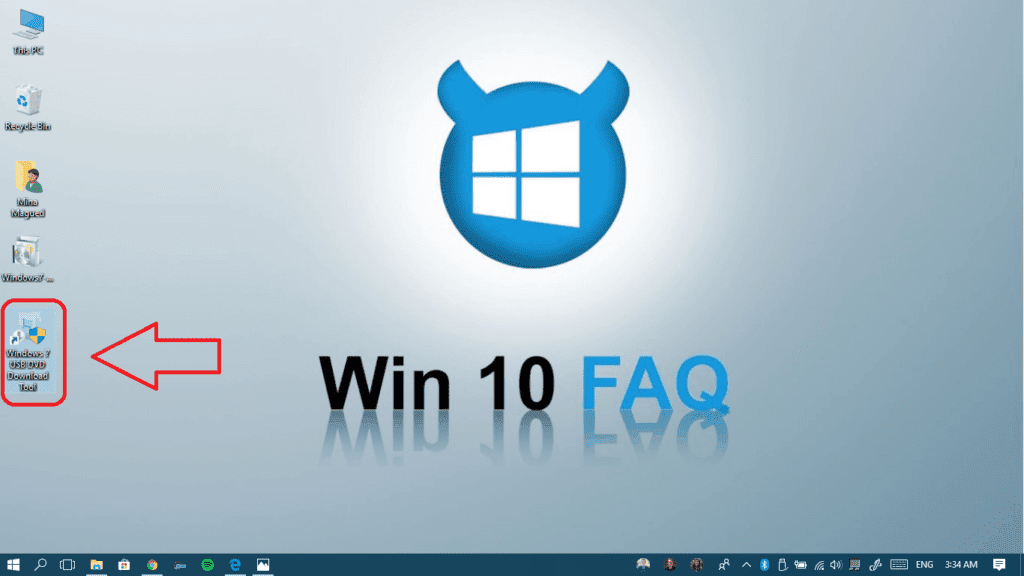
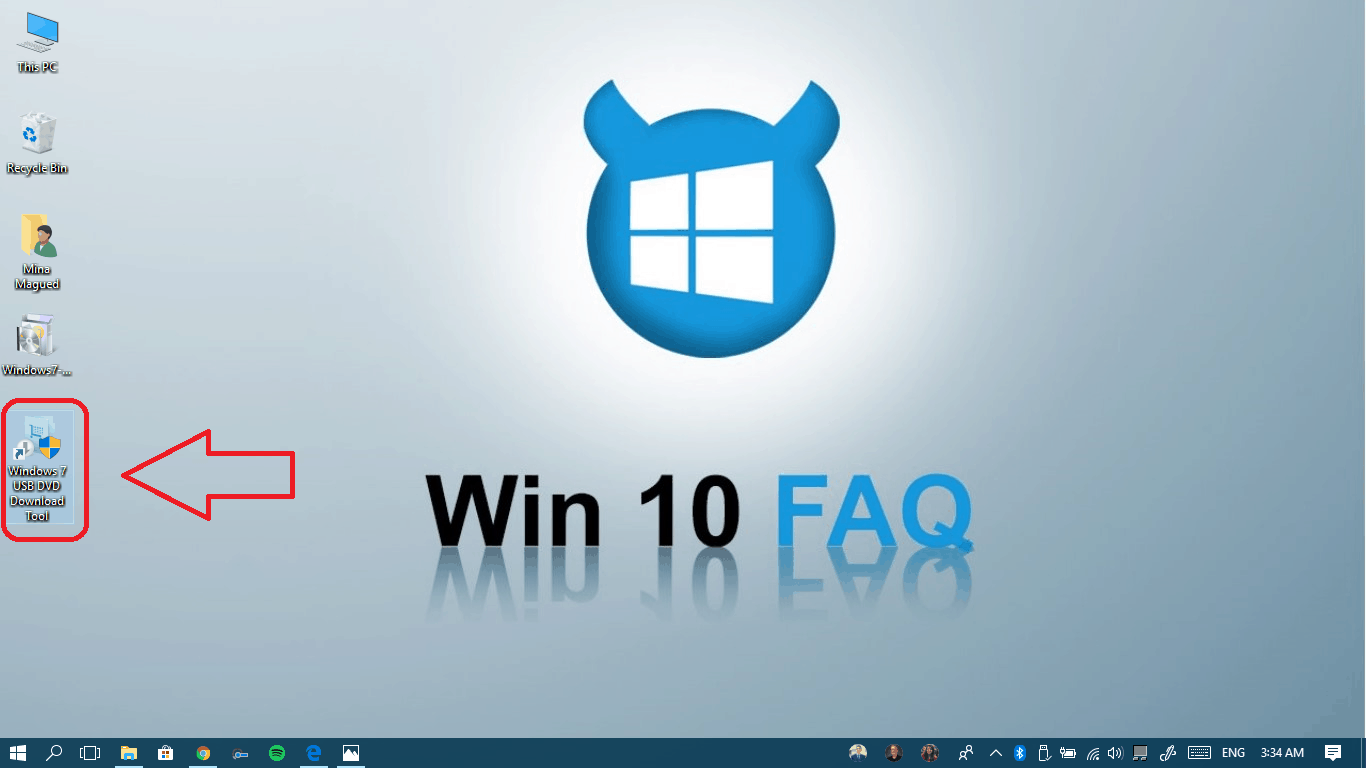
- Launch the tool from its Desktop shortcut.
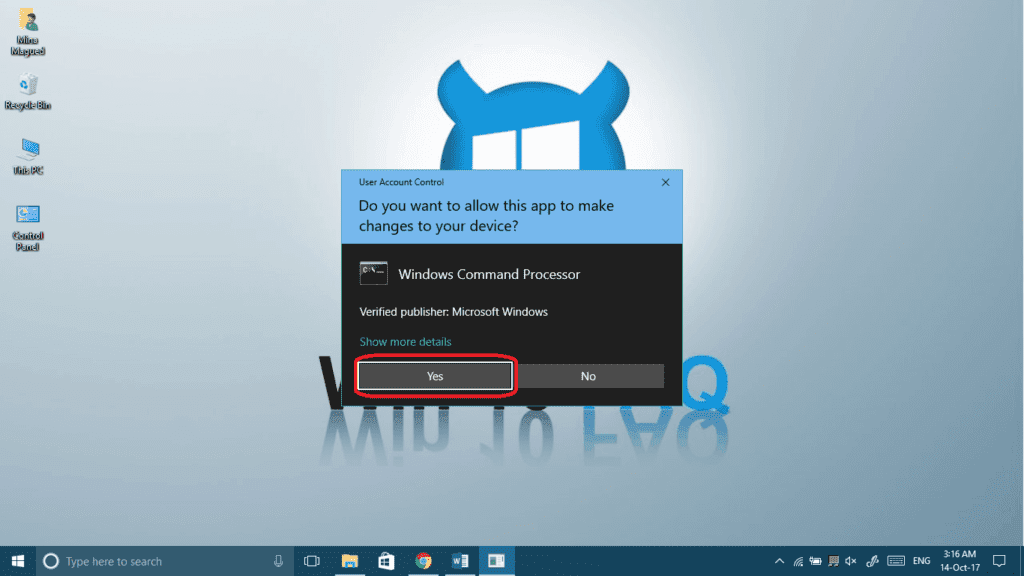
- In the dialog box, click Yes to give the tool the permission to make changes to your computer.
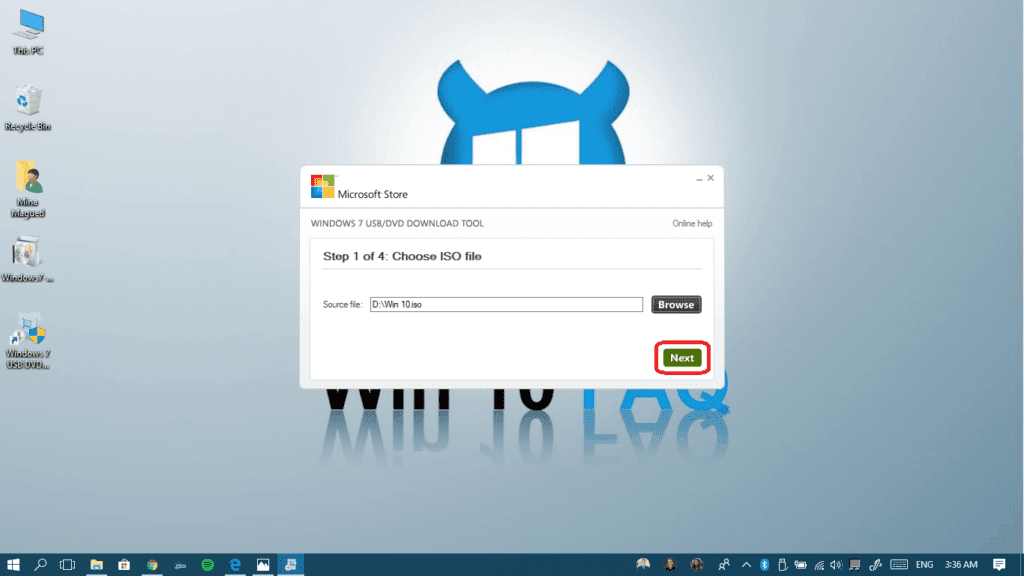
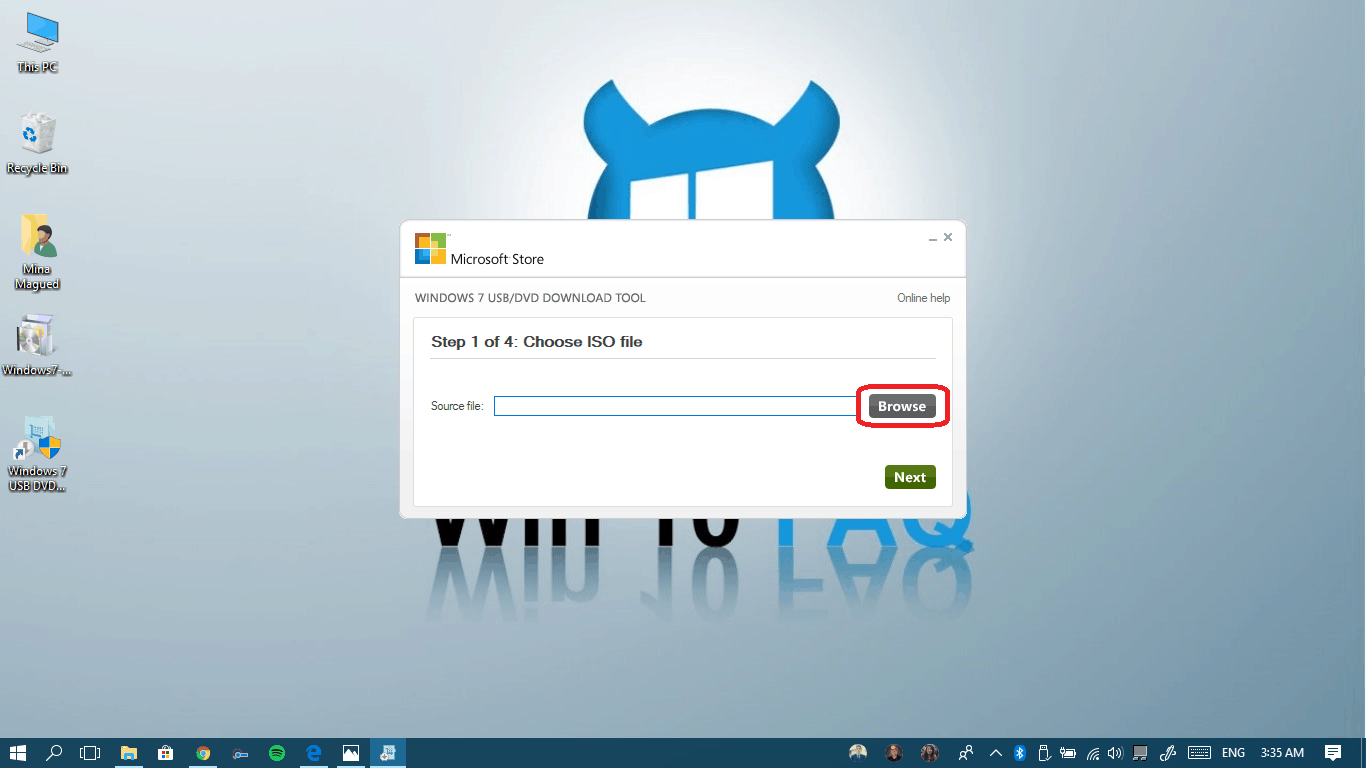
- Now, click on the Browse button to pick your iso file.

- Browse to your iso file’s location, select it and then click Open.
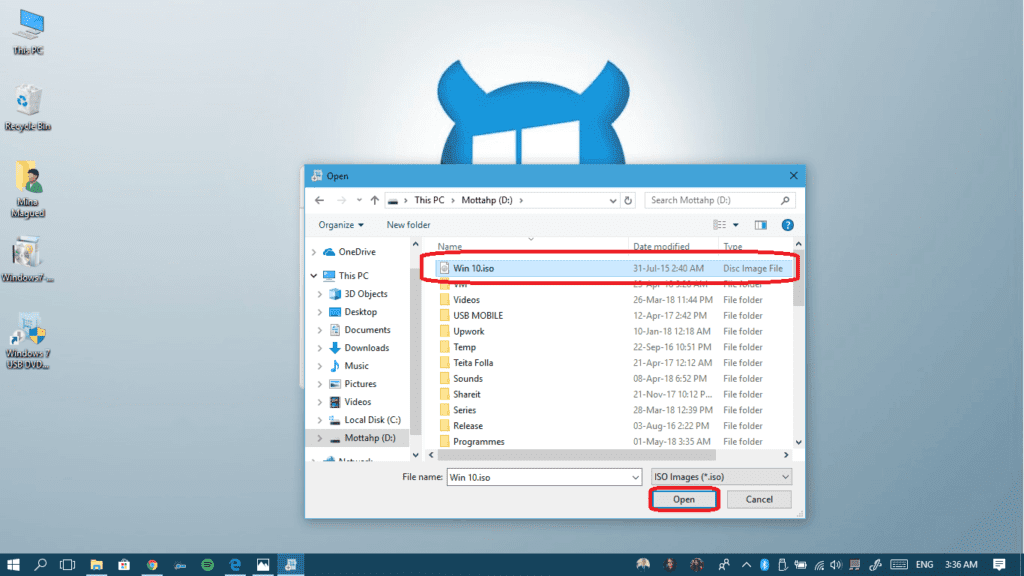
- Once your iso file is chosen, click on the Next button to proceed.
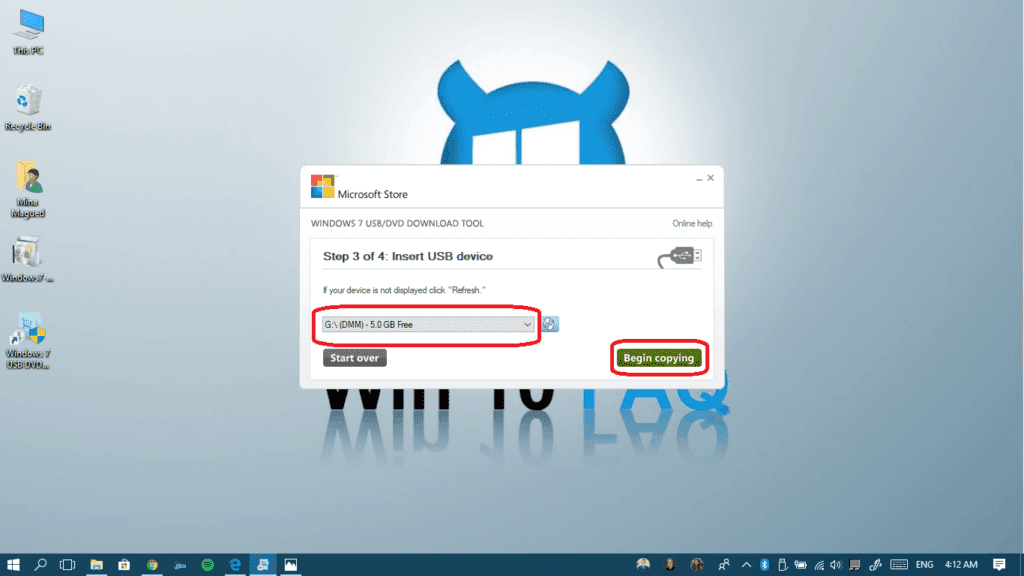
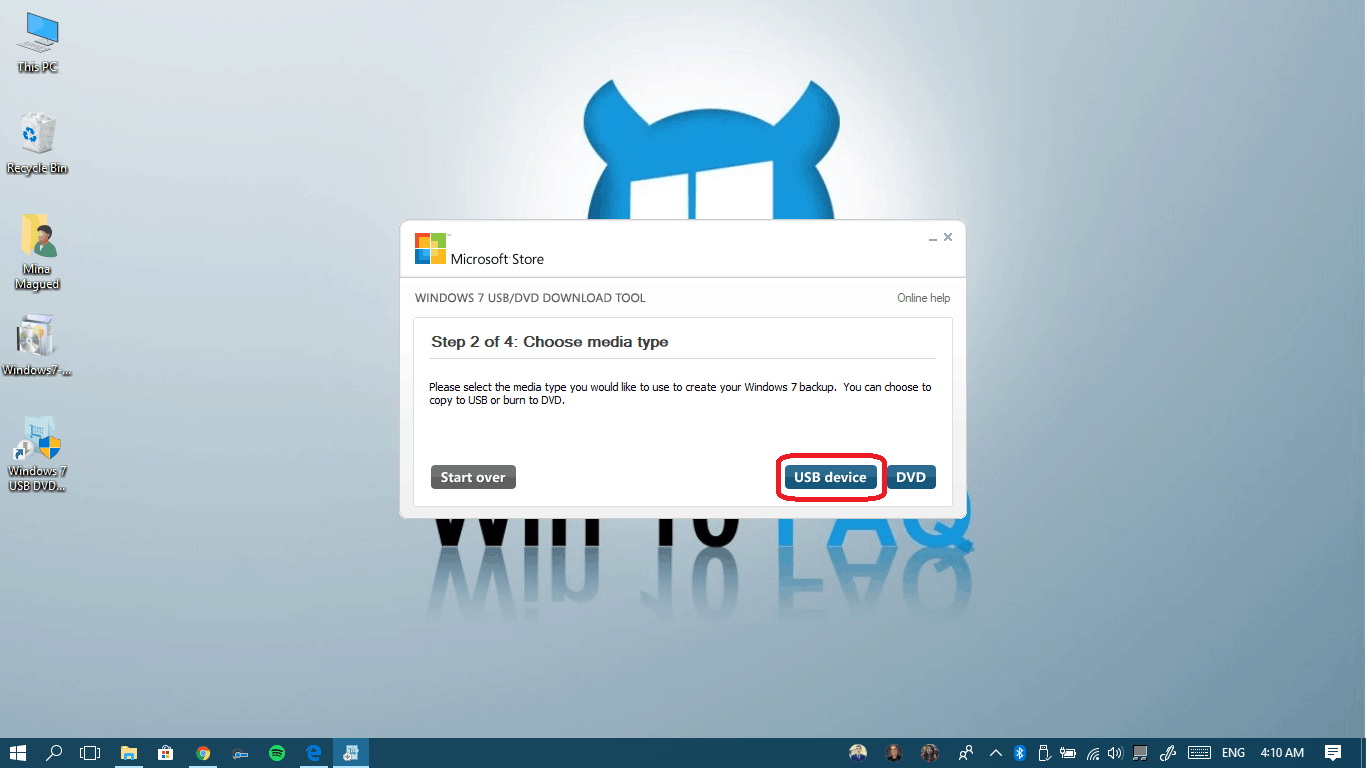
- Select either to burn the iso file on your USB device (pendrive) or on a DVD. In our case, we will go for the USB device option.

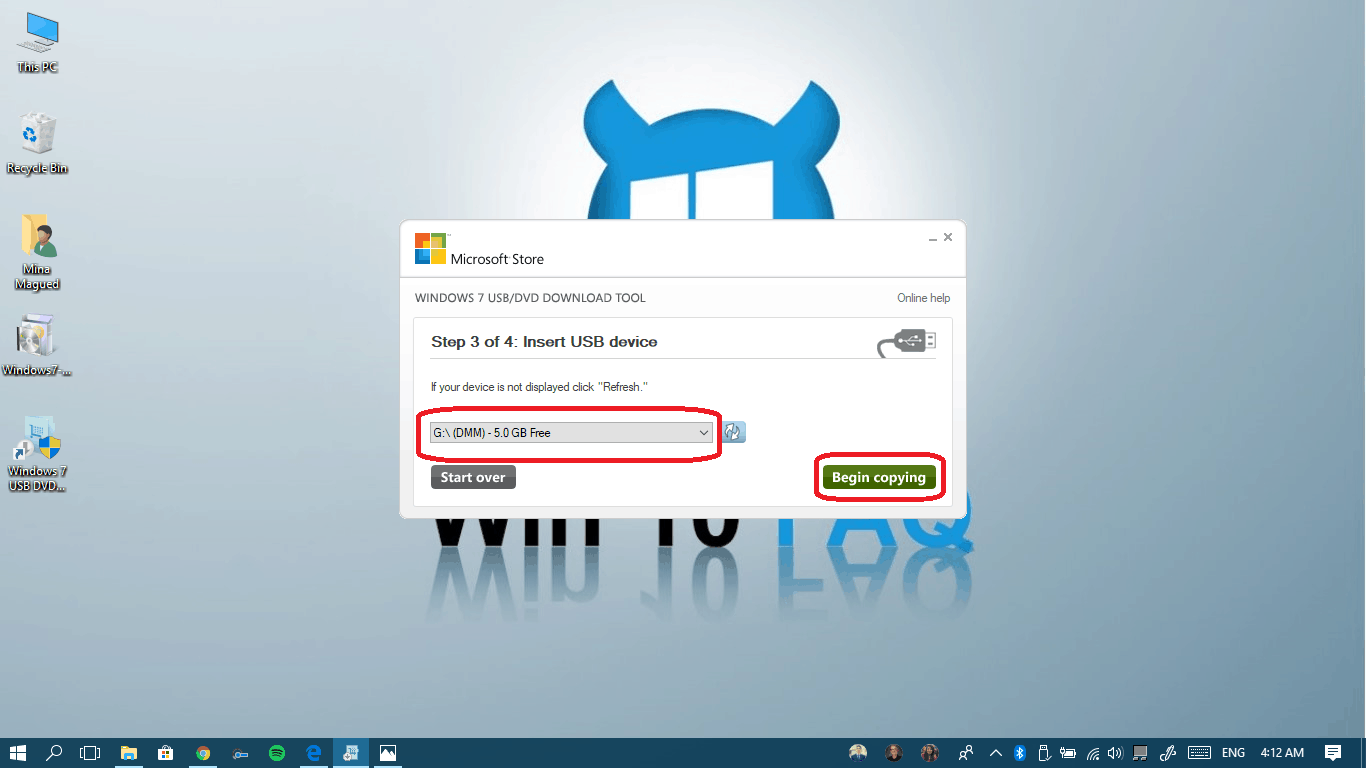
- If you have more than one pendrive connected to your computer, make sure to select it from the drop list and then click Begin Copying. Be careful, any saved data on the pendrive will be erased so make sure you have a backup (if needed).
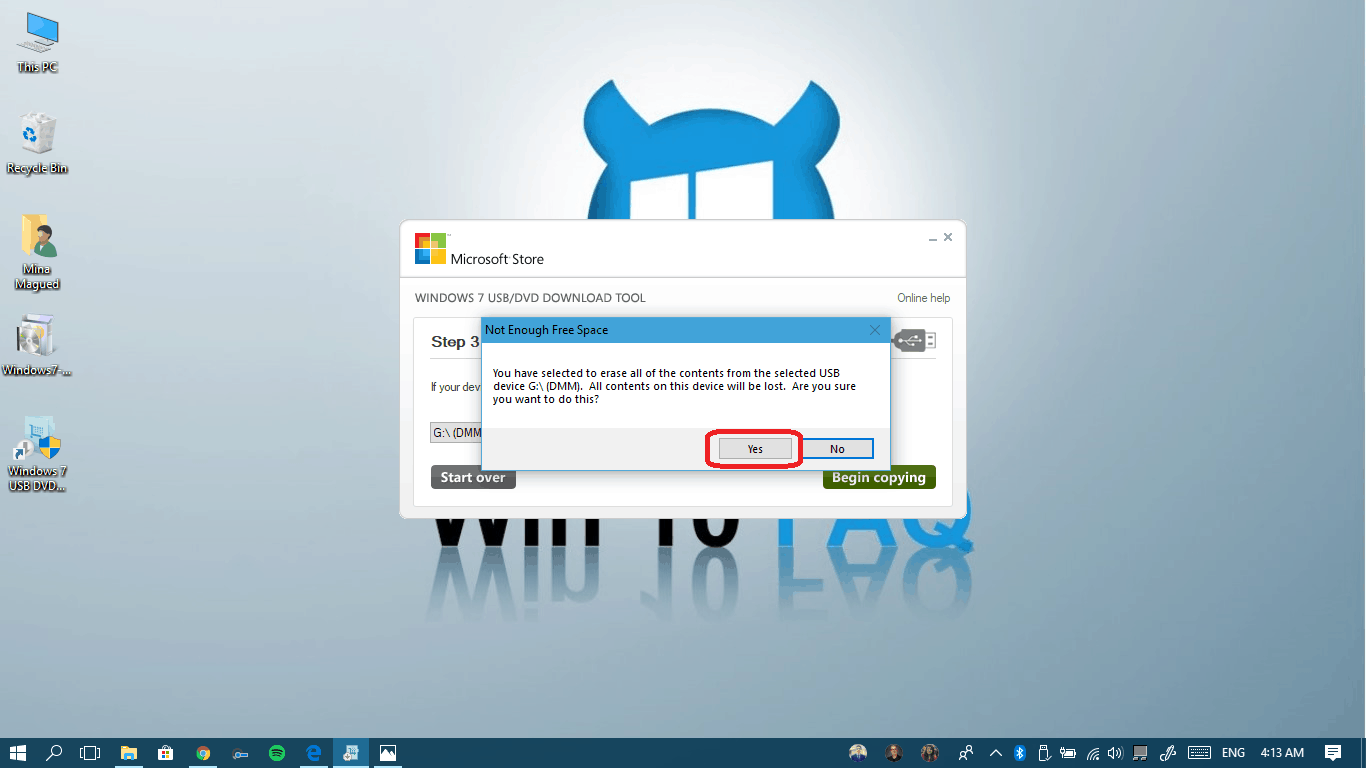
- Now you’ll see a warning to remind you that the pendrive will be totally formated. Click Erase USB device once ready for it.
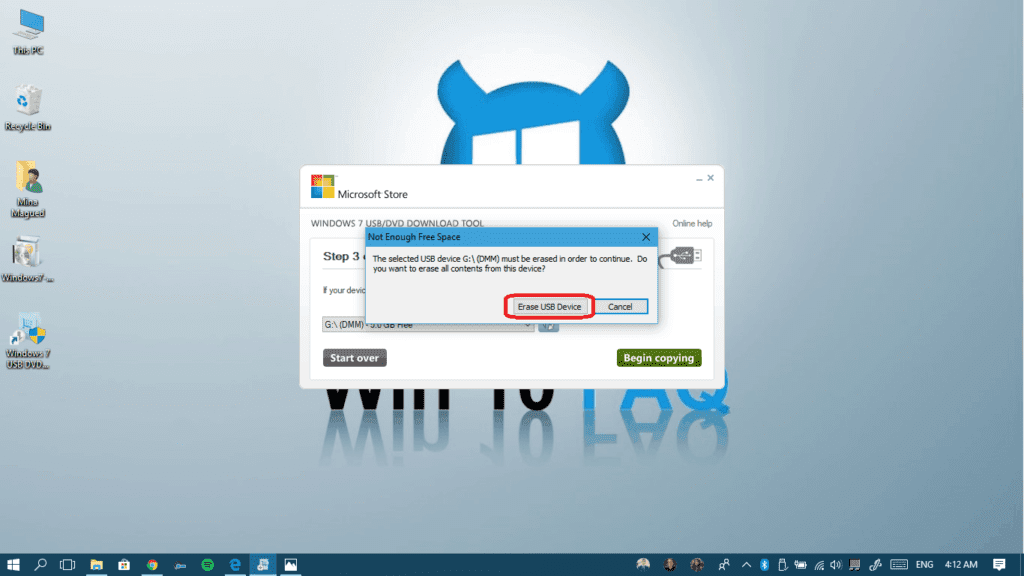
- Another warning, come on guys! Click YES!!!

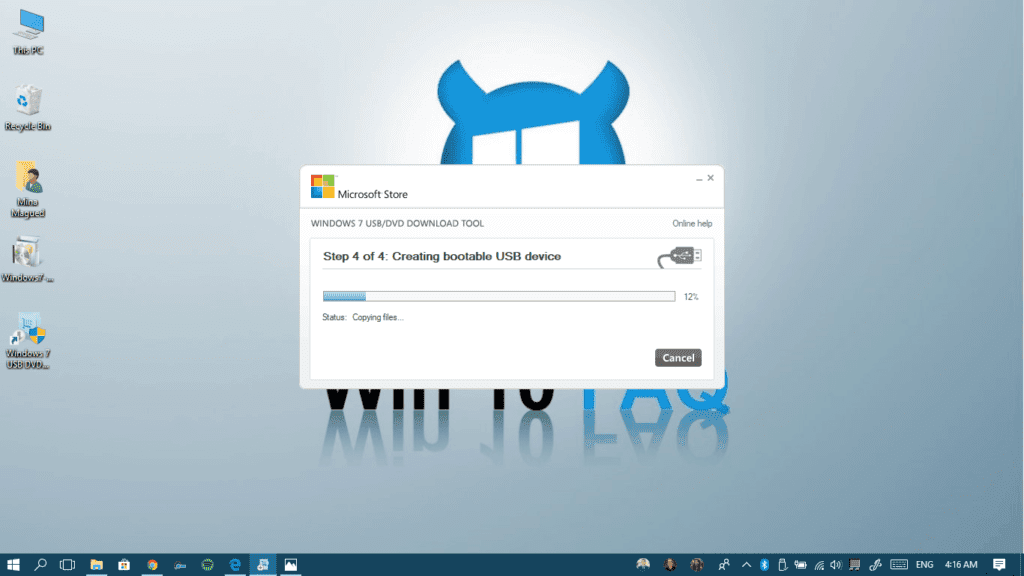
- Wait until the burning is done, it will take some time.
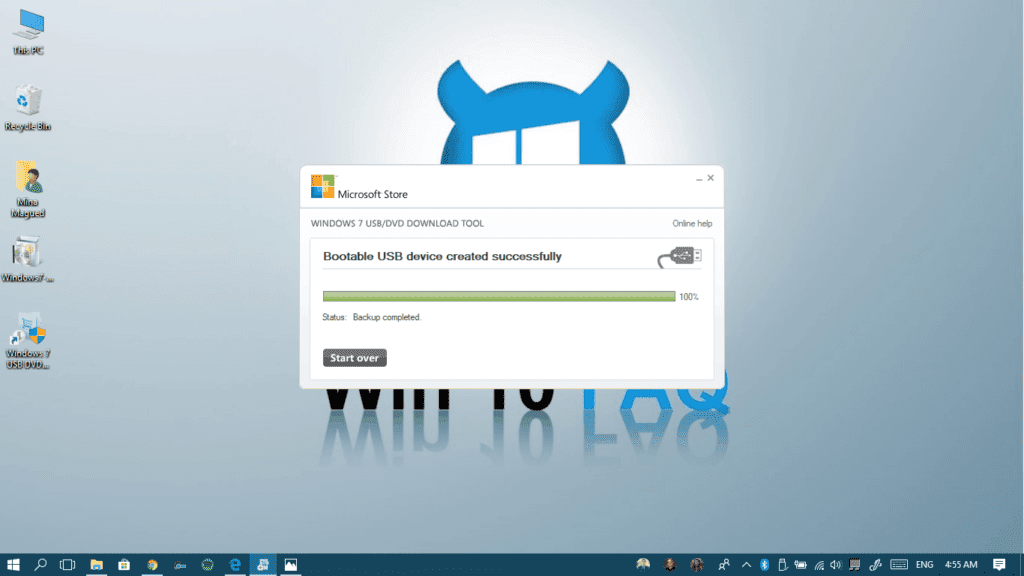
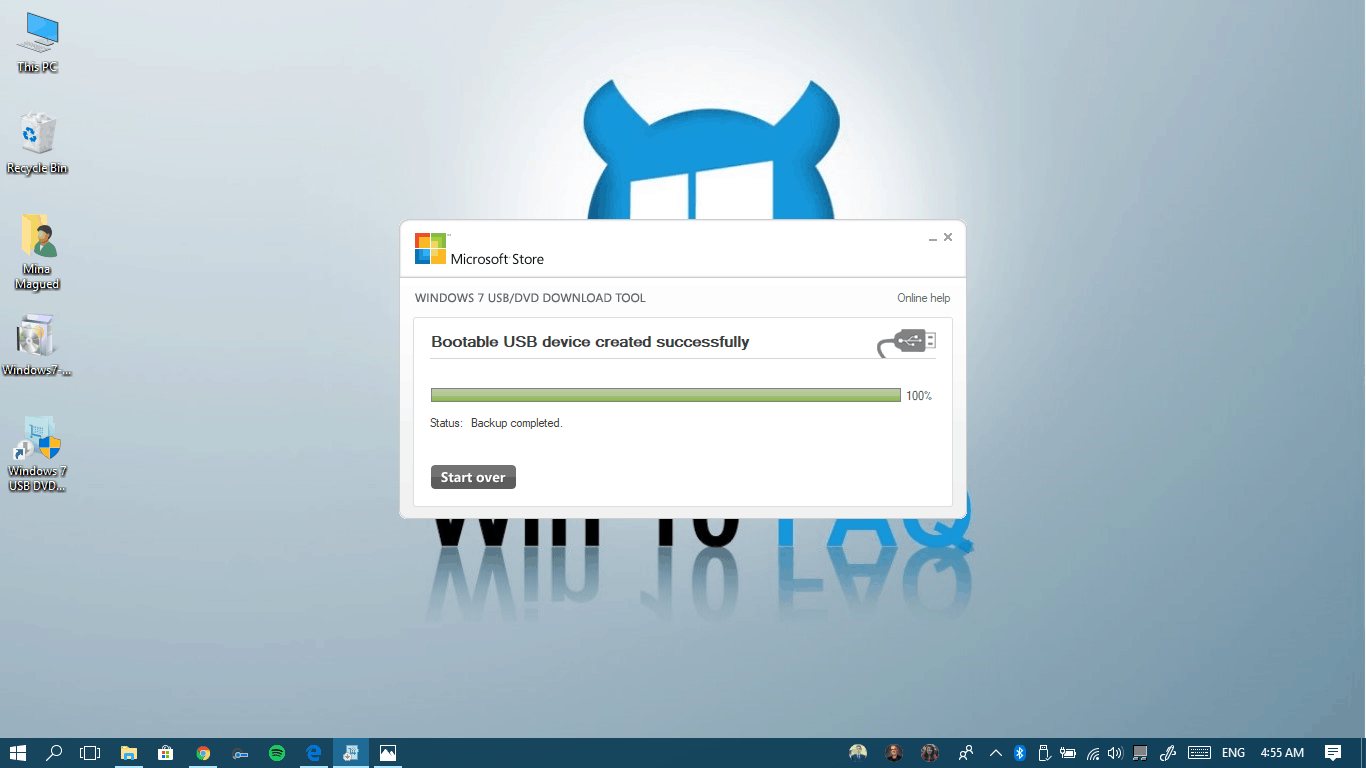
- Once it says Backup completed it means you’re ready to use the pendrive.


The next method will be almost the same but we will be using a third-party program called Rufus.
Method II: Using Rufus
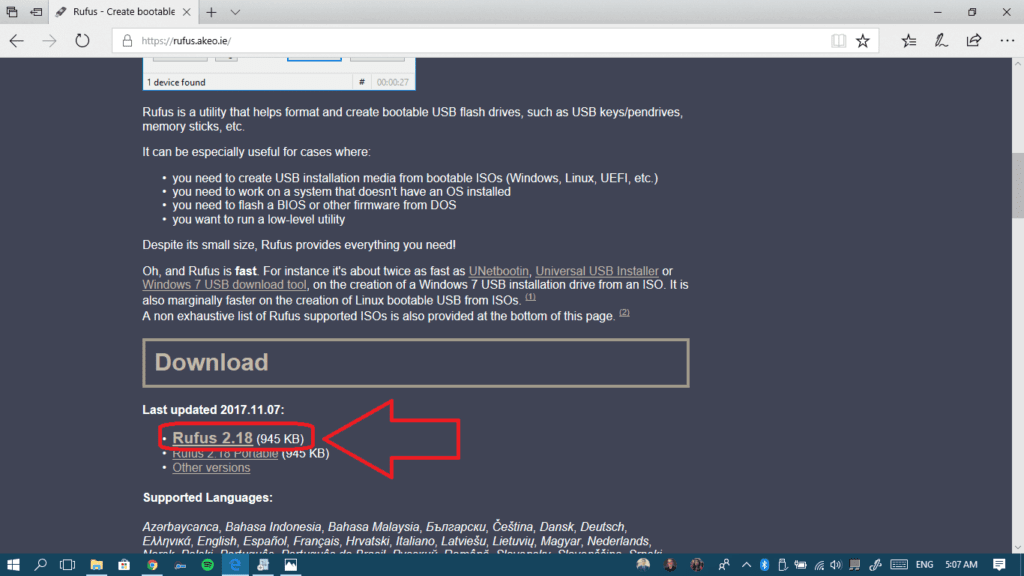
- Go to Rufus’ official website, scroll down a little bit and click on the latest build under the download section.
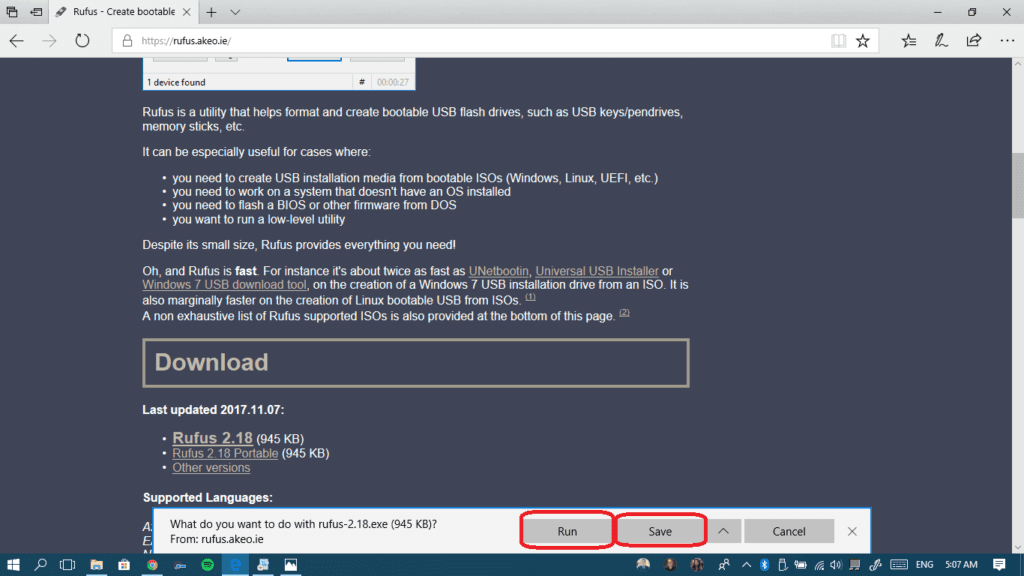
- Click Save to keep the installation file, or just click Run if you don’t want to save the setup file.
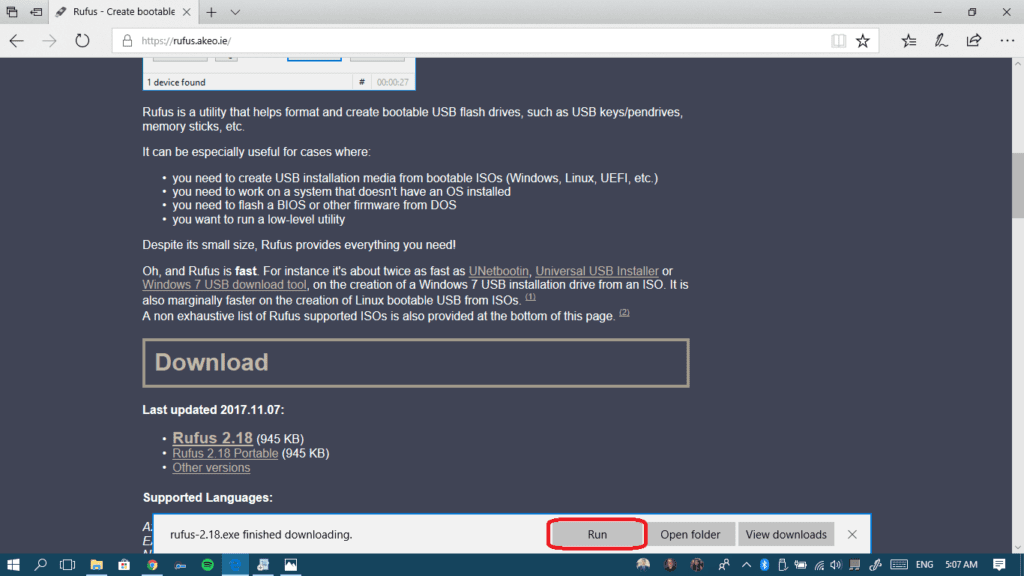
- Once the download is completed, hit Run to open the setup file.
- Voilà, it’s already launched and no need for setup.
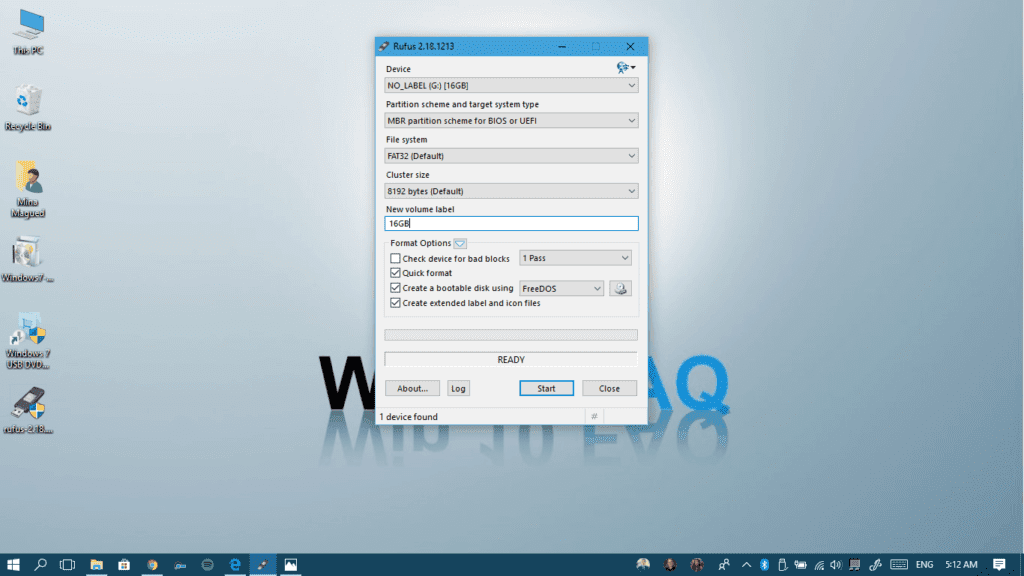


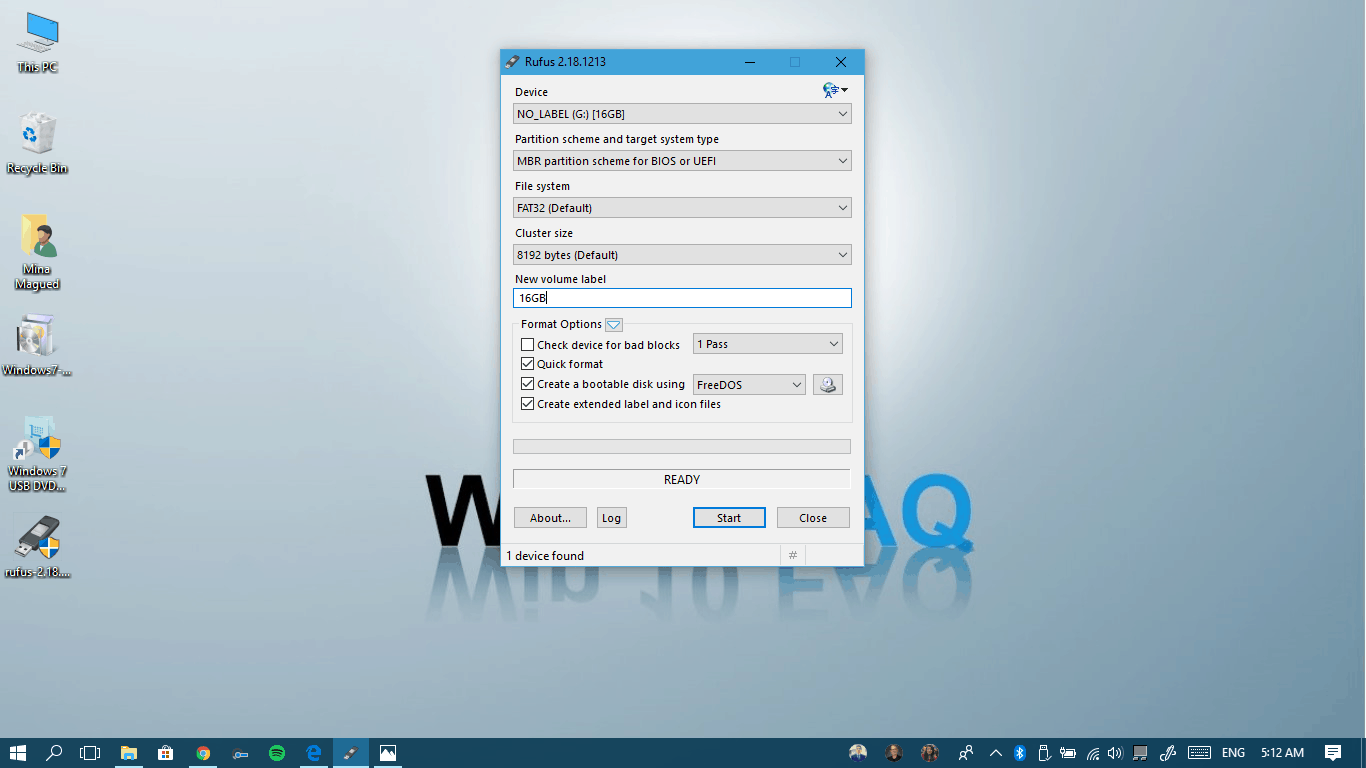
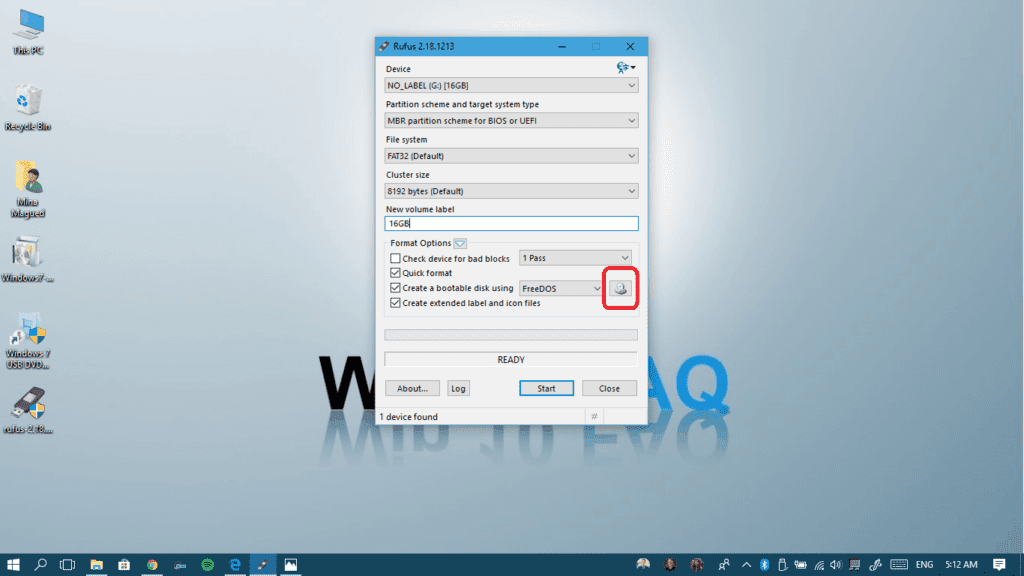
Let’s start burning our pendrive. Everything you need to do is in this one Window that you’re seeing.
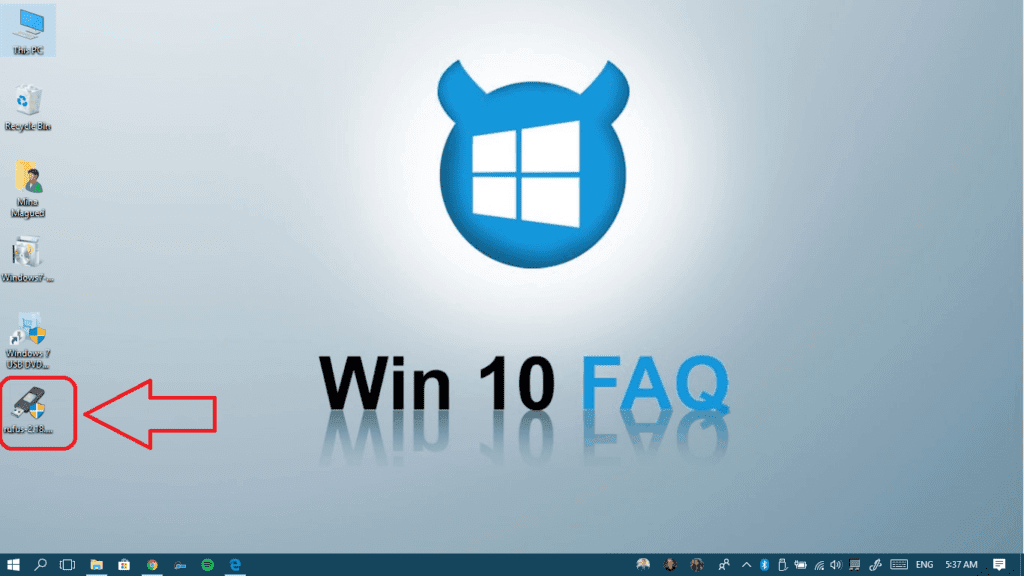
- Launch Rufus from the downloaded file if it’s not already on.
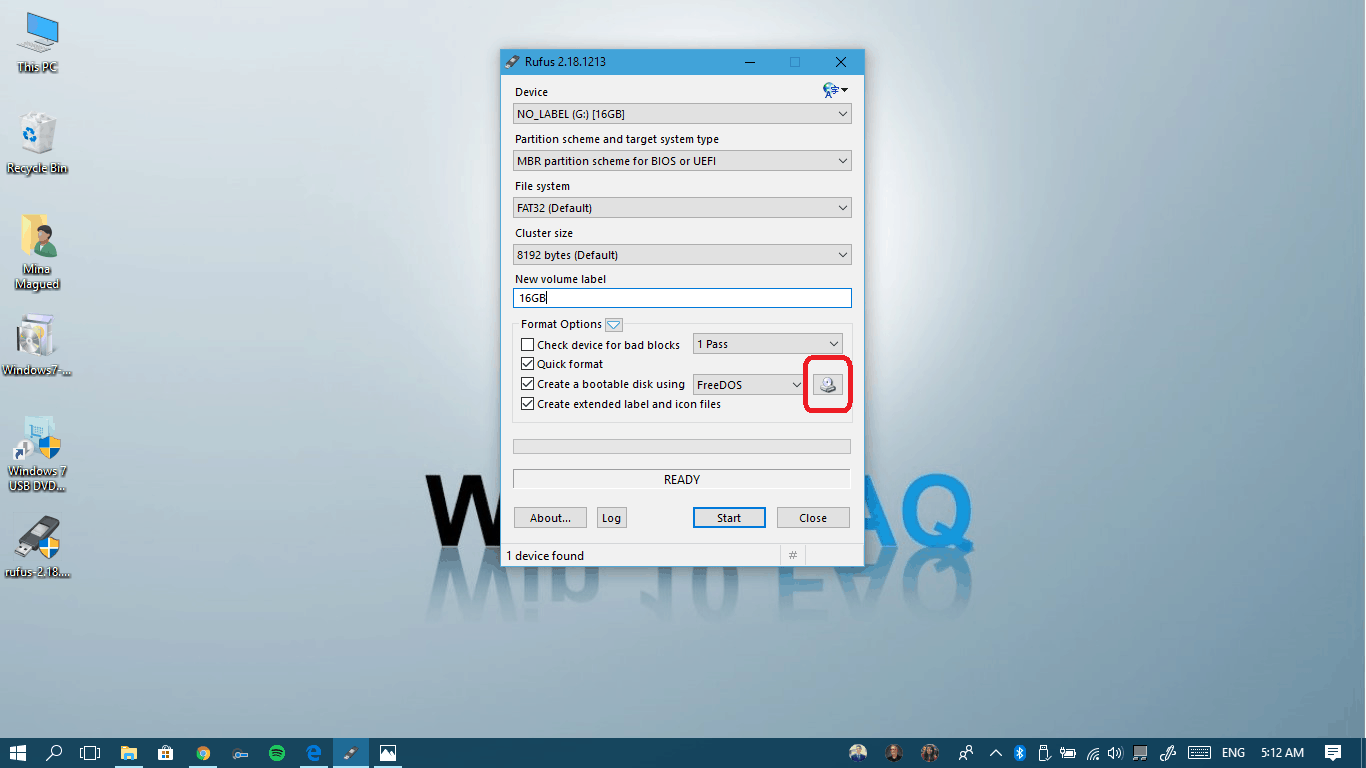
- Click on the DVD icon to insert your iso file.
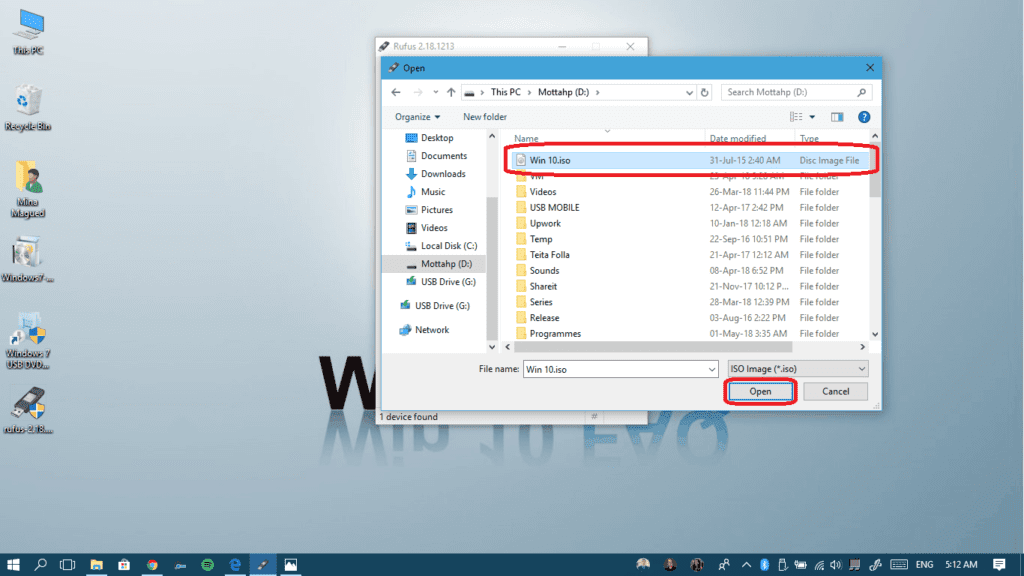
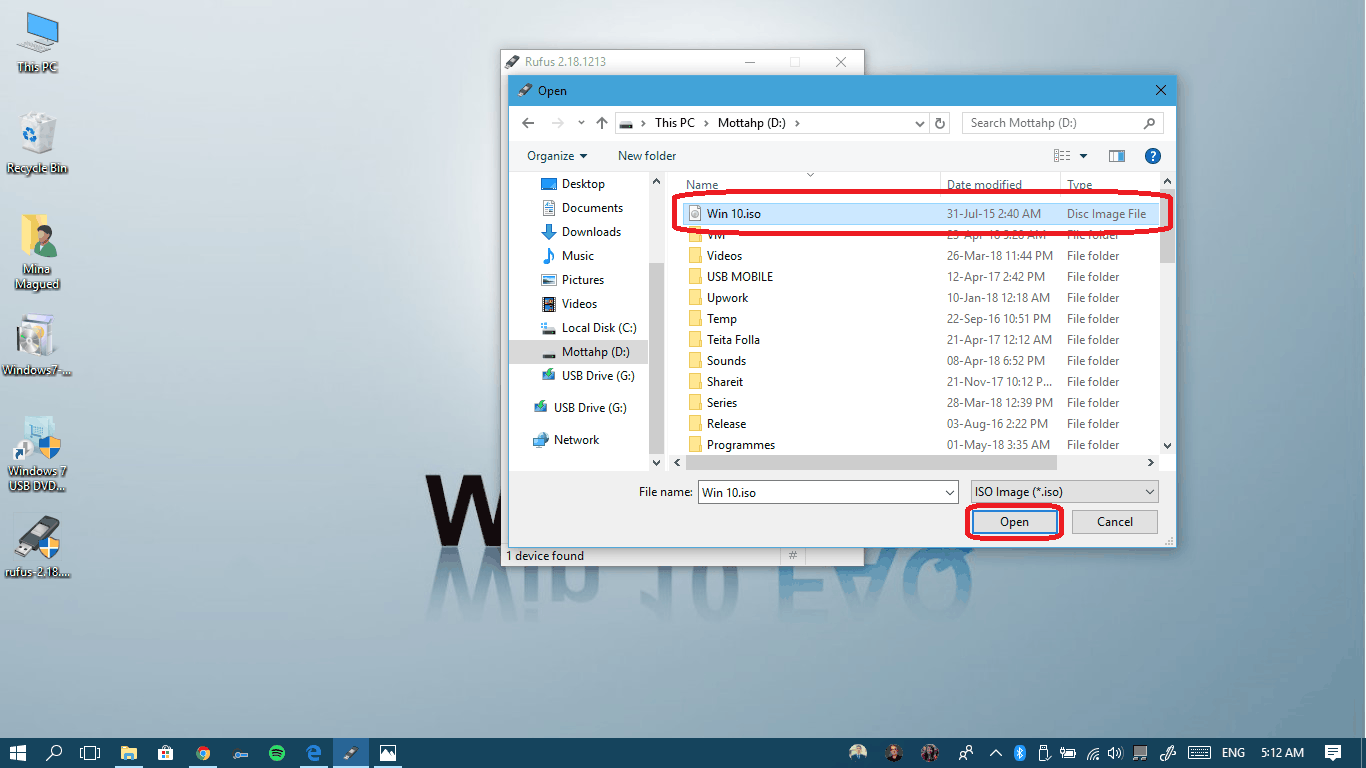
- Browse to your iso file’s location, select it and then click Open.
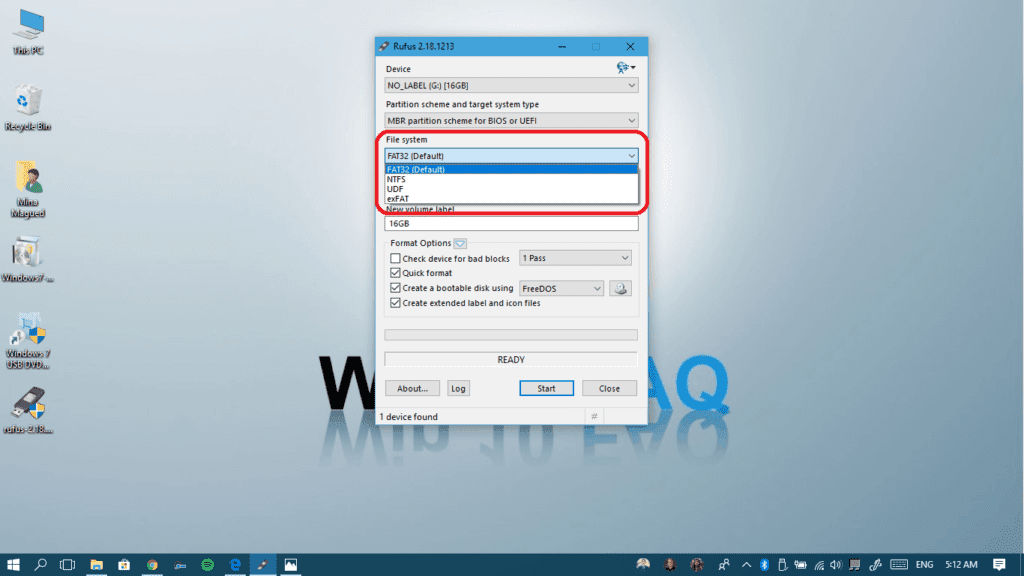
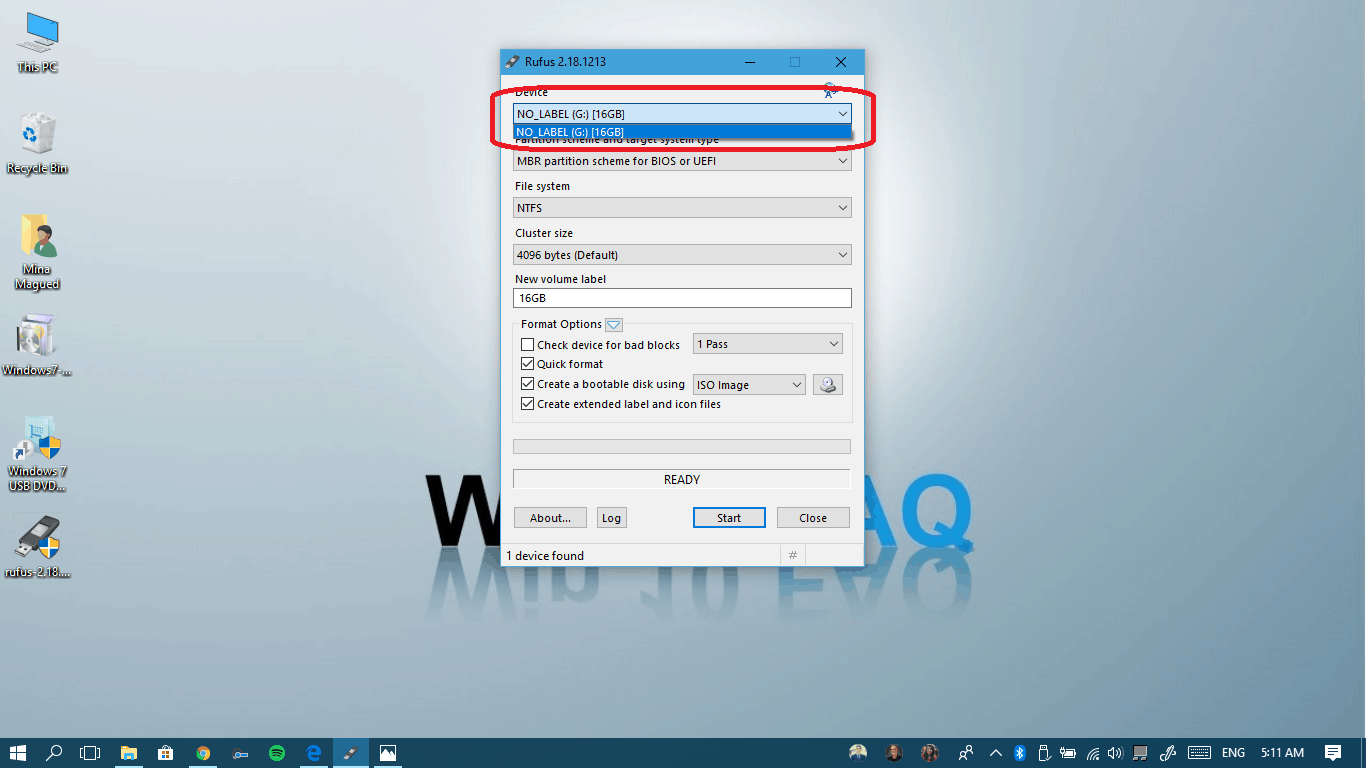
- Choose your pendrive from the list if you have more than one connected.

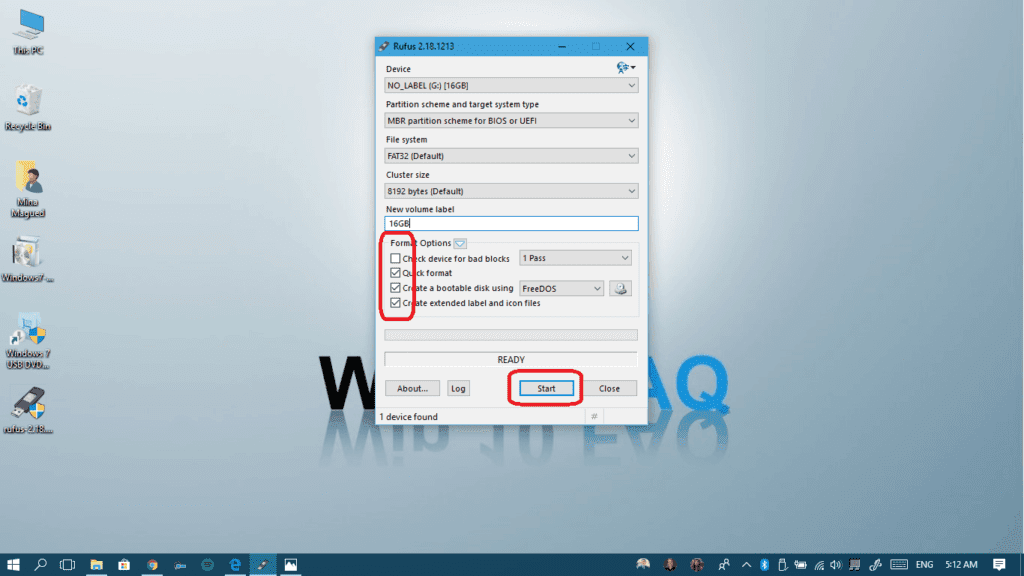
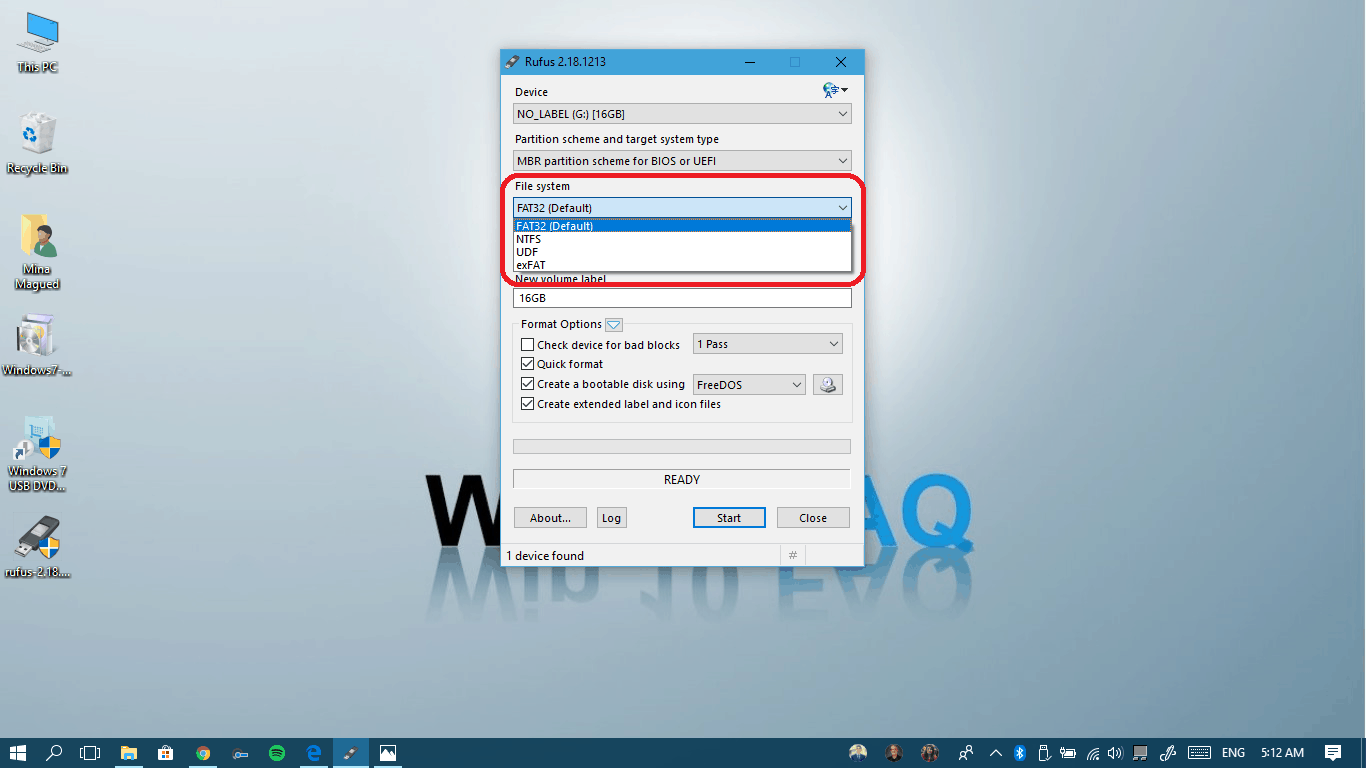
- Choose your format type from the list… choose either NTFS or FAT32, there will be no difference between then since all computers read both.
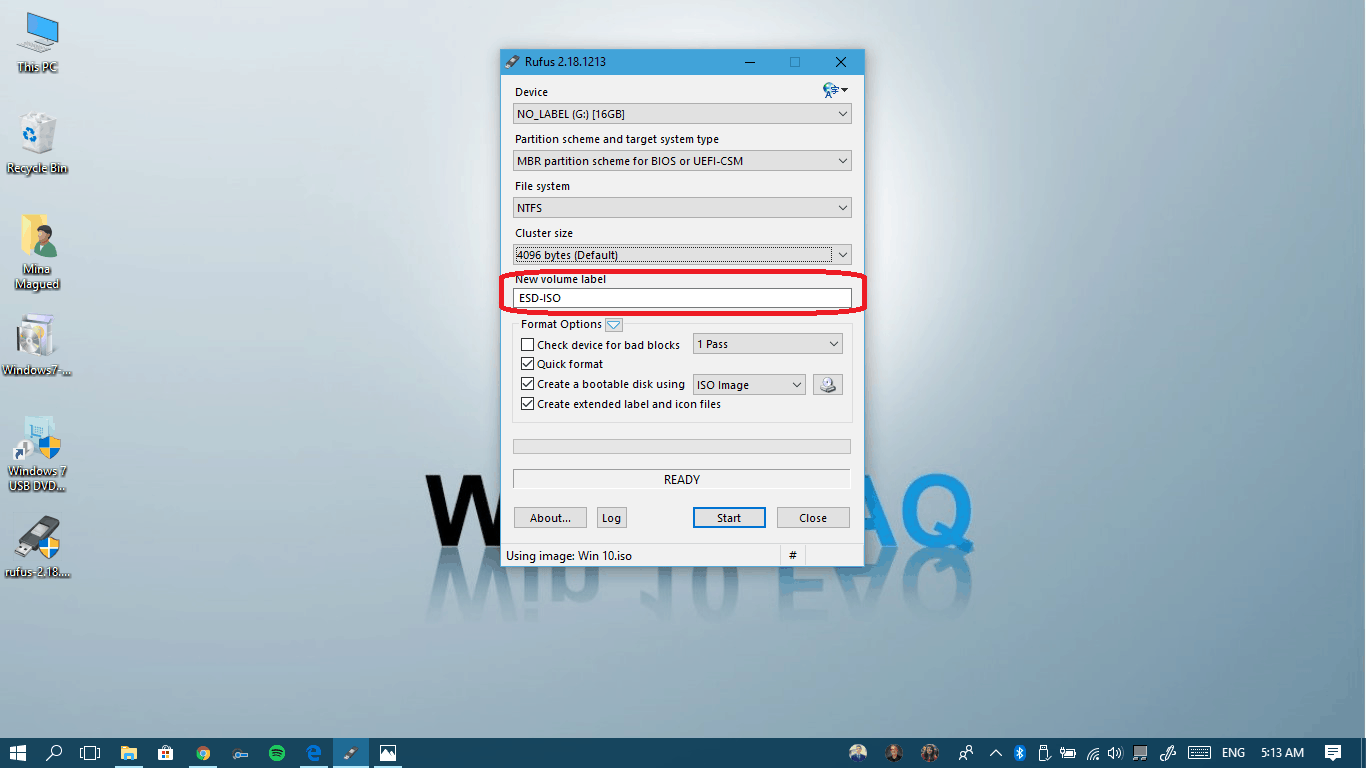
- Leave the cluster size as default.
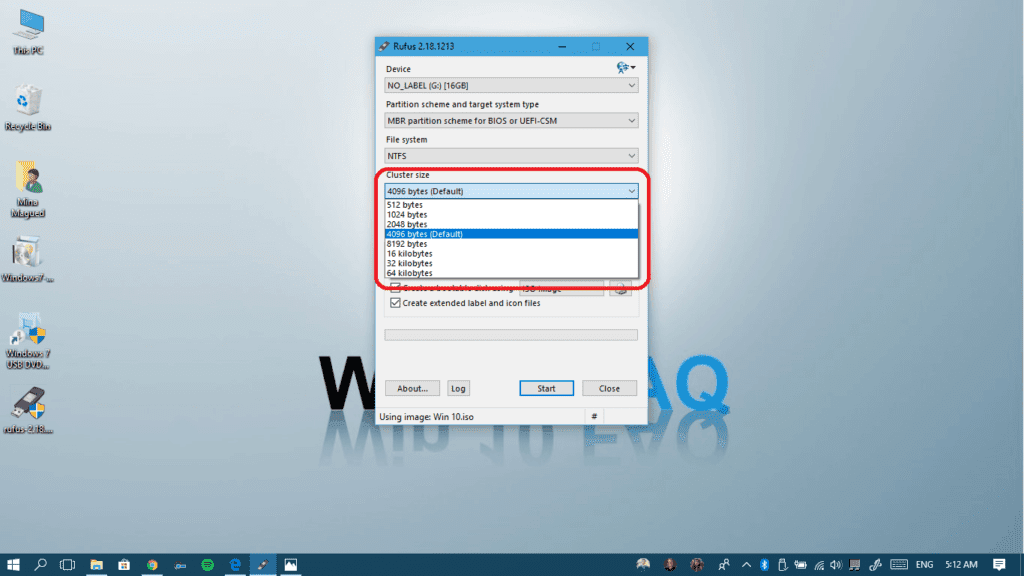
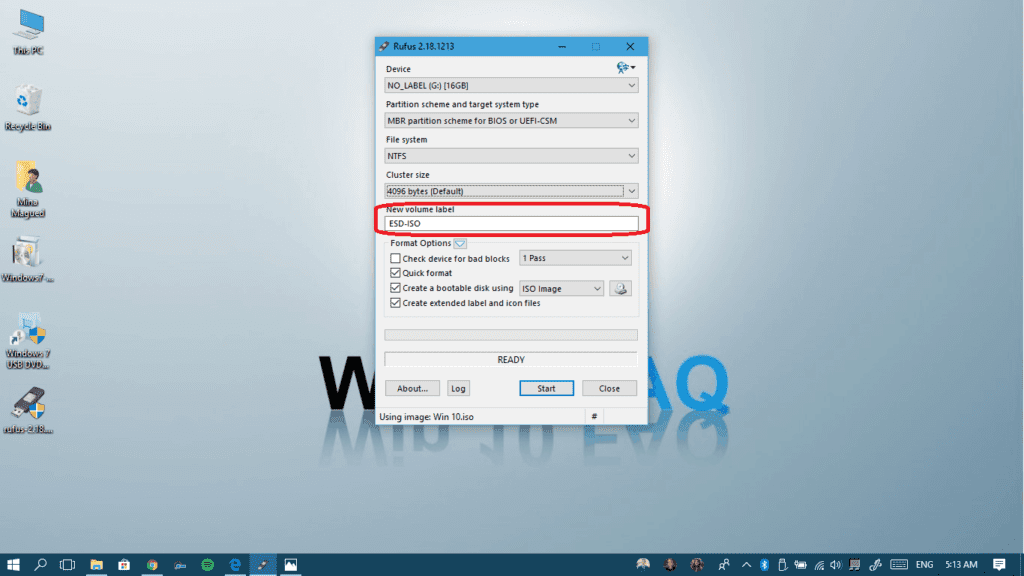
- Create a name for the future bootable pendrive from here:
- Leave all the selected options as they are and click Start.
- A warning will remind you that the pendrive will be totally erased during this process, so click Ok once you’re ready for it.

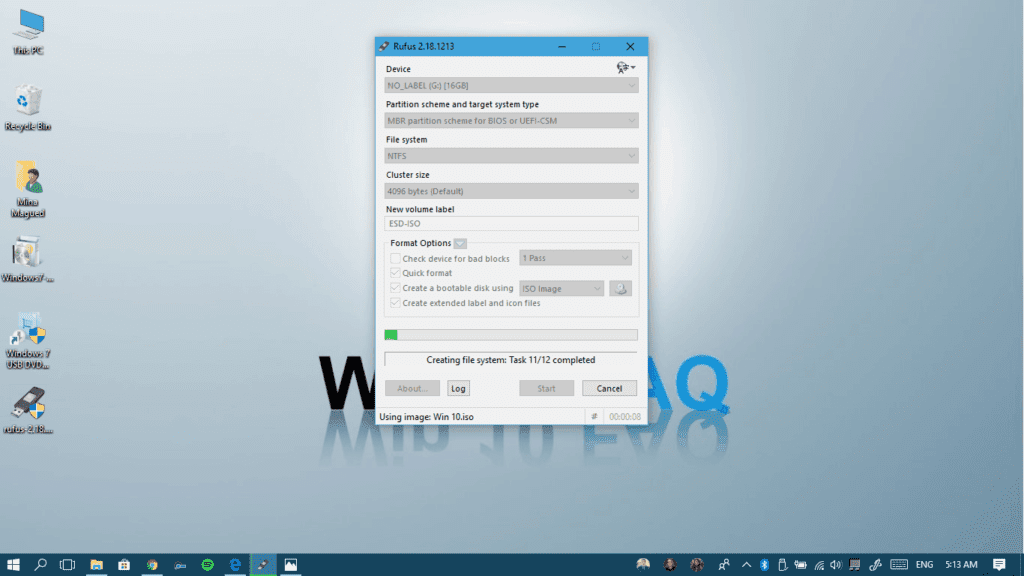
- Wait for the burning to finish, it shouldn’t take a long time with average computer specs.
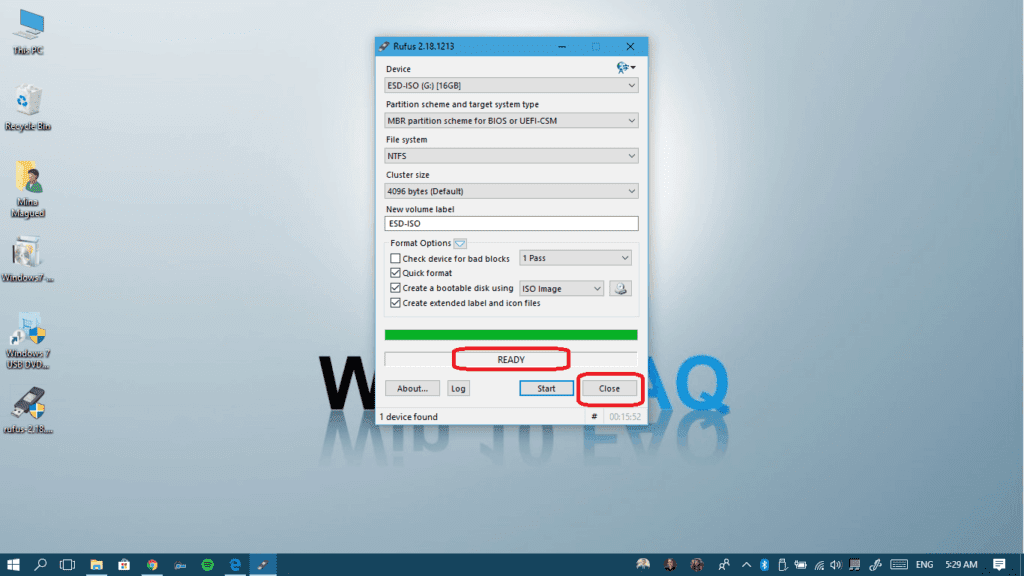
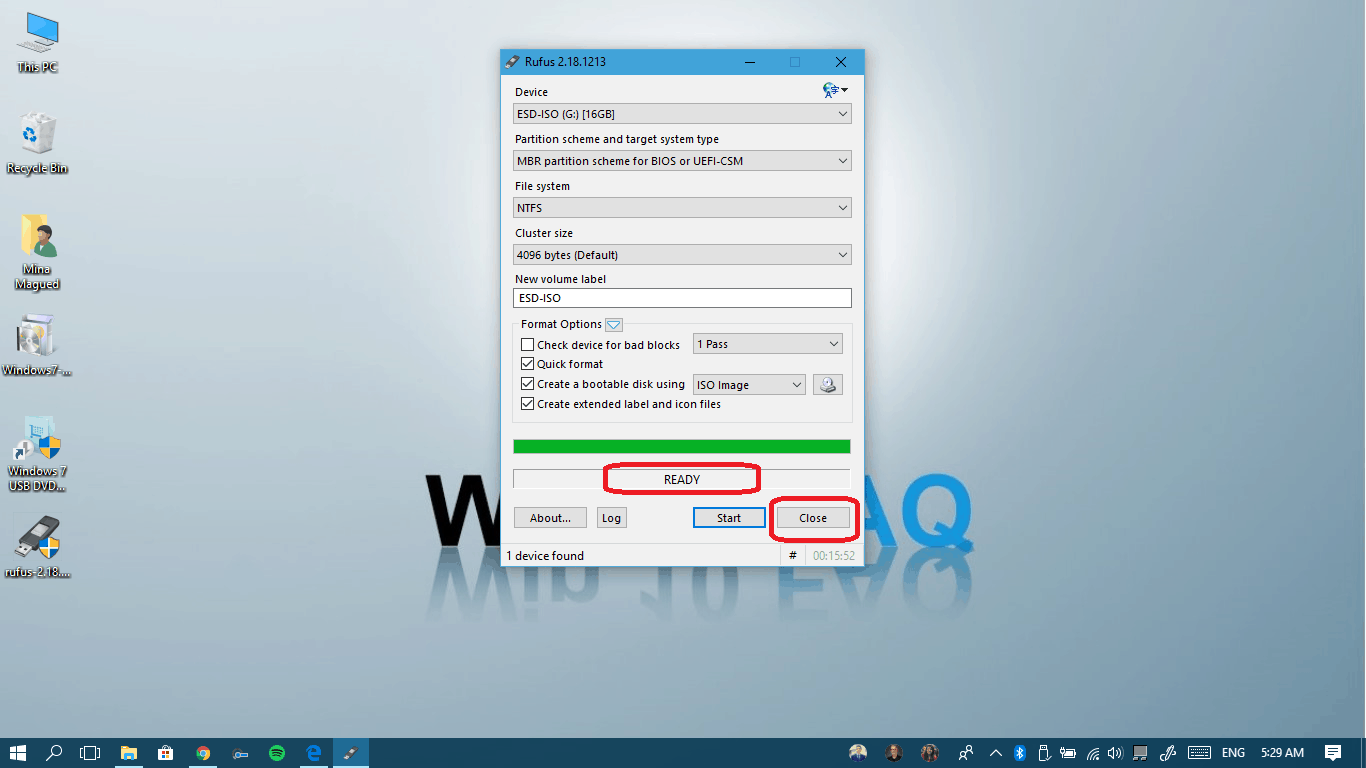
- Once it says READY, it means your pendrive is now ready. Click Close and feel free to unplug and use it.


Method III: Using Command Prompt (CMD)
This method doesn’t need any downloaded or installed apps, all the process can be done through the command line (CMD) program. Follow me and you’ll be able to do it.
- Don’t forget to plug your Pendrive and keep in mind its storage capacity, it will help you recognize it.
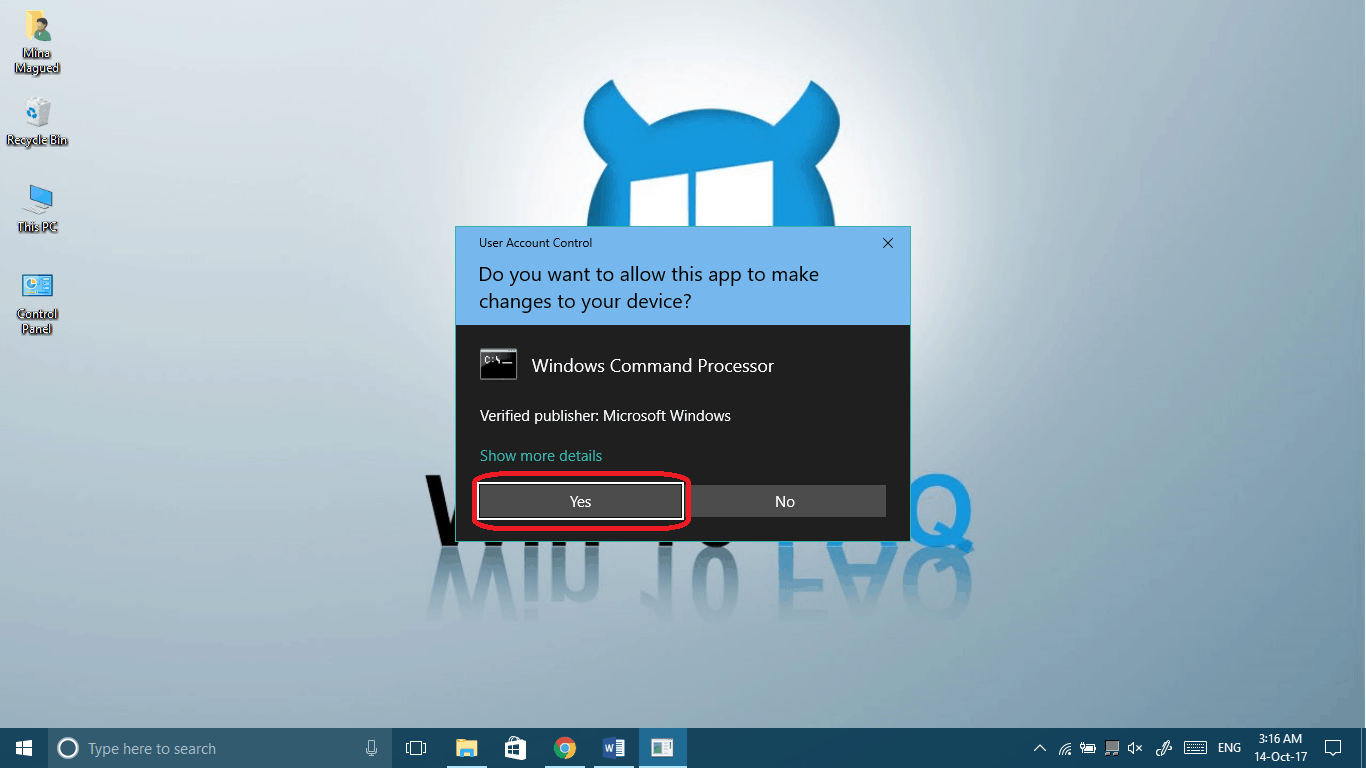
- Type “cmd” in your start menu, right-click on Command Prompt and choose Run as administrator.
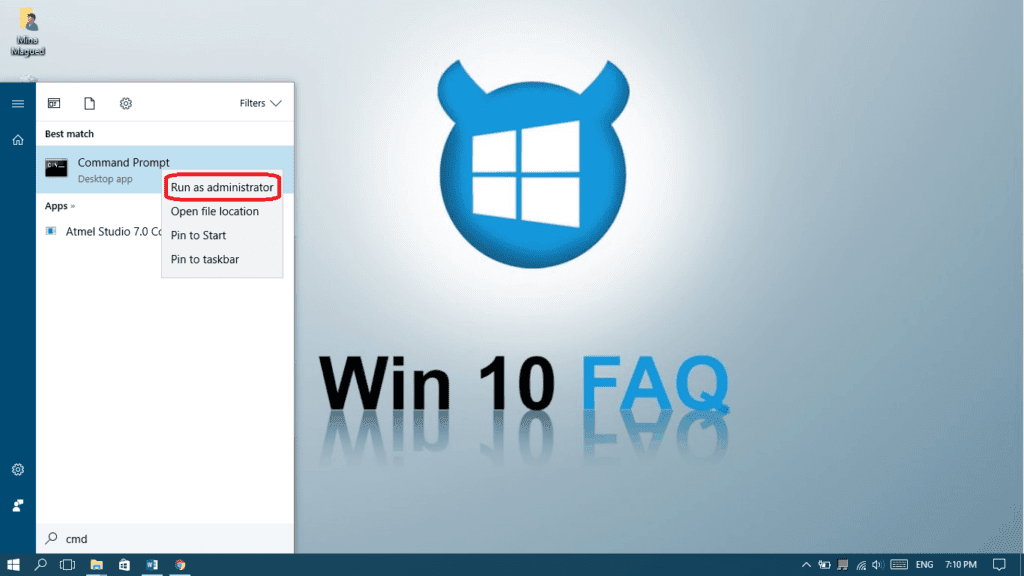
- Click Yes to give it permission.
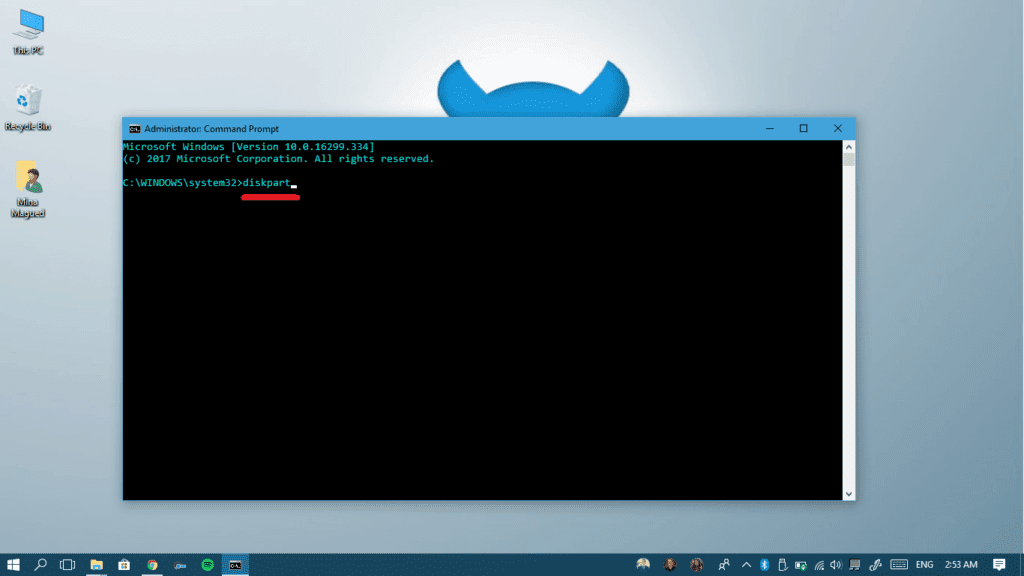
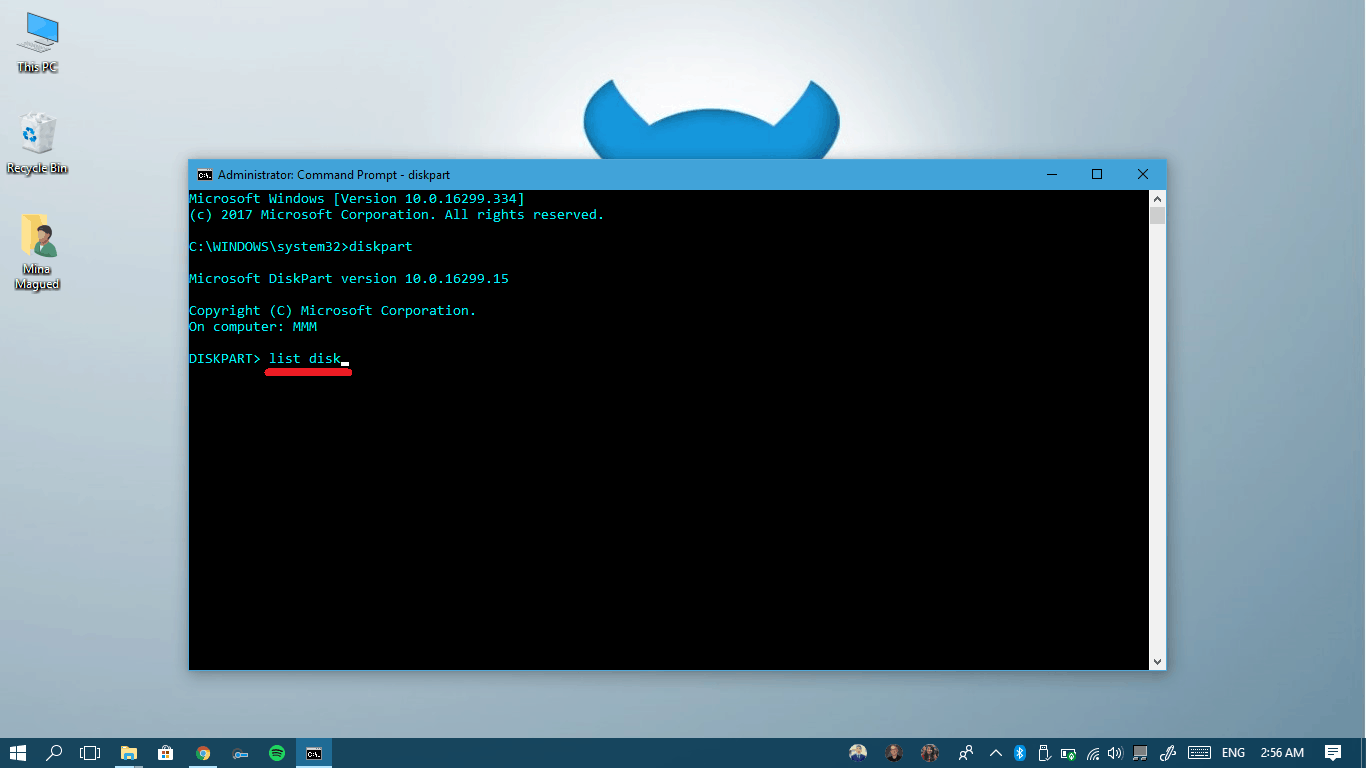
- Type diskpart in the command windows and then press Enter, this will launch Diskpart – a program inside the CMD interface that will create our bootable pendrive.
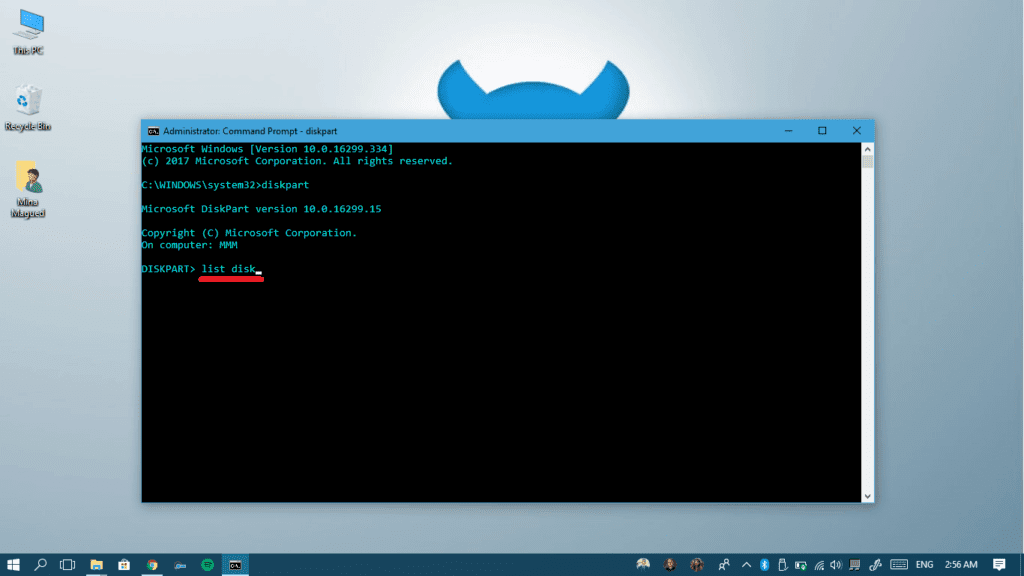
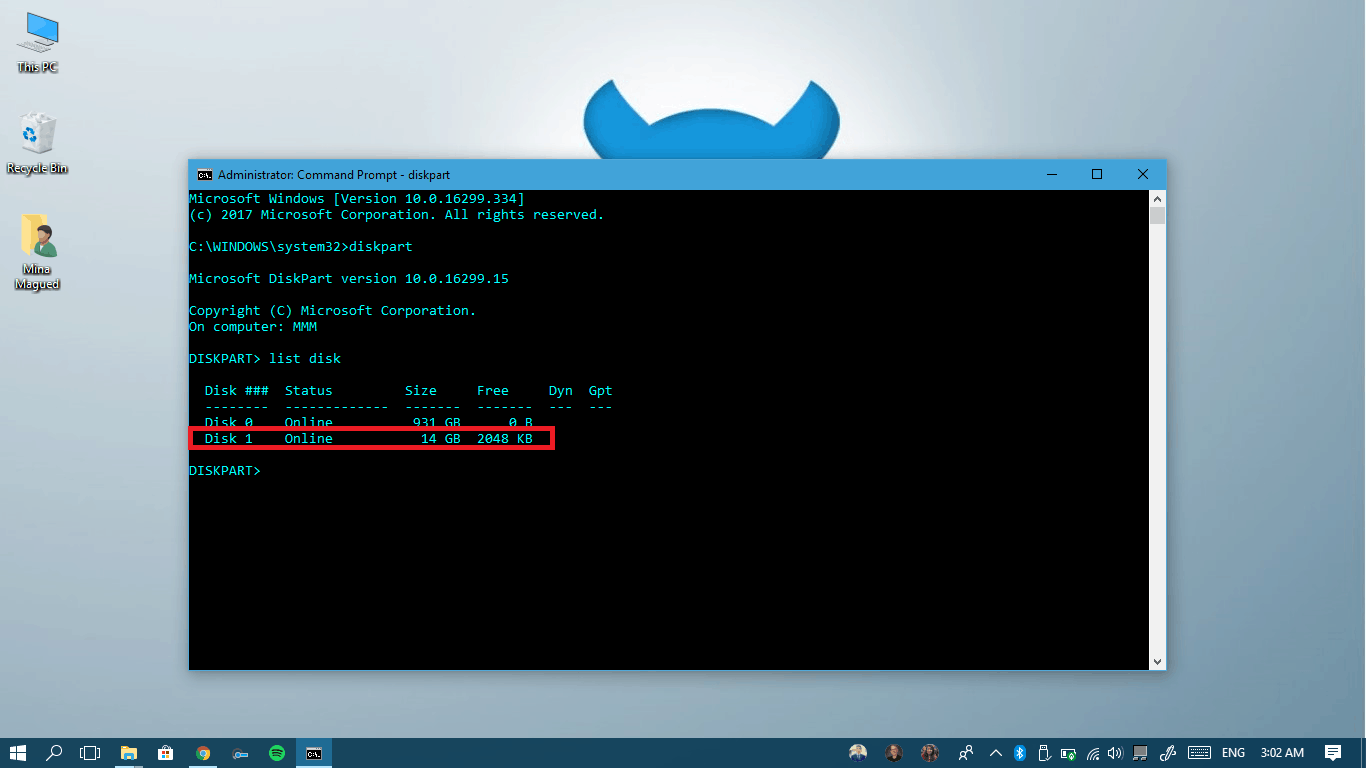
- Once the program launches (it take a couple of seconds), type list disk to view all the active storage devices connected to your computer (Hard disk, USB drives and others).
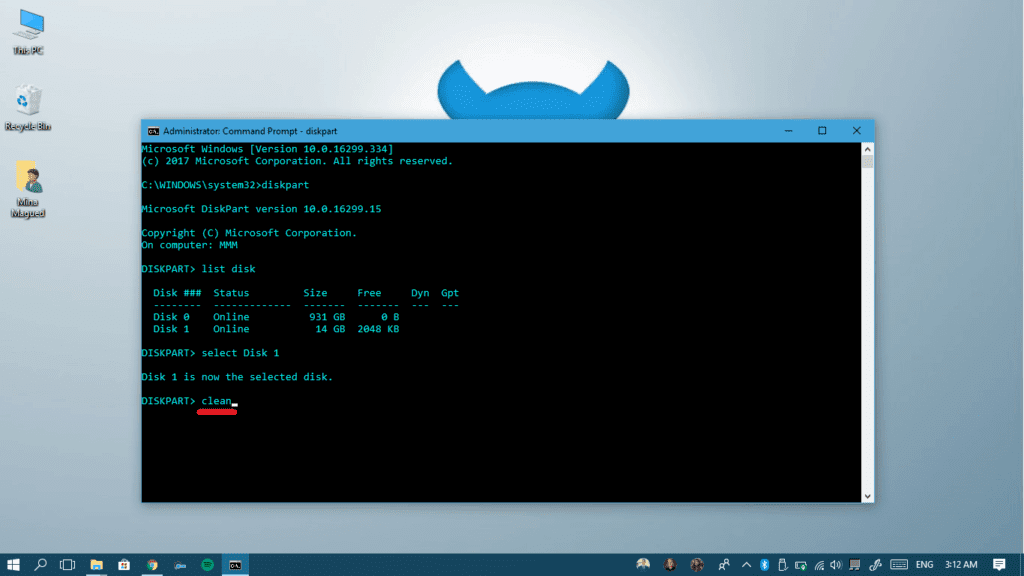
- In my case, Drive 0 is the internal Hard Disk, and in most cases, Drive 0 is you primary storage device. So obviously, my pendrive is Disk 1, it’s the 16 GBs one (the actual size is always a little smaller). That’s why I recommend connecting the pendrive your want to burn only, because it will usually be Disk 1 and you’ll avoid confusion and data loss.

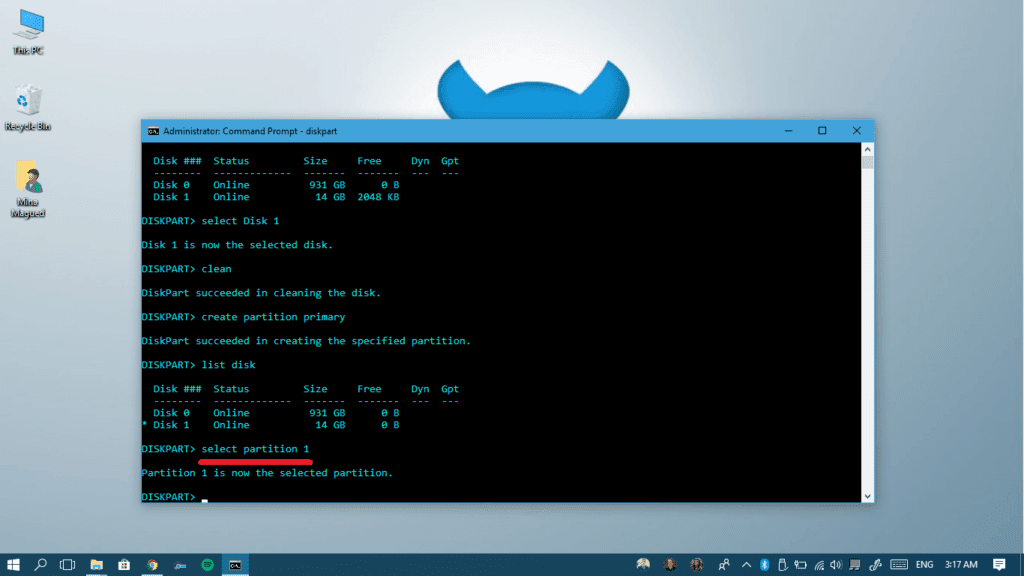
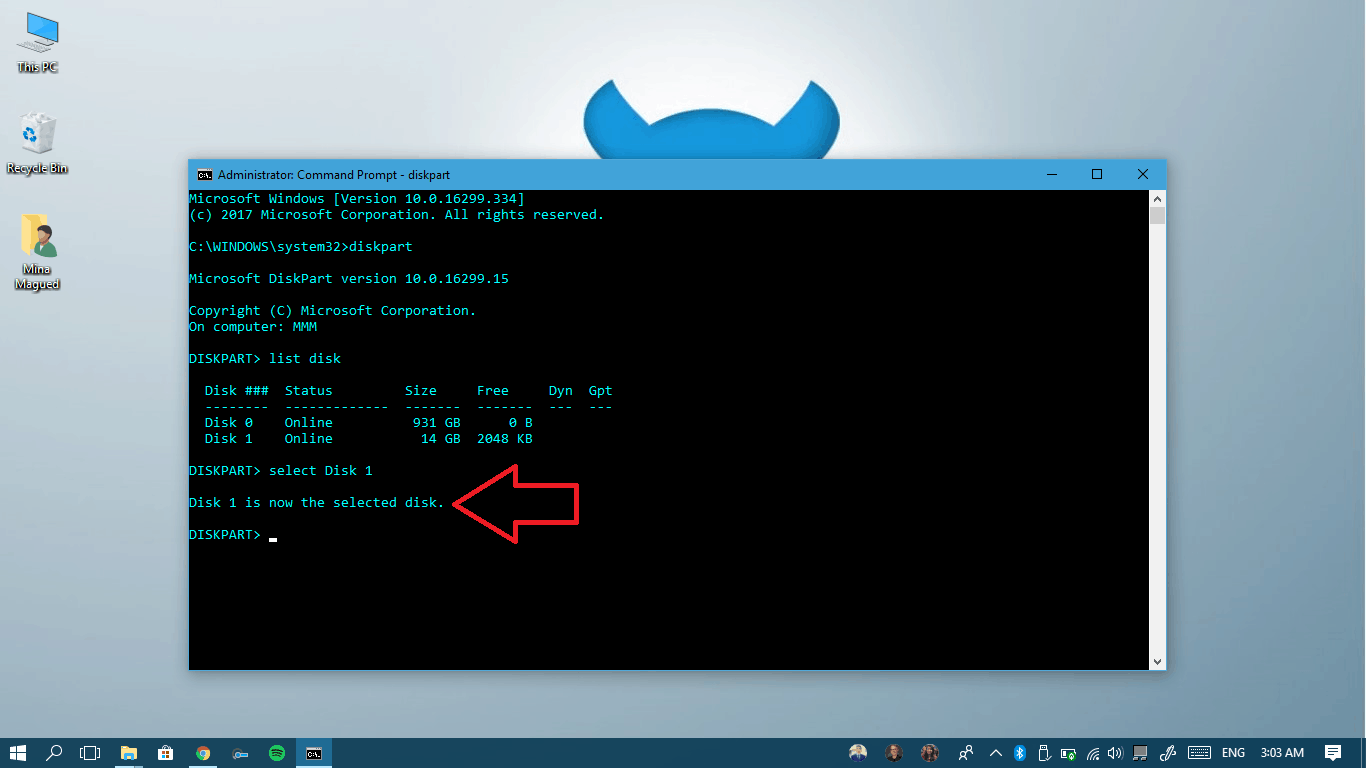
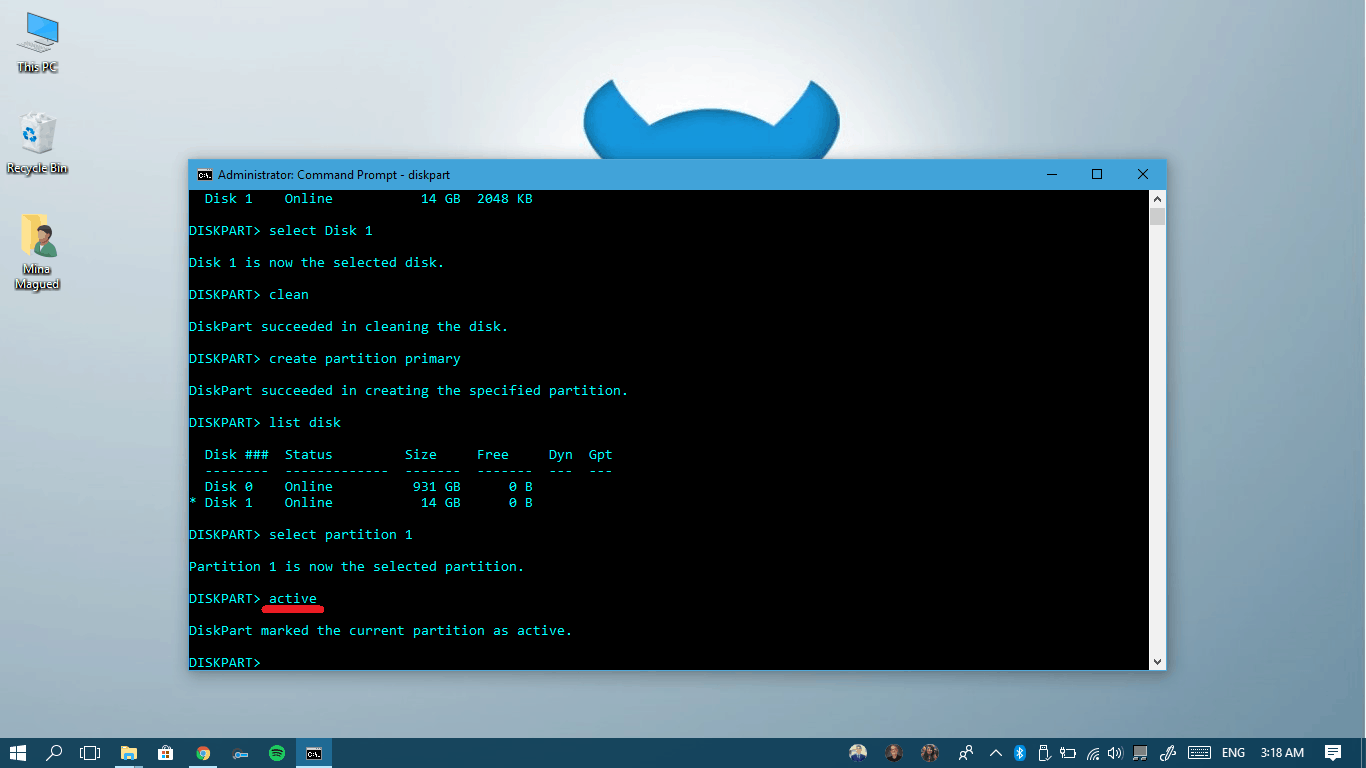
- Let’s type select Disk X (replace X with the correct number for you!) so that Diskpart knows what disk you will be controlling in the next few steps. Hit Enter.

- As you see, Diskpart is telling you that you’ve successfully selected Disk 1.

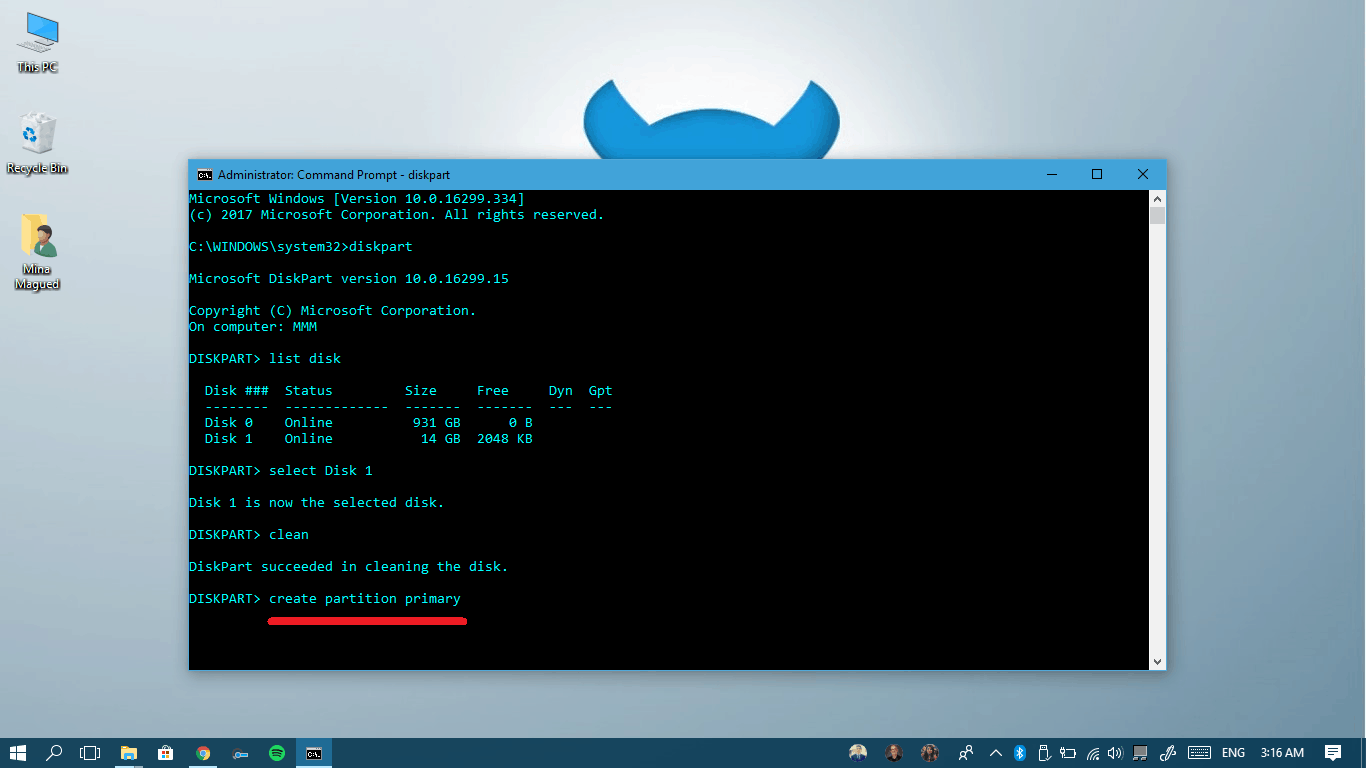
- Type Clean and press Enter, this will erase all data on your pendrive so keep a backup if there’s something you want to keep.
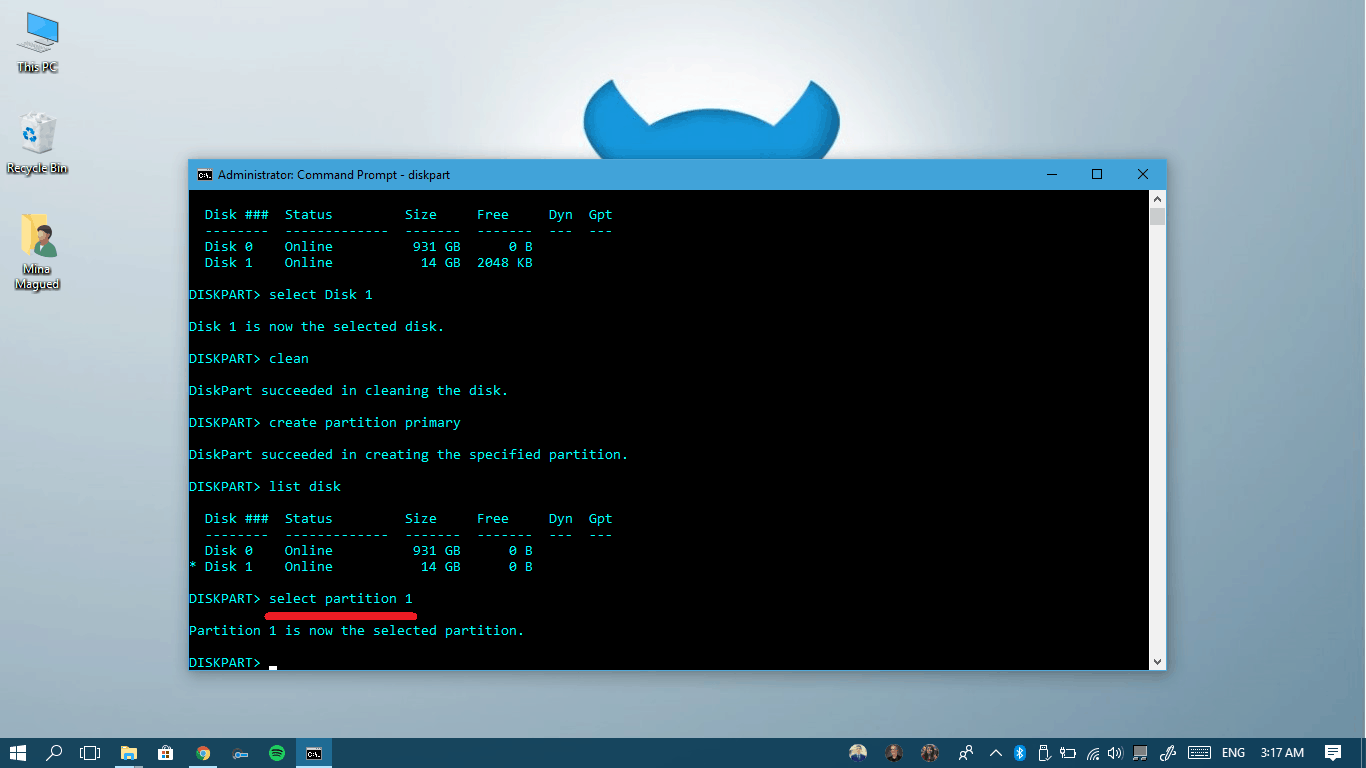
- Once the drive is cleaned, space you got will be recognized as unallocated by the system, which means it can’t use it. That’ why we will create a partition using this space: so type create partition primary and then press Enter.

- By default, the created partition will be recognized as partition 1. That’s why you will have to type select partition 1 to keep working on it.
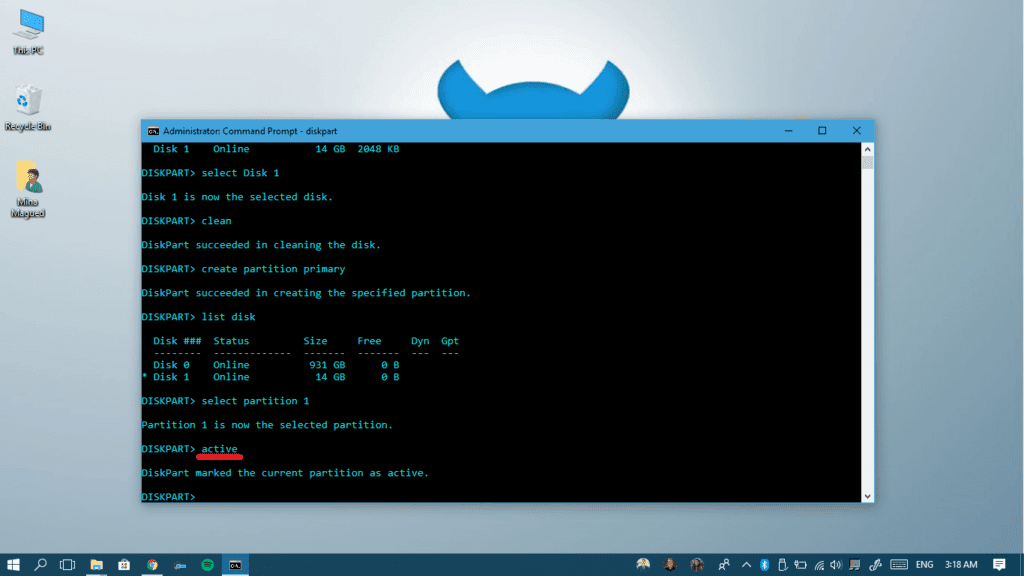
- Let’s type active and hit Enter to activate this partition.
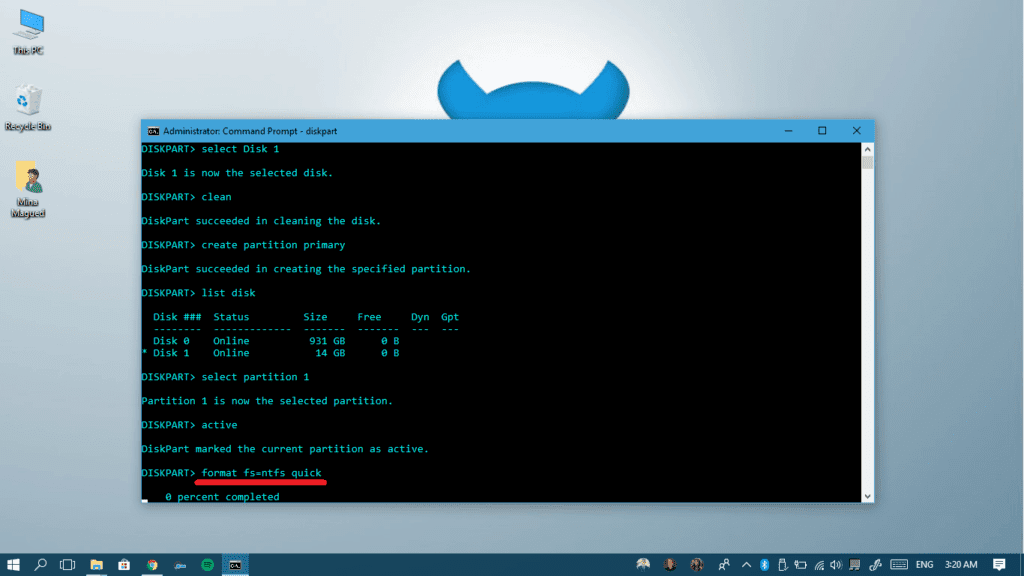
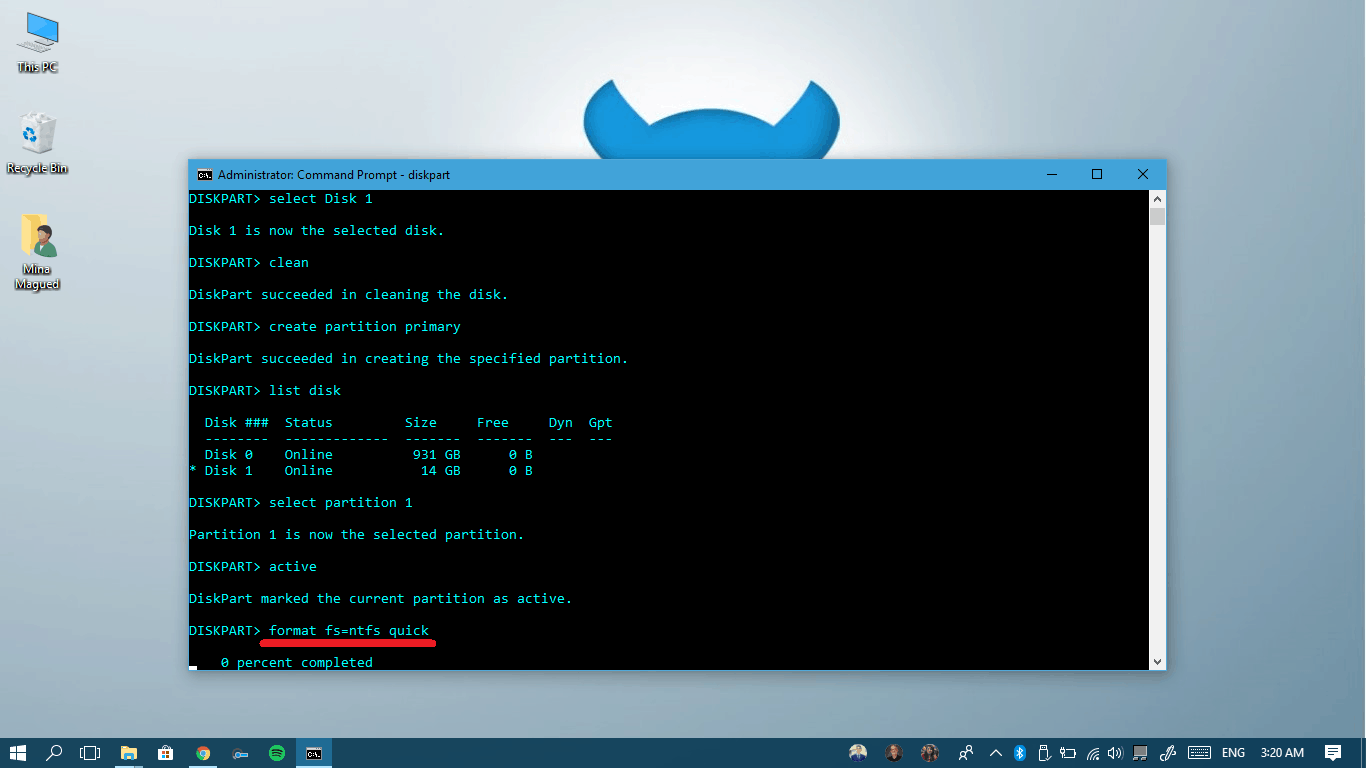
- Now, we will have to format it in NTFS format. I know we erased the data from the pendrive before, but we are doing something different now: we are formatting the partition we created using the empty space and defining its type as (NTFS). So, type format fs=ntfs quick and press Enter. You will have to wait a while after performing the step until the formatting finishes.
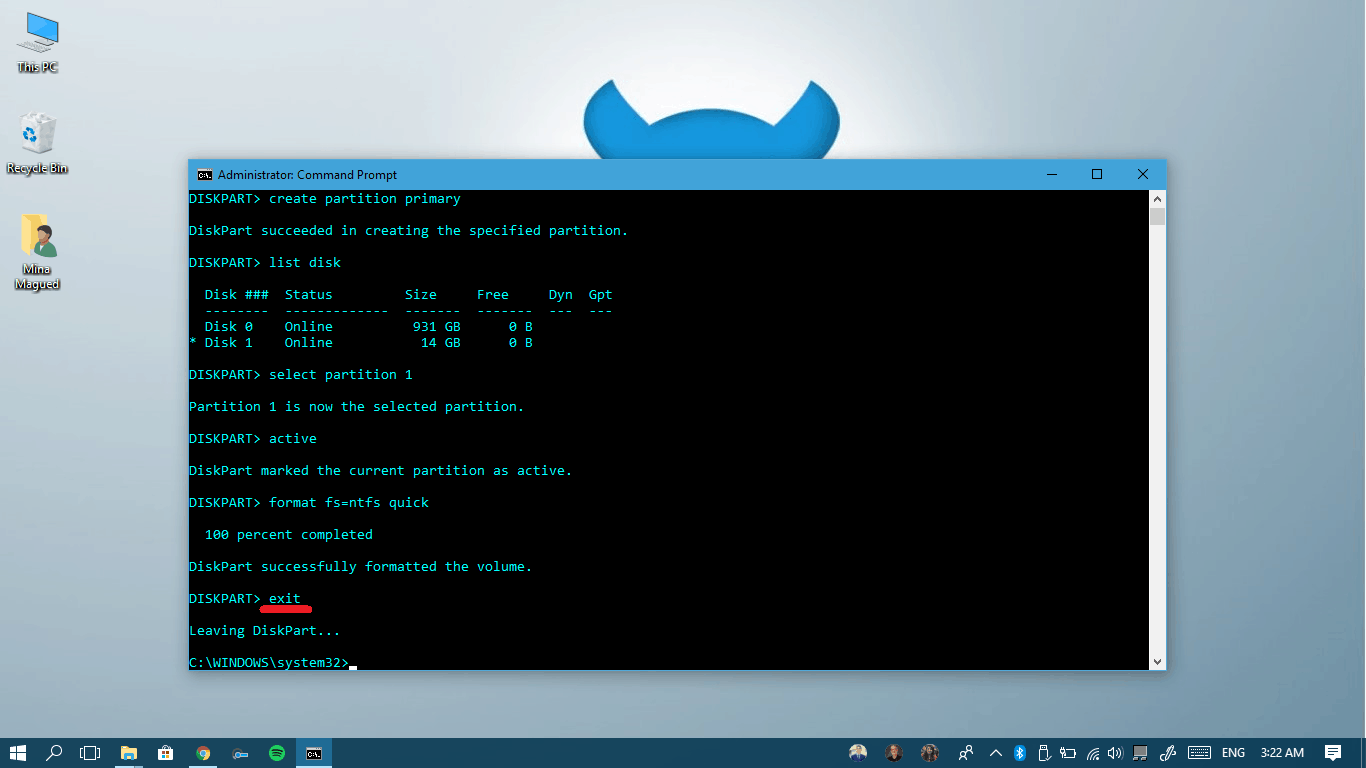
- Once it’s successfully formatted, type exit to leave Diskpart then exit your CMD windows. Now your pendrive is formatted and bootable but it just needs the installation files copied to it.

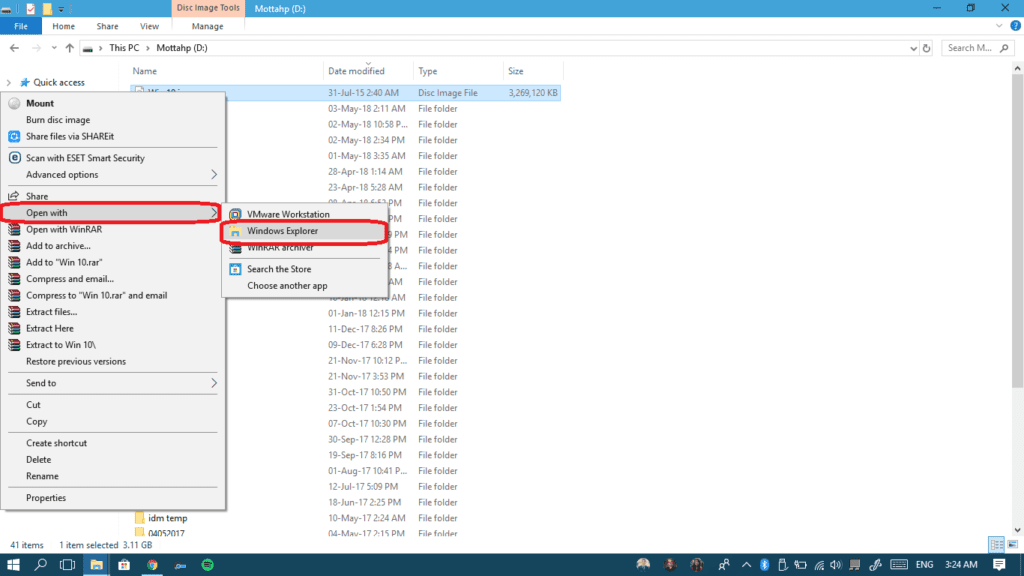
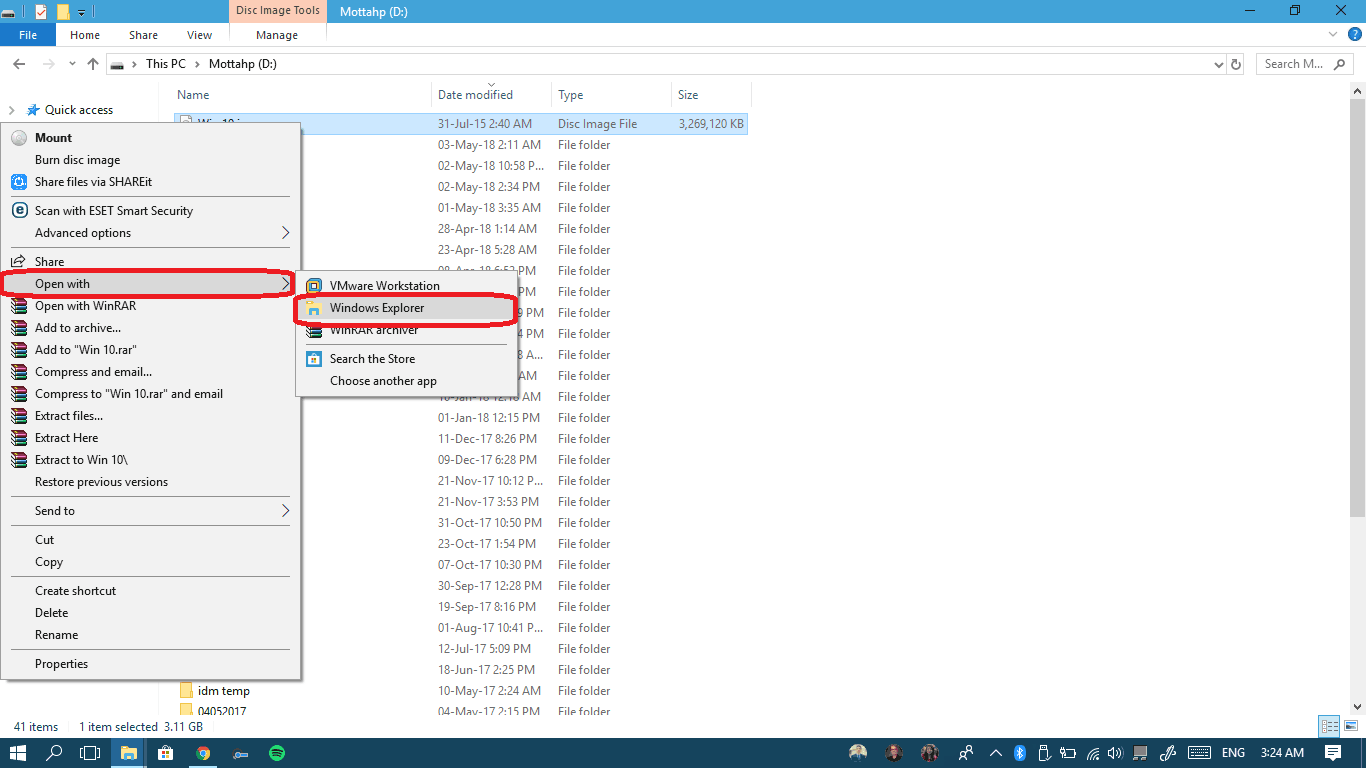
- Browse to your iso file, right-click on it and then choose Open with > Windows Explorer. Your computer now extracted the files temporarily in a new drive that’s virtually created.
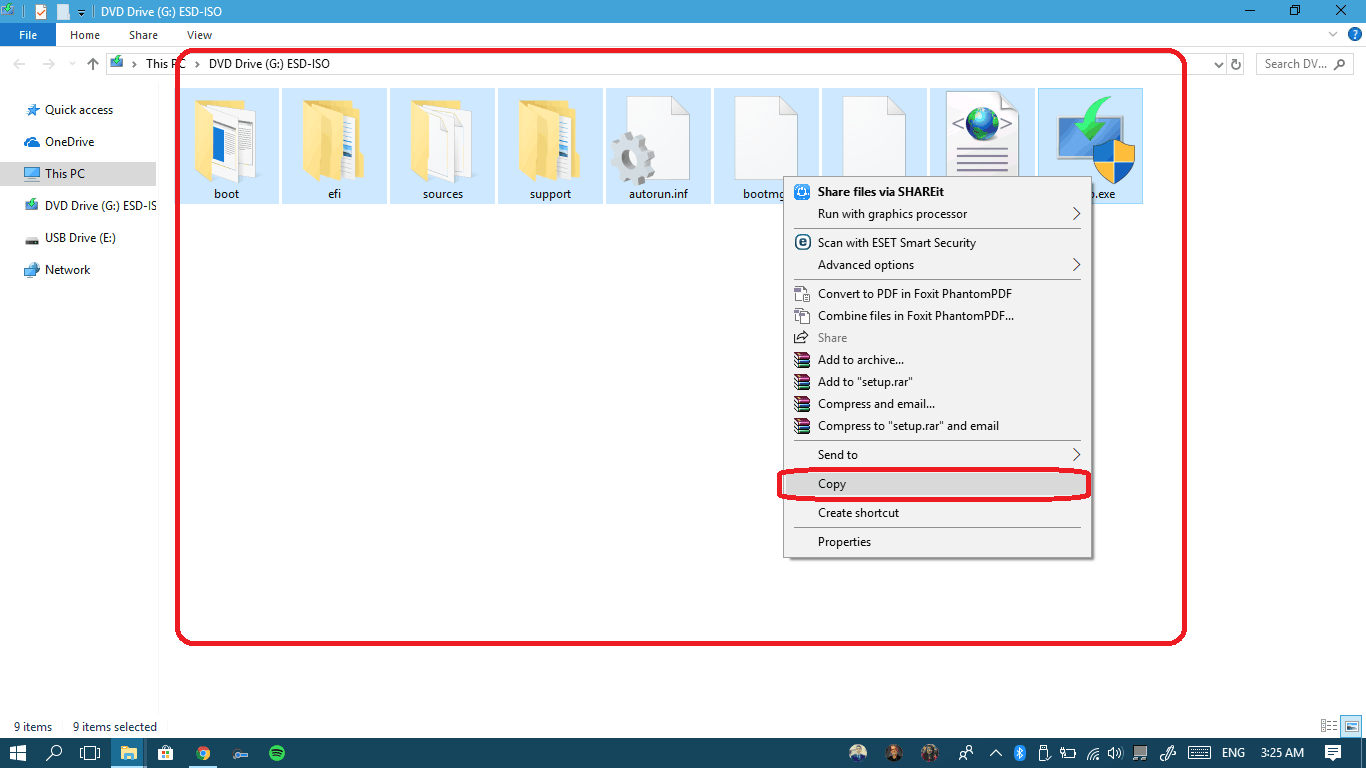
- Select all the files and folders inside the virtual drive that will pop-up automatically, right-click and choose copy.

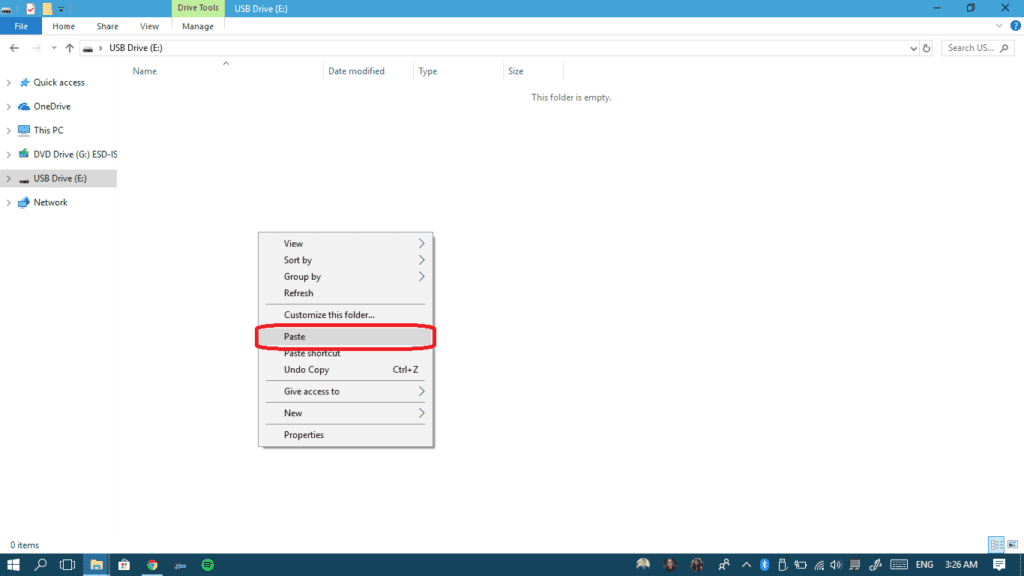
- Now open your empty pendrive, right-click in it and select Paste.
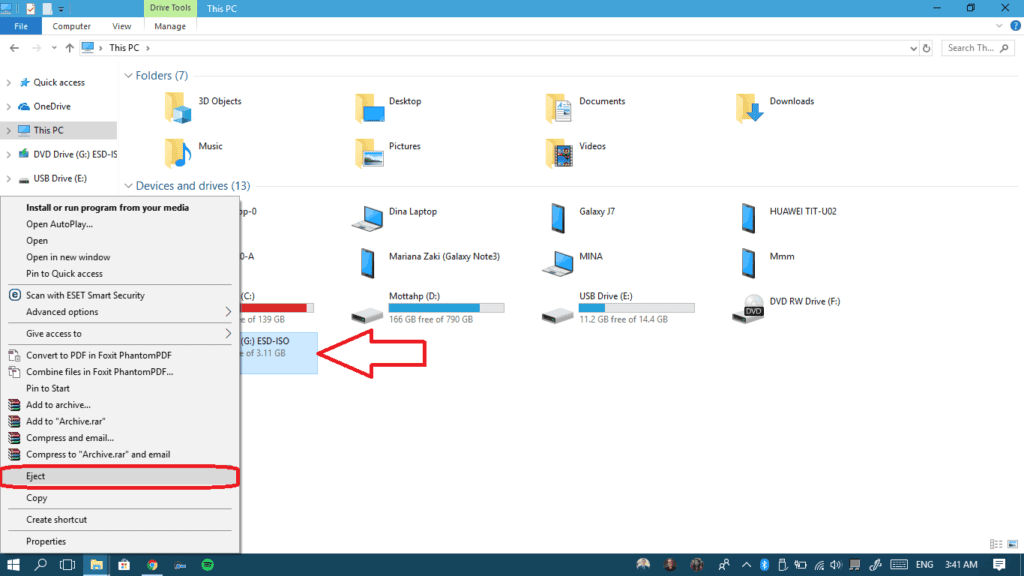
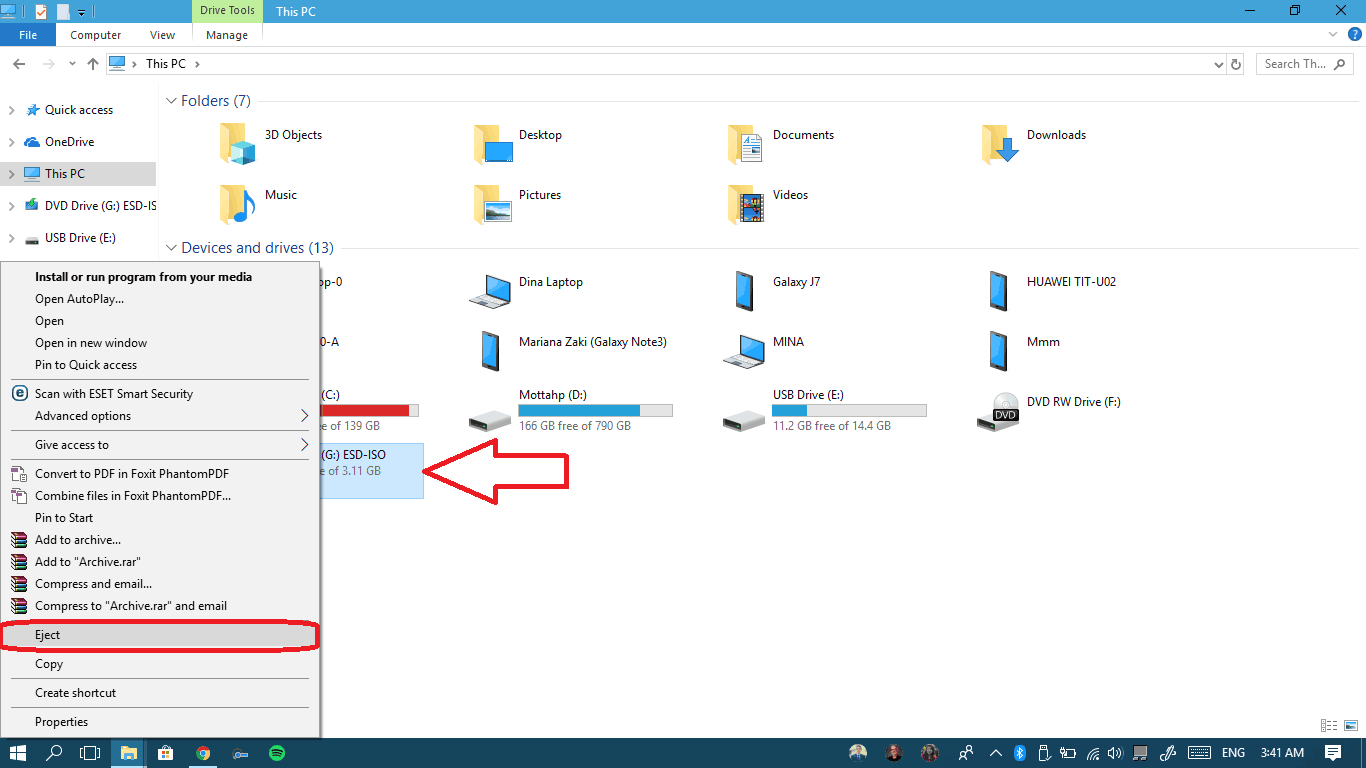
- Eject the virtual drive we extracted the files into to get rid of it.
- Now your pendrive is ready! Insert it to any computer before starting it up to boot from it.


Personal Recommendation
To be honest, I would recommend using Rufus because it’s way faster and lighter than Microsoft’s tool and it requires no installation. But if you’re a geek like us that prefers using the CMD screen to perform your tasks, then method III will be the best for you.
Feel free commenting at the section below and I’ll be happy to get in touch with every one of you… Cheers!
To create bootable pendrive I followed some tricks from online. But I think there was some mistake in that procedure. After that, I got some ideas from this article and applied 2nd method. This procedure works properly.
As per my view, we have to click and select the USB drive in the device. Then select “Create a bootable disk using”.After that, right-click on the cd rom symbol and select the ISO file. From this blog, I gather so many information about this topic. Which will helpful for my work.