What is Windows Modules Installer Worker?
At the latest Windows 10 build, Windows Modules Installer worker or TrustedInstaller.exe is a Windows service that enables automatic installation, modification, and removal of Windows updates and optional components. It’s pretty important to install and uninstall Windows updates, but as we know, Windows 10 is getting updated almost all the time. This makes your CPU usage and RAM usage higher and finally your internet connection slower.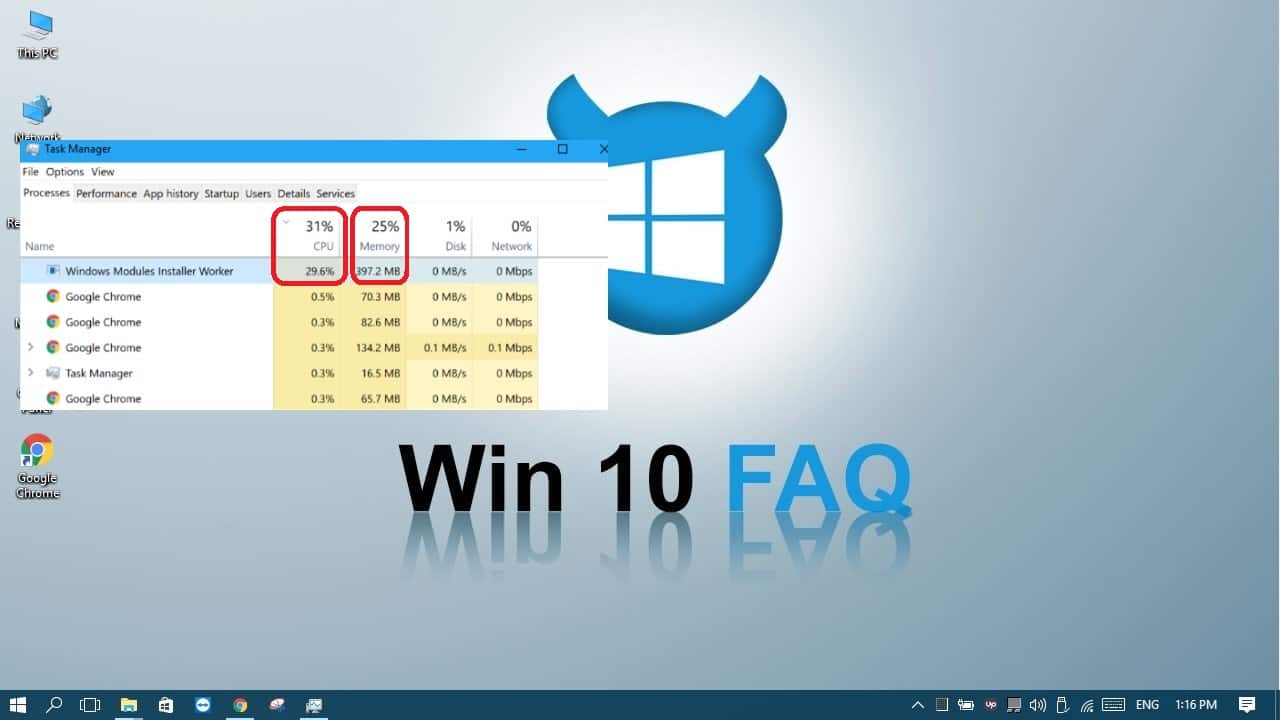
So, here’s how we can control it!
Method I: Set your connection as metered connection
This is the fastest solution for the problem but you have to apply the next steps for every connection you’ll be using. That’s why it’s not a permanent solution that you apply only once.
What is a metered connection?
A metered connection is a connection on a limited data plan. That can happen on a mobile hotspot when the data plan is limited, but also when home internet has a data quota that the internet provider imposes. Setting your connection as metered reduces data usage and gives you more control over it and here is the trick: we like to set ALL our connections as metered because that prevents Windows from downloading updates automatically.
Before following the next steps you need to know that on metered connections, no updates will be downloaded automatically, no apps will be updated automatically, Live Tiles on the start menu may stop downloading updates too and finally any sync processes for offline content may be stopped. We’ll help you know how to toggle it back anyway at the end of the guide.
Here’s how we set you connection as metered connection:
Click here if you are using Wi-Fi connection
Click here if you are using Ethernet connection
Set your Wi-Fi connection as metered connection
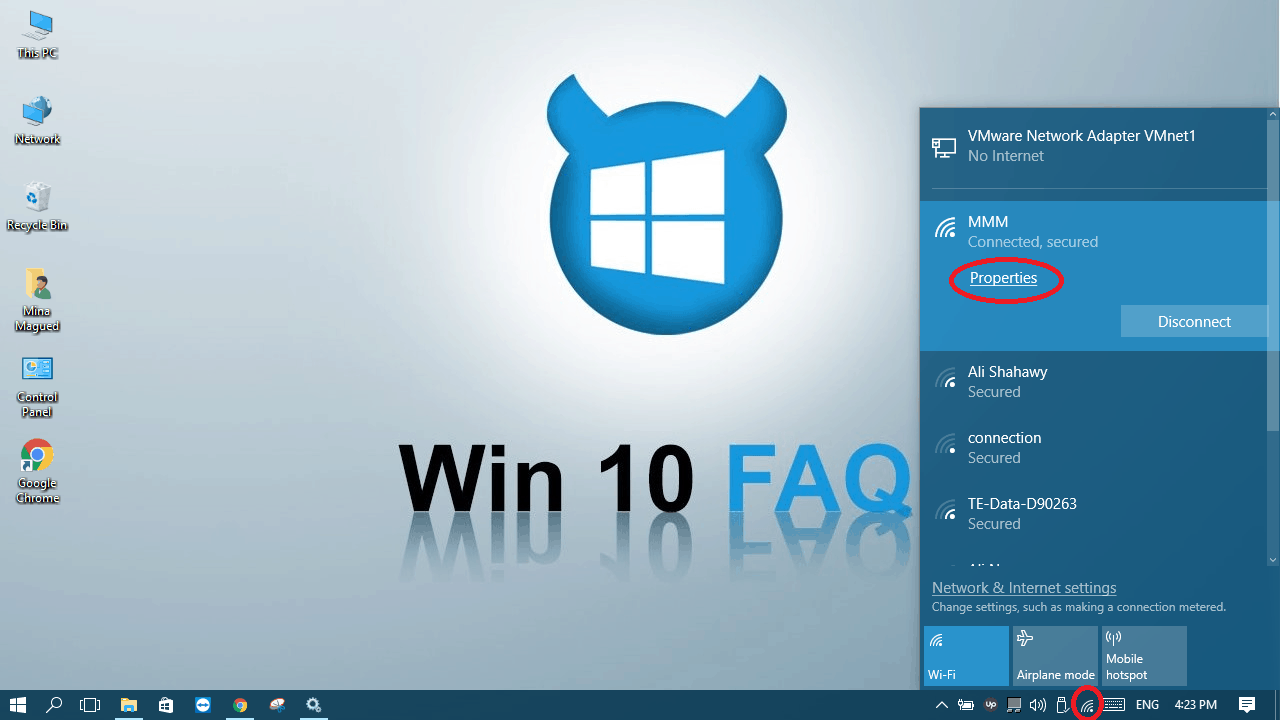
- Click on the Wi-Fi sign and select your Wi-Fi connection and click Properties.

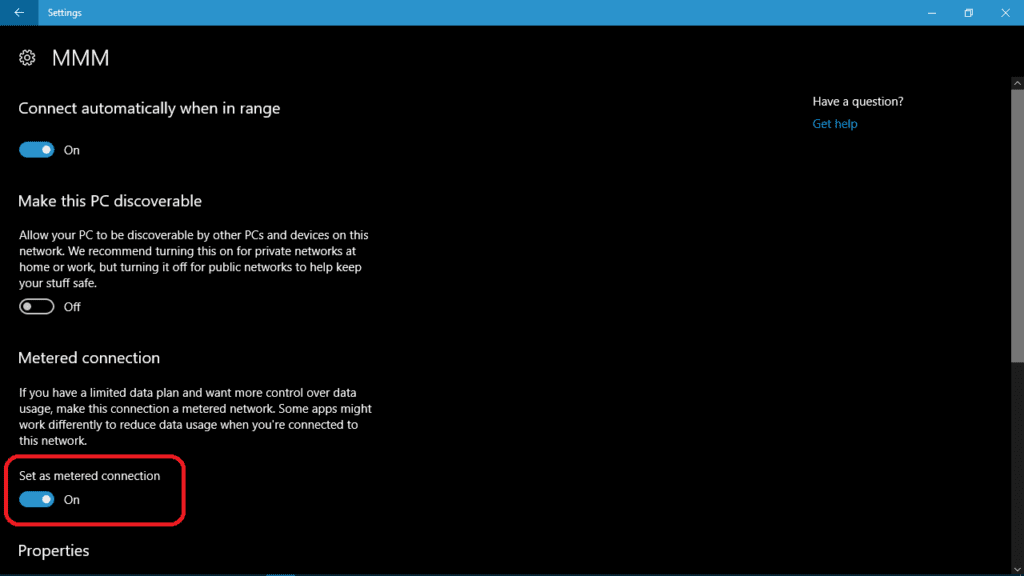
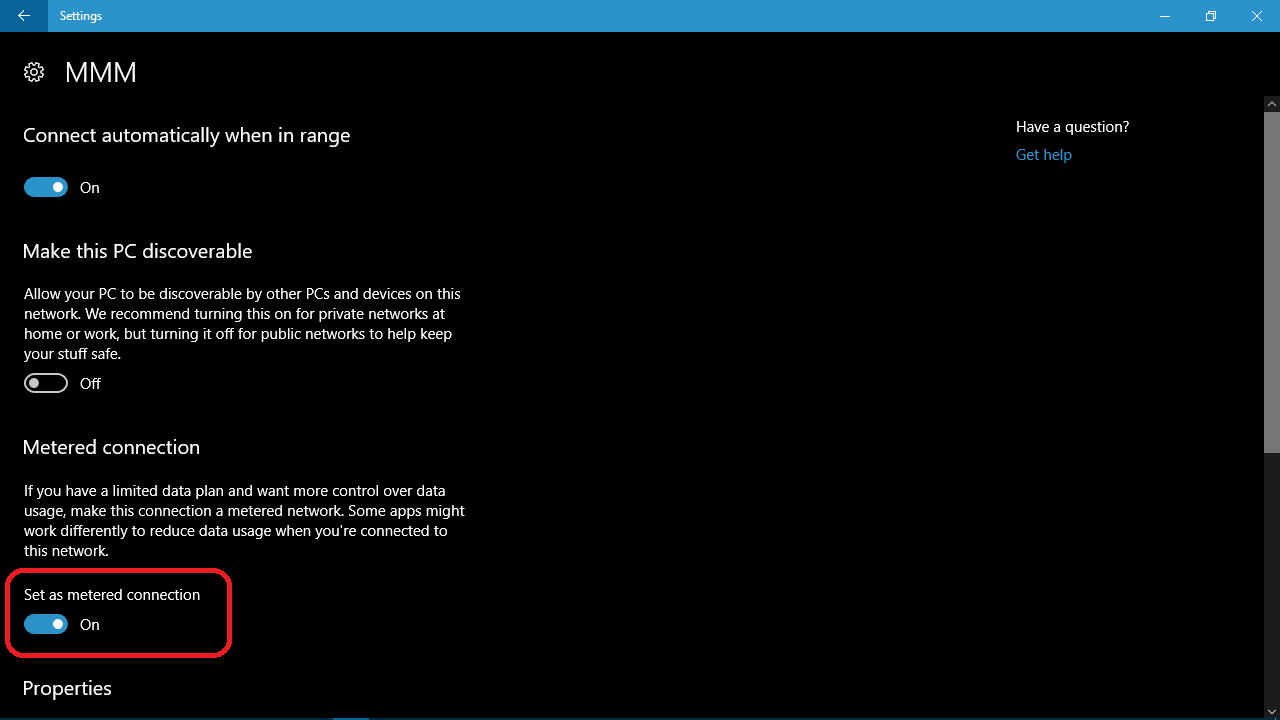
- Turn the Set as metered connection button On.
Set your Ethernet connection as metered connection
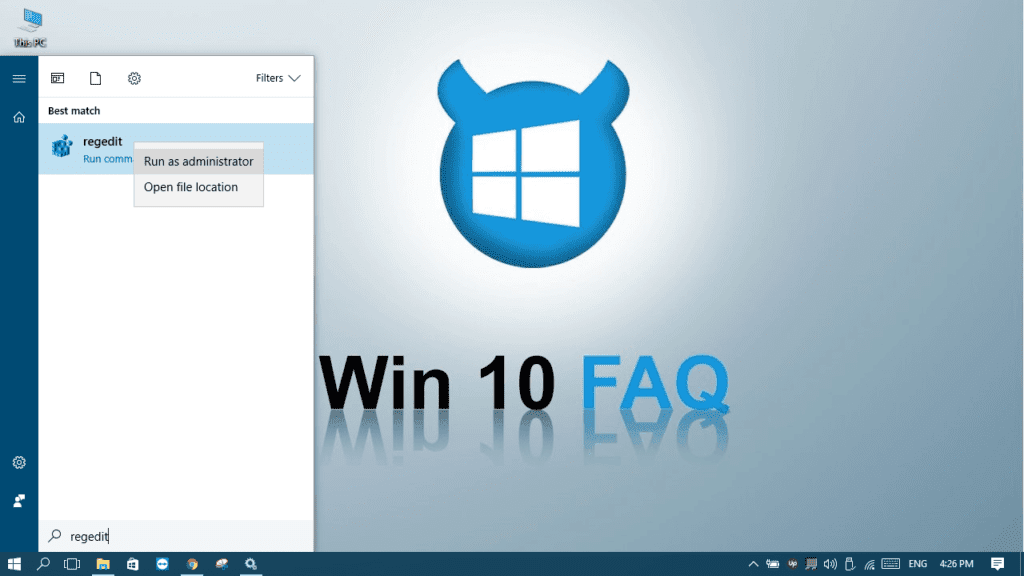
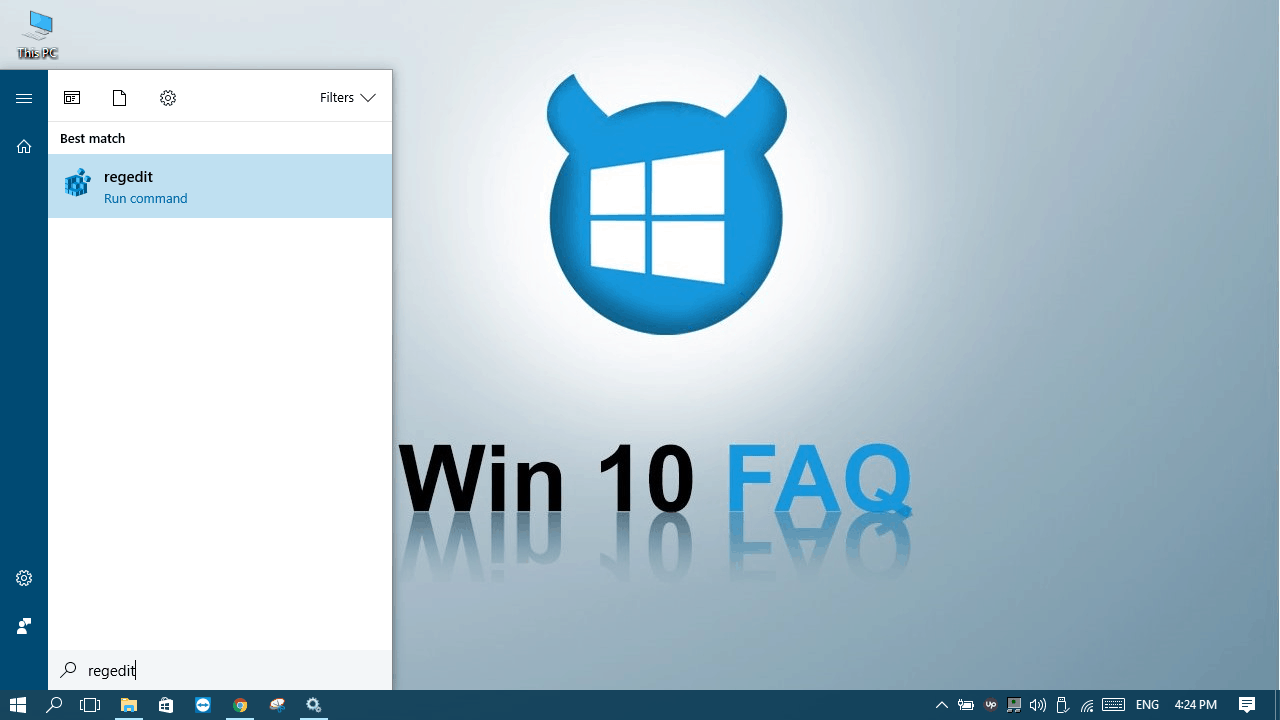
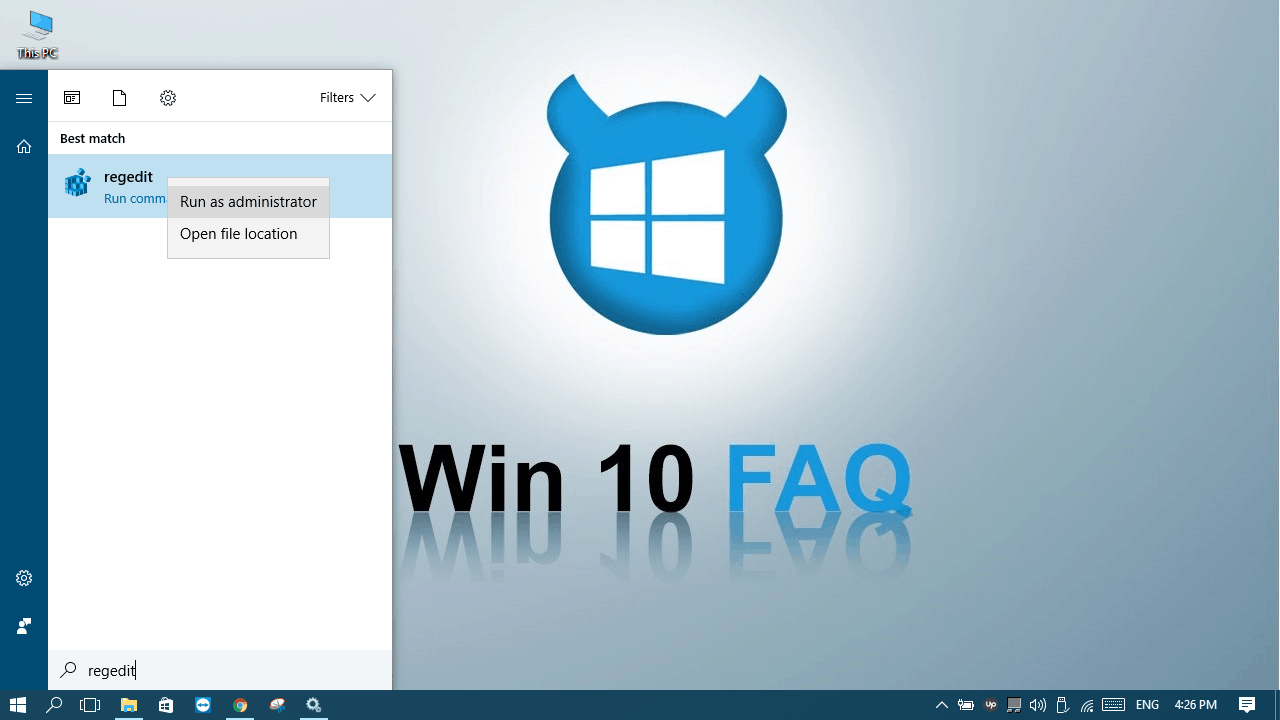
- Open Start Menu and type Regedit.

- Right-click on Regedit and select Run as administrator.
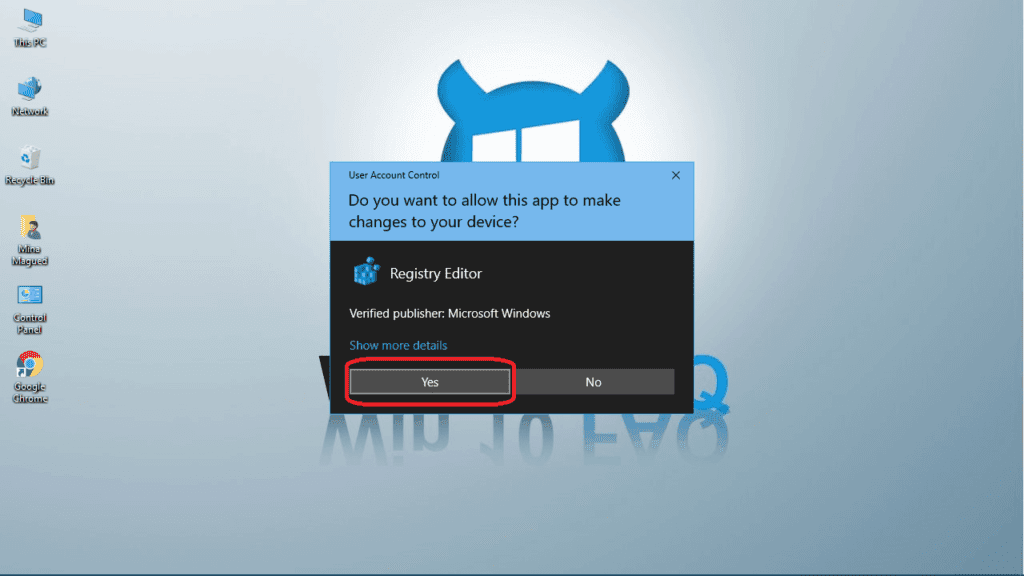
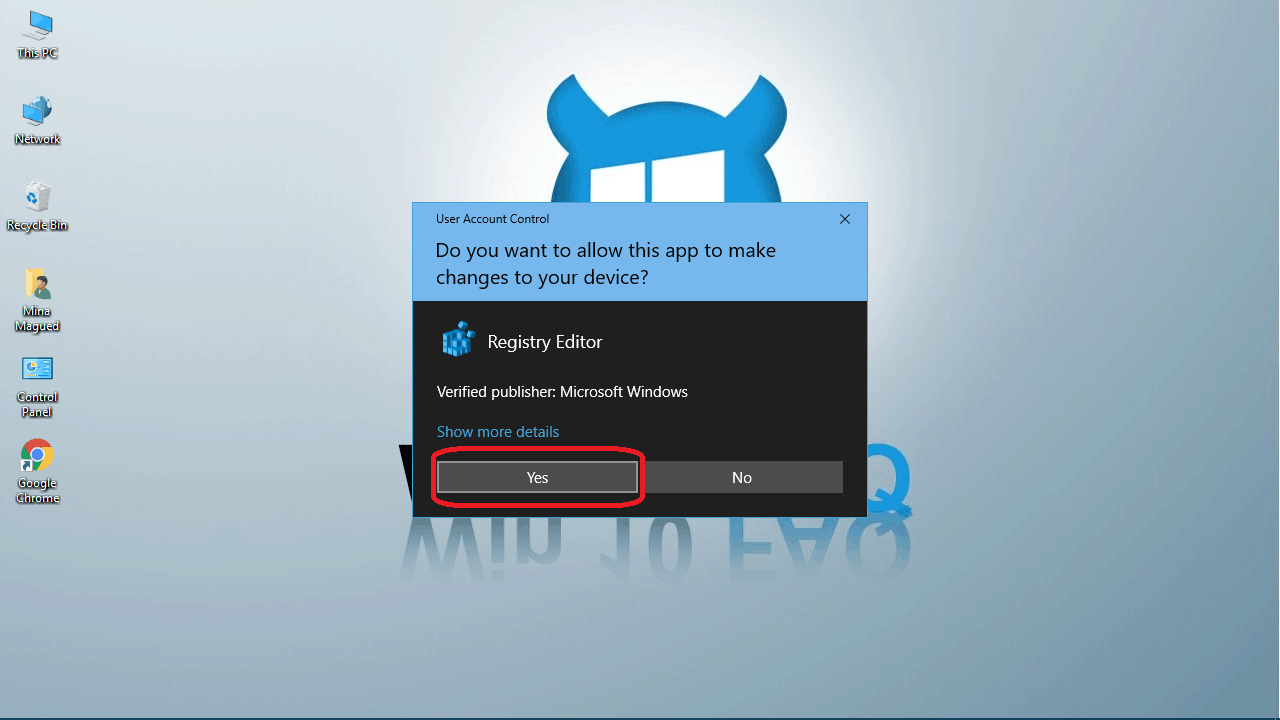
- Click Yes to allow the app to make changes to your device.
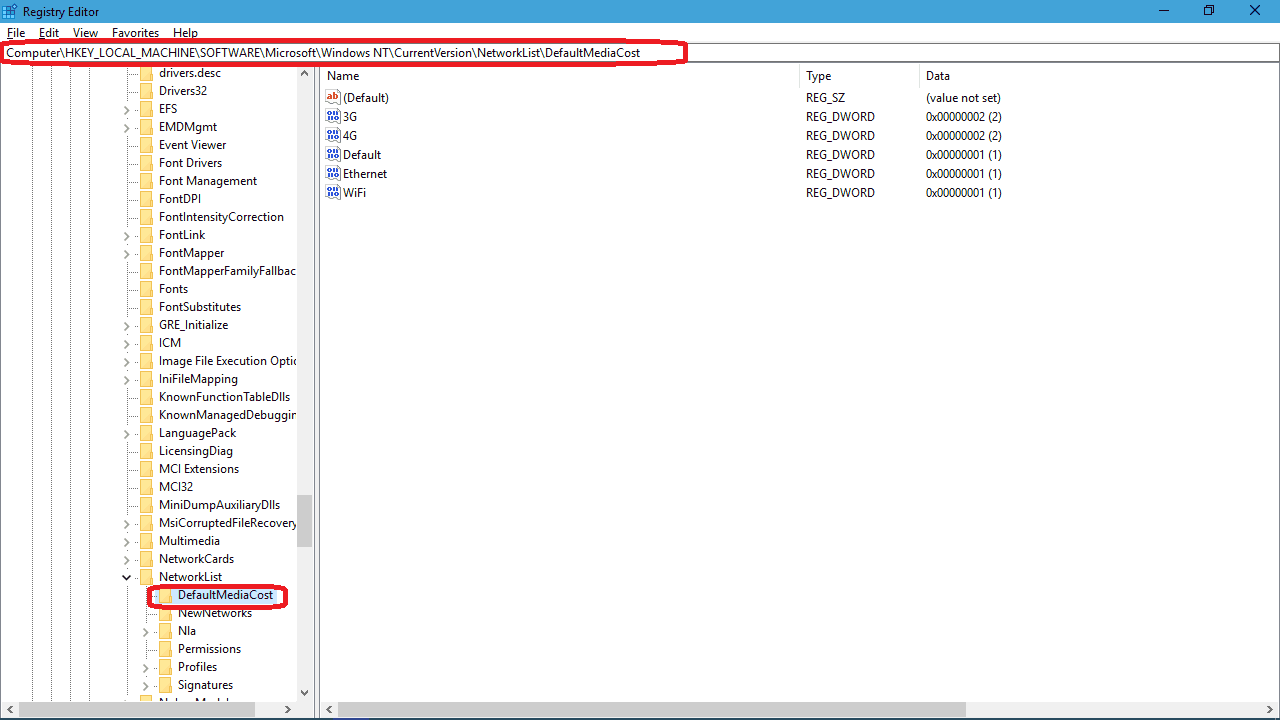
- In the left pane, go to HKEY_LOCAL_MACHINE > SOFTWARE > Microsoft > Windows NT > CurrentVersion > NetworkList > DefaultMediaCost. (You can copy and paste it in the top bar)
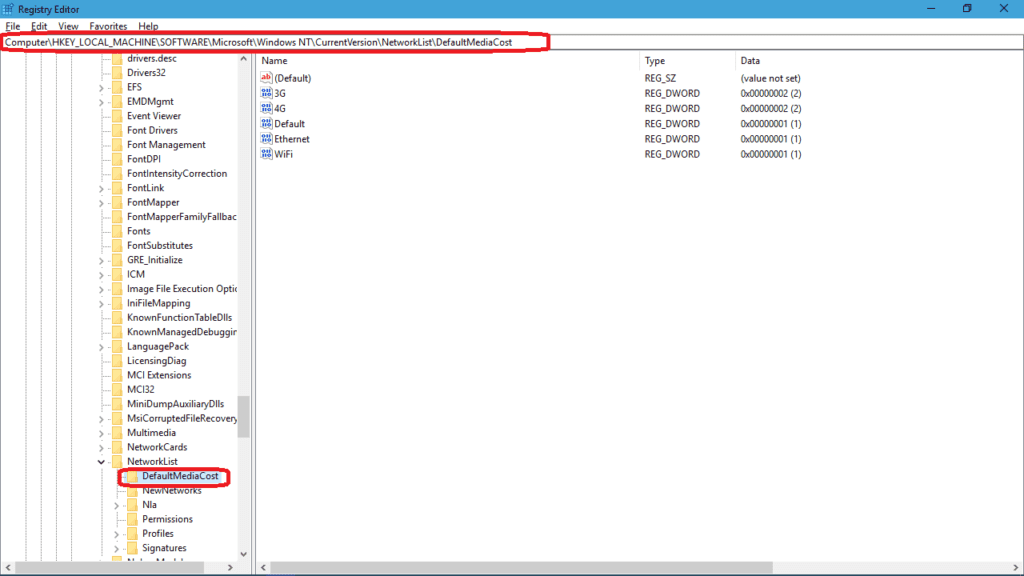
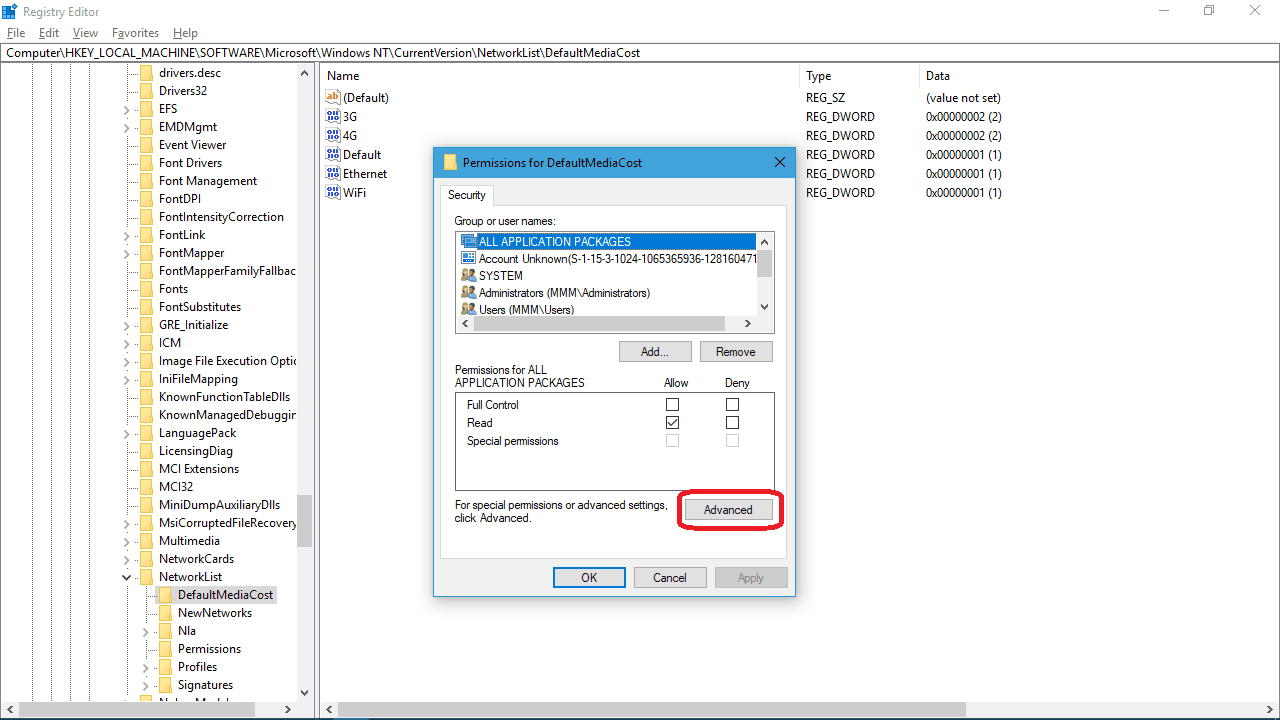
- Right-click on DefaultMediaCost and select Permissions.

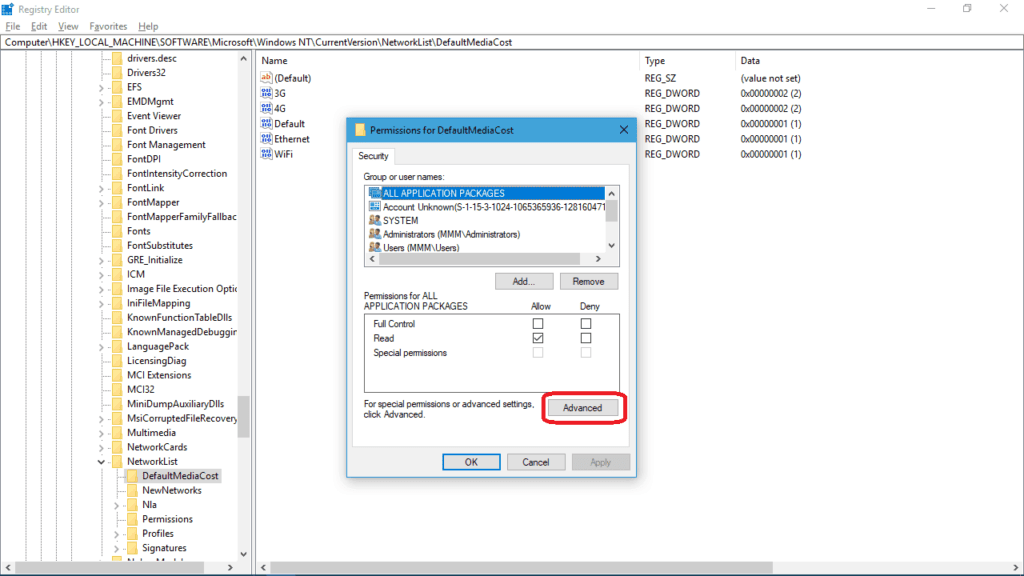
- On the Security tab, click the Advanced button.
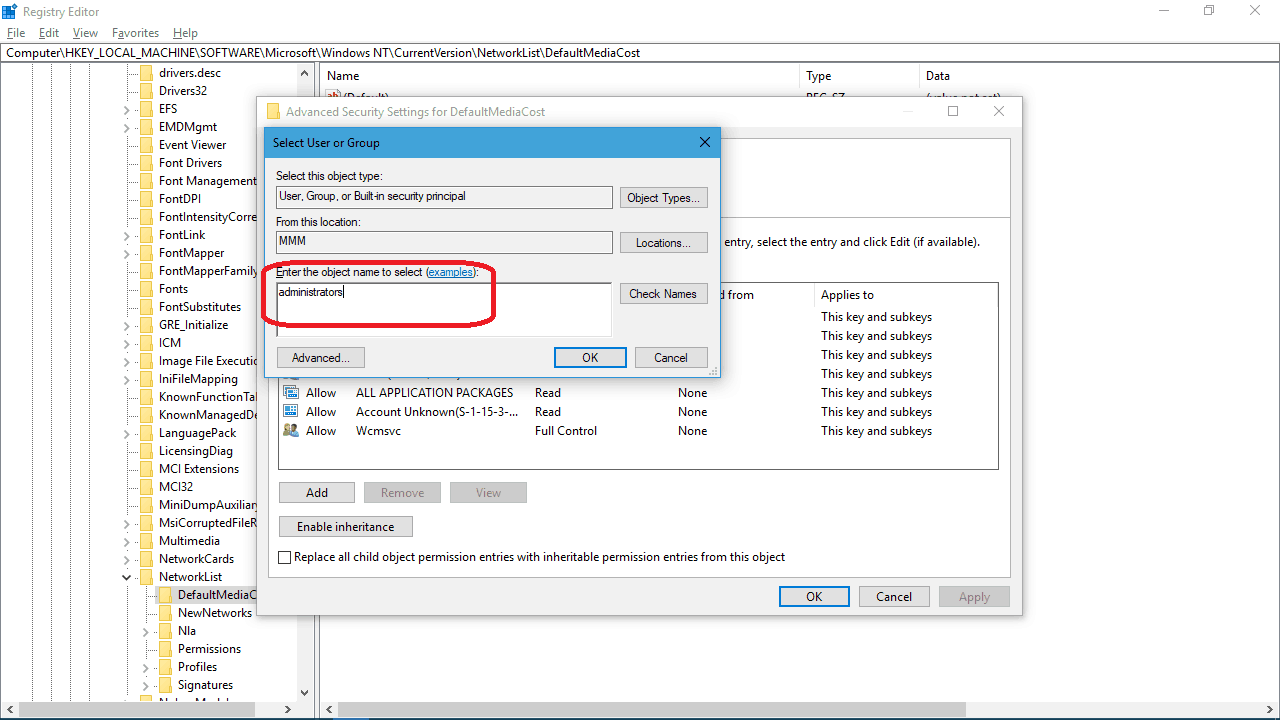
- Click on the change link next to TrustedInstaller.

- In the Enter the object name to select box type administrators

- Click the Check Names buttons to auto-complete the object name we desire and then click OK.
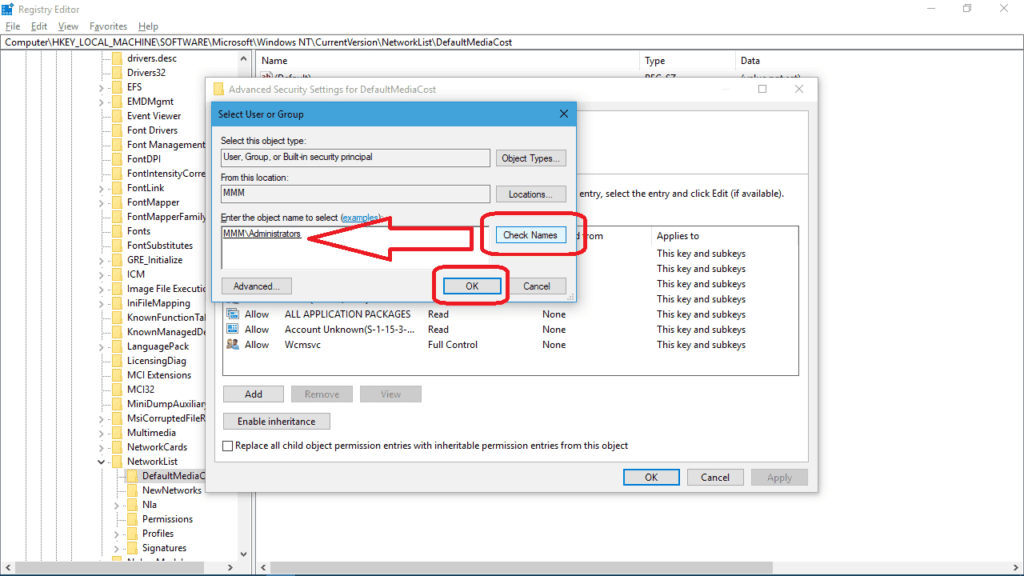
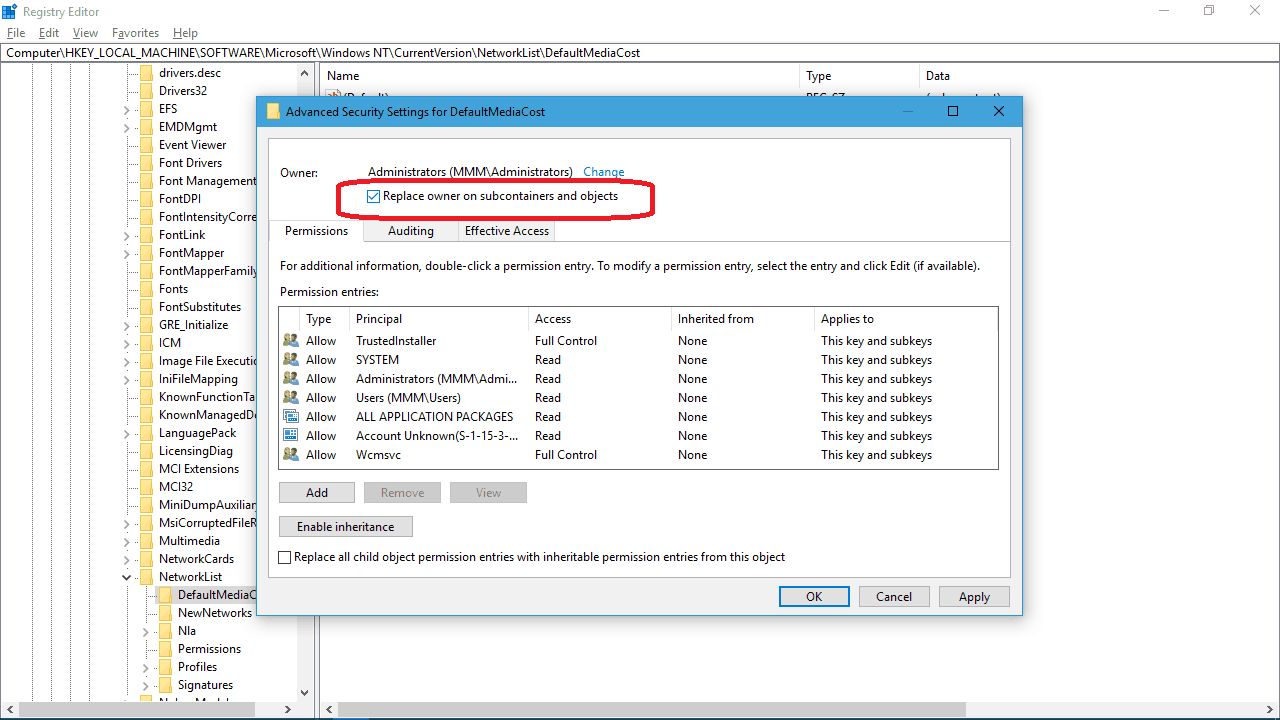
- On the Advanced Security Settings for DefaultMediaCost windows, check the Replace owner on subcontainers and objects.

- Click Apply and then OK.
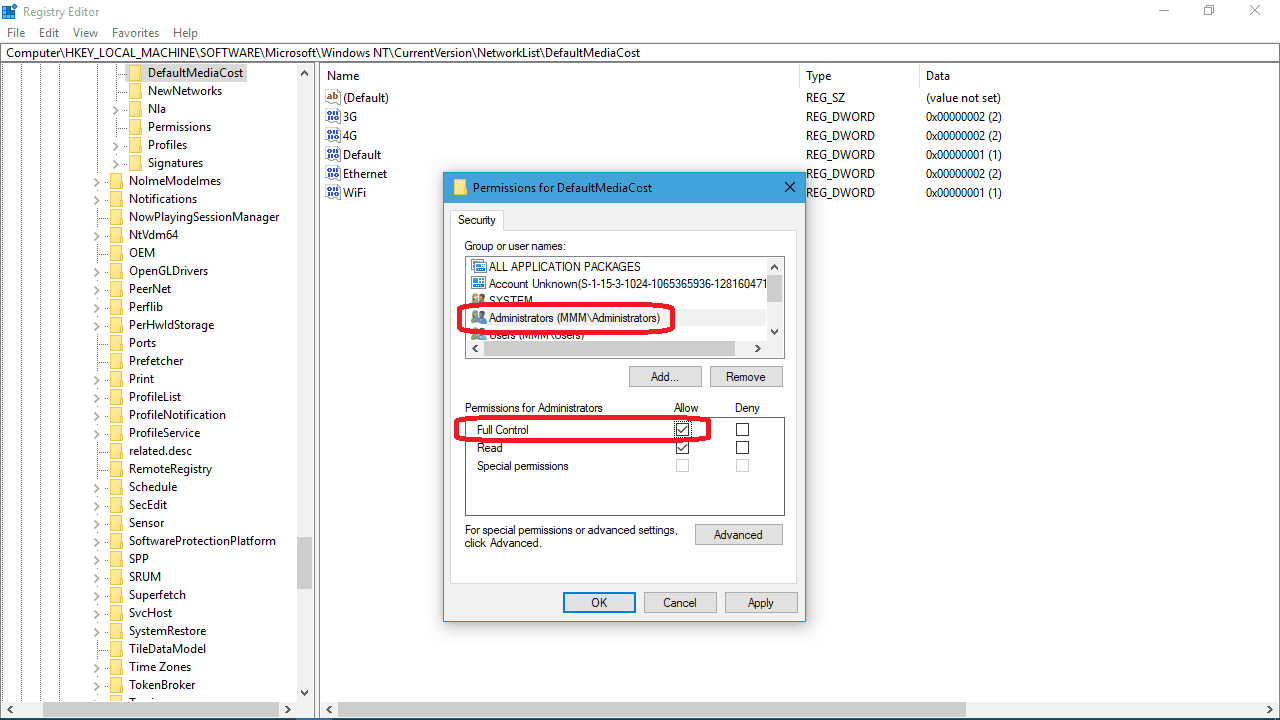
- On the Permissions for DefaultMediaCost windows, select the Administrators group, and then make sure to check the Allow checkbox next to Full Control.
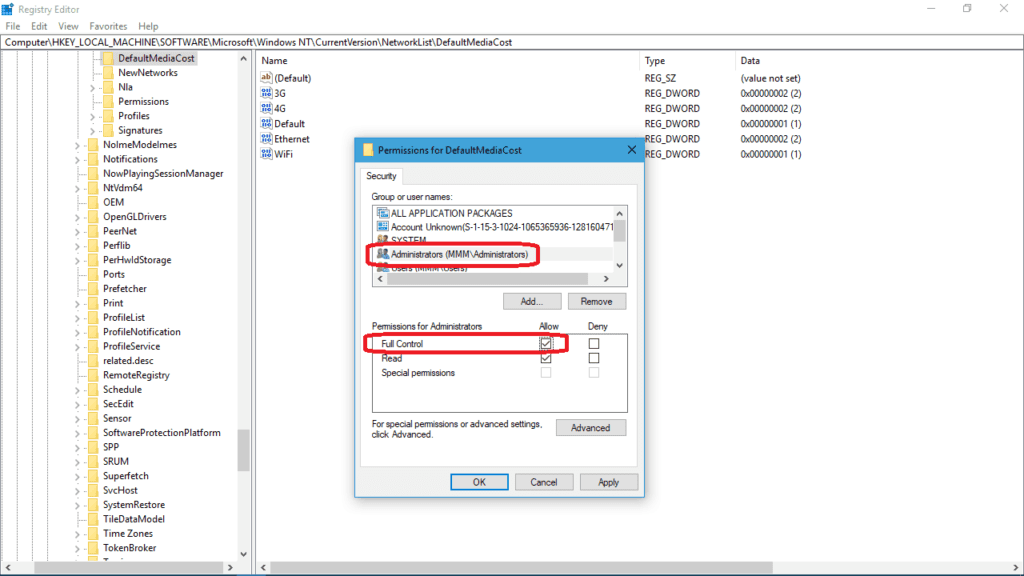
- Click Apply and then OK.
- Double-click on the Ethernet entry and change the value data to 2 then click OK. (The data value 1 means that the connection is non-metered, and the data value of 2 means that the connection is metered).
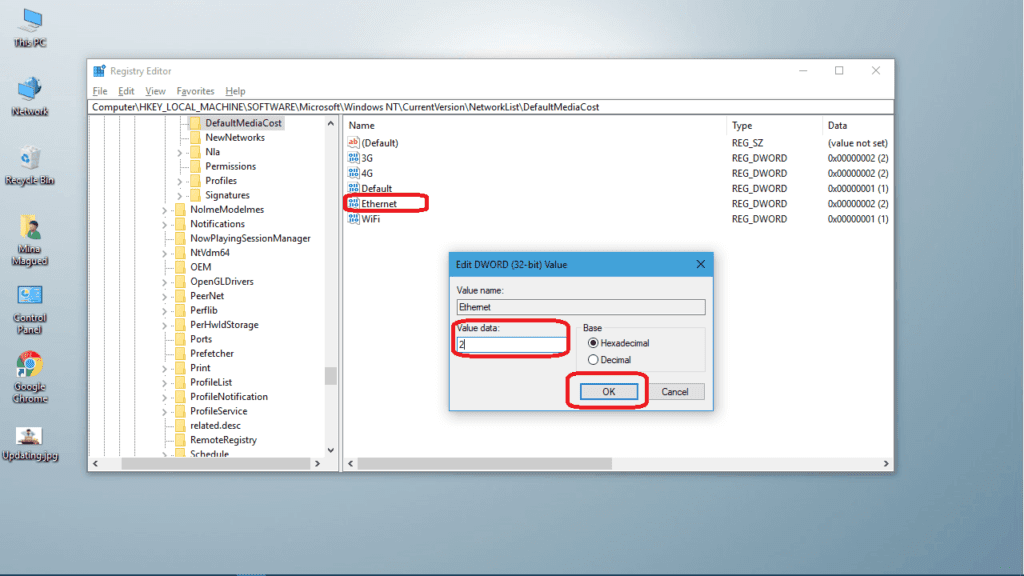
- Close the registry and restart your computer.


If you need to reset all what you have done that’s how to do so:
- Turn off the set as metered connection button in step 2 for Wi-Fi connections.
- Change the value data back to 1 in step 12 for Ethernet connections.
Method II: Stop the update services from running automatically
This solution may not be as fast as turning your Wi-Fi connection to a metered connection, but on the other hand it’s kind of permanent. Once you apply it for one time, your computer will stop downloading and installing updates, period. Even if you switch to a different internet connection. Here is how to do it:
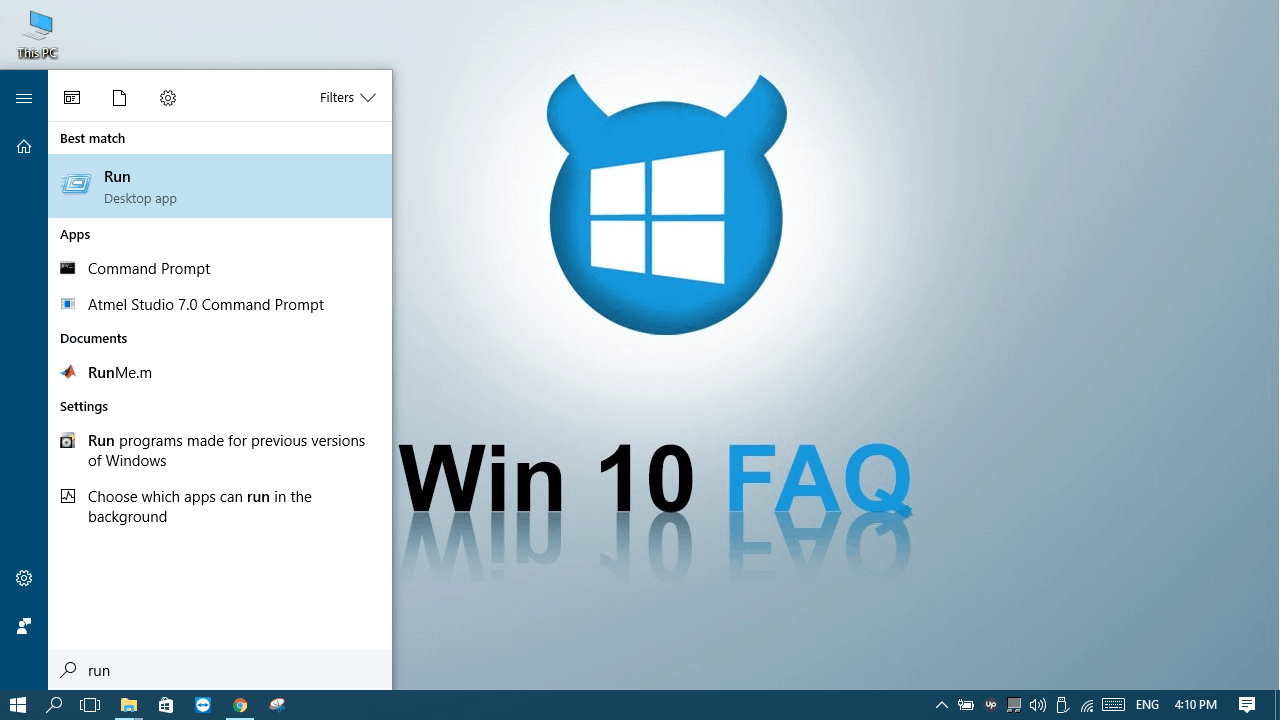
- Open start menu and type Run and select Run desktop app.
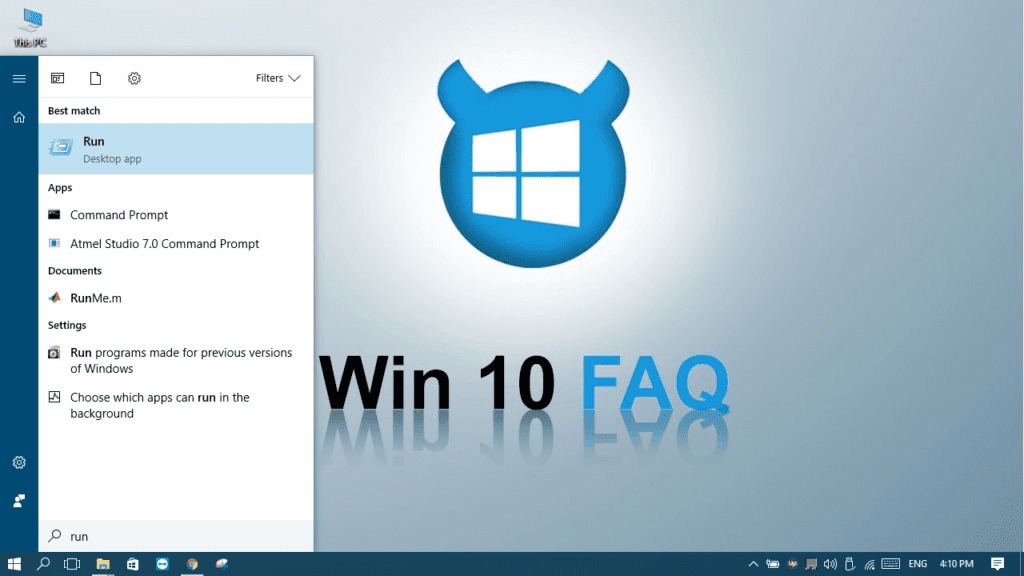
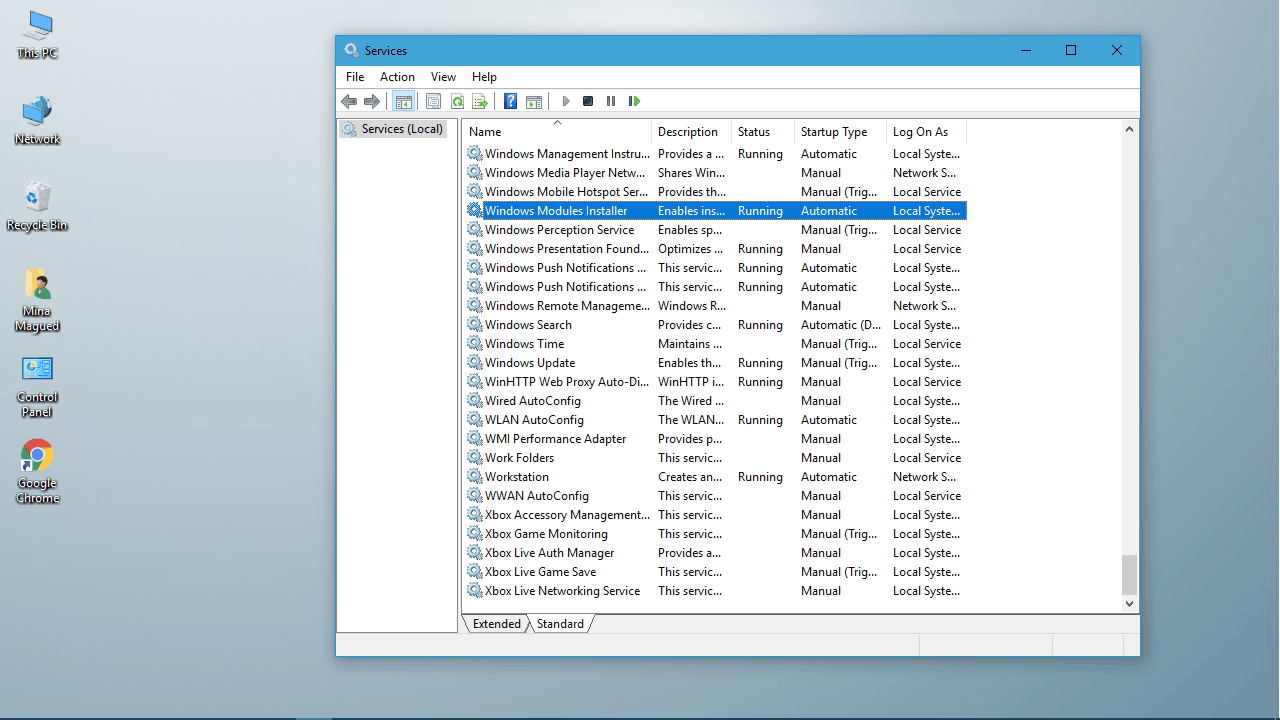
- Type services.msc and click OK.

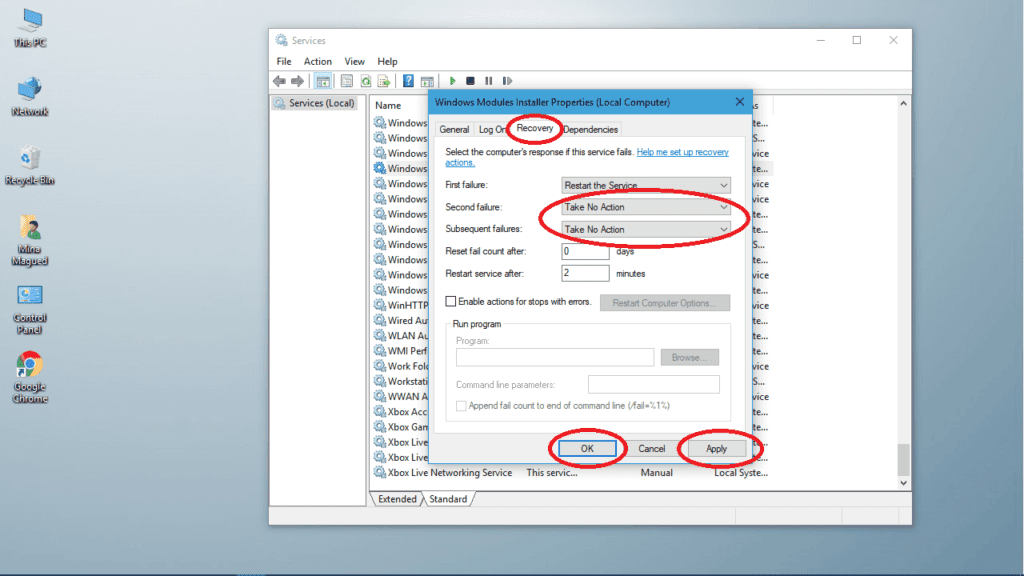
- Double-click on Windows Modules Installer.

- In the General tab, stop the service and change the Startup type to Manual.

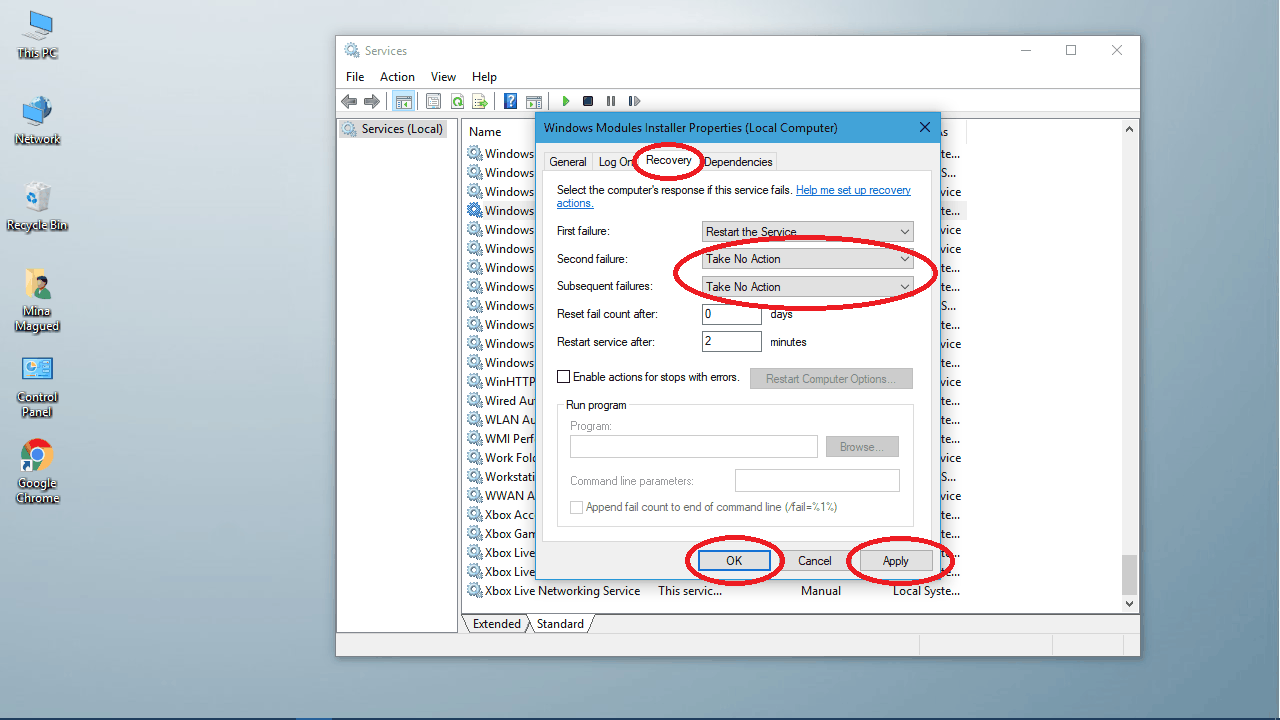
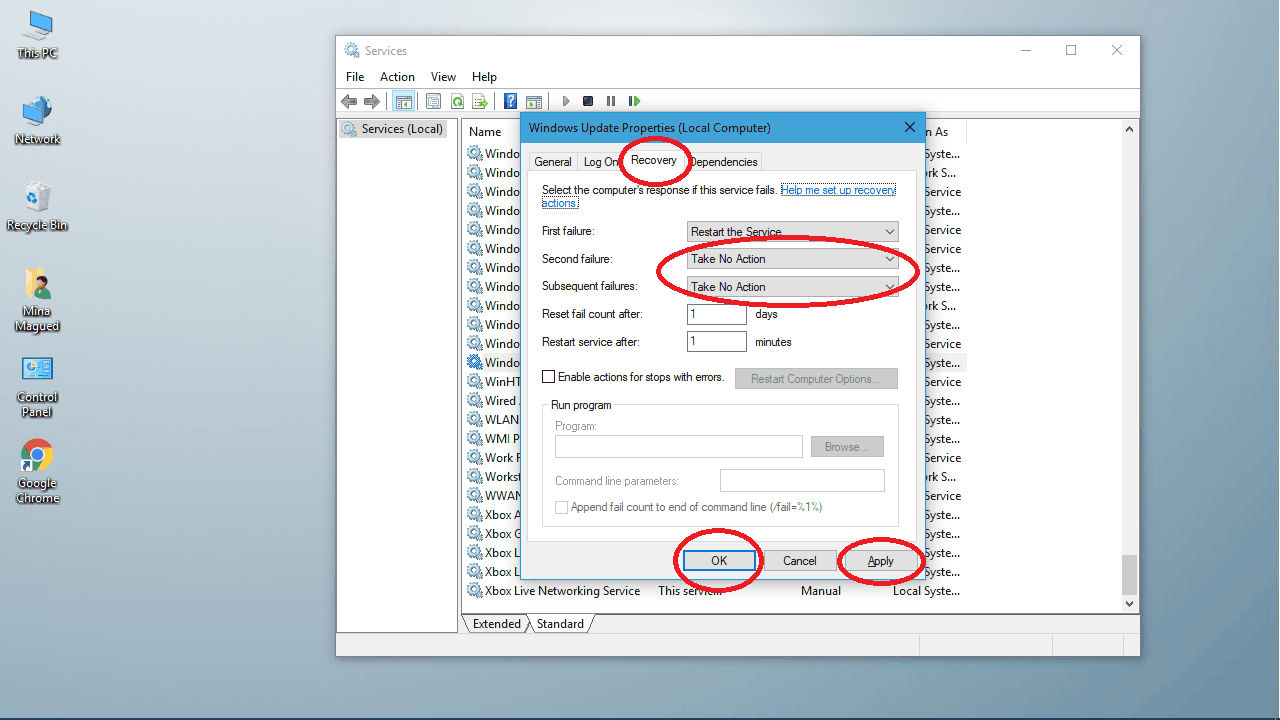
- In the Recovery tab, set the Second failure and the Subsequent failure to Take No Action and click Apply then OK.
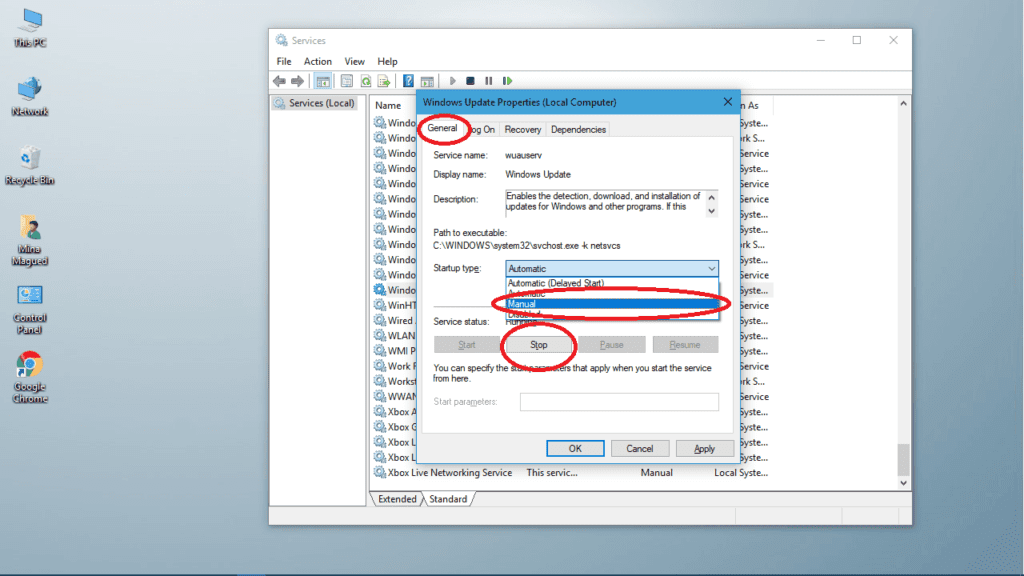
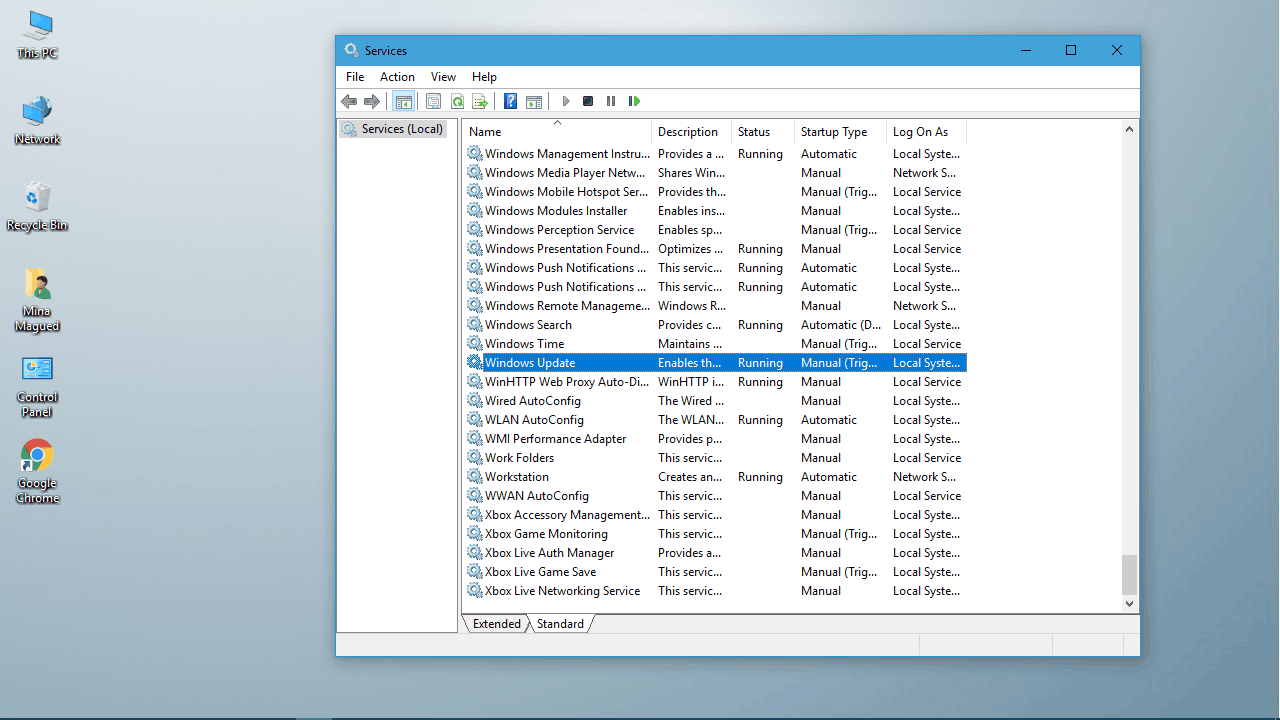
- Double-click on Windows Update.

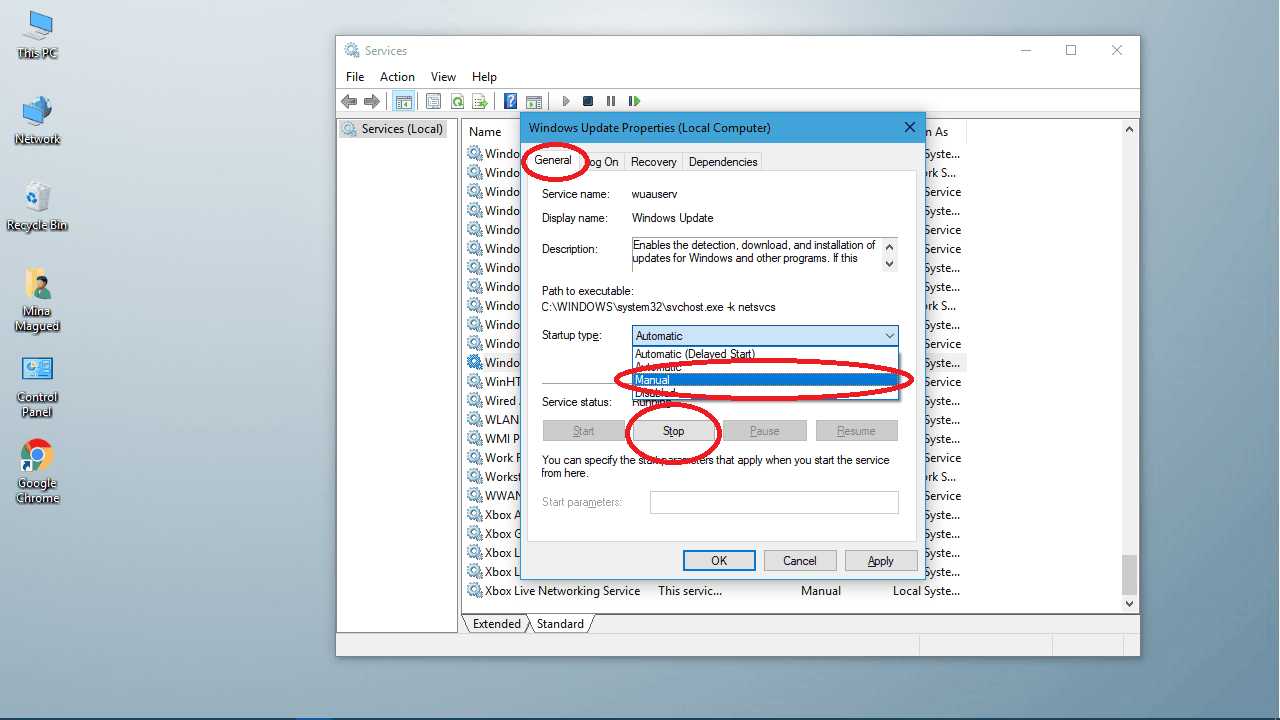
- In the General tab, stop the service and change the Startup type to Manual.
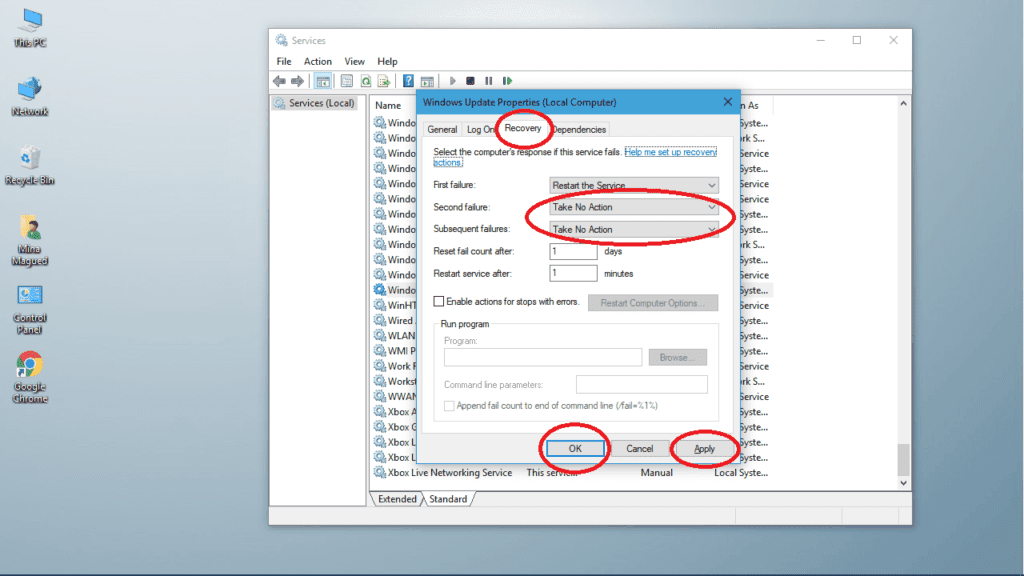
- In the Recovery tab, set the Second Failure and the Subsequent Failure to Take No Action and click Apply then OK.
- Now close the Services and restart your computer.


Very helpful, and easy to understand. Thanks Mate.
You’re always welcome Moustafa, it’s a pleasure to help you 🙂
Thanks so much. I’ve tried the permanent fix, as the Windows update has been retrying and failing on my PC for months. MS Tech has been unable to fix it for me…..
Hey Ray, always welcome 😀 Thank you for your comment!
I use “ShutUp 10” and it must have already set my updates to manual, because checking, this was already done (what you showed above). However, when looking at the latest updates, it appears that Windows has updated Defender along with a Synaptics mouse driver a Realtek driver and a few others. Is this normal?
Hello Matt, you might need to check this:
Go to Settings > Update & Security > Windows Update > Advanced options
Make sure that Automatically download updates, even over metered connections is turned off.
Another thought is that maybe you’re having a third party app designed by your computer or laptop’s manufacturer that checks for driver updates and downloads / installs them. If there are any, uninstall them and see if it works. Actually some light updates won’t be bad for your computer, tell me if you’re facing a particular problem and I’ll do my best to help you through it.
Very informative, polite and honest. I especially thank you for help in turning off these updates. My wife’s older computer (CPU – AMD Phenon II x4 945 3.0GHz, Motherboard – Gigabyte GA-MA785GPMT-UD2H – 8 GB DDR3 RAM, Graphics Card: ASUS AMD Radeon HD 6450 PCI Express 2.1) isn’t all that slow, but the last 4 or 5 “updates” of WIN 10 Home Premium have disabled the computer….EXCEPT that each time, after leaving it for dead for 2 hours on a dead screen — once we get the phrase “preparing to repair” .. in disgust we shut it off for what must be the5th or 6th time – SUDDENLY it operates.
I plan to end the automatic updates as shown here, but can you do a session on “Turning the automatic update back on” or “Doing a manual WIN 10 Update” once ithe automatic has been stopped.
Thank you again very very much!!
Tim and Pat
Hello Tim! You’re so welcome, I’m happy I could help. I’ve included a few hints about reverting back the settings by changing the value back at Registry editor or turning off metered connection. You can also turn back all the services to Automatic instead of disabled, but I’ll make sure to release a session on Turning everything back on for sure ☺ Please don’t hesitate to ask for help if you encounter any problem! Have a great day.