
If after starting up Windows 10 or 11 you encounter a window in the top right corner saying “Personalized Settings (Not Responding)” and get stuck on a black screen, following this guide will help you fix it. You end up getting stuck on this black screen because Windows Explorer doesn’t start properly and so the desktop ends uploading very slowly, or not at all. This issue most often happens due to problems with updates.
Quick Jump:
- Restarting your computer
- Restarting the Windows Explorer process
- Repairing files with SFC
- Removing registry entries
- Check Graphics Drivers
- Switch the network connection
The first thing to try is simply restarting your computer:
Sometimes just restarting Windows can get it to sort out whatever is wrong on its own. Here’s how to restart Windows properly while stuck on this screen:
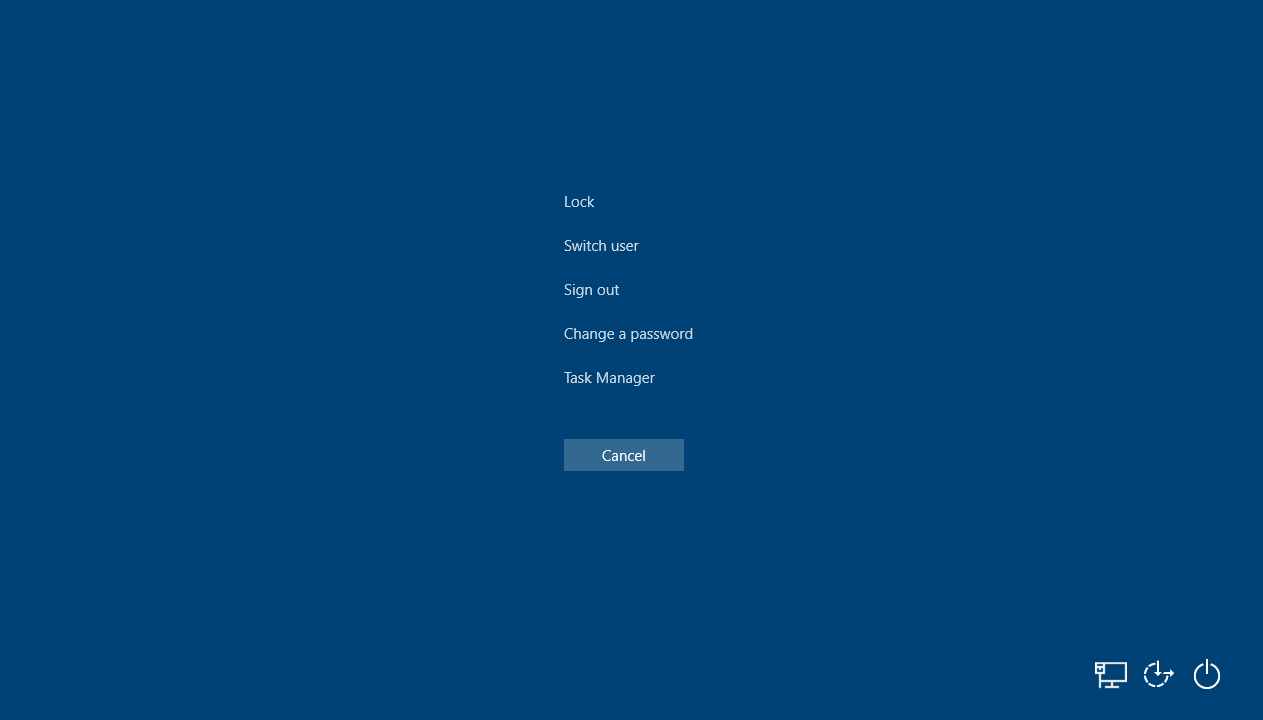
- Press Ctrl+Alt+Delete to open what’s known as the Windows Security screen.

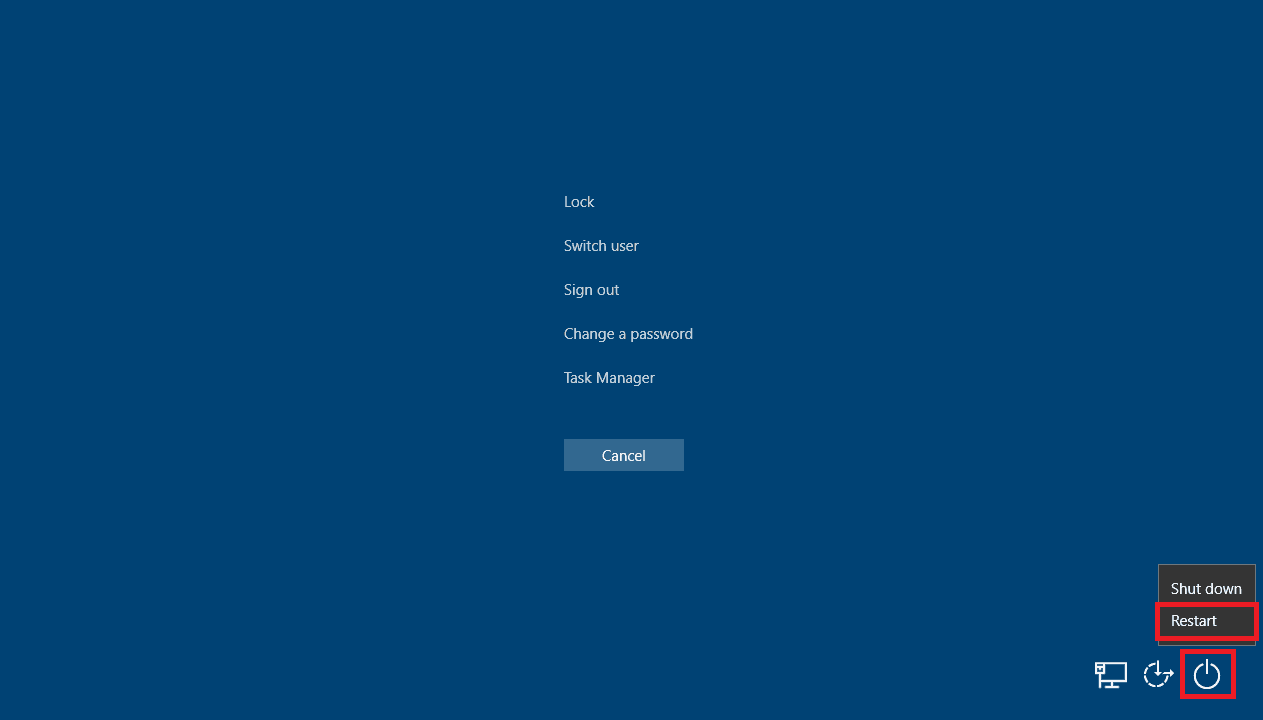
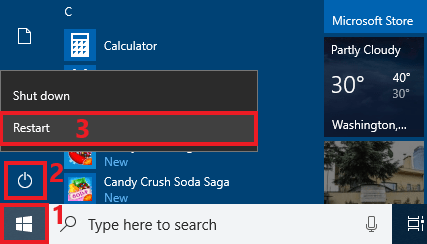
- Click on the power icon in the bottom right corner and then on Restart.
If after restarting you still encounter the “Personalized Settings (Not Responding)” error, read on for more solutions.
As this error has to do with Windows Explorer, restarting it can fix it:
In order to do this, you’ll once again need to access the Windows Security screen:
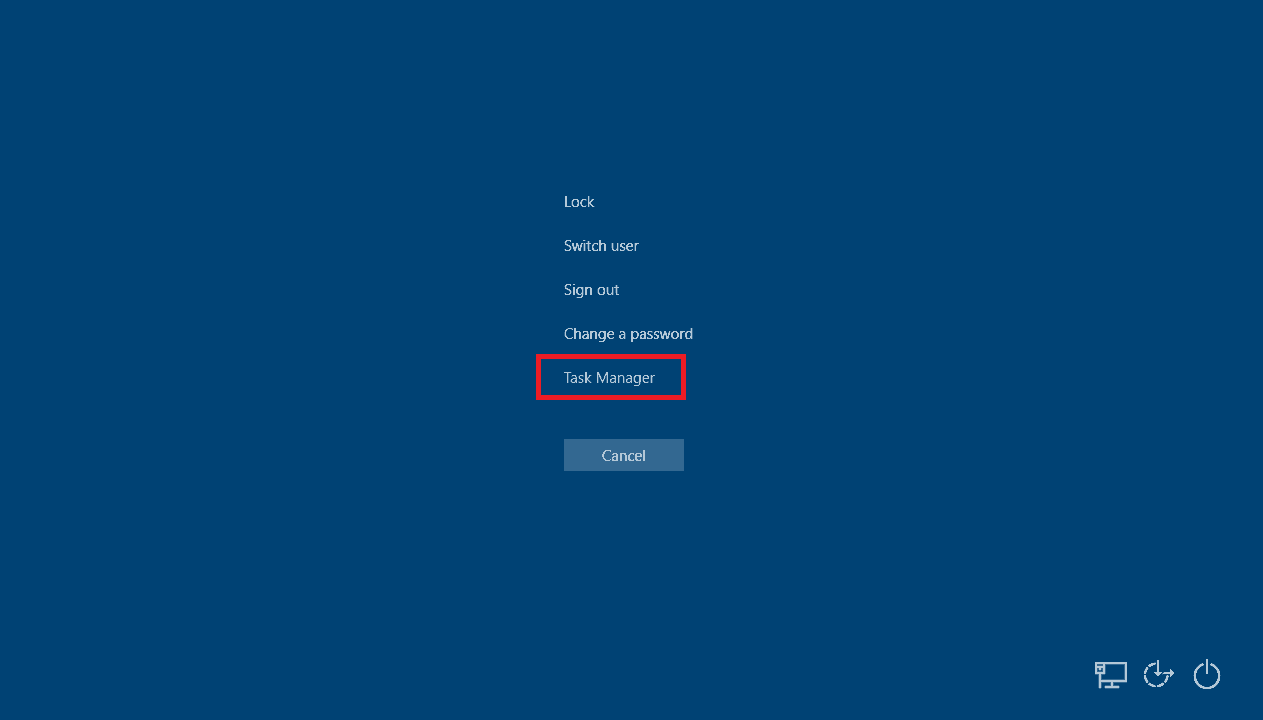
- Press Ctrl+Alt+Delete to open the Windows Security screen and then click on Task Manager.
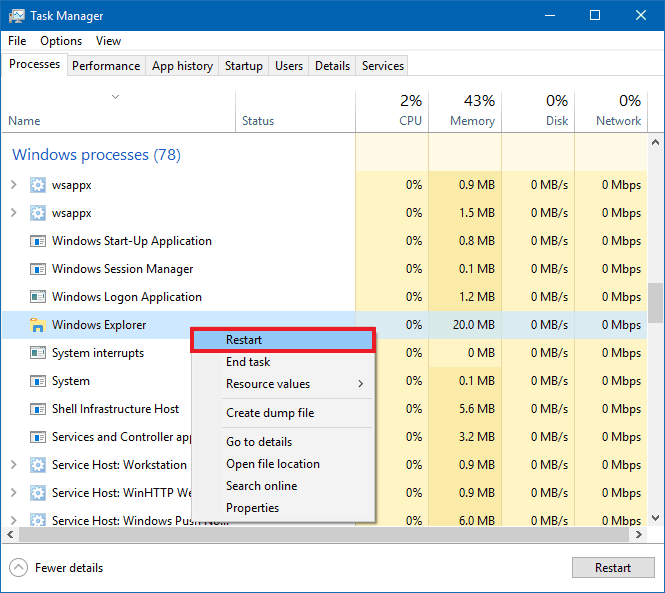
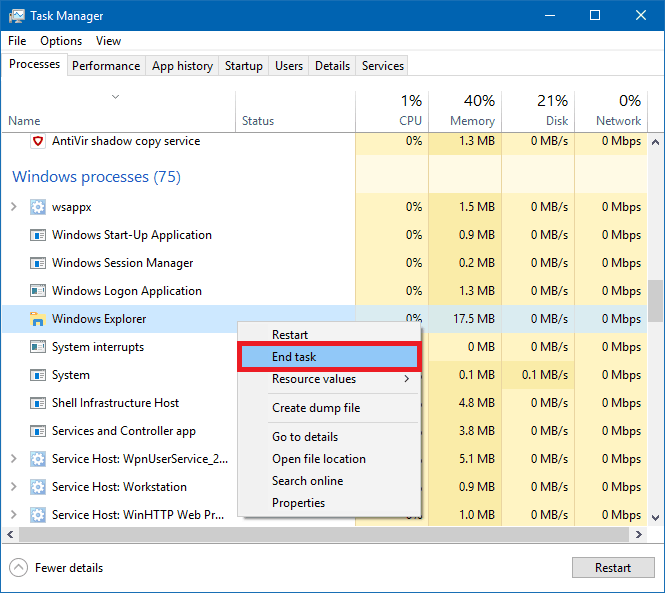
- Once Task Manager has opened, scroll down and search for Windows Explorer then right-click on it and then click on Restart. You can also click on Windows Explorer to highlight it and then click the Restart button on the bottom right.
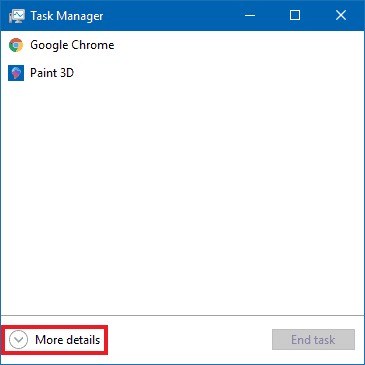
- Click on More details in the bottom left corner to see all processes if your Task Manager does not show everything.
- Click on More details in the bottom left corner to see all processes if your Task Manager does not show everything.
Restarting Windows Explorer this way isn’t always enough, however. Sometimes you need to completely stop Windows Explorer and then start it again with administrator privileges. This can also be done from Task Manager:
- Press Ctrl+Alt+Delete to open the Windows Security screen and then click on Task Manager.
- Once Task Manager has opened, scroll down and search for Windows Explorer, right-click on it and then click on End Task.
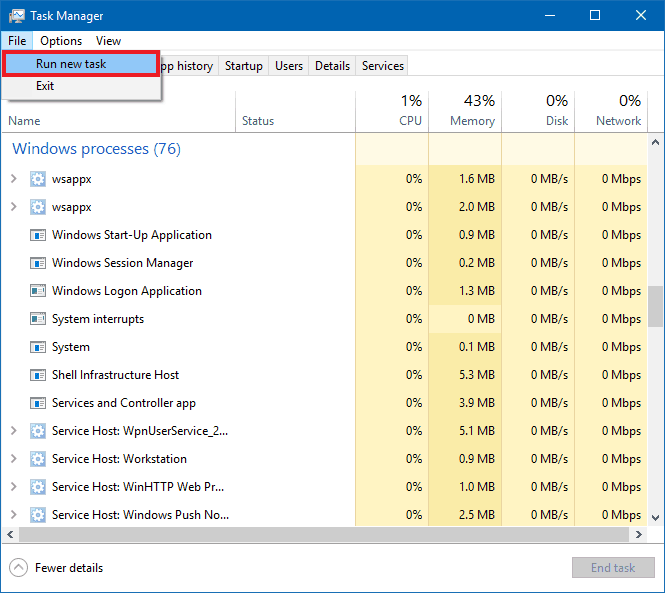
- Now click on the File menu in the top left and then on Run new task.
- In the window that comes up type in “explorer” in the Open: box, make sure to tick the Create this task with administrative privileges box and then click OK.
- If all goes well you should have your desktop back. It’s a good idea to restart your computer to see if the problem comes back.

If following these steps doesn’t work or the problem comes back after restarting, there’s still more you can try.
Corrupted system files can cause this issue and running the SFC command can repair them:
You’ll need to open Command Prompt in order to do this. Normally you’d do this through the Windows start menu or Windows search, but as they will likely not be available for you, you’ll need to open Command Prompt from Task Manager. Here’s how:
- Press Ctrl+Alt+Delete to open the Windows Security screen and then click on Task Manager.
- Now click on the File menu in the top left and then on Run new task.
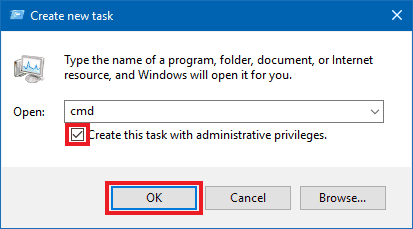
- In this new window type “cmd” into the box, tick the Create this task with administrative privileges box and then click OK.
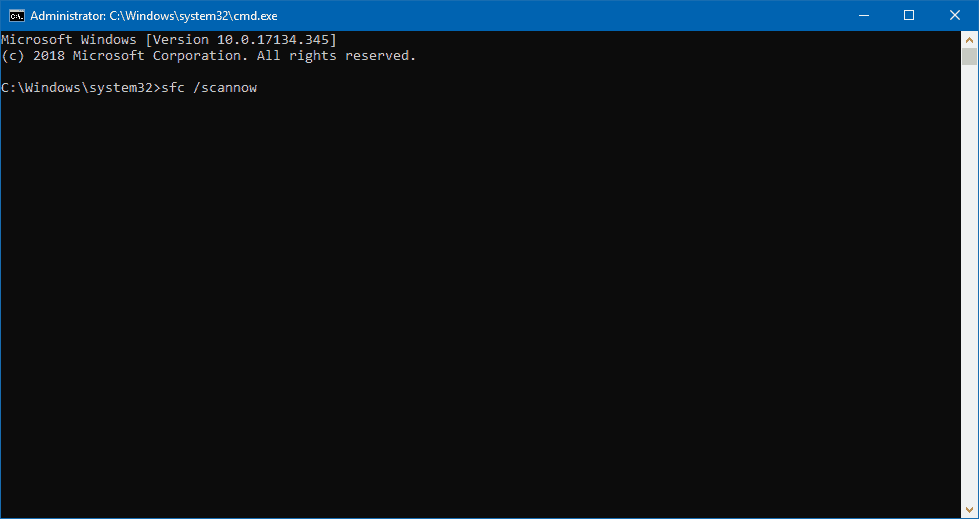
- In the Command Prompt window, type or copy and paste the following command:
sfc /scannow
and then press Enter.
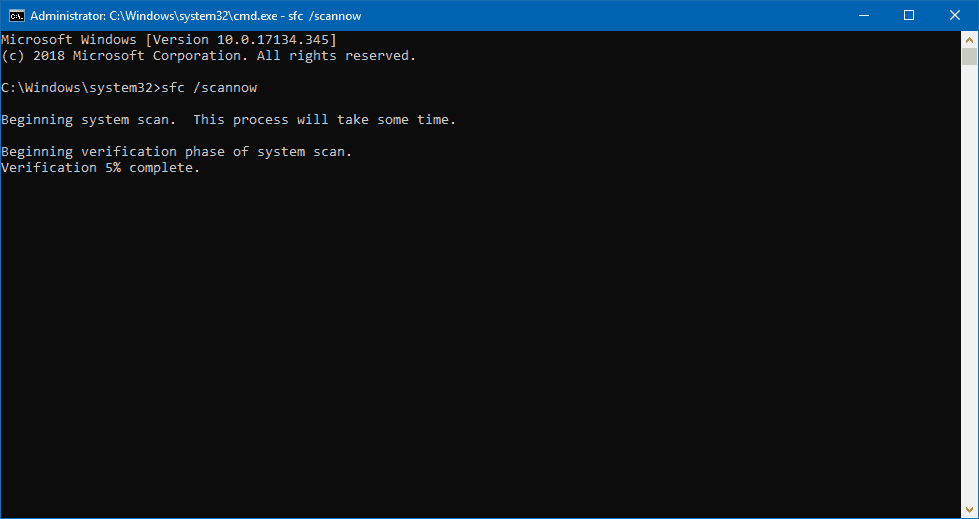
- The scan will then begin and attempt to fix any corrupted files it finds. This can take a while. Wait for it to finish.
- Once the scan and repairs have completed, restart your computer to see if the problem still occurs. Use the Ctrl+Alt+Delete shortcut to reach the Windows Security screen again in order to do so.
Still no luck? There’s one more solution to try.
This issue can also be resolved by removing certain registry entries:
Sometimes registry entries can become corrupted after an update and deleting them allows Windows to regenerate properly working ones. As editing the registry can be risky, it’s recommended to back up the registry before making any changes.
The first entry involves updates to Windows Explorer and is usually the one that ends up causing the “Personalized Settings (Not Responding)” issue.
Here’s how to access and delete it:
- Press Ctrl+Alt+Delete to open the Windows Security screen and then click on Task Manager.
- Click on the File menu in the top left and then on Run new task.
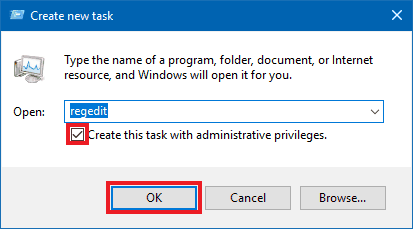
- Now type “regedit” in the box of the window that comes up, then tick the Create this task with administrative privileges box and click OK.
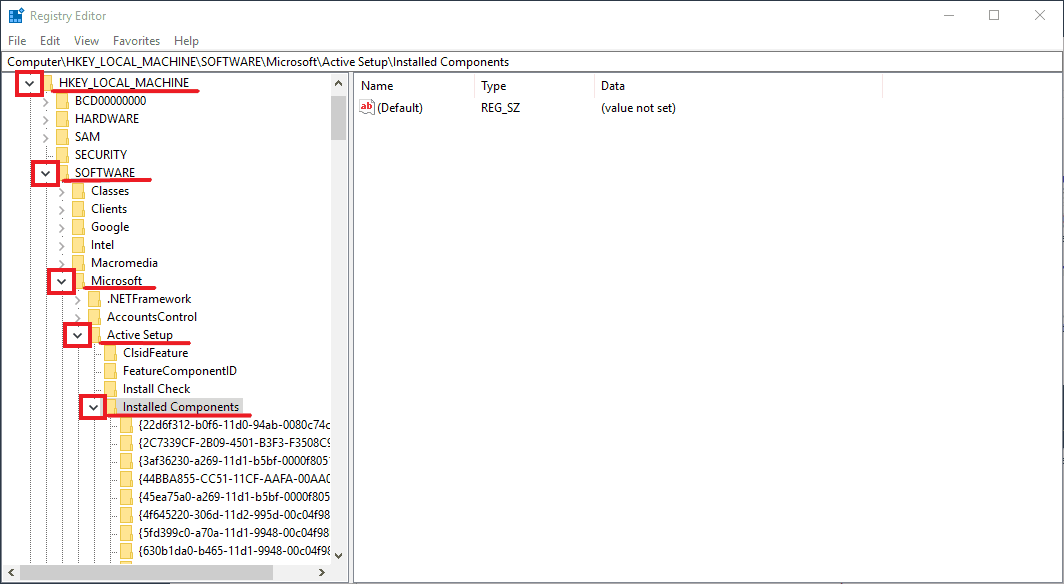
- Once Registry Editor is up, you’ll use the arrows next to the folders on the left to expand them and navigate. Click on the arrow next to HKEY_LOCAL_MACHINE then the one next to SOFTWARE, then Microsoft, then Active Setup and finally on Installed Components.
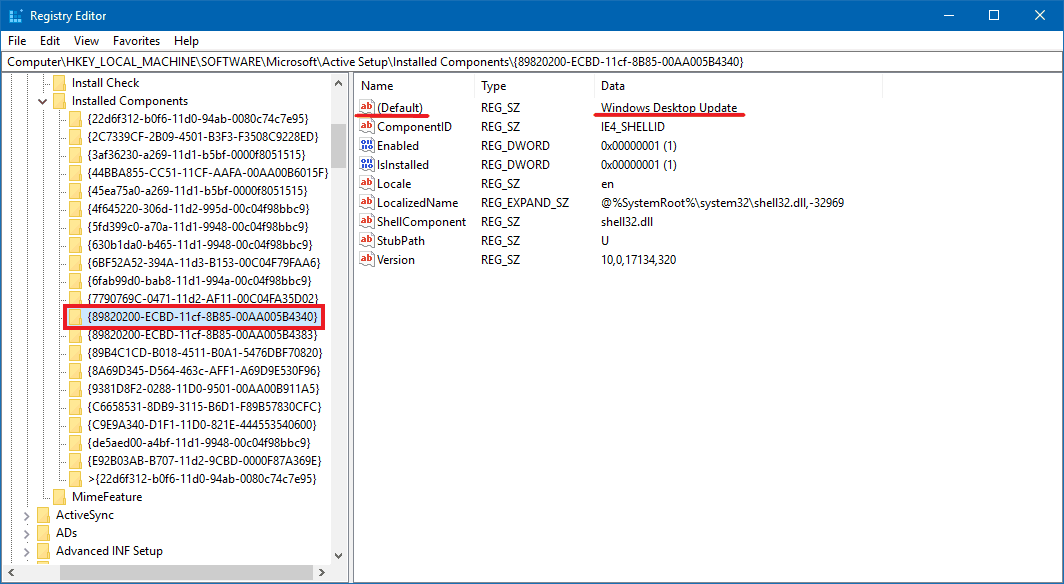
- Below Installed Components there will be a number of folders with strings of numbers and letters. Look for and click on the one named {89820200-ECBD-11cf-8B85-00AA005B4340}. When you do, an entry named (Default) with the value of Windows Desktop Update should be the first one on the right. Your folder should have the same name, but if not look at all of them until you find one with the (Default) : Windows Desktop Update entry.
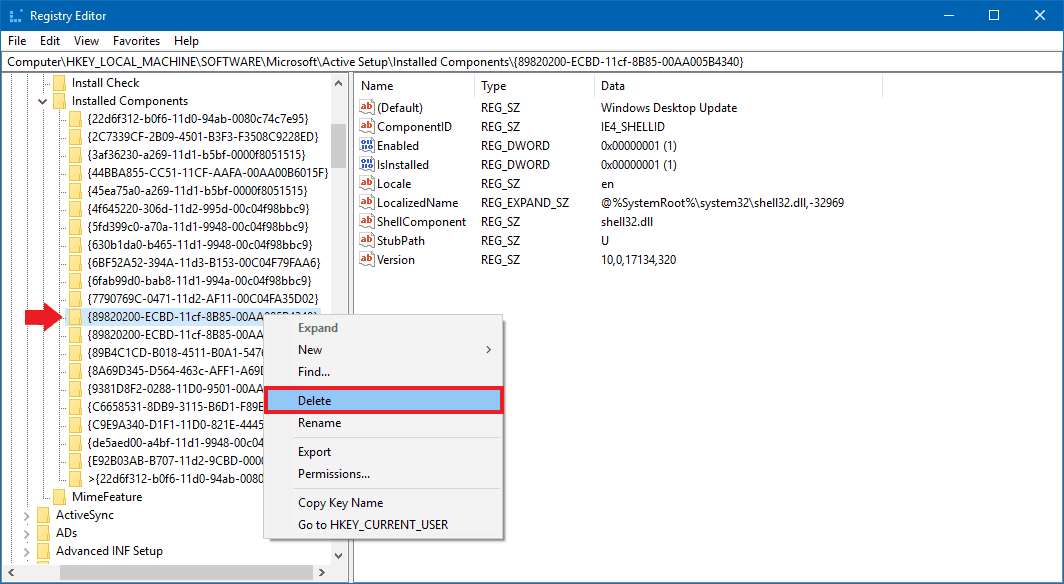
- Once located and selected, right-click on the folder and then click Delete.
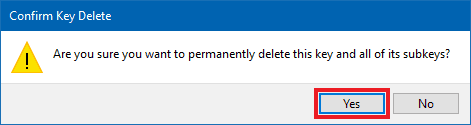
- On the confirmation window click Yes.
- Once done, restart your computer from the Windows Security screen which can be accessed with the Ctrl+Alt+Delete shortcut.
You should now be able to access your desktop normally without an error message or black screen.
If deleting the first entry doesn’t work, there’s another you can try deleting:
This entry is under the same Installed Components folder. Here’s how to access it from the beginning:
- Press Ctrl+Alt+Delete to open the Windows Security screen and then click on Task Manager.
- Click on the File menu in the top left and then on Run new task.
- Now type “regedit” in the box of the window that comes up, then tick the Create this task with administrative privileges box and click OK.
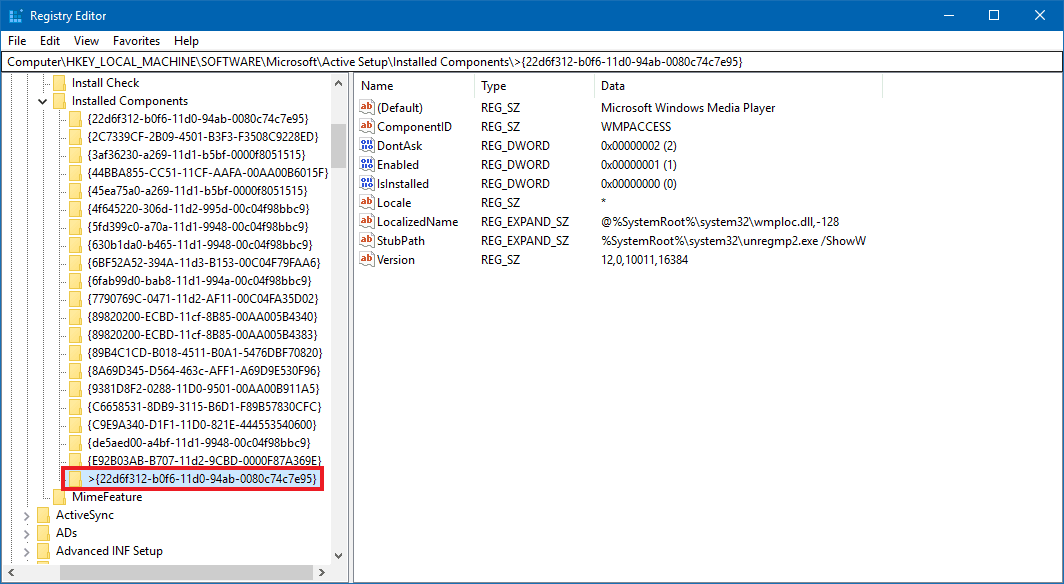
- Once Registry Editor is up, you’ll use the folders on the left to navigate. Click on HKEY_LOCAL_MACHINE then find and click on SOFTWARE, then Microsoft, then Active Setup and finally on Installed Components.
- Below Installed Components click on the very last folder. It should be named >{22d6f312-b0f6-11d0-94ab-0080c74c7e95}, but it’s possible yours could be different.
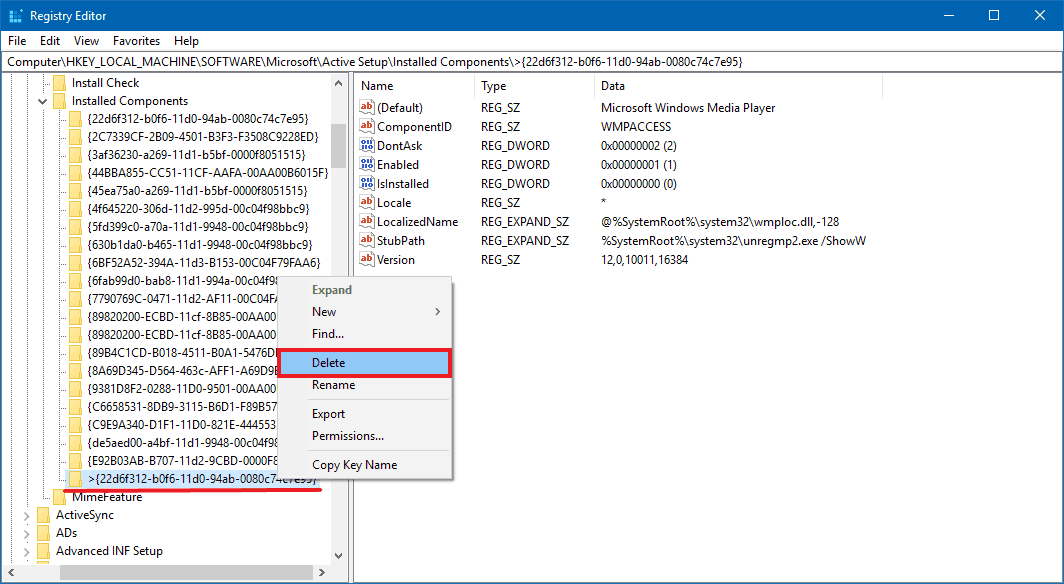
- Now Right-click on this folder and then click Delete.
- Click on Yes when the confirmation window comes up.
- Now use the Ctrl+Alt+Delete shortcut to reach the Windows Security screen again and restart your computer.
Update Your Graphics Driver.
At times, an outdated graphics driver might be causing all the fuss. To make sure you’ve got all of the latest drivers and updates, be sure to visit the “drivers” or “updates” sections of the manufacturers’ websites.
Otherwise, a third-party application can easily solve this problem for you in the background, so you can forget all about it and still have all of the latest tweaks and benefits. One of our users’ favorite pieces of software that can achieve such a thing is Driver Booster. We highly recommend you download it and configure it properly, especially if you’re a beginner computer user.
Another program that can do this is DriverPack. It’s easy to use, makes installs and commits command files automatically so you don’t have to move a finger if a new driver update is available for download and installation. Furthermore, you don’t need to install DriverPack per se, as it’s a portable application – meaning that you can just run it on the go without any installs, much like a typical Linux Distro but in a small application formfactor. Wicked, right?
Finally, some networking could do the trick.
If all else fails, then this last-resort trick should finally lay the problem to rest.
- Press Ctrl+Alt+Delete to open the Windows Security screen and then click the airplane mode icon (or the computer network icon).
- Then click Airplane mode whether it’s On or Off to switch the network connection.
- Now click Sign Out in the power off section of the Security Screen.
- Finally, log back in to your user and your computer should now be working as intended.
Final Thoughts
Hopefully, you should now be able to log in to Windows with a working desktop. If you have any questions or comments, feel free to leave them below. We’re always eager to reading what our community thinks regarding these fixes and if they also have tricks of their own.
Will deleting the Windows Updates registry key affect future updates?
It Worked perfectly, Thanks!!!!
Thanks so much for this guide. The Windows Update registry edit worked for me
Woah, the regedit fix worked for me! You saved me from the headache of reformatting my laptop. Salamat! 🙂
Giant Props – first regedit entry removal worked for me. Thanks!
My task manager will not come up I still see a black screen. Any suggestions?
Thank you so much. Followed your instructions and my pc is now working . Will keep these instructions handy but hopefully won’t need again!
Thanks man, deleting windows update from the registry sorted me out!
Ran across your article when I had this problem after a Windows update. Restarting Windows Explorer was exactly what I needed. Thanks!
It helped me to fix my issue. Thanks!!!
You are awesome. It worked for me when I deleted Windows Desktop Update from registry.
Thanks Ryder.
Voce é o cara… ajudou muito…
Thanks mate it worked !
Thanks, by removing the first regedit the black screen is no longer an issue, however now my explorer.exe is stuck in a loop of chrashing itself.
Thank you brother
Removing the first registry key resolved the issue!
ta
I did it and on the third time waiting, it worked!! Thank you
Comment *wow this website safed my pc