If you’re here and if you weren’t living under a rock, you know about iTunes: the extremely popular music program by Apple, that lets you sync your music across different devices.
But it’s not only good for music: iTunes can also be the place where all your iPhone/iPad/iPod data is backed up! iCloud offers online backup (first 5 GB are free) but iTunes is an alternative way to backup your data on your PC (the storage space can be much larger, as it’s only limited by the space on your computer).
The issue is that many users reported having problems installing iTunes after upgrading to Windows 10. So, in this guide we will guide you through standard installation and then how to solve your problems if it doesn’t work.
Note that during the fixing process, you will have to know whether you are running Windows 10 32-bit or 64-bit. If you you’re not sure which version you’re using, click here.
If you want to jump straight to the trouble shooting, click here.
Standard installation
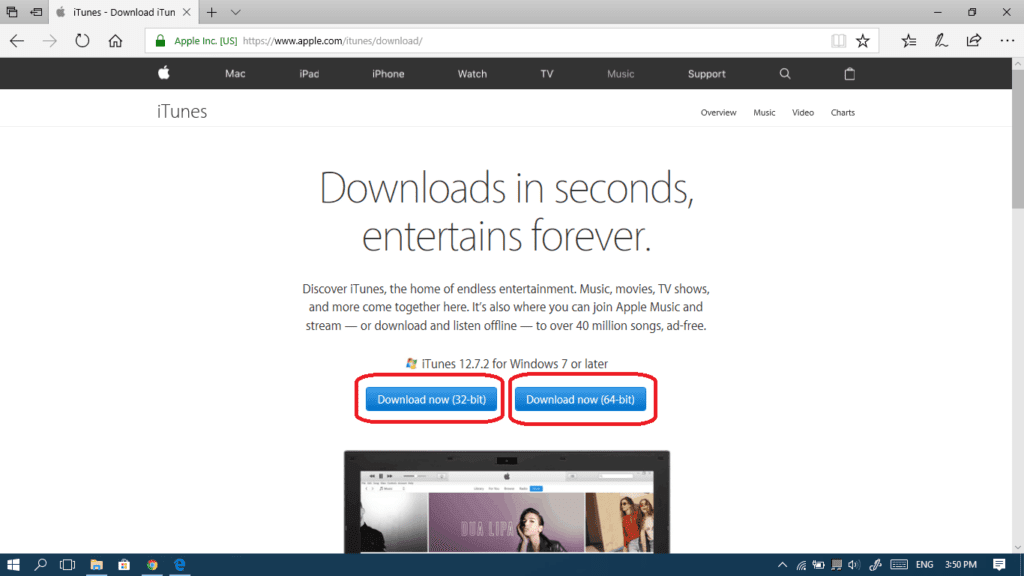
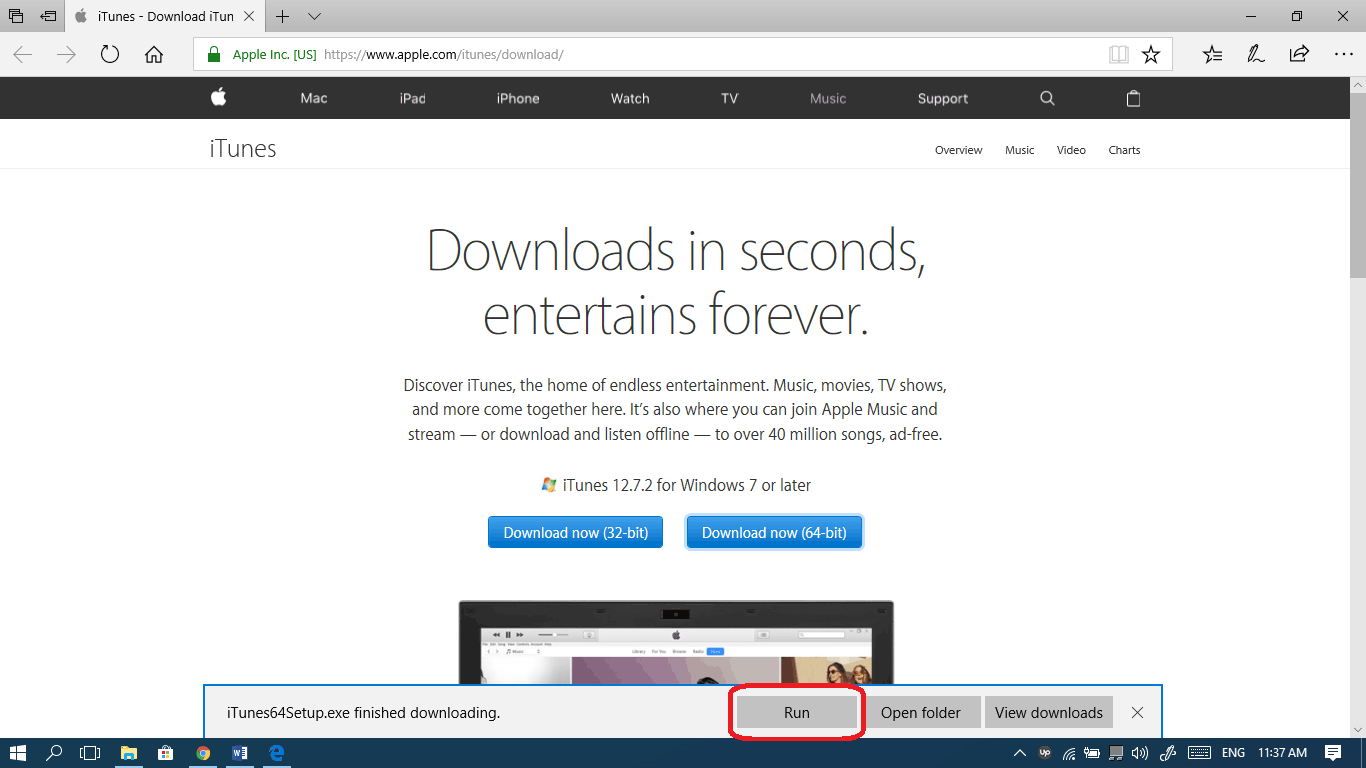
- Go to https://www.apple.com/iTunes/download/ and download the suitable version for your system ( 32- bit or 64-bit Windows).
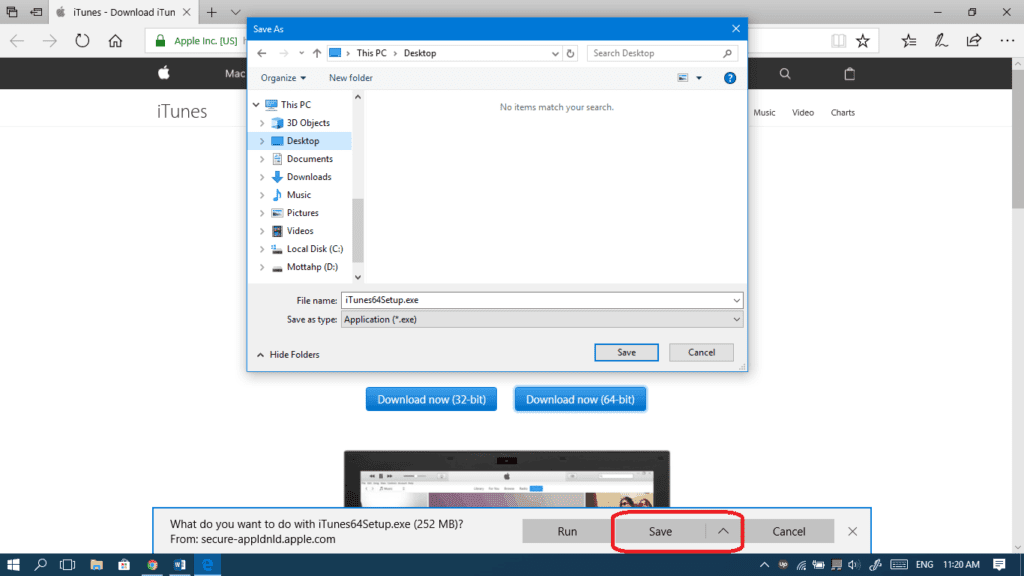
- Click save or save as to determine the location where the file will be downloaded.
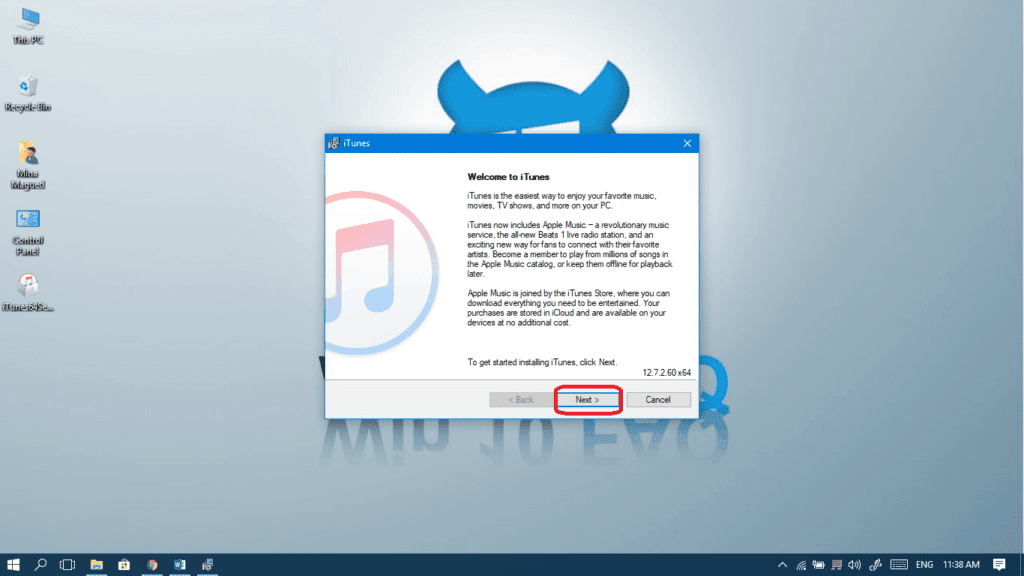
- Open the setup file after the download finishes.

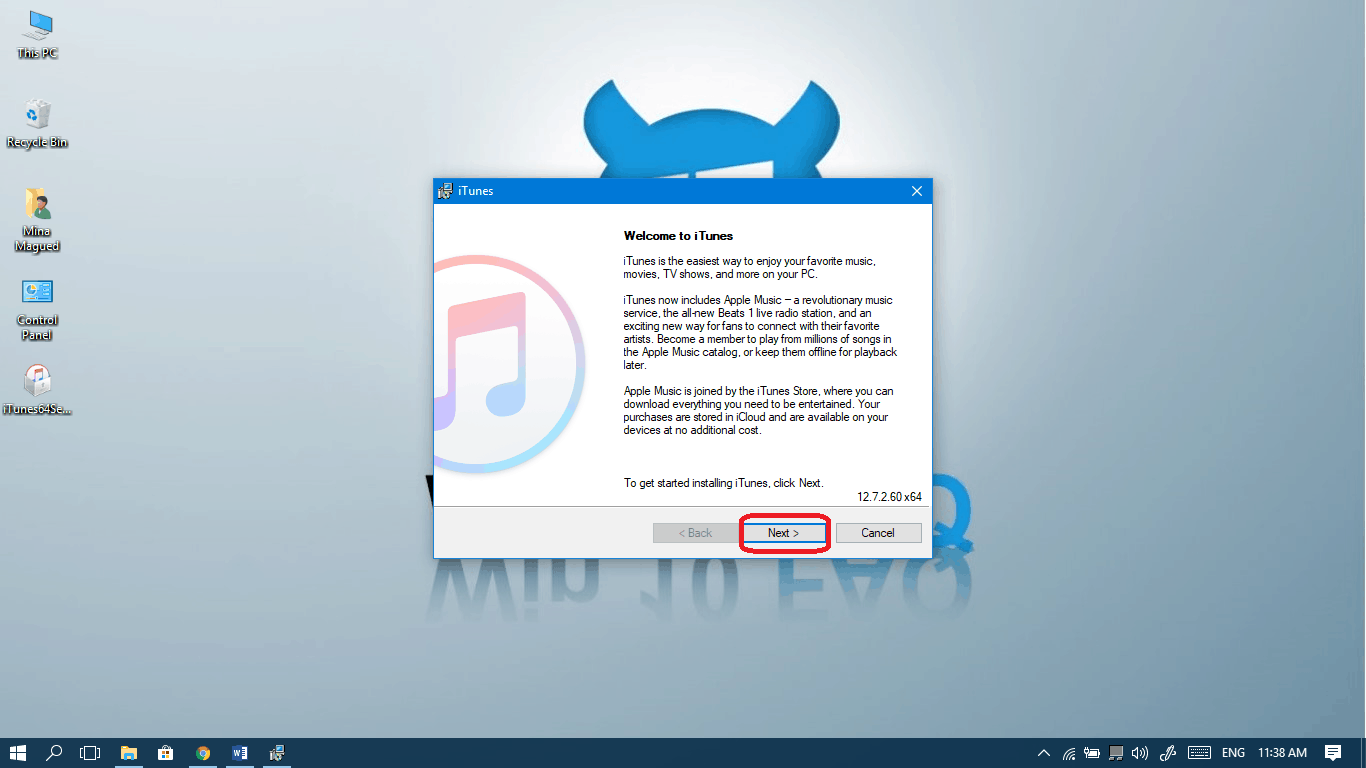
- Click Next.
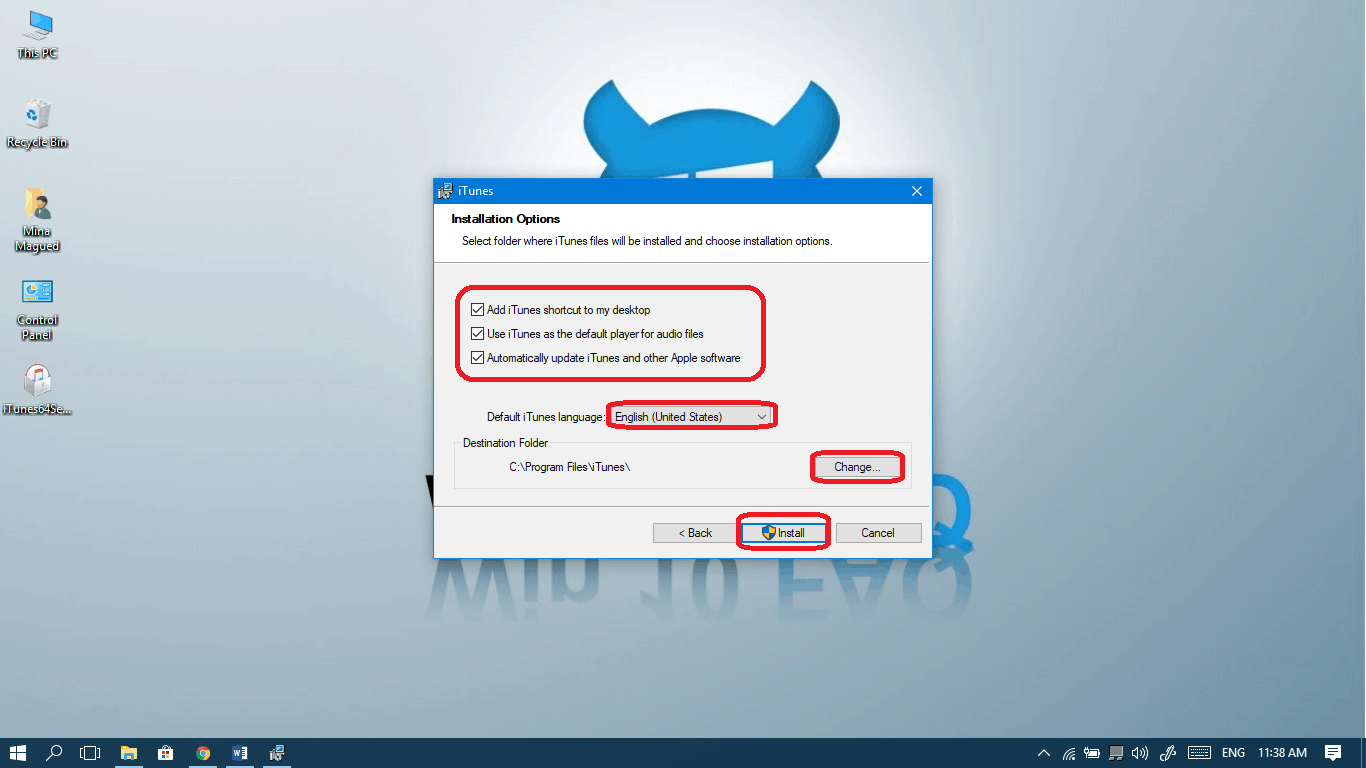
- Customize your settings as you want: you can add a shortcut to your desktop, use iTunes as your default music player, update iTunes automatically, define the language and finally the installation directory: it’s (C:\program files\iTunes) by default. Now click Install.

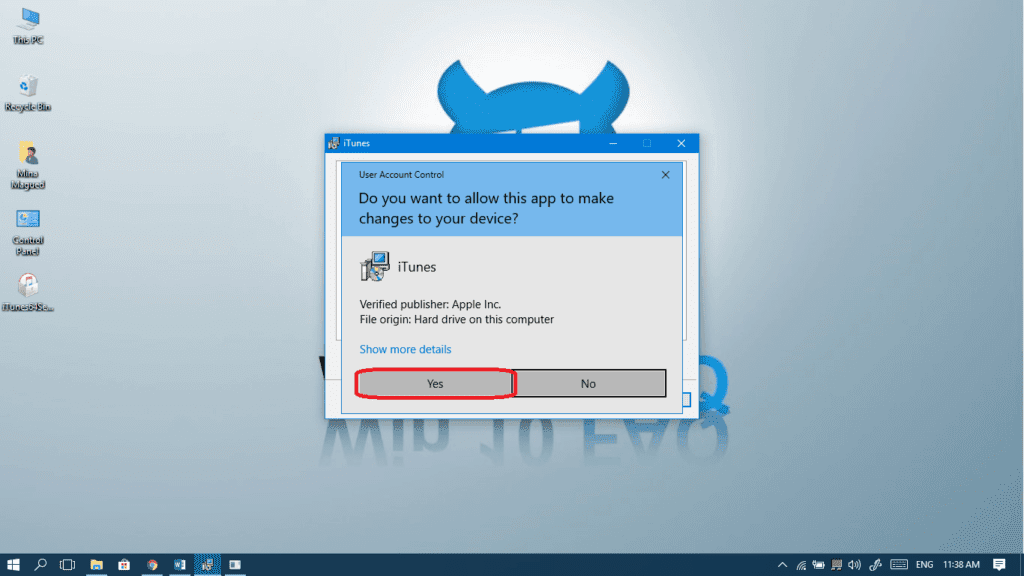
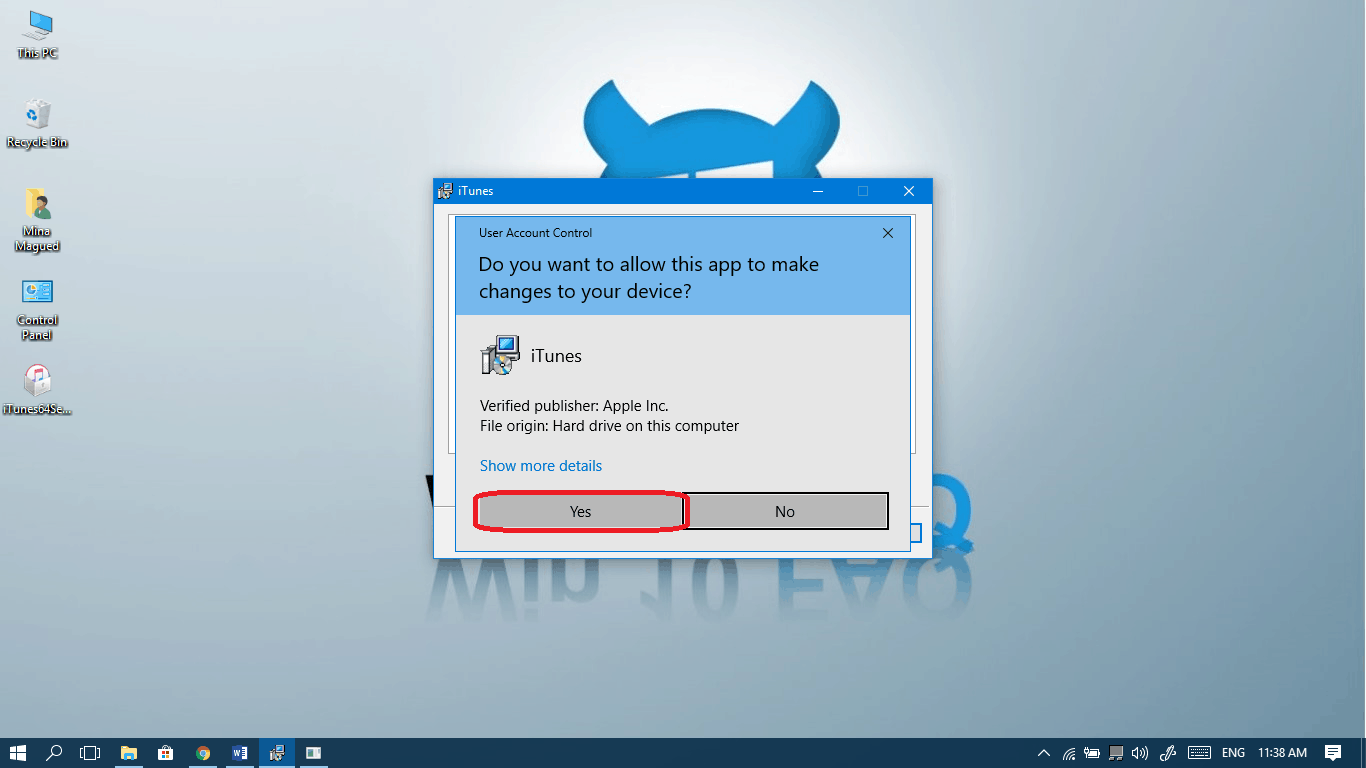
- Click Yes every time this message shows up.
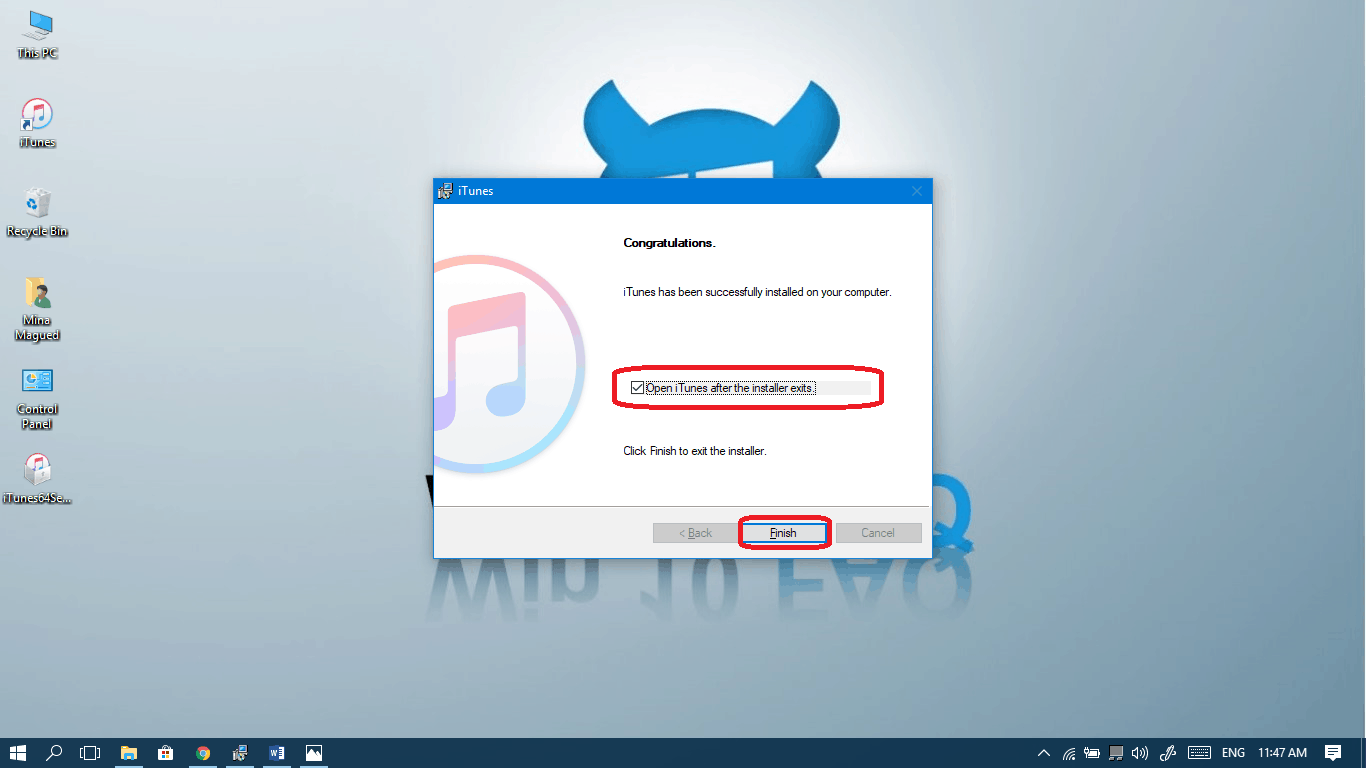
- Now choose whether you want to launch iTunes once the installation exits or not and click Finish.

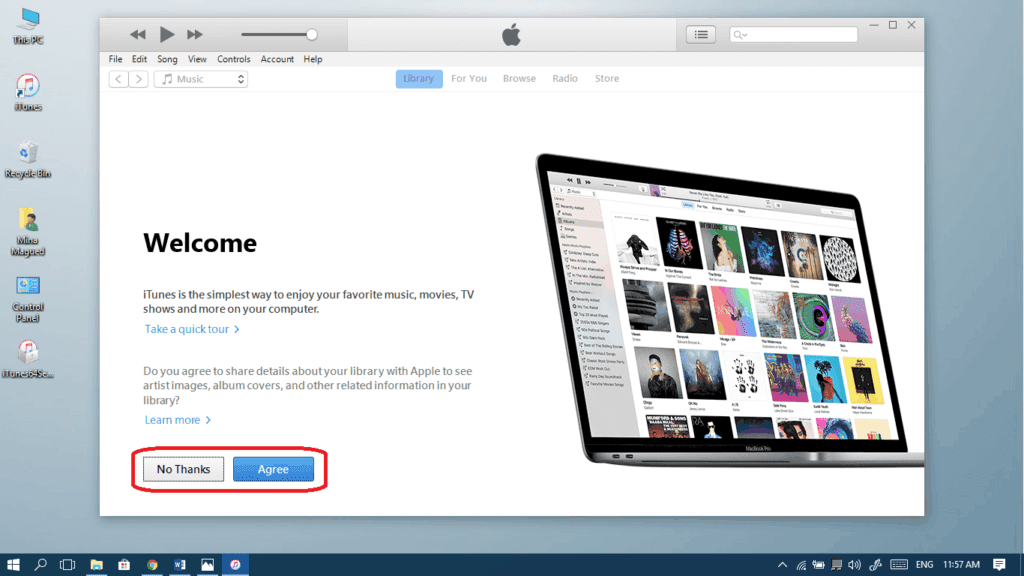
- Once you launch iTunes, you will be asked to agree to iTunes Software License Agreement. Read it carefully and then click Agree if you’re okay with it. Declining it will end the program and prevent it from running.

- Also, you will be asked if you want to share some details about your library. Disagreeing with it will not prevent you from using iTunes.
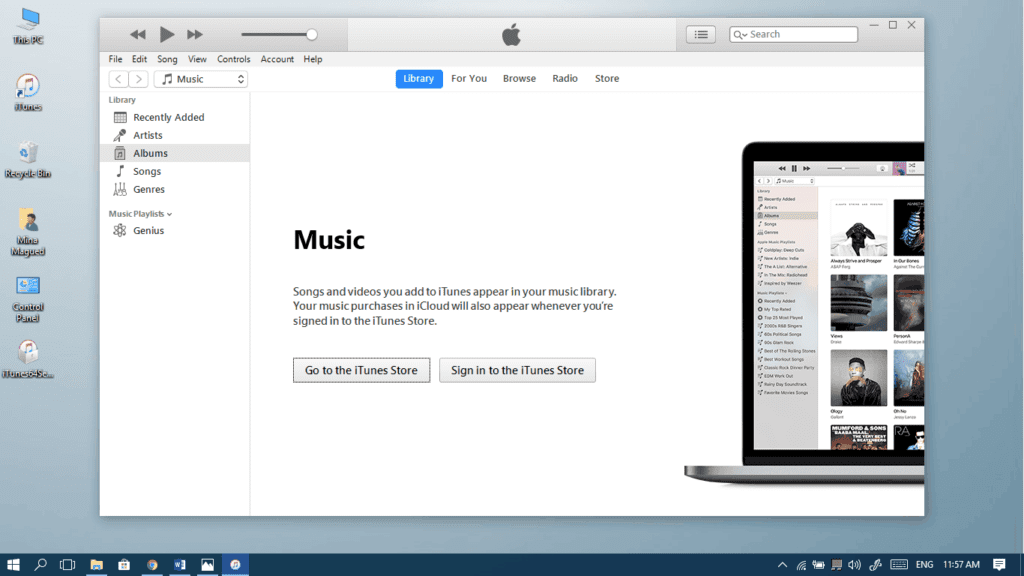
- Here you are, now you’re ready to enjoy iTunes.


Now for users who have some problems installing it, follow these steps:
I-First of all, disconnect all Apple devices connected to your computer.
Unplug any iPhone. iPad, iPod or iPod touch from your USB ports.
II-Remove iTunes Helper from your startup programs
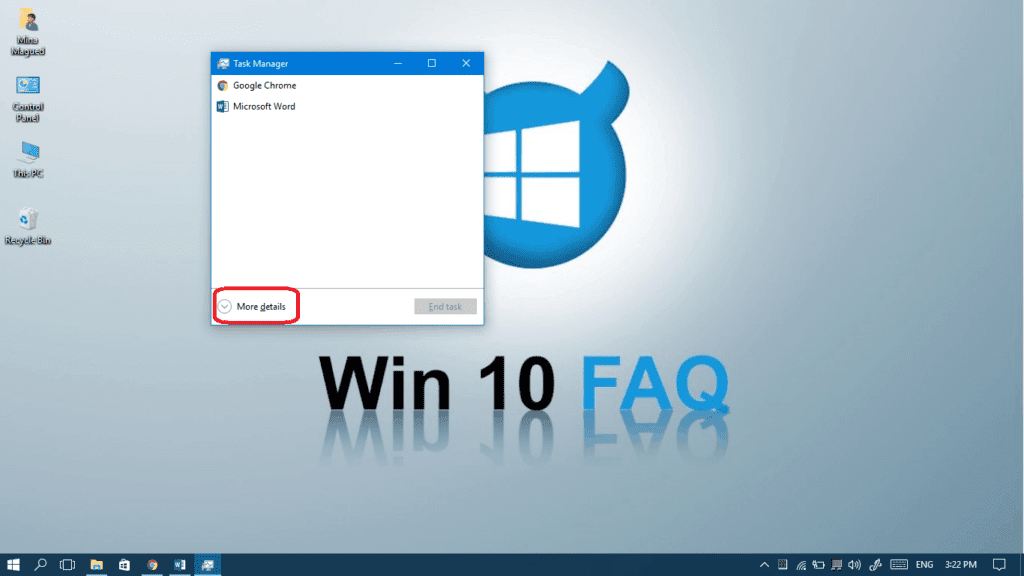
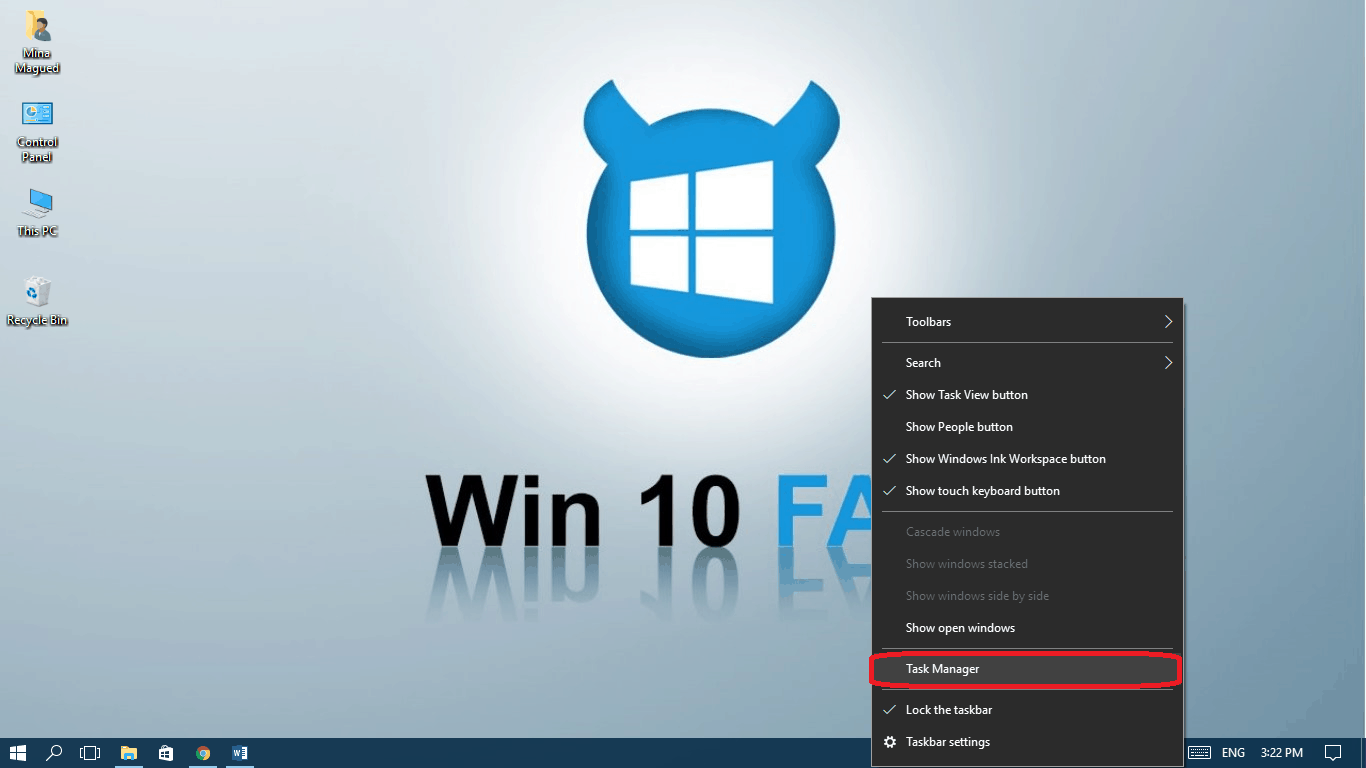
- Open task manager from your taskbar or by pressing Ctrl + Shift + Esc.

- If you see the small panel, click More details to switch to the big panel.
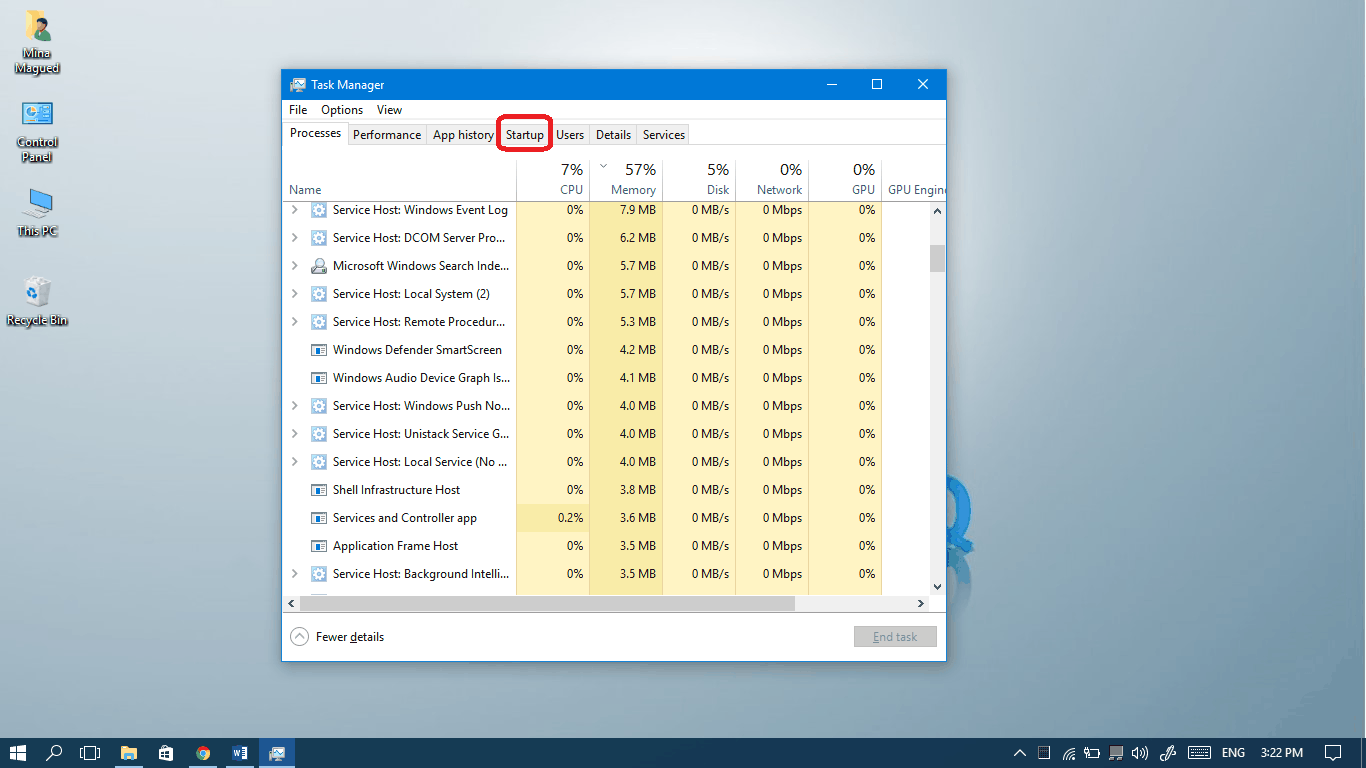
- Open the Startup tab.

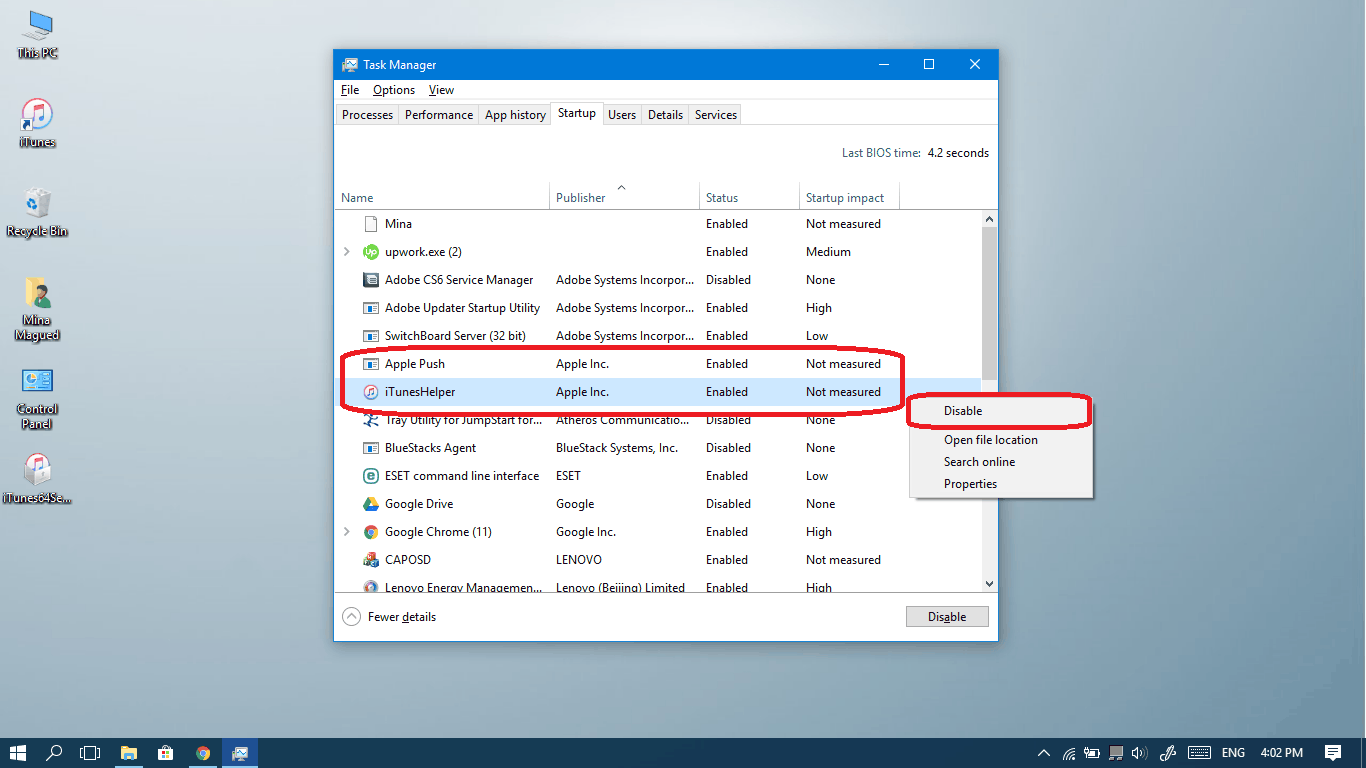
- Right-click on both Apple Push and iTunes Helper and select Disable.


III-Now uninstall any old version of Apple programs.
Uninstall all Apple published programs at your Programs and Features page in your Control Panel:
- Apple Application Support (both 64 and 32 bit)
- iTunes
- Apple Software Update
- Apple Mobile Device Support
- Bonjour
Select each of them and choose Uninstall and once you finish, restart your computer.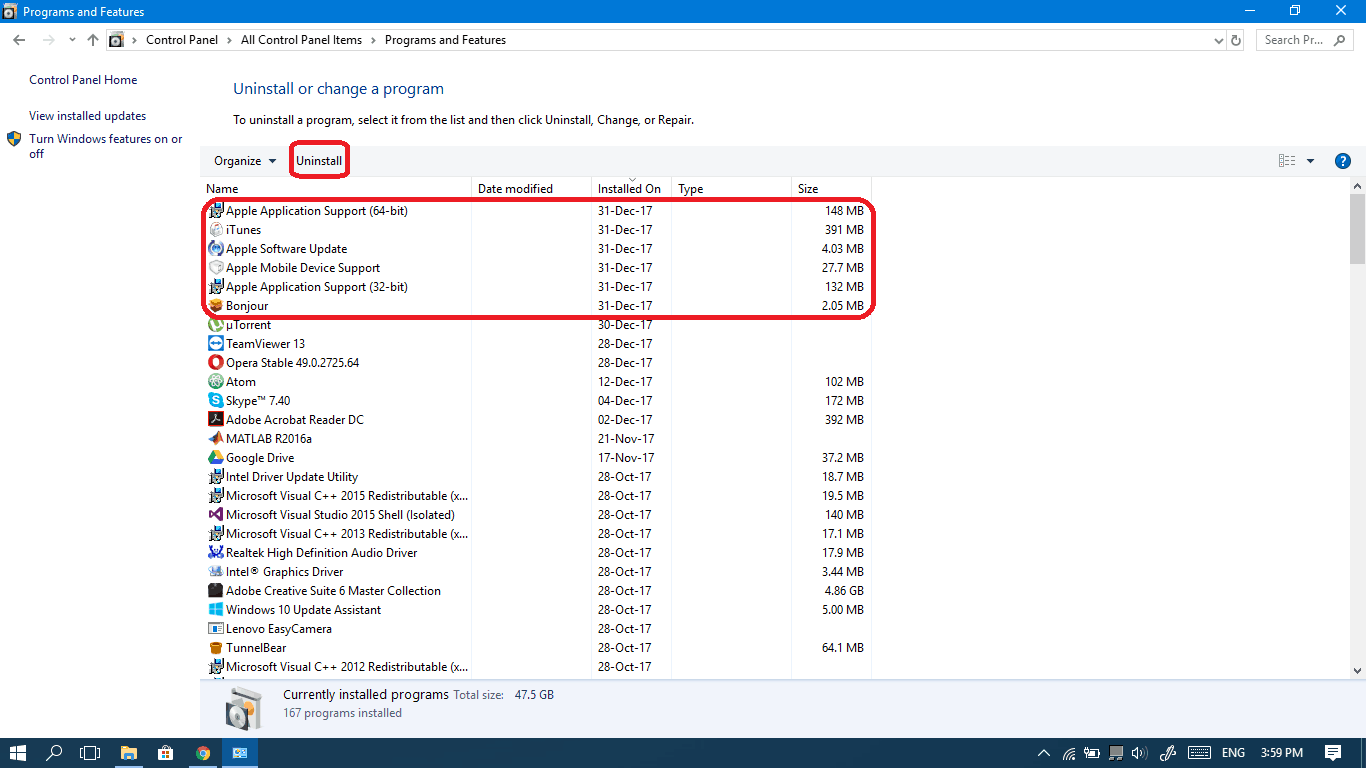
IV-Make sure you have the right version
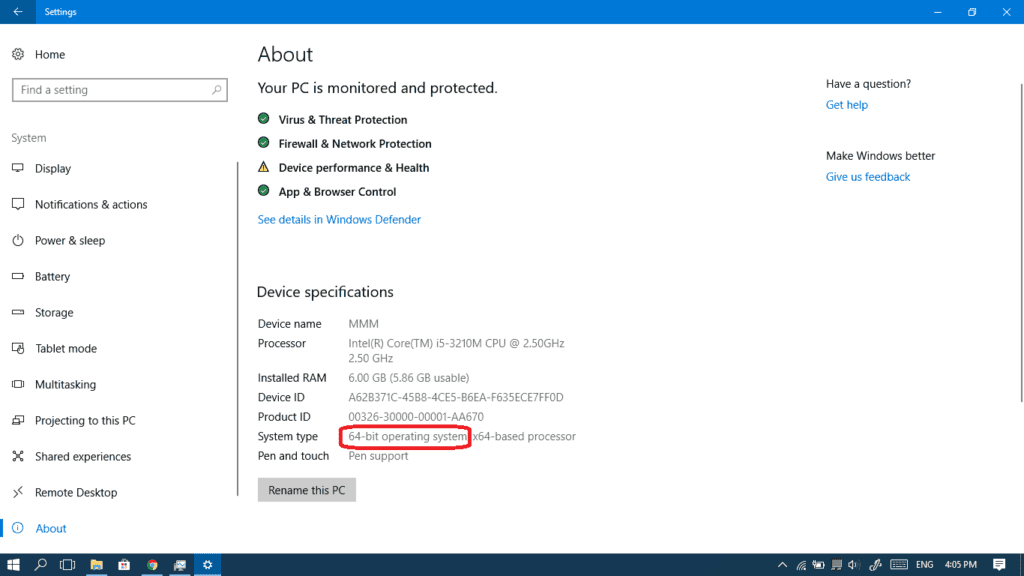
While installing, you have to make sure you make the right choice between 32 and 64-bit versions, otherwise it won’t work. Follow these steps or check this guide in order to know which version of Windows 10 you have, and understand if you have to reinstall:
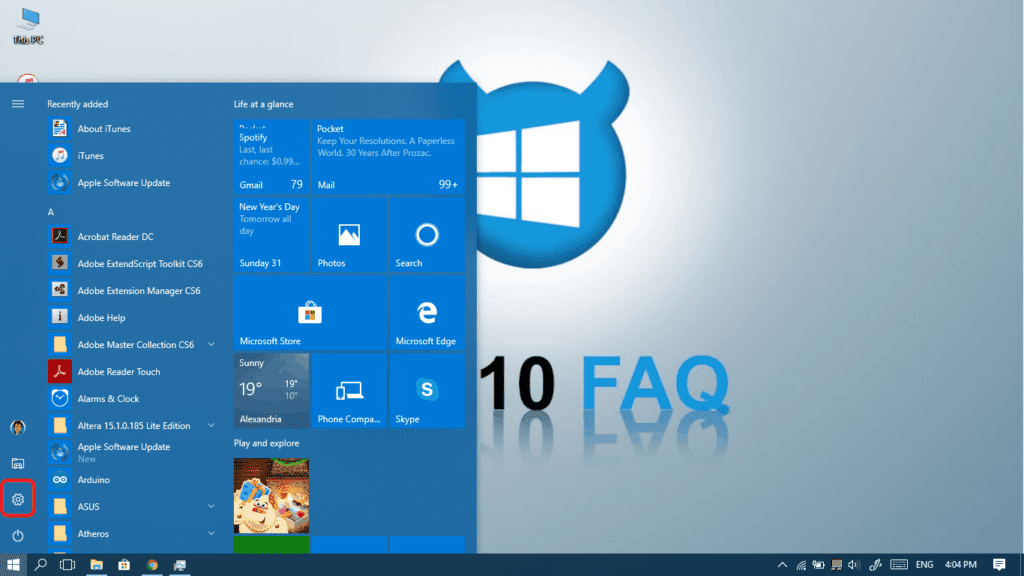
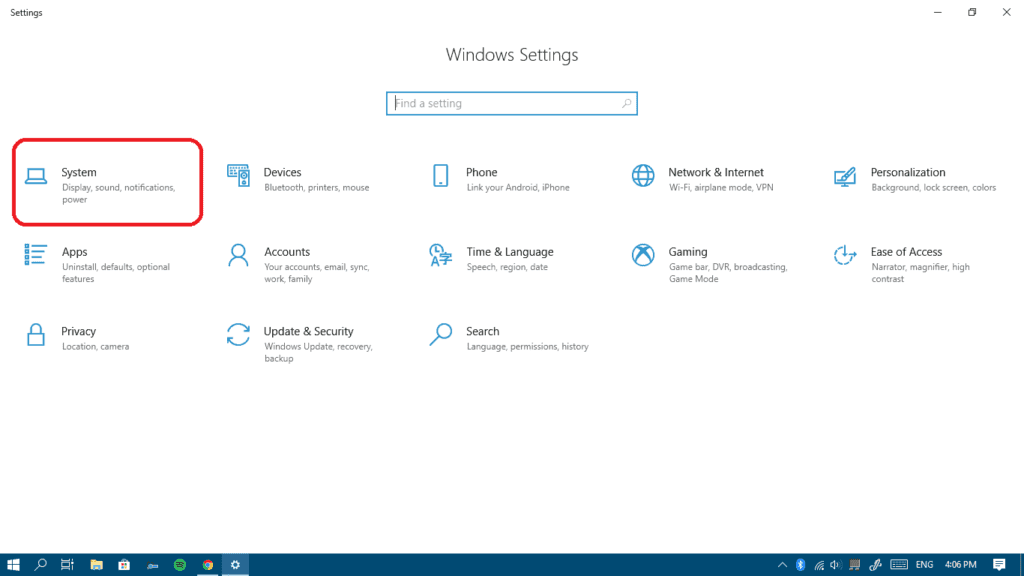
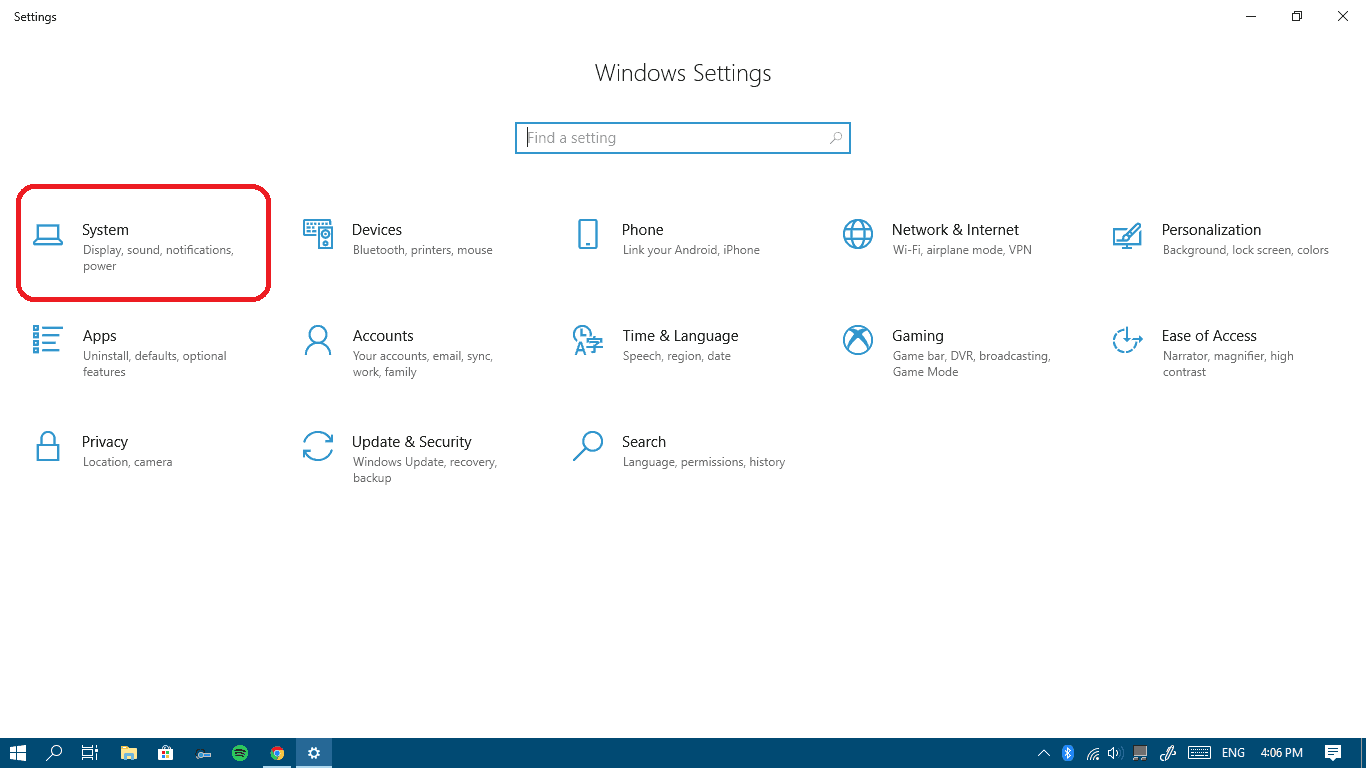
- Open Settings from Start menu.
- Select System.
- From the left pane, select About.
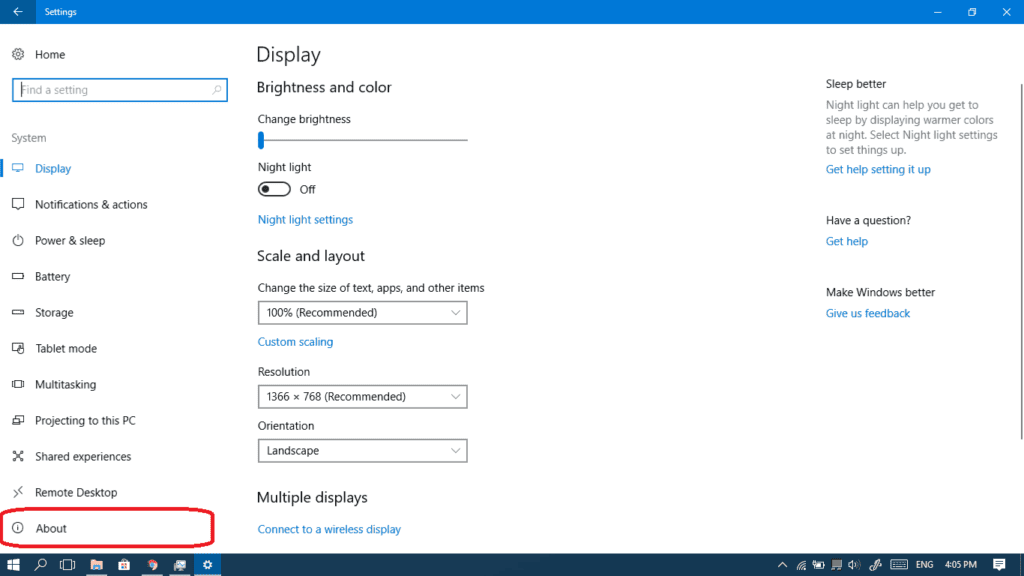
- You can check it right here (Mine is Windows 10 x64-bit).


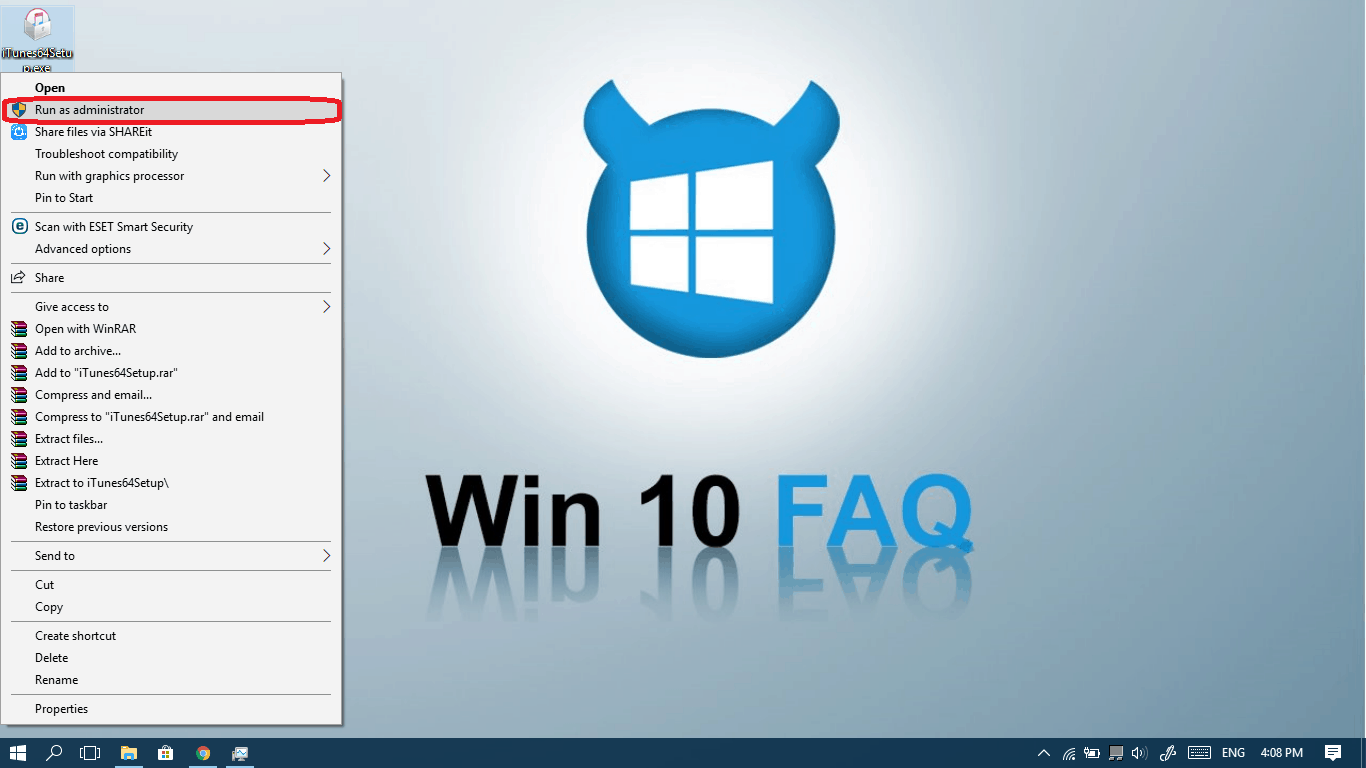
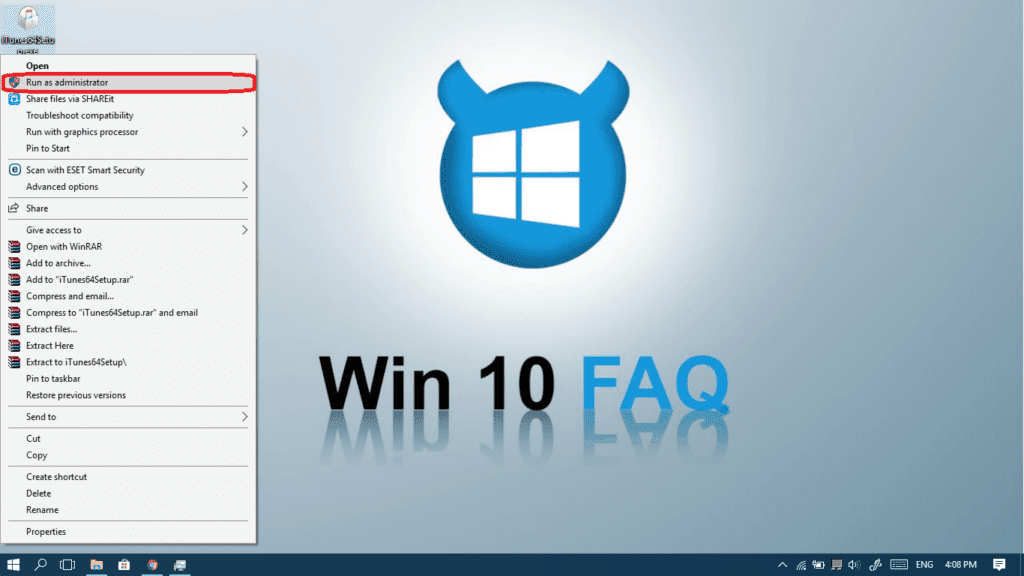
V-Launch the setup as administrator
- Maybe your problem is some issue with Users and Permissions, therefore when you’re about to install iTunes, right-click on the setup file and choose Run as administrator.
- Now complete the steps from 4 to 10 in the Standard installation section to finish the installation.