In this guide, we will discuss all the types of microphones you may want to setup, and will guide you through doing that in Windows.
Let me list the microphone types we are going to talk about (click on the one that’s relevant to you to hop right to it):
- Built-in microphone in a laptop
- Single jack microphone
- Double jack headset (headphones + microphone)
- Two-in-one jack headset or earbud (it has three stripes on the metallic part instead of two)
- USB microphone or headset
- Wireless (Bluetooth) headset
And finally here are some dongles and converters to use in case of incompatibility.
Microphone setup
I- Laptop’s built-in microphone
This is the easiest one to deal with because it’s already compatible with your hardware. If your laptop has Windows pre-installed the mic will probably be configured correctly right out of the box. But in case you have problems with it or if you had to install your Windows version yourself, then here are the steps to set it up right.
- Check that you know which version of Windows you have.
- Go to your Laptop manufacturer’s website, search for a “Downloads” section, and download updated audio drivers. Make sure you are downloading drivers that are for your specific version of Windows, as you checked in Step 1.
- Install the driver you’ve downloaded (normally a Next-Next-Finish process).
- Restart your computer a couple of times.
Now that the microphone is installed, click here to continue to the configuration section.
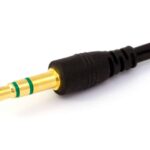
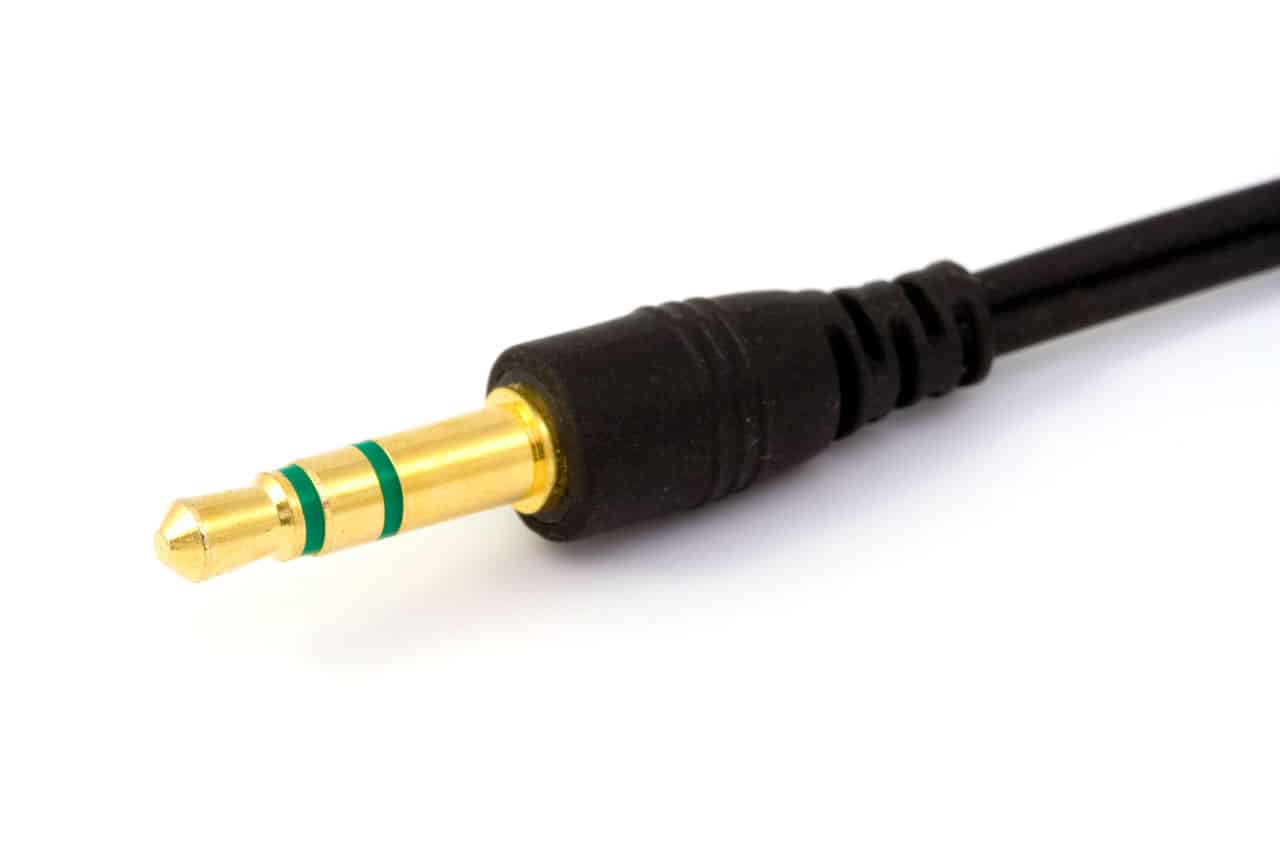
II- Single jack microphone
 First, connect it
This kind of microphone has one or two stripes on the microphone jack. Connect the jack to the port carrying the microphone symbol – sometimes it’s colored Pink but not always.
Now, download drivers
Most of these microphones don’t need special drivers to work on your computer. But be careful, there is either a mute button or a volume controller in the microphone, so check that it isn’t muted or turned all the way down.
If you do find that the mic isn’t working even after un-muting it and configuring it according to the configuration section below, you may need to install new drivers. The required drivers are: audio drivers suitable to your motherboard. You can find them on your motherboard manufacturer’s website or on your laptop manufacturer’s website in case you’re using a laptop.
And then, configure it
Click here to jump to the configuration section.
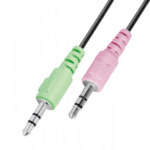
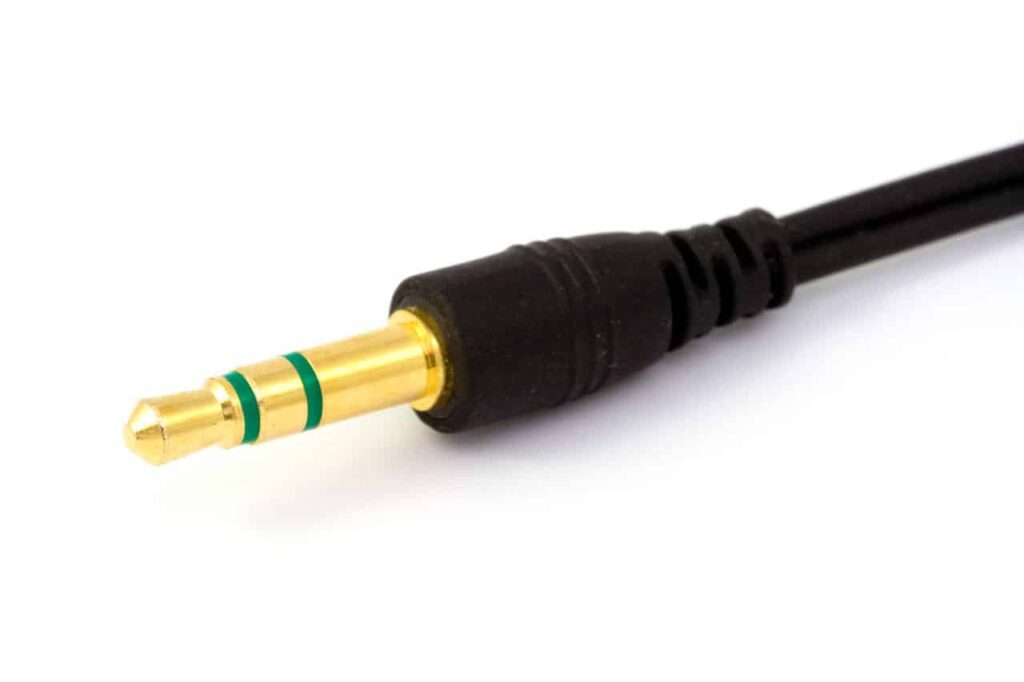
III- Double jack headset (Headphones + microphone)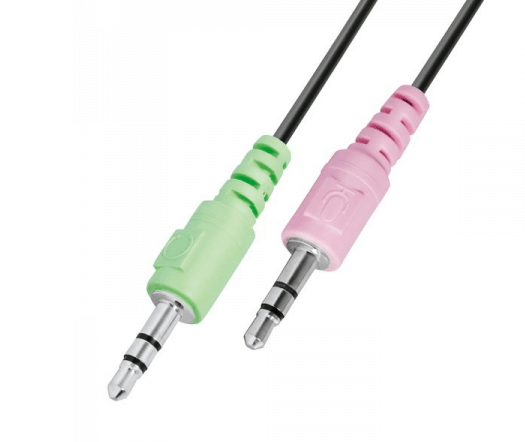
First, connect it
Here we have two separate jacks, one for playback and the other is for recording and each of them have Two isolation stripes (those stripes you see in the picture above) on the jack. You’ll need to connect each of them to its correct port. The audio port has the headphones symbol next to it and the microphone has its own symbol. They are also known by their default colors: Green means Speakers and Pink means Microphone.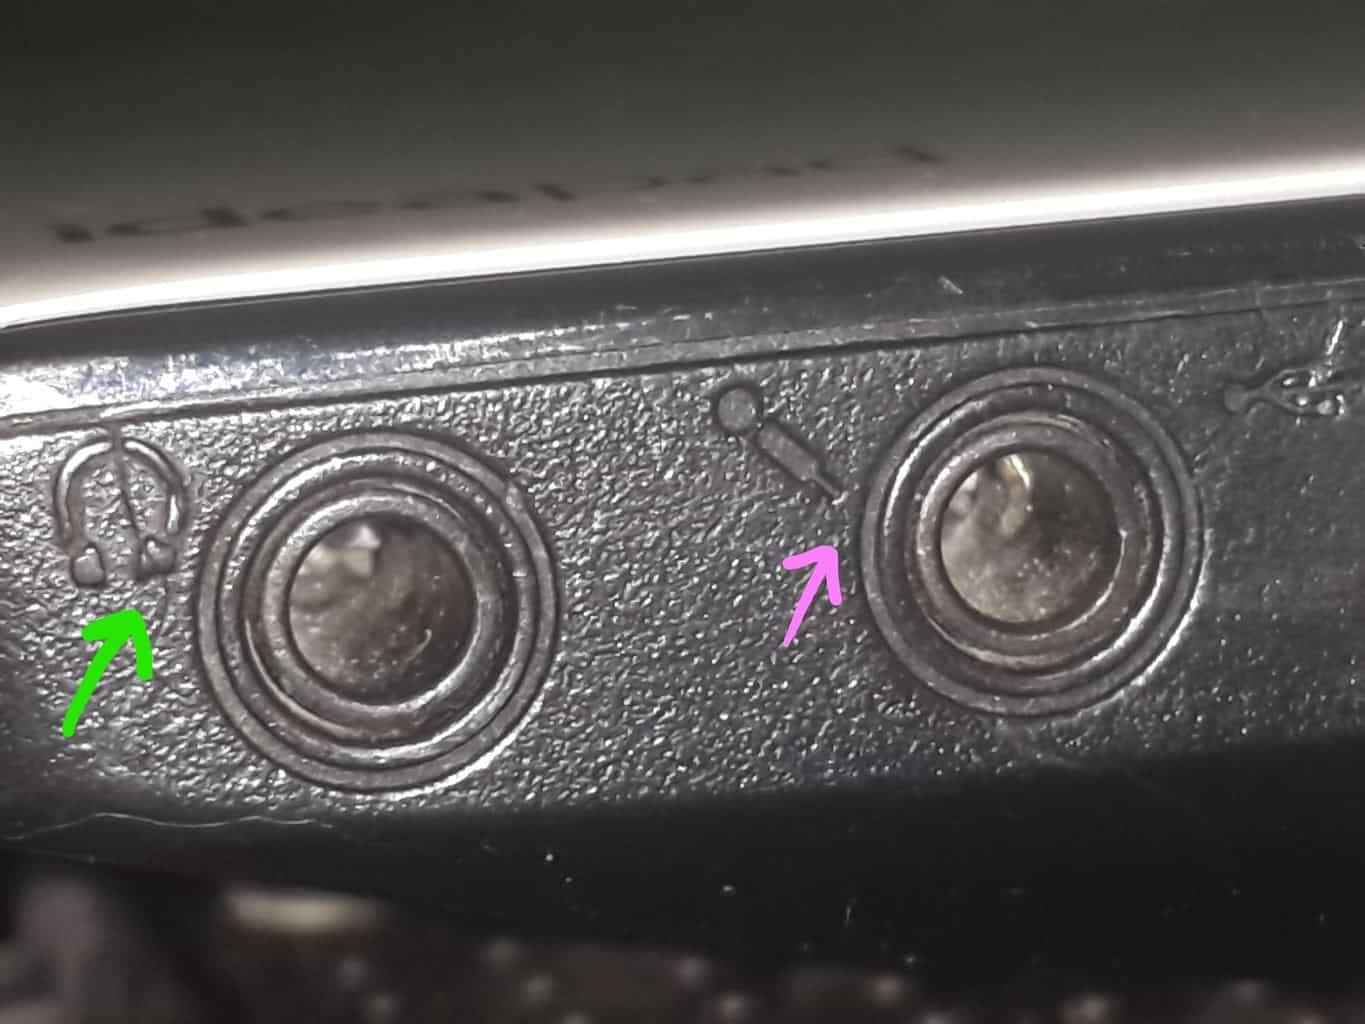
Note that if you have a 2-in-1 headset port (see picture below) you can connect the headphones jack to it – and it will work. But if you connect the mic jack to it – it won’t work.

Now, download drivers
Required Drivers: the right audio drivers for your computer’s motherboard. You can find them on your motherboard manufacturer’s website or on your laptop manufacturer’s website if you’re on a laptop.
And then, configure it
Click here to jump to the configuration section.
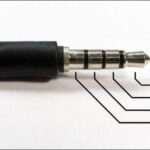
IV- 2-in-1 3.5mm jack headset or earbud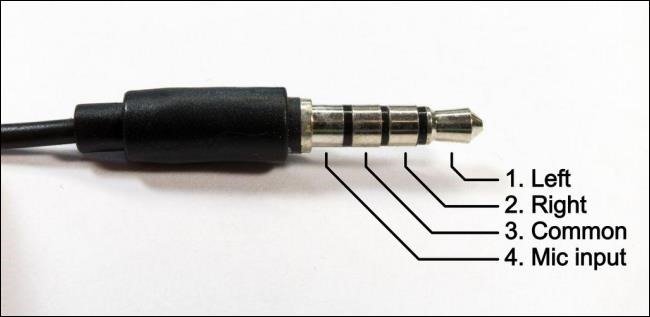
First, connect it
This one was widely used in Smartphones earphones, and more recently it started replacing the old 2 separated 3.5 mm jack ones. And as you see, there are 3 isolation stripes on it instead of 2, making it easy to recognize.
Remember that this one can be used to pick up audio from the old green audio port but you can’t use it on the microphone port. So remember, in order to use the microphone, you have to stick with this port:
Now, download drivers
Required drivers: Audio drivers depending on your Motherboard Driver. You can find them on your Motherboard manufacturer’s website and on your laptop manufacturer’s in case of a portable computer.
And then, configure it
Click here to jump to the configuration section.
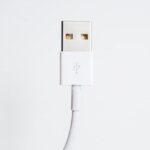
V- USB microphone or headset
First, connect it
When we have a USB connection at the end of our microphone or headset wire, we immediately assume it’s a simple deal But sometimes it isn’t so simple. The are different types of USB connections (USB 1, USB 2, USB 3) – and I would recommend that if you’re not sure, connect your new microphone into a USB 2.0 plug and a USB 3.0. Why so? Because USB 2.0 is compatible with almost all the devices. And USB 3? Not as much.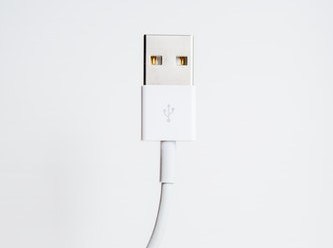
Here’s a couple of hints to know whether your USB is 2.0 or 3.0:
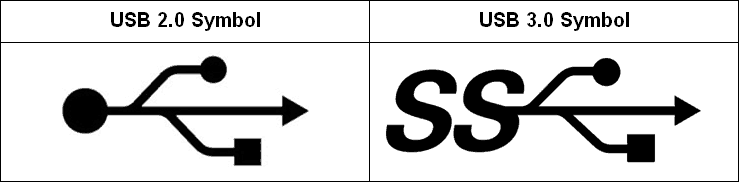
Check the logo
Since USB 3.0 is also knows as SuperSpeed USB, if the port is a USB 3.0 there would be an SS USB mark near your USB port, while USB 2.0 just has the regular USB icon.
Check the color
Usually (but annoyingly – not always!) the USB 3.0 port has a blue color inside the port (even if it doesn’t have the SS mark) whereas USB 2.0 has either black or white inside the port.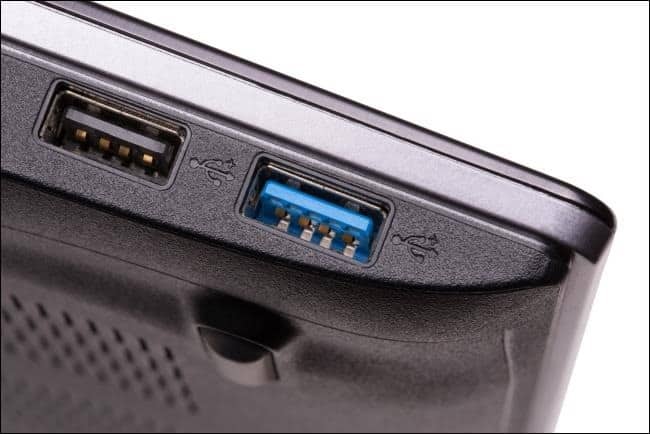
Also, some headsets simply have USB dongles (adapters), which means that if it doesn’t work with the USB port you can remove the adapter and plug the 3.5 mm jack directly.
Typically, USB isn’t a Plug and Play port which means there is a big chance you’ll need external drivers from your microphones drivers, which leads us to the next couple of lines…
Now, download drivers
Required Drivers:
- I/O Serial driver from your motherboard manufacturer’s website (in case of a desktop PC) or from your laptop manufacturer’s website (in case you have a laptop!). This driver is used for lots of serial input/output connections – including USB – so you can just call it a USB driver if this I/O thing seems scary (I met some people who were scared by that).
- Microphone driver from your USB microphone manufacturer’s website.
If you haven’t bought it yet, I recommend that before you purchase your microphone, check the manufacturer’s website to see that the mic is indeed fully compatible with Windows 10 (if there are Windows 10 drivers on the website for this microphone then it’s ok).
And then, configure it
Click here to jump to the configuration section.
VI- Bluetooth Microphone and Headsets
Who doesn’t like to go Wireless? Maybe people who don’t know how to enable and use Bluetooth in Windows 10! If you’re one of those, then click here to learn all about enabling and using Bluetooth.
Do you already have Bluetooth enabled but it’s not working? Here’s the thing: The Bluetooth version of your headset must be compatible with the Bluetooth version your computer has got. I know you may have not noticed it but Bluetooth has evolved from version 1 to version 5 over the years. So knowing which Bluetooth version you have and configuring the microphone might take a tiny bit more effort. It’s recommended that your headset Bluetooth version is the same version or older (smaller number) than your computer Bluetooth module. Here’s how you check your Computer Bluetooth version before you buy your headset:
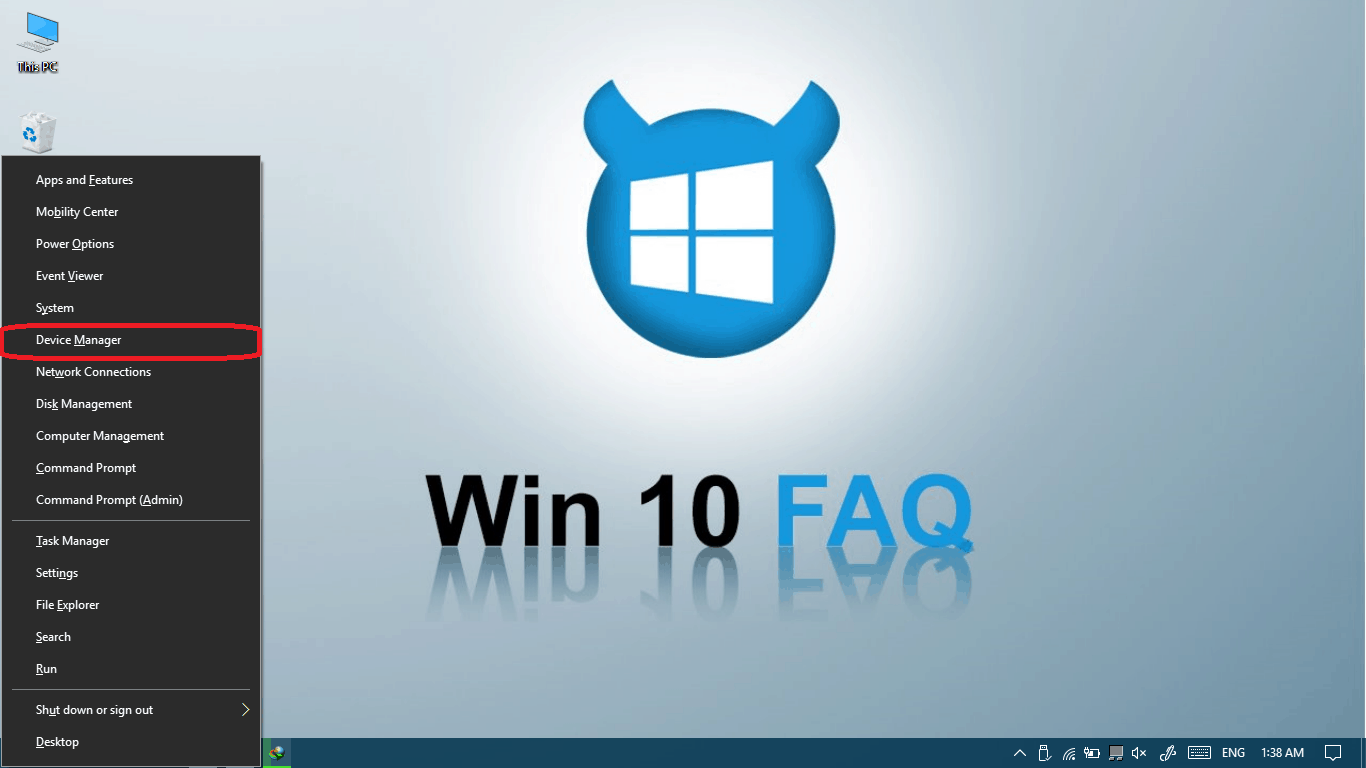
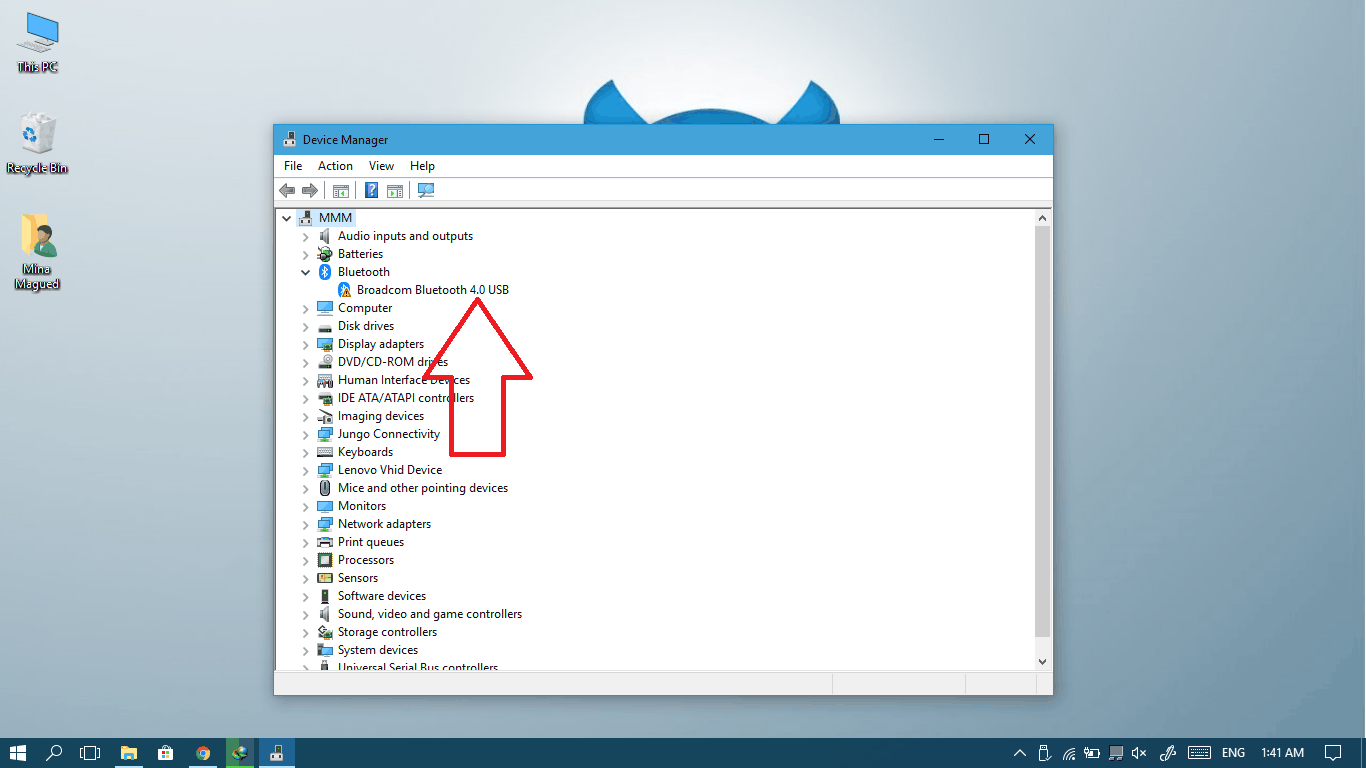
- Right-click on your start button or press the Windows logo key + X and select Device Manager.
- Expand the Bluetooth tree and you’ll find the Bluetooth version shown right below it. (Mine is version 4.0 as shown)
Here’s what you need to do in order to install you Bluetooth microphone/headset:
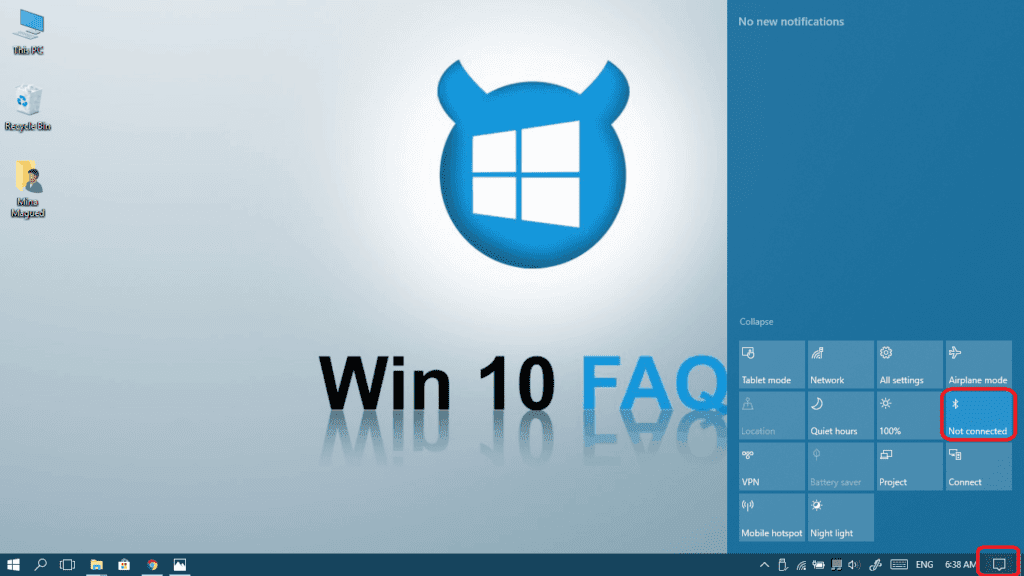
- Turn on your Bluetooth by clicking on its button at your Action Center.
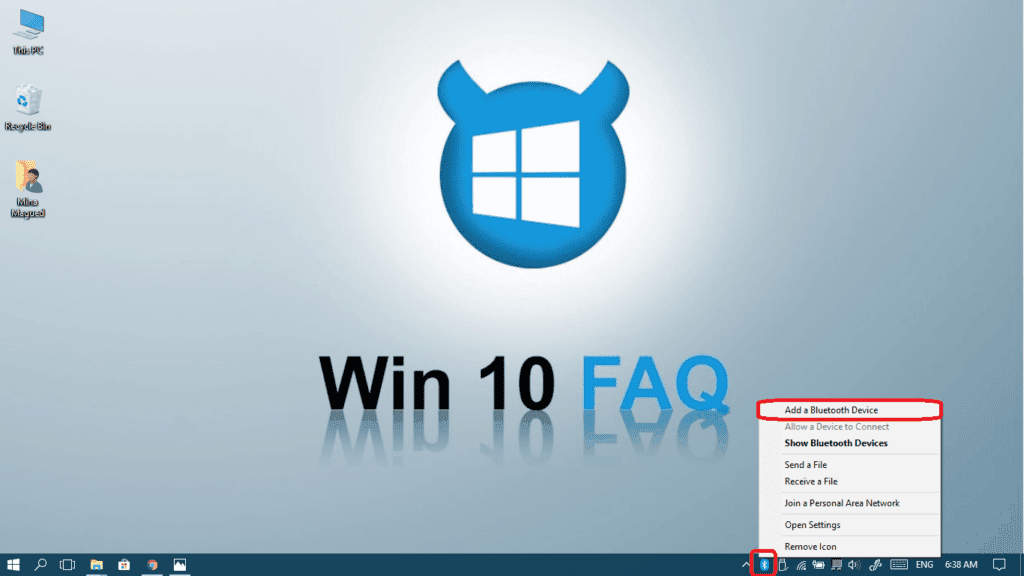
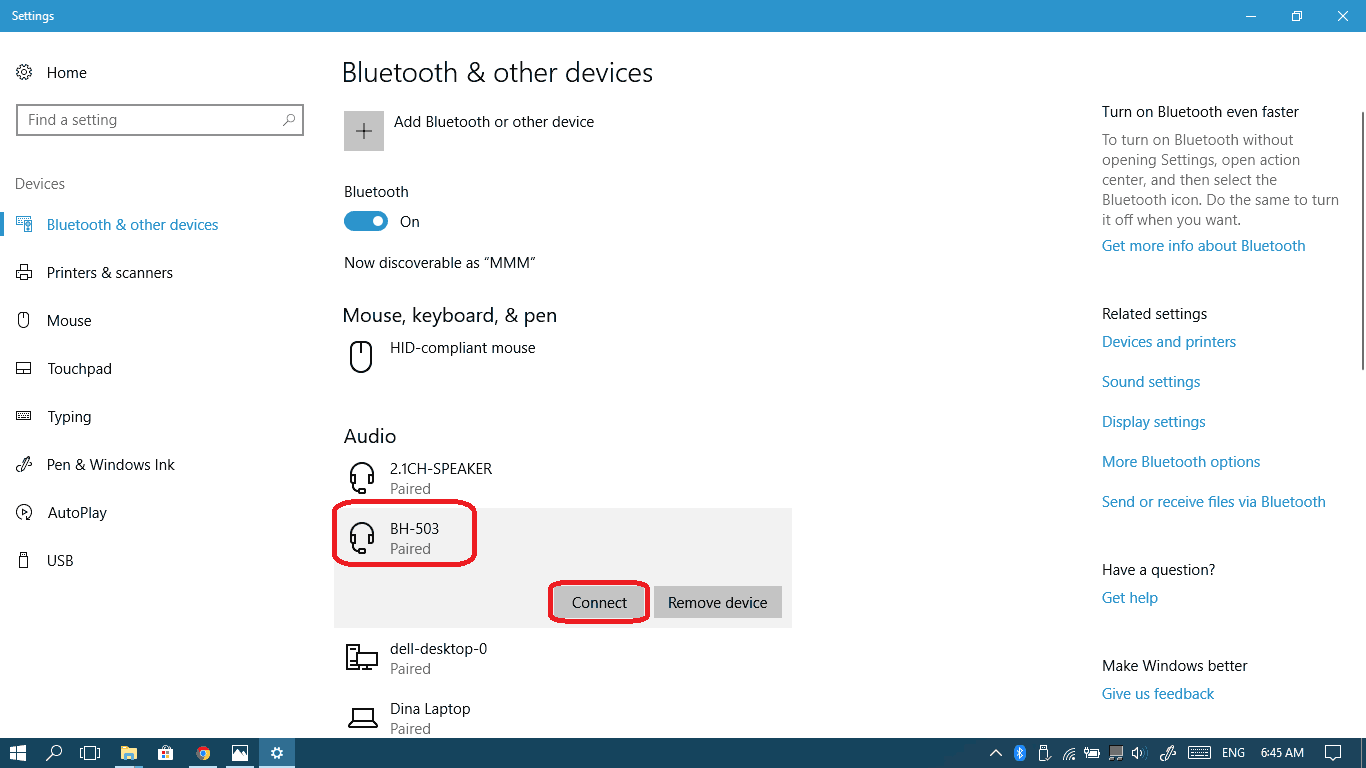
- Right-click on the Bluetooth icon and select Add a Bluetooth Device.
- Choose the Bluetooth microphone/headset from the list and click Pair or Connect if it’s already paired.
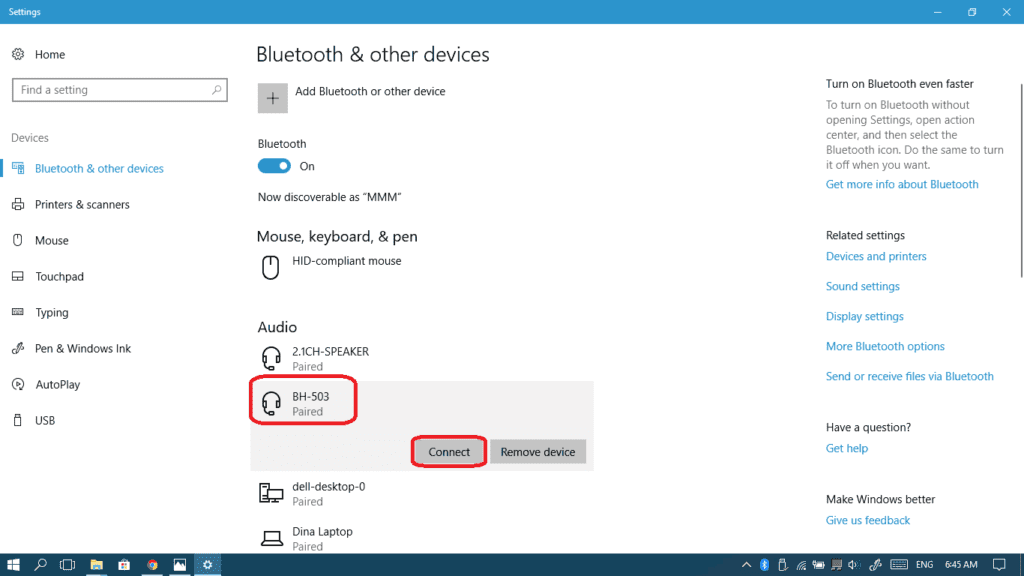
- Once paired or connected, right-click on the speaker icon in the bottom-right part of the screen and choose Sounds.
- Click on the Recording tab in order to see your recording devices list.
- Right-click on the Bluetooth microphone/headset and make sure it’s already connected. If it’s not, click Connect.


If it’s not working out of the box (after following the installation steps above and the general configuration steps below), try downloading new drivers. The required drivers are:
- Bluetooth driver from your computer manufacturer’s website.
- Audio drivers from your motherboard/computer manufacturer’s website.
Click here to jump to the configuration section.
General Configuration
Now that your microphone is connected correctly and has the right drivers, some small configurations are sometimes needed so that the computer could hear it. Follow us:
- Make sure your microphone isn’t muted by a mute or a volume button.
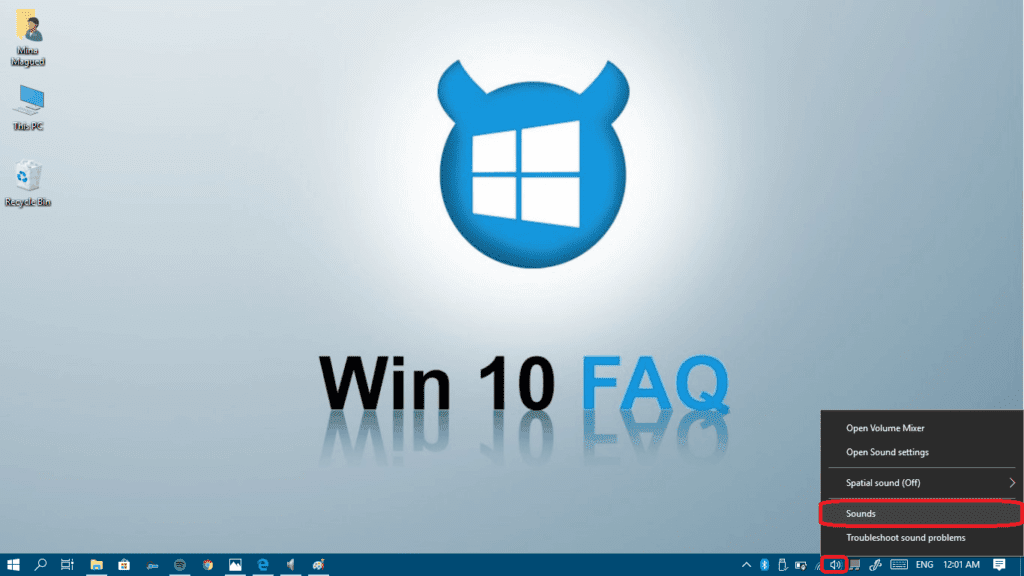
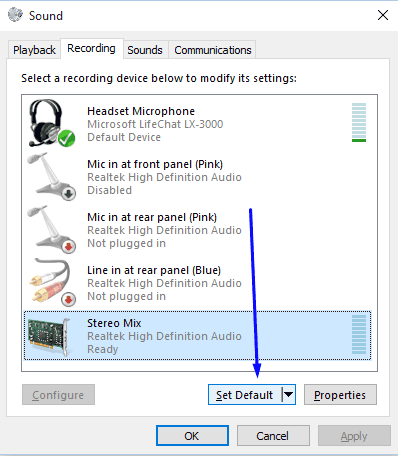
- Right-click on the speaker icon in the bottom-right part of the screen and choose Sounds.
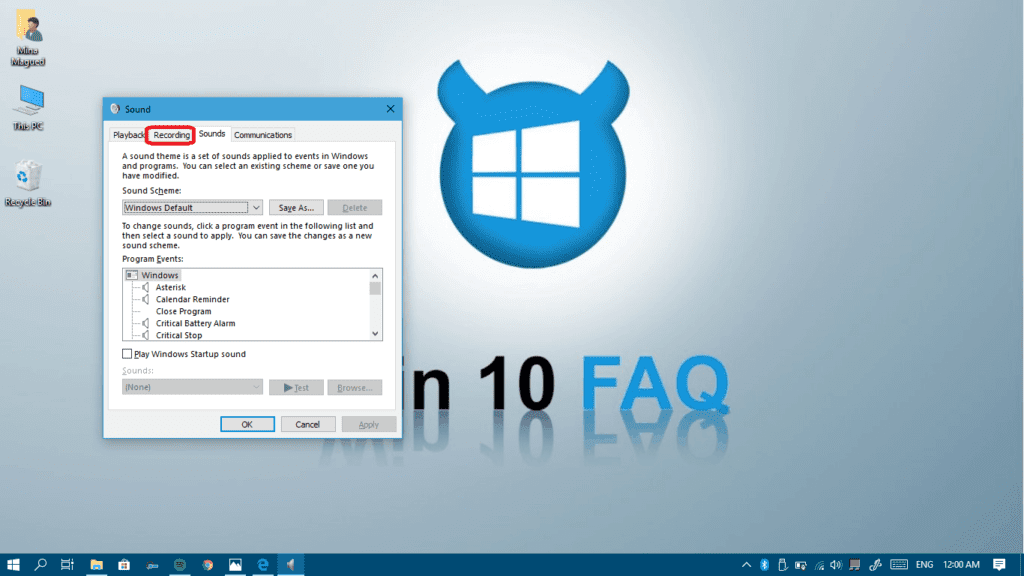
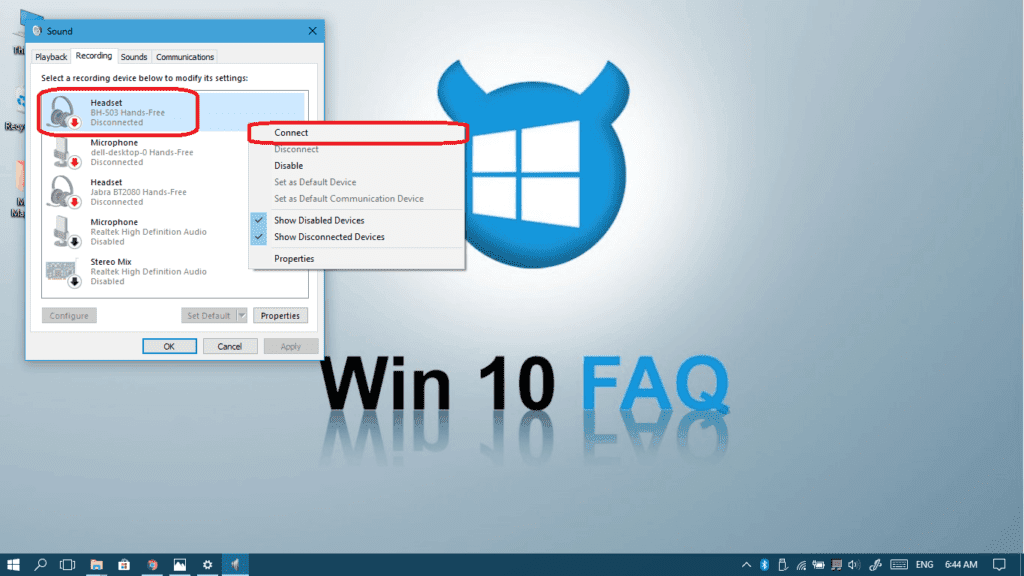
- Click on the Recording tab in order to see your recording devices list.
- If you see a microphone device with some green bars moving while making some noise, then that one is working for sure.
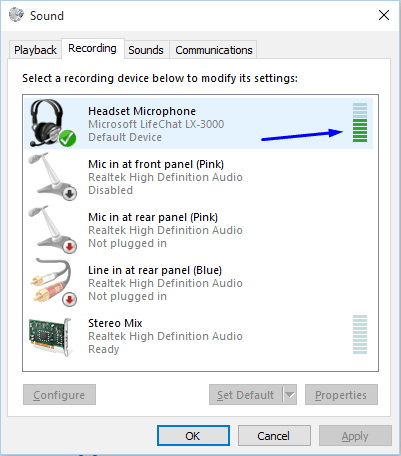
- If no microphones shows green bars, disable all the recording devices you don’t need and set the desired microphone as default.
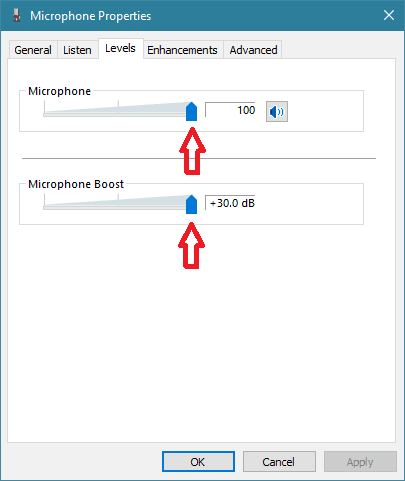
- Double-click on the device that represents your microphone. The Microphone Properties window will appear. Click the Levels tab.
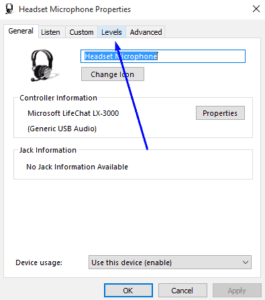
- In the “Levels” tab make sure that “Microphone” and “Microphone Boost” are set to the maximum, you can do that by sliding them to the right until the first one shows 100 and the boost is set to +30.0 dB. Then click OK.
- In the “Enhancements” tab (if found), make sure to uncheck the “Disable all sound effects” checkbox.
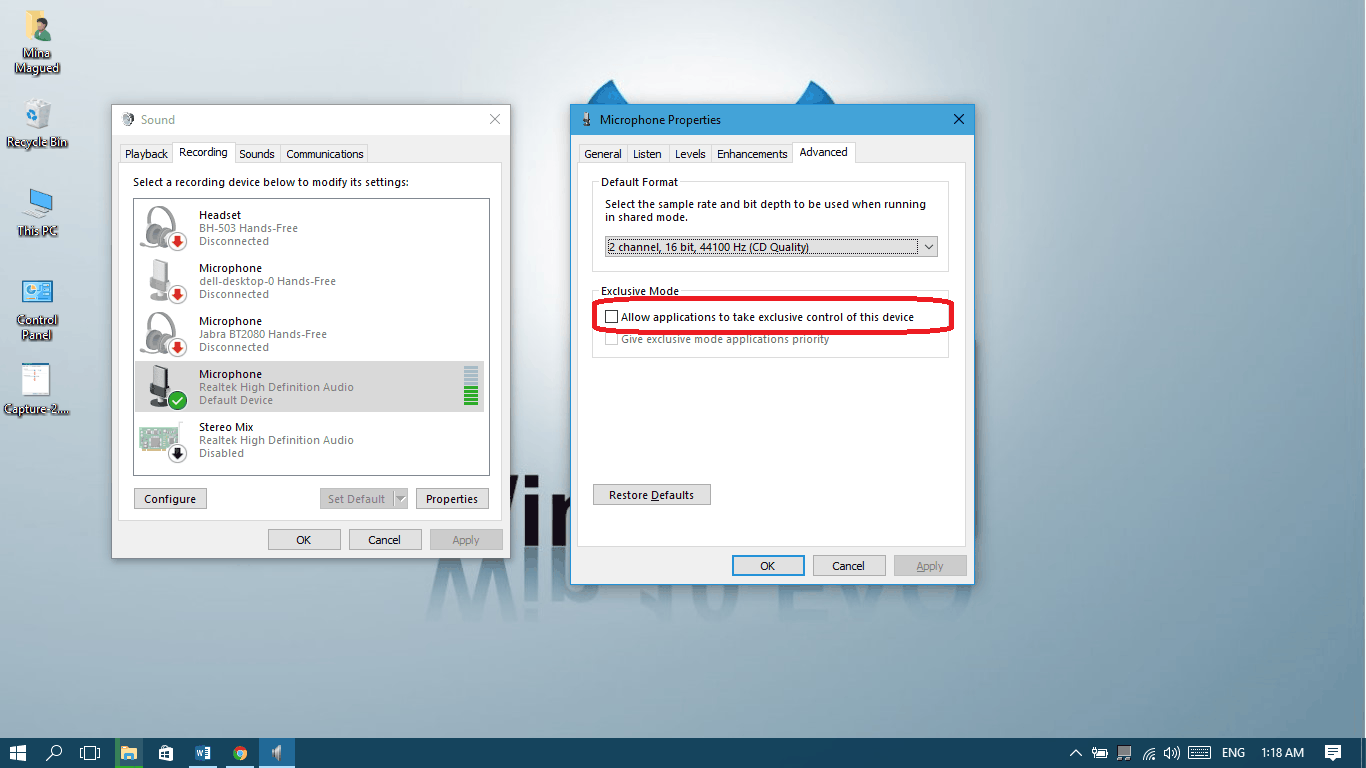
- Now visit the “Advanced” tab too and make sure to uncheck the “Allow applications to take exclusive control of this device” checkbox and click “OK“. (Also uncheck the “Enable audio enhancements” check box if you see one).

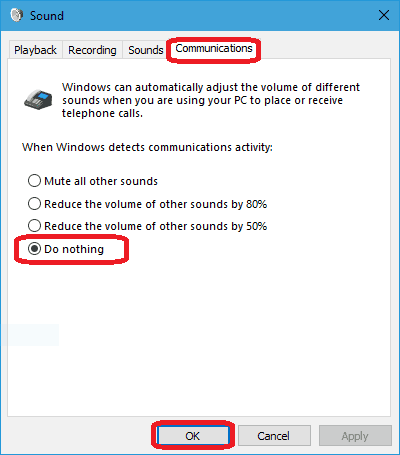
- In the main recording devices panel, go to the “Communications” tab and select the “Do nothing” radio button and then click OK.
- Restart your computer and recheck your recording devices panel. If you see green bars rising when you talk into the microphone – your mic is now properly configured!
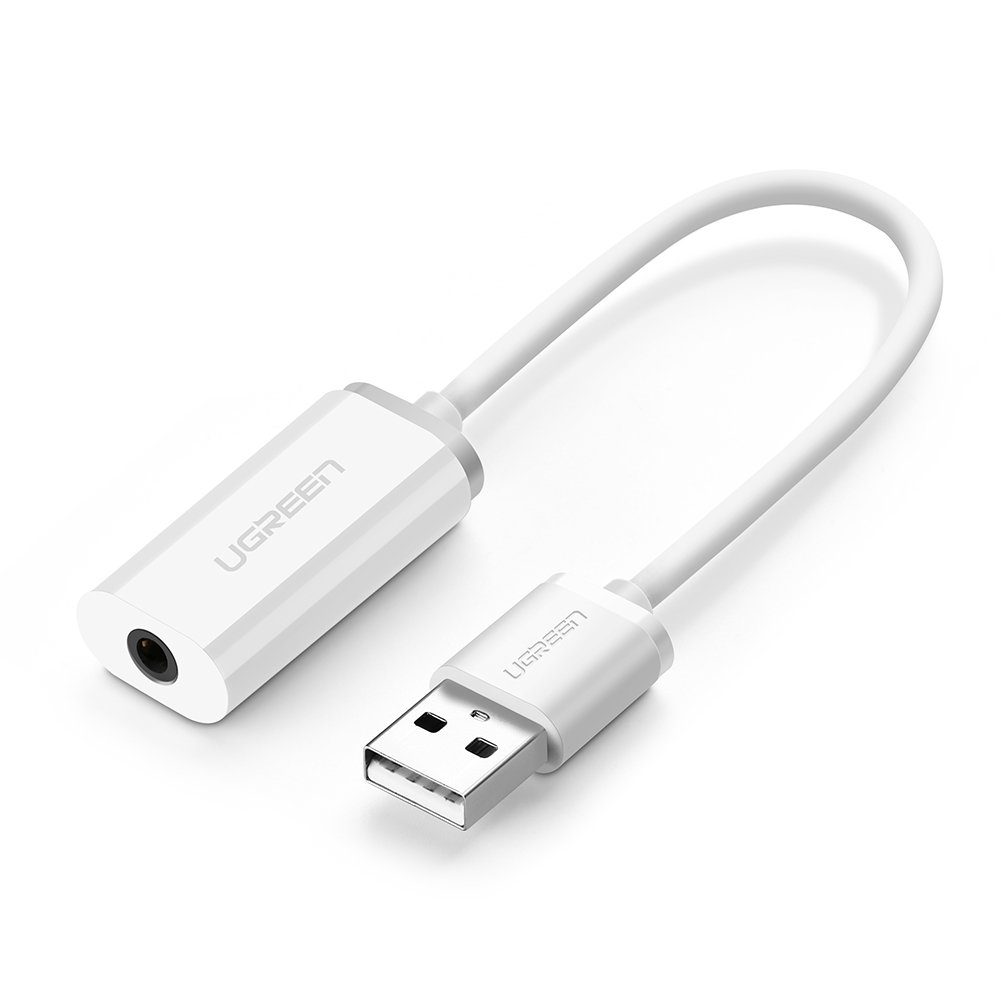
Some dongles and converters to use in case of incompatibility
If your microphone connection isn’t compatible with your computer, or if it just doesn’t work and you need to connect it some other way, here’s a little guide about dongles and converters that are easy to use:
- iPhone earphones and other headsets’ microphones with one single jack won’t work in case your computer has two ports, splitted. So you’ll need to buy one of these splitters:

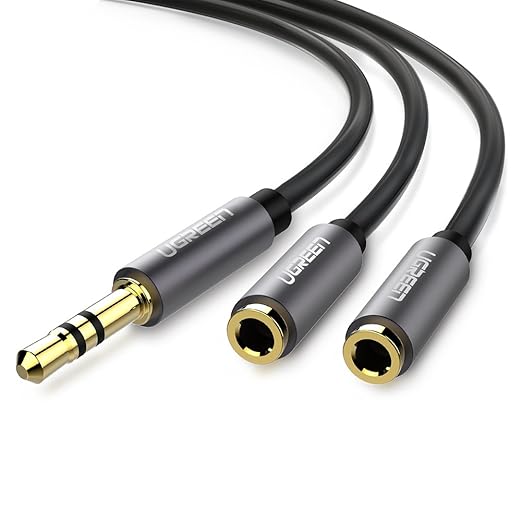
- If your headset has two independent jacks and you want to connect both of them to the one headset port in your computer you will need one of these splitters:
- If your connection is the same on the headset and in the computer, but the microphone still doesn’t work, you may try to convert to a USB connection. Use one of these converters:
- For 2 x 3.5mm jacks headsets

- For 1 x 3.5mm jack headsets
- For 2 x 3.5mm jacks headsets
I have the I have microphone feedback I can’t seem to fix it
Hello James, you may consider reading this article which has all the fixing you need:
https://win10faq.com/fix-microphone-settings/
I read that article from top to bottom, frontwards & backwards, & up & down. Nowhere did it say how to fix a microphone feedback issue!! Mine is a USB plug & play webcam microphone (although I installed the AMCap software) & the microphone appears to work (the green bars react to my voice), until I turn the camera on, then I get a squeal that keeps rising in volume until I can’t stand it anymore & mute it! What could be wrong? Thank you for your response!
Your article has proven useful to me. It’s very informative and you are obviously very knowledgeable.
Thank you for your amazing comment!
I am beyond impressed! I have been struggling to get a new headset/mic (2-in-1 3.5mm) to work to no avail, until I discovered your post. The precise detail, covering every tiny aspect of each step of the process, in a totally understandable way for the non-geek, made it possible for me to get the headset to work properly without having to buy any extra dongle or adapter. Thank you for your willingness to share your knowledge, Mina.
Oh my god, this may be the best comment I’ve ever received. Thank you so much! I’m so happy I could help. Happy new Year!
I need help, I have turtle beach headphones, that work when I use them for my ps4 but don’t on my laptop. Please Help!!
Hello Raj, can you specify which model do you have? By the way, the ones in this link are the only models compatible with Windows devices, hope yours is one of them:
https://support.turtlebeach.com/hc/en-us/categories/202689847
There is no “Sounds” option in the menu after right-clicking on the audio icon.
Windows 10 Pro, latest updates installed as of Sept 13, 2019.
Windows web site has similar instructions as this, but this has more screen shots. But I cannot find the menus shown here in this version of Windows using these instructions. Obviously something changed in an update that is not reflected here.
My headset/mic isn’t even appearing in the recording tab!