Hello everyone! Sometimes a Windows computer runs a disk check on startup. It happens every now and then on every computer, but for some people it happens every time they start their computer up.

When it shows up, you have 8 seconds to skip it by pressing any keyboard key, and if you have to do this every time the computer starts up it definitely gets a bit Annoying.
Why does it happen?
Disk checks are triggered by Windows automatically when the computer didn’t shut down cleanly, when it sensed a problem with the file system or the hard drive, and for other reasons. If it happens every now and then it’s normal but if it runs every time you start your computer up then there may be a problem that needs to be fixed.
Since frequent disk checks can signify that your hard drive is faulty, I strongly recommend that you backup your hard drive on an external storage drive as soon as possible because you risk losing your files at any moment. After you have your important files backed up, continue to the methods below to fix the problem.
Method I and Method II will try to actually solve the disk issue, but if you’re not really interested in that and you just want to disable the disk check, you can go directly to Method III.
Method I: Fix the error using CMD
I would like to begin with this couple of commands in order to check for system and disk errors and try to fix them. If you’ve read any of my previous guides, you’ll know how much I love those magical commands, they save tons of time and energy… Here we go:
- Type “cmd” in your start menu, right-click on Command Prompt and choose Run as administrator.
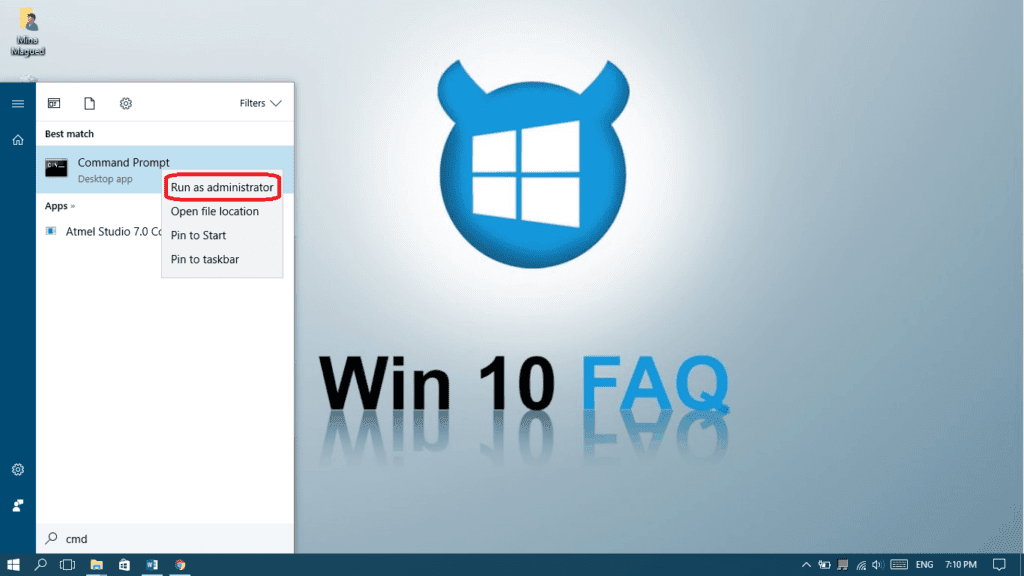
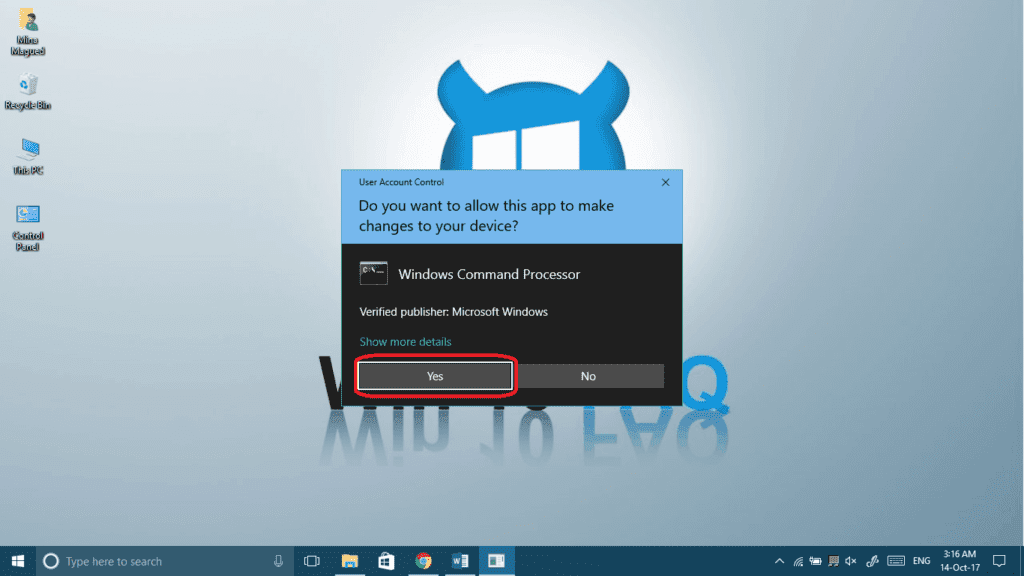
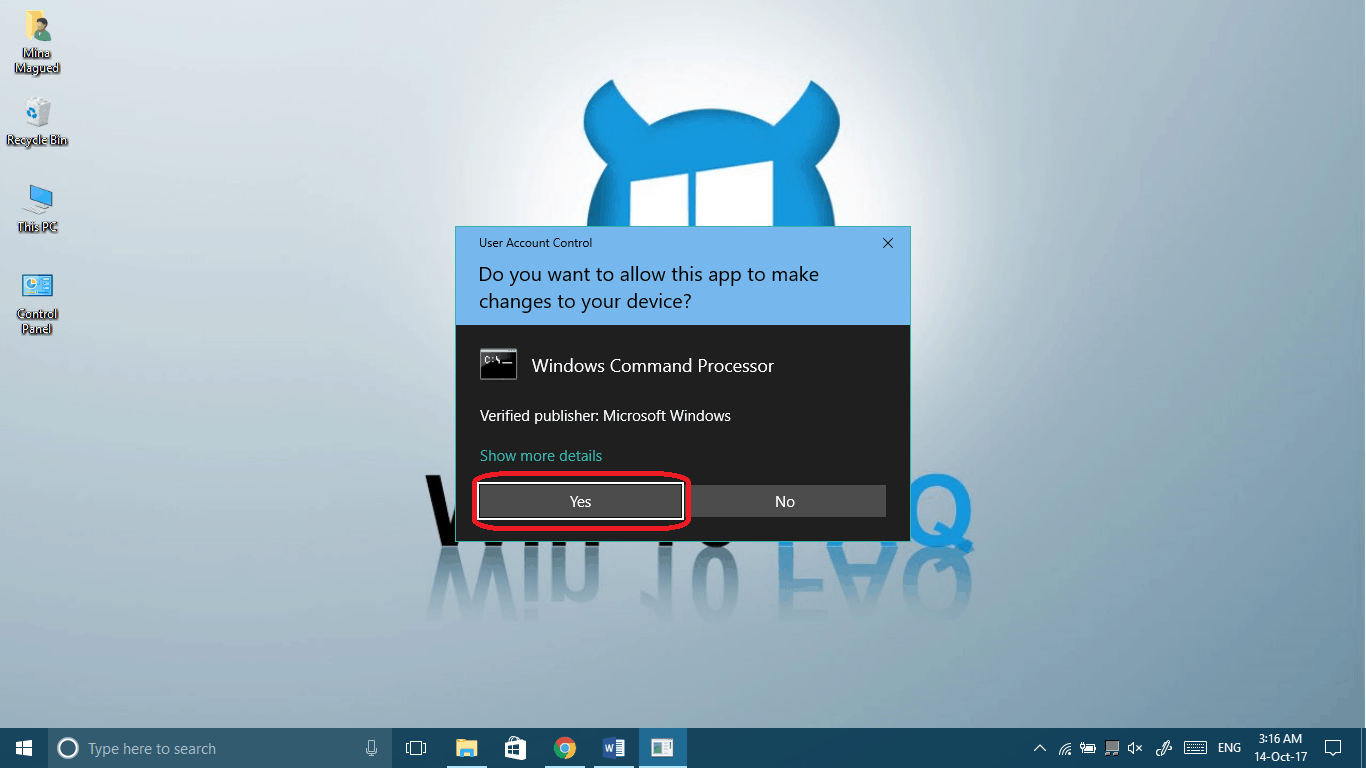
- Click Yes to give it permission.
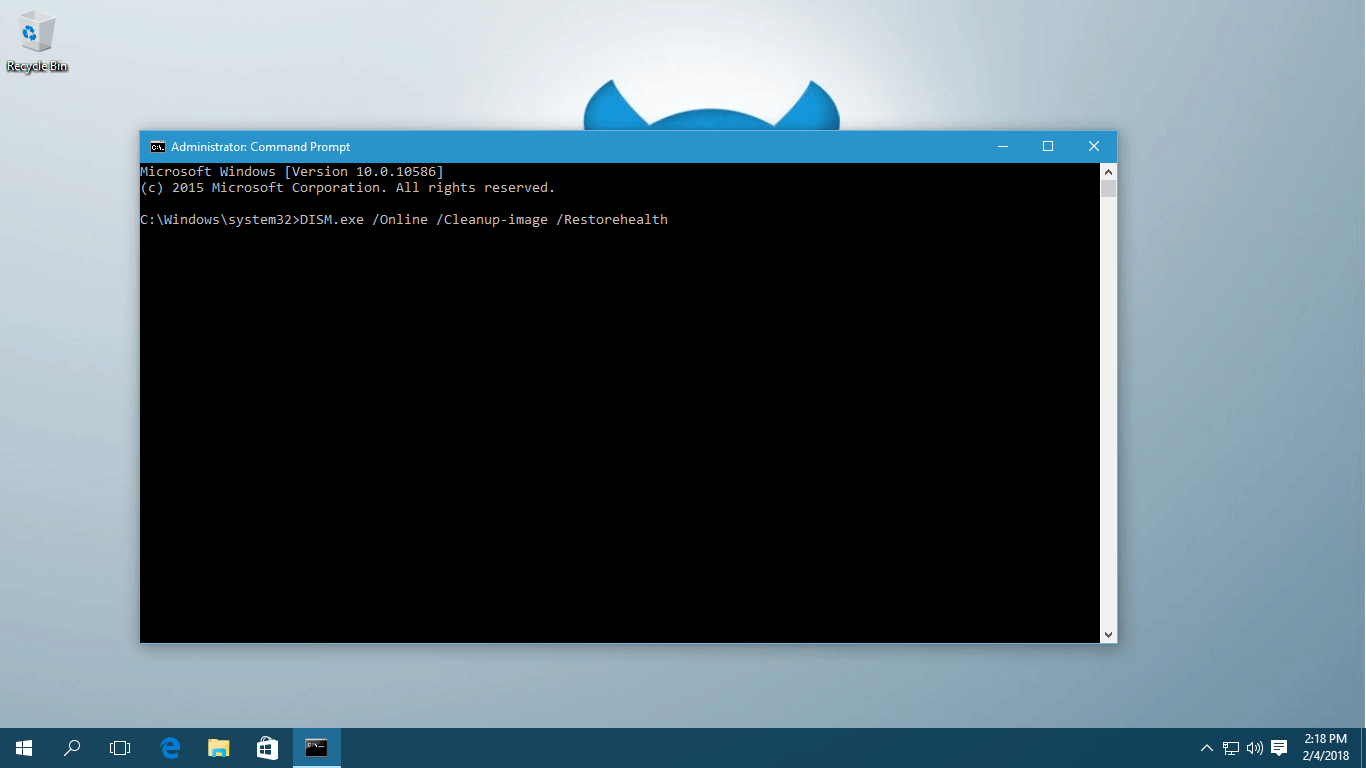
- Type the following command and then press Enter:
DISM.exe /Online /Cleanup-image /Restorehealth
(note the spaces before each “/”).
- Type the following command then press Enter:
sfc /scannow
(make sure you put a space between “sfc” and “/scannow”)
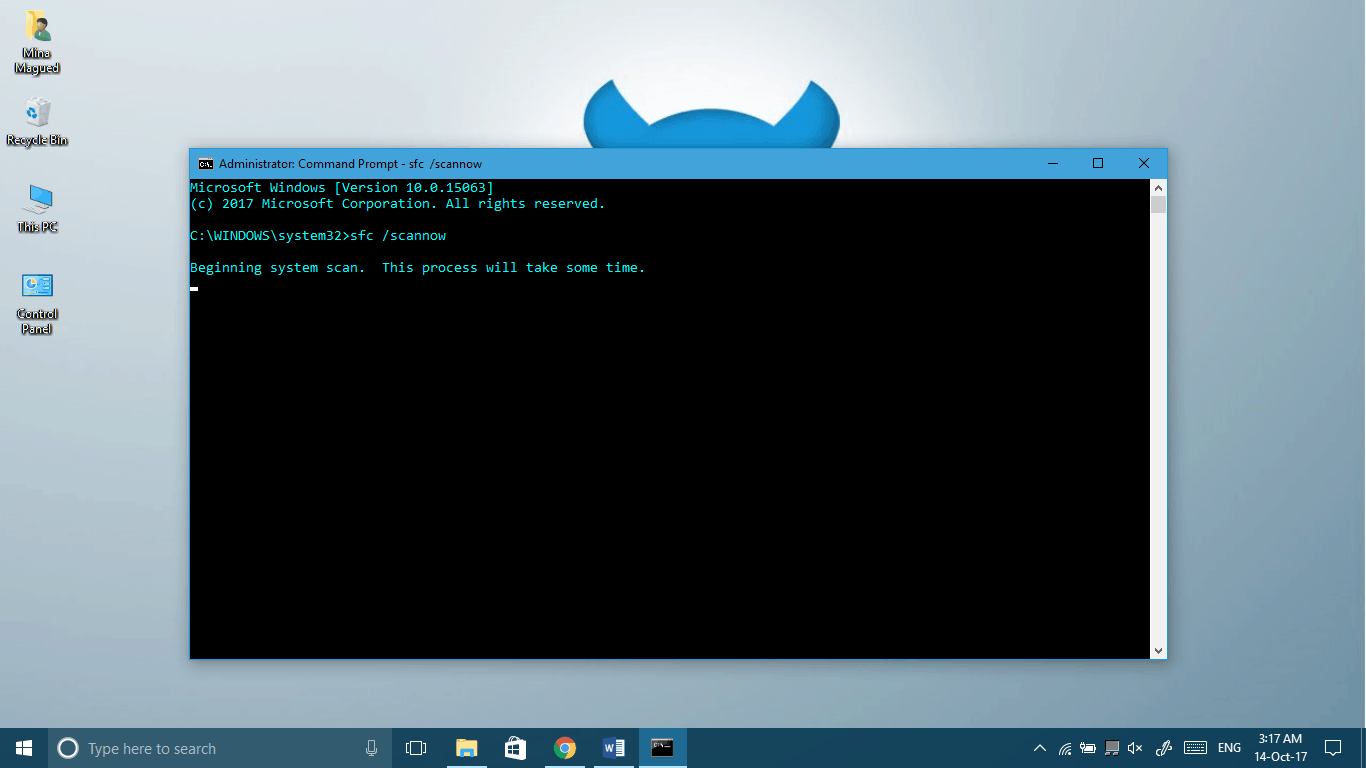
Now you should perform a couple of restarts and see if it worked and the auto CHKDSK is gone. If it still happens when you start up, then try the next methods.
Method II: Check for drive errors
In general, the C drive is the most important one because it’s carrying all the Windows installation files. Therefore, we will check for errors in this drive. Of course, you can do this for all of your remaining drives, it’s going to be the exact same procedure. Let’s do it:
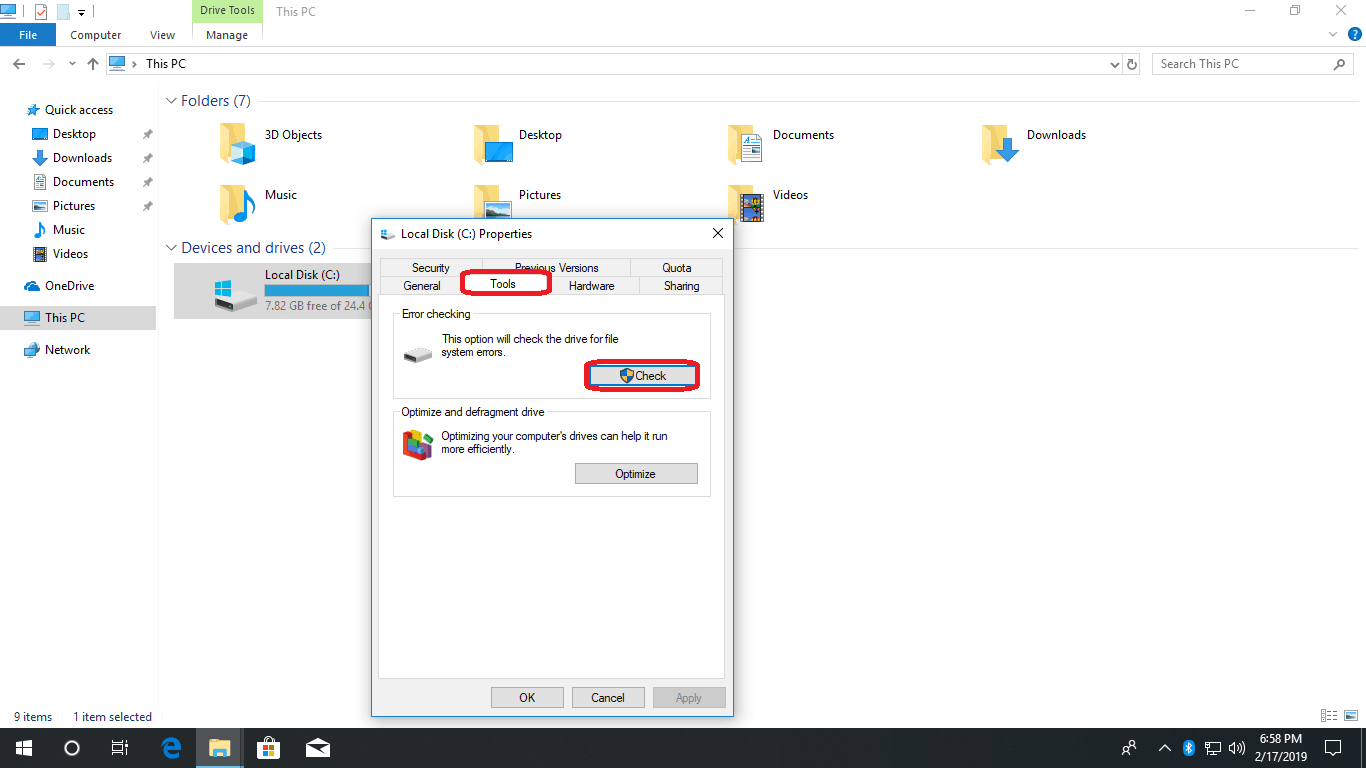
- Right-click on your C drive and choose Properties.
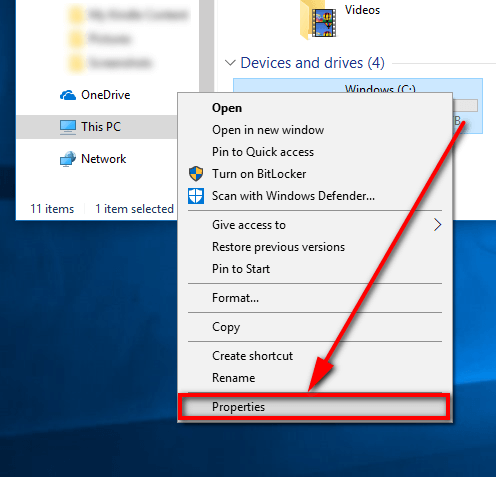
- Go to the Tools tab and click the Check button.

- Click Scan drive in order to start scanning and fixing any drive errors.
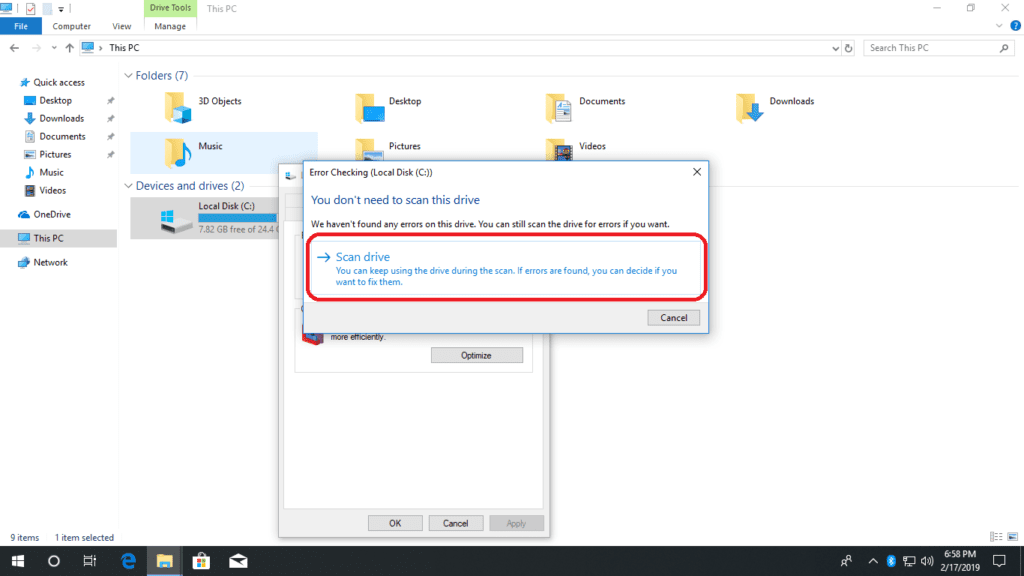
- Now, you should just relax and wait, this is going to take a while but it might fix the whole issue.
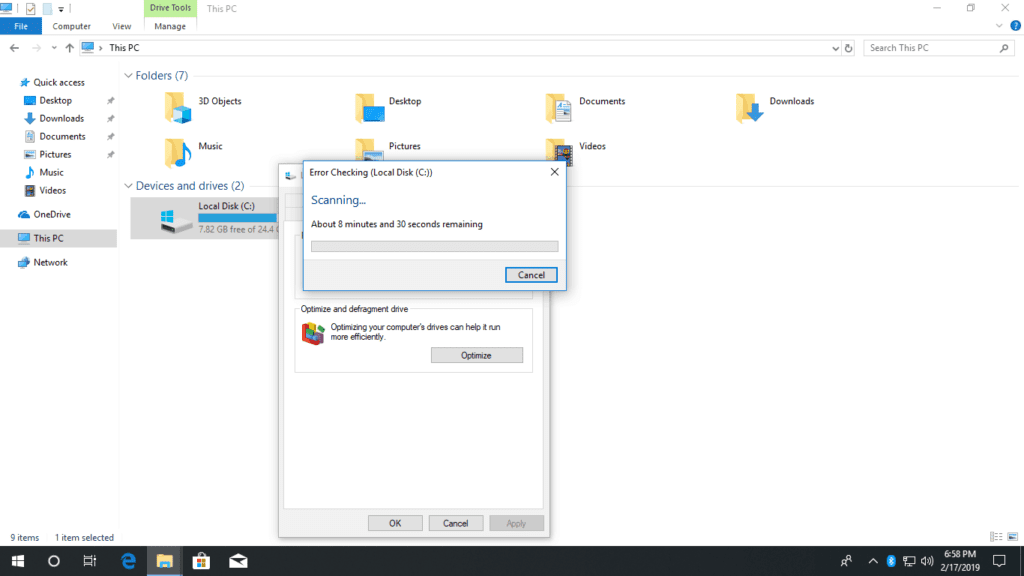


Once this is done, give your computer a couple of restarts and see if the problem still occurs. Method II was the last software methods of fixing your hard drive, so if it the disk check at startup still happens, I recommend to just have backups done regularly (in case there is a real problem with the hard drive), and go to method III to stop this disk check nonsense with brute force 🙂
Method III: Stop auto disk check using Registry Editor
First of all, the Registry Editor is an advanced control panel which controls every little part of your system, so if you’re not familiar with it, we would advise that you back up your registry just in case. Yeah, back up your registry separately from the regular hard drive backup. Visit our Backup your Registry article which is going to help you. At any case, follow the instructions carefully and no harm should come to your computer:
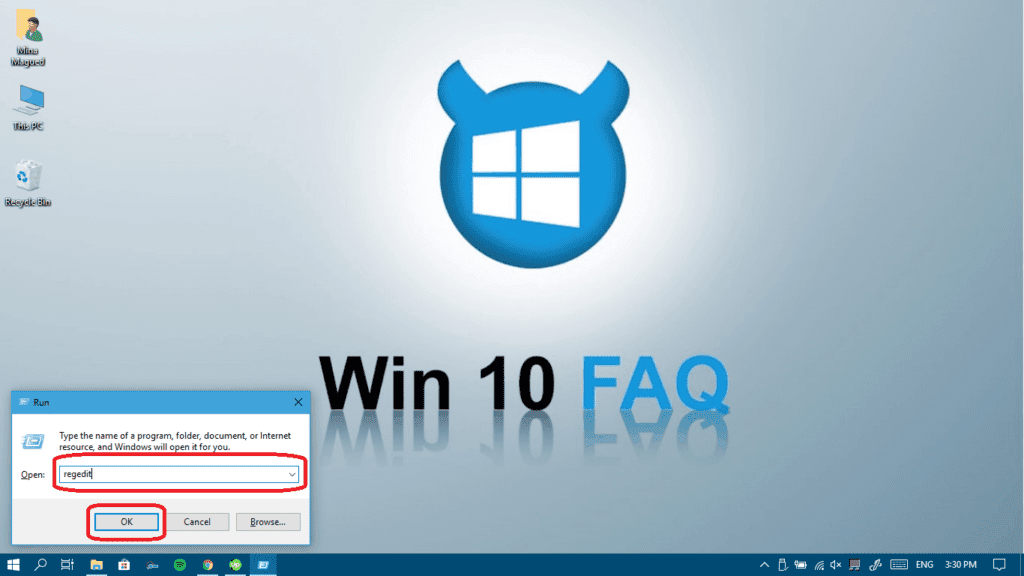
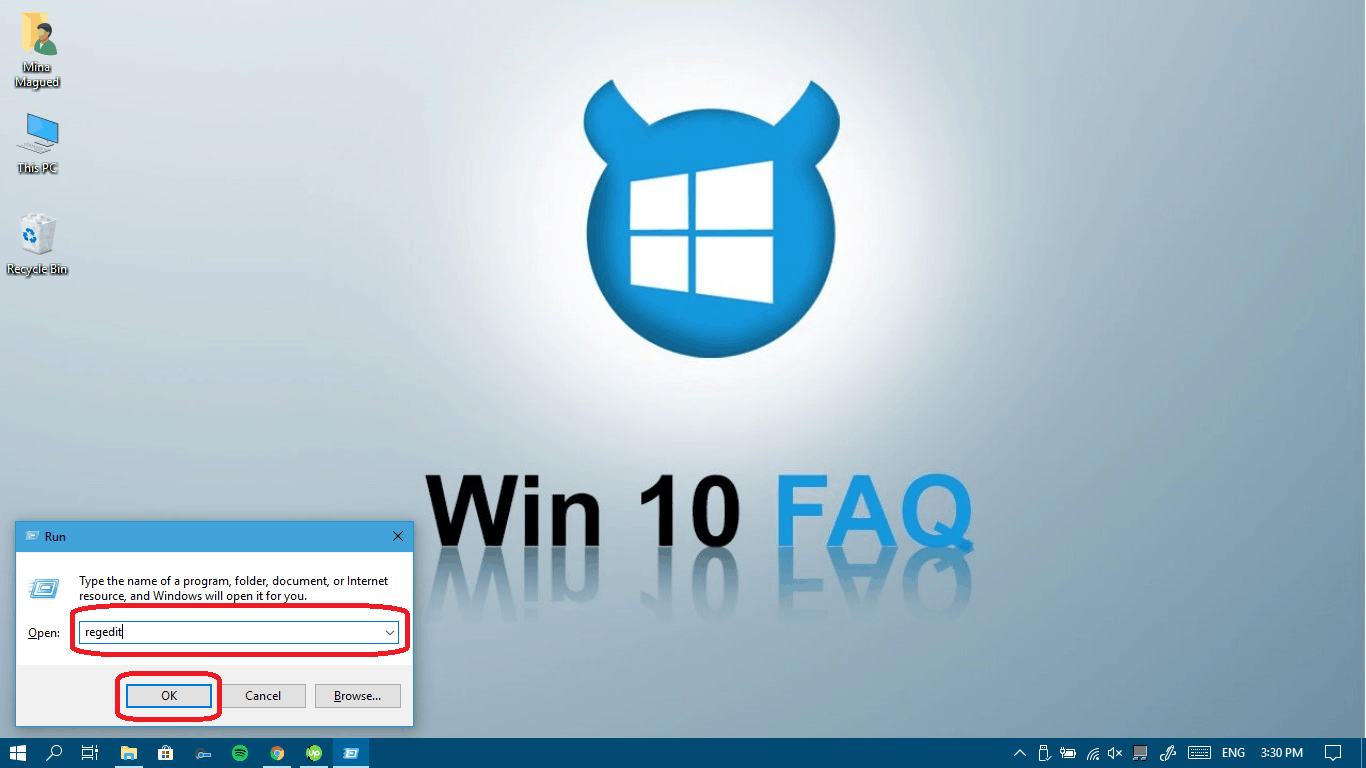
- Press your Windows logo Key + R to launch your Run app and then type regedit and click Ok.
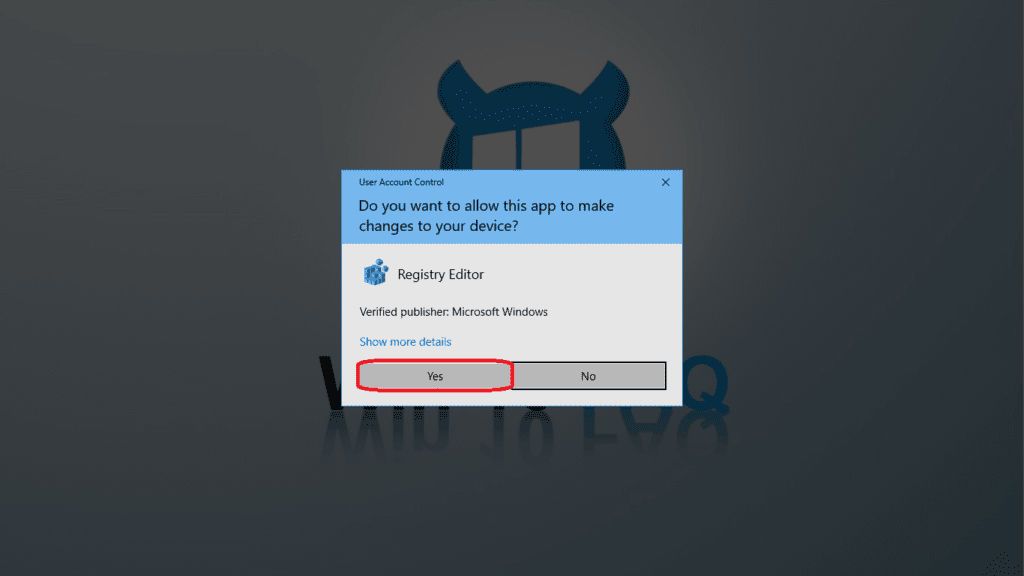
- Click Yes to give it permission.
- Go to this exact location and double click on BootExecute (you can copy and paste this directory at the top and then press Enter to get to it):

Computer\HKEY_LOCAL_MACHINE\SYSTEM\CurrentControlSet\Control\Session Manager
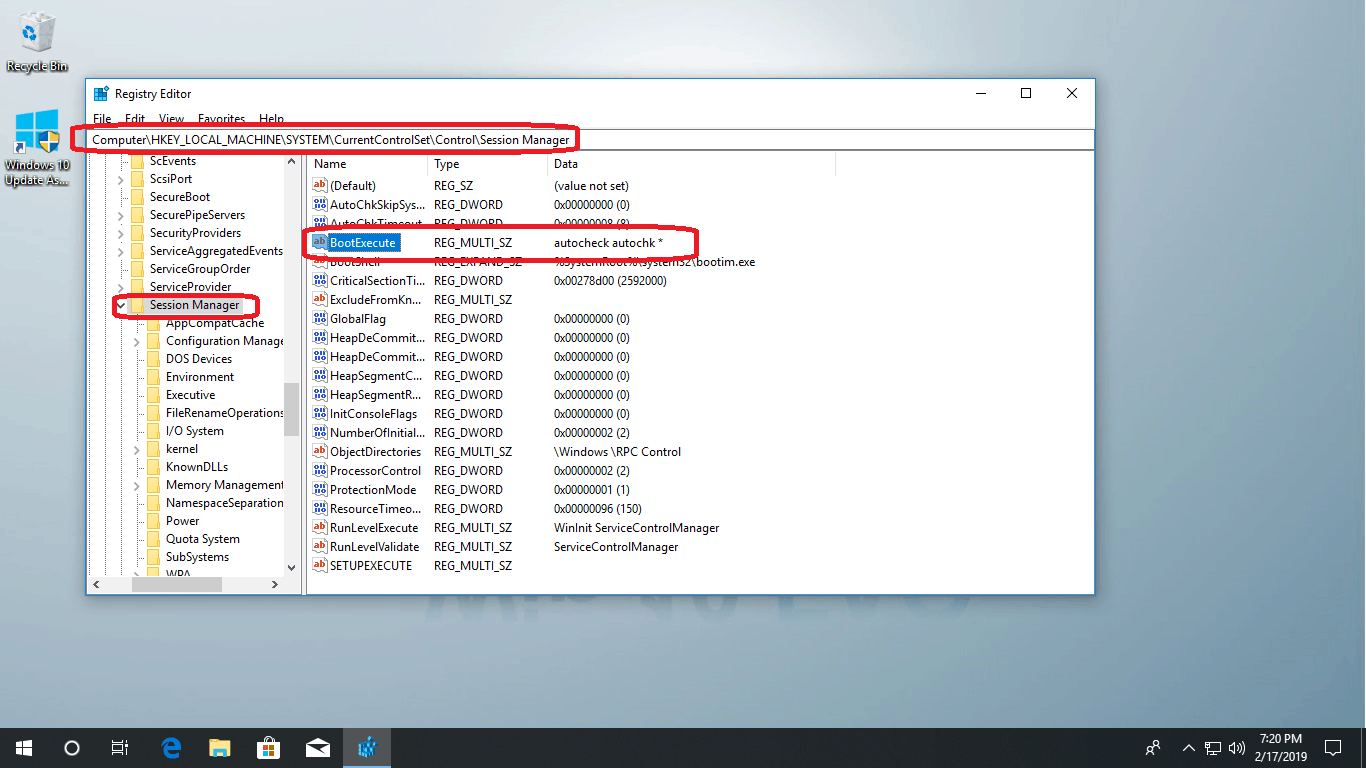
- Now delete all the lines in Value data and paste this then press Ok:
autocheck autochk *
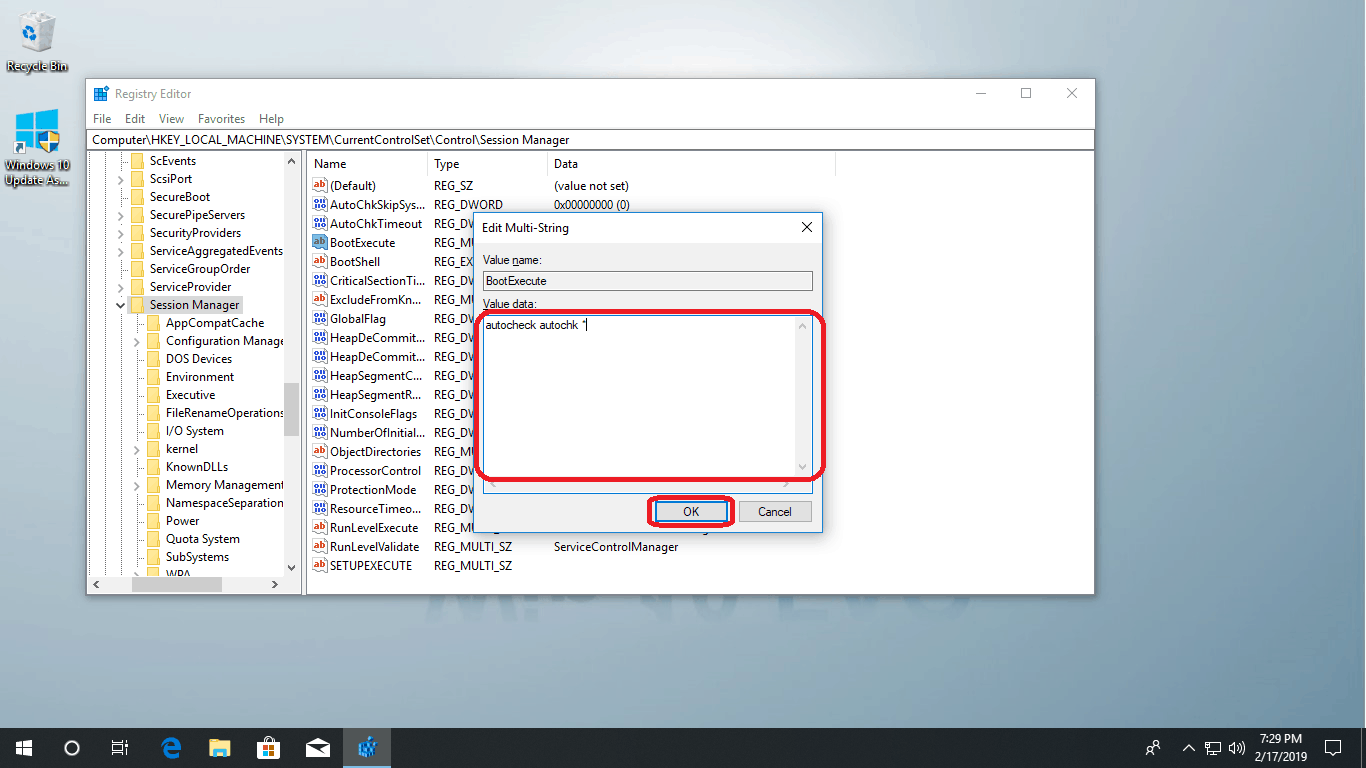
Here we go, now give your computer a couple of restarts, this was tested by many and it stops the auto disk check completely.
Other solutions found online:
There is a solution on many websites advising you to run this command in your CMD to exclude a certain drive from disk check at startup (it’s the C drive in this example):
chkntfs /x C:
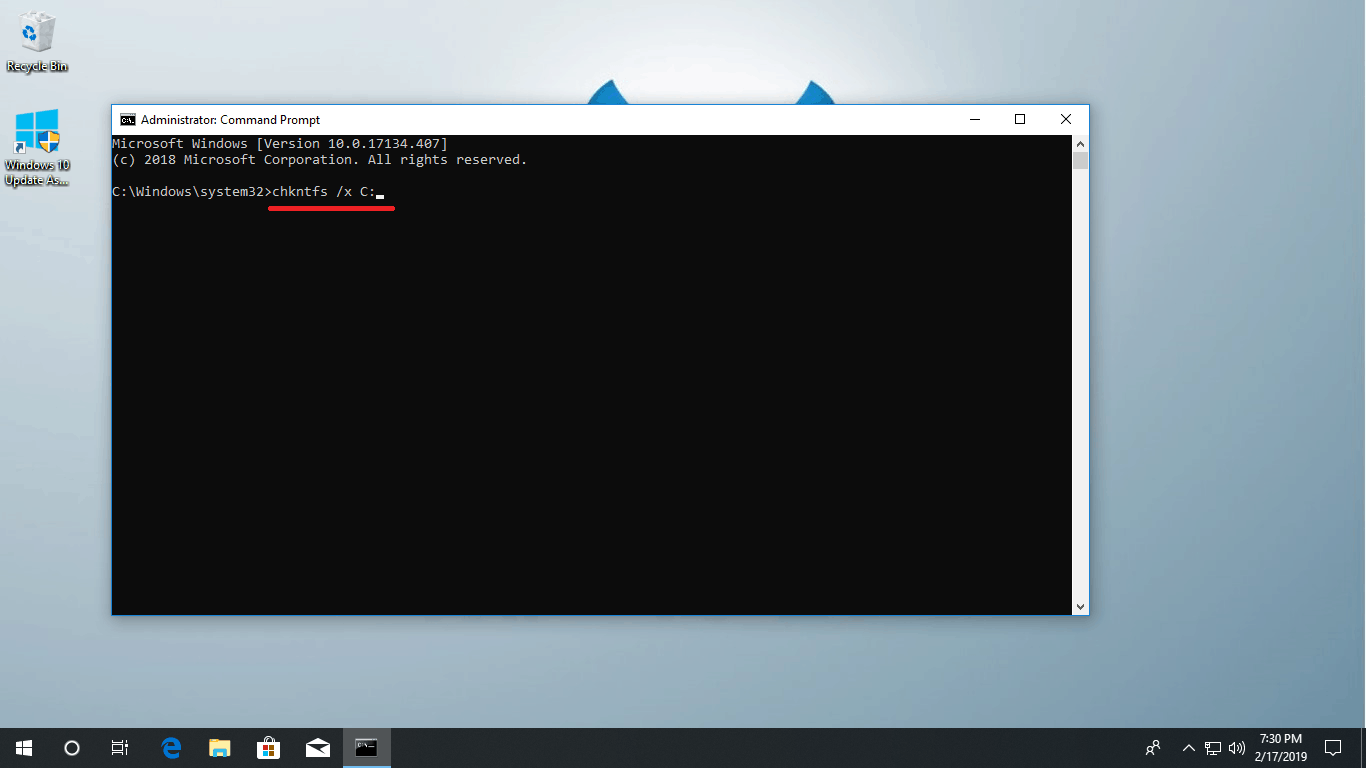
You can definitely do that, and it would work. I personally prefer the registry method editor, as that one stops disk check for all the hard drives at the same time.
Other reasons why your computer is checking the disk at every startup
Of course, if none of the solutions mentioned above have worked out so far, then you might have other, more serious problems. We’ve already mentioned that improper shutdowns are oftentimes the culprit. However, if your computer keeps checking the disk every single time, then the issues might be harsher. Let’s look at a few of the possibilities:
Your hard disk is malfunctioning
As scary as it sounds, it’s all too possible if none of the fixes above have worked. Instead of waiting for the inevitable to happen, it’s high time you purchase an external hard drive and make a backup of all your important files such as work documents, family pictures, and so forth.
Alternatively, you can purchase cloud storage from reputable companies like Dropbox, Mega, pCloud, and so forth and throw your files over there. However, be aware that having an external hard drive is a much safer solution because hackers can’t get to something that isn’t connected to the internet. And, no, Apple products aren’t unhackable. Just look at the 2014 iCloud leak.
You might have a malware infection
Speaking of hackers, the internet is full of dangerous perils. Viruses, malware, phishing, you name it, you’re possibly a victim of it. The type of infection that most commonly starts Windows’s check disk program and start-up is malware. Keeping a good anti-malware or anti-virus program on your computer should prevent or even solve this issue in most cases. Pair it with the above solutions and, if your problem still persists, then try either reinstalling Windows or replacing your hard drive (after you’ve made a backup).
Suggested Read: Can’t Sign In Account Message (Fix it!)
The Bottom Line
There are multiple ways to solve the issue of your computer automatically checking the disk at startup. Use these wisely and you can hopefully solve it.
Final Thoughts
We hope that this little help we provided to you will deal a big impact on your concerns about your Windows 10 computer. Have you already fixed your PC on your problem? Or have you got any easier way to solve this? Please let us know in the comments below.
Do you got any other technical questions about your Windows 10 PC? Try visiting our website. You could find a topic that might help you with your concerns. Or you might have a direct question like How To Customize You Start Menu (Tricks).
My system was behaving erratically for days after a power failure even after many restarts. it never told me the file system was corrupted. I forced a disk check + repair at boot and it took hours to complete. If auto disk check at boot had been working i would not have wasted so much time looking for other solutions. I don’t want to know how to disable it, I want to ENABLE it so this does not happen again !!!
Fantastic method 1.
type CMD worked perfectly I followerd the instructions and rebooted and the disk check problem was solved thank you
Hi, I’ve tried the first 2 methods, but they didn’t work, so I tried your last method. But then I found that I already have the value that you wanted us to put into the registry
autocheck autochk *
so nothing was changed at the registry. Anything else I can try?
and what about if you desparately want to stop a check in progress – on stage 2, eta 6 hours!! ??
how to stop disk checking during starting windows?
Thank you. This helped me with that.
Very good! It worked! Thanks for this~
I do not know about this, today I found out through your post. Thank you very much to the writer for sharing methods with detailed analysis and step-by-step instructions.